- Help & Service
- Order Status
- Login to your Account
- Go to Checkout

- Classic Woven Labels with Text & Symbol - design online
- Classic Woven Labels with Sparkling Text & Symbol

- Classic Printed Satin Labels - design online
- Printed Satin Labels Colour
- Printed Iron-On School Labels
- Bespoke Woven Labels - upload your own logo or artwork
- PRO Printed Fabric labels
- Bespoke Printed Satin Labels - upload your own logo or artwork

- Printed Satin Textile Composition & Care Labels - design online
- Woven Care Labels
- Printed Satin Care Labels with Text & Laundry Symbols - design online

- Classic Leather Labels with Text & Symbol

- Printed Cotton Labels with Text & Symbol
- DTF custom heat transfers
- DTF Name Labels for Kids

- Classic Swing Tags with Text & Symbol - design online
- Bespoke Swing Tags - upload your own logo or artwork

- Classic Sticker with Text & Symbol - design online
- Bespoke Stickers - upload your own logo or artwork

- Kids’ School Label Set

- Classic Printed Ribbon
- Printed Ribbon - with your logo

- Printed Wristbands - Text & Symbol
- Woven Wristbands - Text & Symbol

- Business Cards

- Woven Size Labels
- Child - Woven Size Labels
- Adult - Woven Size Labels
- Mixed bag of Size Labels

- Woven Flag labels

- Gift Voucher

- Sample Pack
- Pre-Designed Labels

- Hang Tag Cords & Ribbons

- Wristband Closures
- Screws & Rivets for Leather
Oh no - your shopping cart is empty!
Our English-speaking shops
Unsere deutschsprachigen Shops
Nos boutiques francophones
Nuestras tiendas de habla hispana
Nuestras tiendas de habla italiana
Onze Nederlandstalige winkels
Nasze sklepy mówiące po polsku.
Nasze sklepy polskojęzyczne
私たちの日本語を話す店舗
Våra svensktalande butiker
CHOOSE YOUR CURRENCY
By Annabelle Short on 10/17/2017


17 Common Sewing Machine Problems and How To Solve Them
There's nothing worse than working with an uncooperative sewing machine! Broken or tangled threads, skipped stitches, snapped needles—it can make for a very frustrating experience. But most of these issues can be resolved without taking your machine in for expensive repairs. We've assembled a list of some of the most common sewing machine problems, and their solutions, to help you troubleshoot even while mid-project!
1. Thread bunching up under your fabric when sewing
If you're seeing knots of extra thread on the underside of your sewing, there are several likely culprits. First, remove your sewing from the machine. You may have to cut through all the extra thread to get it free. Don't simply pull it loose, or you risk damaging the mechanism of your machine, not to mention your fabric! Once your project has been freed, carefully remove all the cut bits of thread as well. Now you're ready to identify the issue. Keep a scrap piece of your fabric on hand to test solutions as you try them.
- Remove your top thread and re-thread the machine, being careful to follow the threading schematic provided in your machine's manual. Make sure your presser foot is up while threading—many machines lock the tension disks when the presser foot is down, making it impossible to thread the machine through the disks correctly.
- Remove and re-thread your bobbin. Some machines are particular about which way the bobbin unwinds. Consult your manual to be sure it's inserted correctly.
- Make sure you are using the same type of thread in both top thread and bobbin. A difference in thread weight commonly causes machines to draw threads at different rates, leading to tangles and knots.
- Adjust your tension settings. This is a common issue, especially if you go from working with a heavy fabric to a delicate one (or vice versa) without remembering to adjust your settings. Test your tension settings on a scrap of your project's fabric to make sure everything is correct.
2. Bent or broken needles
This is a problematic issue that can be dangerous as well as annoying. Always use a new needle for a new project. This prevents needles from getting dull or hooked at the tip, which can damage your fabric. Make sure you're using the right type of needle for the project at hand— knit fabrics do best with a ballpoint, or jersey needle, while leather, vinyl, or denim will need sharp, sturdy needles. If your needle breaks or bends, stop sewing immediately. Carefully remove the broken needle and put it in a container to be disposed of properly. Replace the needle with the correct type for your project, being sure to install it according to your sewing machine's manual. Re-thread, and continue your project. If you're using the correct needle, but you continue to have issues with breaking or bending, you may have underlying mechanical issues with the timing mechanism, which will require expert repair.
3. Fabric not feeding
Make sure if your machine has a drop-feed setting that it has not been activated, and that you don't have an embroidery or darning plate covering the feed dogs. You'll also want to be sure that your presser foot is down, and is set to the correct pressure for your fabric—too little or too much pressure results in a poor feed. When starting a seam, make sure the fabric is all the way under the needle before lowering your presser foot.
4. Thread keeps breaking
Check the type of thread that you're using. Delicate threads designed for hand sewing are not suitable for use in a sewing machine. Your top and bottom threads should also be of the same weight. Re-thread your top thread, making sure your presser foot is up while threading. If you're still having issues, lower the tension settings for your top thread.
5. Machine is skipping stitches
There are several possible reasons for your machine to skip stitches. First, check that your needle is installed correctly, not bent or otherwise damaged, and that you're using the right type of needle for your project. If the top thread is not reaching the bobbin, the threads will not lock properly, resulting in a skipped stitch. Re-thread your machine, both top and bobbin threads, and test. If your machine is still skipping stitches, there may be an issue with the timing, which will require expert repairs.
6. Bobbin tension not consistent
If you find yourself constantly adjusting the tension of your bobbin thread, check the bobbin itself. Plastic bobbins especially can wear, causing them to grow loose within the bobbin housing and making it difficult to maintain the correct tension. Try switching to a new metal bobbin and see if that resolves the issue.
7. Seams in stretch fabrics coming out wavy
This one may be a sewing machine issue, but it can also be a problem with your technique. First, adjust the way you're sewing. Make sure the entirety of your project is supported while you're sewing. The weight of the fabric alone can be enough to cause knits or other stretch fabrics to stretch while you're sewing, so don't let your fabric drape off the table while you work. Let the feed dogs do all the work, and avoid pulling on the fabric to straighten it as you sew. Pin well before you start! If you're still seeing issues, adjust the pressure of your presser foot, or better yet, switch to a walking foot, which will feed the top and bottom layers of your fabric under the needle at the same rate, avoiding that distortion.
8. Sewing machine seizes up or won't sew
It's not uncommon to need to give your machine a bit of help by turning the handwheel, especially when you're just getting a seam started. However, if you need to force the wheel to turn, or the machine doesn't pick up after a bit of assistance, stop what you're doing! Likely, your fabric is too tough for your machine to sew, and continuing to try will damage your machine. If you're not working with a particularly tough fabric, make sure that your needle is installed correctly and is the right type. Remove it to check that it isn't bent. If you're still having issues with your machine not sewing, check your manual for cleaning and maintenance tips. A build-up of fuzz and lint can make it tough for your machine's mechanisms to work correctly.
9. Needle comes unthreaded before sewing
How annoying! You just spent ages getting that thread through the eye of the needle, and as soon as you go to start sewing, it unthreads itself. Luckily, there's an easy fix for this one. Before threading your machine, just make sure that the needle is at its highest point. You can do this by winding the handwheel toward yourself (always wind it toward yourself since this advances the machine—winding it backward can cause threads to tangle) while watching the needle. Some machines also have an "up/down" function that allows you to raise or lower the needle automatically to its highest or lowest point.
10. Fabric or threads are bunching at the start or ends of seams
Your seams should lay perfectly flat from one end to the other, but it's not uncommon to see bunching or tangled threads at the ends. This is caused by backstitching (or back-tacking) over the ends of the fabric, which changes the tensions your sewing machine experiences and causes tangles. Avoid this by sewing an extra few millimetres into your fabric before backstitching at the start of seams, so that the backstitches are all made through fabric and not over the edge. Similarly, when ending a seam, backstitch before you hit the edge, and then sew straight off the edge for a nice clean finish.
11. Thread inconsistently knots, loosens, or tangles
This can be an infuriating problem to track down. One minute, everything's sewing along just fine, and the next, your machine has tangled, skipped stitches, or knotted up the threads. If the issue is inconsistent, the problem is not likely to be your threading or tension settings. Instead, the issue is probably fluff! That's right, the tiny bits of lint and dust that build up inside your sewing machine, especially in and around the bobbin case, can cause no end of difficulties if they end up in the wrong place at the wrong time. Avoid the issue by regularly cleaning your machine per the instructions in your manual. Many sewing machine manufacturers recommend using brushes or vacuum attachments to remove lint; while using cans of compressed air may seem like a good idea, they often have a tendency to drive tiny bits of lint further into the mechanism, where they can continue to wreak havoc. It's best to follow the manufacturer's instructions!
12. Thread fraying, shredding, and breaking
If your thread looks as though it's been through the mill, it's probably an issue with your needle. Make sure that your thread and needle sizes are compatible—your needle needs to be large enough for the thread you're using to pass through the eye without catching or pulling. If your needle and thread are incompatible, there's a good chance one or the other isn't right for your project anyway, so start by making sure you've got the right tools for your materials.
13. Fabric feed is inconsistent
Even seams are the mark of a good sewist, but it can be terribly difficult to manage if your machine isn't drawing the fabric evenly. There are several possible reasons for uneven feed, and the culprit, not surprisingly, is usually the feed dogs. If your machine is older, it's possible the feed dogs may have worn down enough that they aren't catching the fabric evenly. They can typically be replaced, and your machine can be running good as new in no time. If your machine is new, try cleaning around the feed dogs. Lint tends to build up in this area, particularly if your machine has a drop-feed function. If neither of these seems to be the issue, try increasing the pressure of your presser foot to make sure your fabric maintains even contact with the feed dogs.
14. Machine is making strange noises
Step one: stop sewing! As soon as you hear unexpected thumps or clunks coming from your machine, take your foot off the pedal. It's likely that your machine just needs a good cleaning, so check through your manual for the recommended maintenance procedure. Clean and oil your machine according to the instructions, and then give it test on a bit of scrap fabric. If there are still unusual noises, it's best to take it to a repair shop to have it tuned up.
15. The machine is running, but the needle won't move!
Though initially perplexing, this problem has a simple solution. Your machine is likely set in bobbin-winding mode, so check that the lever or winding post for your bobbin is in the correct position.
16. Decorative stitch settings aren't working
If your machine has a variety of decorative stitch settings, but they don't seem to be working, the first step is to check your stitch length and width settings. Many decorative stitches require specific settings in order to appear properly. Double check your manual to make sure that you're using the right length and width for the stitch you're trying to create.
17. Seams are puckered and distorted
While a bit of unevenness in a seam can be dealt with by pressing, puckered and distorted seams may actually be a problem with your machine. First, check the weight of the thread you're using. A thick, stiff thread will cause distortion in lightweight fabrics, and will also throw off your tension settings. Tension is the second thing to check, if your thread is sufficiently lightweight for the project. Another possibility is uneven feed. If your presser foot pressure is correct, and your feed dogs are working properly, try switching to a walking foot, which can help even out the feed for slippery or heavyweight fabrics.
As frustrating as it can be to have your sewing machine stage a revolt, the solution is likely quite simple. A bit of regular maintenance can help prevent the worst issues, and your manual is an invaluable resource. Do you have other tips and tricks to help with sewing machine difficulties? Share them in the comments below!
Don’t miss out: subscribe to the Wunderlabel Newsletter!
Would you like to be informed about new creative instructions, tips and inspirations from us? Then subscribe to our newsletter to benefit from our special promotions and more!
- Tips & Inspirations
- Knitting & crochet tutorials
- Sewing tutorials
Recent Posts
- Colour Trends in 2024: What do Pantone® Fashion and Fashion Week say?
- Custom Textured Labels - Options & Uses
- Video: DIY Macrame Keychain Tutorial
- Guide to launching a successful clothing fashion brand
- Why Can You only Choose a Limited Number of Colours for Woven Logo Labels ?
- Tips for the Perfect Logo
- Sewing Business Ideas for Home
- Crochet Shopping Bag - Tutorial
- How Much Fabric Do I Need for my Sewing Project?
- Starting a business - Information and checklist for your journey to independence
Information
Wunderlabel / Company
Customer Service
Troubleshooting Common Sewing Machine Problems
Cultura / Matelly / Riser / Getty Images
How many times have you been in the middle of a project and your trusted sewing machine has decided it doesn't want to sew? The fun part of sewing is completing our creative inspiration, not fighting the machine.
The most frequent issues involve fairly simple problems we have overlooked while absorbed in a project. Here is a simple checklist for mechanical problems, a guideline that can help save you an unnecessary trip to the repair shop and a load of frustration. But remember that each type of sewing machine has its own unique set of operating issues and routine problems. Always refer to the troubleshooting guide in your sewing machine manual .
Symptom: Skipped Stitches
The place to look when a sewing machine starts to skip stitches is the machine needle. If your machine was sewing fine and suddenly decides to skip stitches, change your sewing machine needle. That machine needle is little more than a sliver of metal and you may have inadvertently bend it while tugging the fabric or by hitting a straight pin. Learning and understanding sewing machine needles can save you hours of frustration.
If you find yourself changing the needle often, be sure you are allowing the feed dog to feed the fabric through the machine and that you are not forcing the fabric, which can lead to bent needles. Even forcing the fabric ever so slightly can bend the machine needle. Let the feed dog do the work.
Symptom: Knotting or Breaking Thread
Are you using a quality thread? Most bargain threads throw off excessive lint and have loose fibers and knots, all of which can all affect how your machine forms stitches.
Check the way your machine is threaded . Completely un-thread your sewing machine and re-thread it. Remember to always thread your machine with the presser foot up. Knotting thread on the bottom side is usually caused by upper threading errors.
Check the bobbin and be sure it is threaded correctly and that the bobbin case is correctly threaded. Be sure the bobbin is positioned in the bobbin case in the correct direction.
Always watch for bobbin wear, especially on plastic bobbins. If the edges of the plastic are showing abrasions, the size of the bobbin has changed and this may be the culprit. Although the size change might be minute, it allows the bobbin to wobble in the case and changes the tension.
Standard Operating Procedures
Following routine practices can help prevent the appearance of symptoms that indicate actual mechanical problems.
Tension Adjustments
How tension adjustments are made varies depending on the make and model of your machine. The rule of thumb for a turning disk-style adjustment is "righty tighty, lefty loosey." The disks are helped in place by springs and screws; by turning them to the right you are tightening the spring, by turning them to the left you are loosening the spring.
Regular Maintenance
Have you been so "into" your projects that you have not taken the time to do basic maintenance on your machine? We're all guilty of this from time to time, but we do shorten the life expectancy of our sewing machines by not properly maintaining them. There is nothing like machine problems to force us to take the time to do basic maintenance described in the machine manual. Regular attention to these maintenance schedules will prevent mechanical problems requiring repair.
Be on the Lookout for "Helping Hands"
Is it possible that you had some helpful little hands at the sewing machine while your back was turned? Children may have been taught not to touch your sewing machine, but all those knobs and buttons can be irresistible.
And always unplug your machine when you are not using it if children are in the area. It is very simple for them to step on the foot pedal while a small hand is on the needle bed. The resulting medical emergency is far worse than dealing with skipped stitches.
More from The Spruce Crafts
- 6 Common Sewing Machines Problems and How to Solve Them
- How to Hand Sew Basic Stitches
- How to Thread a Sewing Machine
- Solutions to Sewing Machine Problems
- How to Fix Bobbin Thread Bunching and Other Threading Problems
- How to Teach Sewing Lessons for Adults and Children
- How to Hand Sew a Seam That Has Ripped
- The 8 Best Sewing Machines for Quilting
- Sewing Machine Operation Instructions and Basics
- How to Make an Oven Mitt
- How to Fix Skipping Stitches on Your Sewing Machine
- How to Easily Adjust Sewing Machine Tension
- How to Find a Sewing Machine Replacement Manual
- How to Sew a Slip Stitch (Ladder Stitch)
- The 7 Best Embroidery Machines
- How to Wind and Insert a Sewing Machine Bobbin
- Kitchen Appliances
- Home Appliances
- Health & Fitness
Common Sewing Machine Problems– Easy & Quick Fixes for You

Just imagine you are in the midst of a beautiful stitching project and suddenly your sewing machine won’t work!
Tangled or broken threads, snapped needles, skipped stitches or a complete lockout – even a minor hiccup of your trusted sewing machine can be extremely frustrating.
However, most of these problems can be fixed easily without needing costly repairs.

Therefore, we have compiled a comprehensive list of the common sewing machine problems and their solutions to get started with your creativity again.
Common Sewing Machine Problems & How to Troubleshoot Them
Here is a guide to quickly fix your sewing machine problems:
1. Tangled Threads
Does the thread get tangled every time you work on a sewing project? May be you need to improve your thread skills!
Most of the times, the tangled mess of threads appear on the bobbin side and it is normal to think the problem lies with the bobbin. However, it is improper threading that primarily causes your threads to tangle as you start stitching.
To fix this problem, unthread the machine completely by putting the presser foot up. Then follow the user manual to thread the machine properly as mentioned in the instructions.
But make sure you don’t do the mistake of threading the sewing machine with presser foot down. It will cause the tension disks to be too tight or engaged. This prevents the thread from properly sitting between the disks.
Some good sewing machines come with automated threading functions with clear instructions mentioned one the machine dial. This will make it easier to thread the machine properly and prevent it from getting tangled.
2. Fabric Not Feeding Properly under the Needle
If your fabric is not feeding under the needle, there may be several reasons behind the same. Check if the drop-feed setting of your sewing machine has not been activated , or there is a darning or embroidery plate covering the feed dogs.
Also ensure the press foot is down and set to the right pressure depending on the fabric – too much or too little pressure can cause poor feeding.
Many sewing machines come with a setting that can lower the feed dogs. This is crucial for free-motion sewing. If you find that the feed dogs are not coming up automatically to move the fabric under the needle, check if some setting has lowered the feed dogs.
If yes, return the feed dogs to their normal setting.
If the sewing machine does not have any such setting, thoroughly clean the throat plate for all thread, dust or lint. Oiling the machine (as per user manual) can also help fix the problem.
Another solution to avoid this problem is by ensuring the fabric is all the way under the needle before you lower the presser foot .
3. Broken or Bent Needles
Broken or bent needle is one of the most annoying and dangerous problems you may face while sewing. Using an old needle or which is hooked at the tip can significantly damage your fabric.
To avoid this, change your needle every time you are working on a new project . Also, depending on the project, choose the right type of needle. For instance, denim or heavier fabric would need sturdy or sharp needles, while knit fabrics work best with jersey or ballpoint needle.
It is also important to install the needle properly by following instructions in the user manual.
4. Thread Keeps Breaking
This is one of the most common problems you face while sewing, especially when you do not use the right type of thread.
Prevent using delicate threads in sewing machines because a considerable amount of tension caused by the machine can cause a soft thread to break easily.
You should also maintain the same weight for your top and bottom threads.
If the thread breaks off, re-thread the top thread with the presser foot up. You can also consider lowering the tension settings of the top thread.
5. Skipped Stitches
Not using the right kind of needle for your fabric can cause the problem of skipped stitches.
The thumb rule of choosing the right needle is: a sharp needle for woven fabrics and a ballpoint needle for knit fabric.
Make sure the machine feeds the fabric properly under the needle. Do not force the fabric in or it can result into skipped stitches or bent needle.
6. Excessive Noise while Sewing
A strange knocking noise from your sewing machine can be worrying. And there may be several reasons for this.
Regular cleaning and maintenance of the sewing machine as mentioned in the user manual is important. Turn off the machine’s power and check for a problem, such as loose screws or if any part require lubrication.
Often too much lint build-up can cause unnatural noises. You can use a soft lint brush to clean the lint and debris from the bobbin area or under the needle plate.
Consider changing the needle.
Check the race-hook area for even the most little piece of thread that can create a tight spot and cause noise.
7. Inconsistent Bobbin Tension
Do you need to adjust the bobbin thread’s tension constantly while sewing? Is the bobbin tension not consistent?
Check your bobbin.
Often due to wear and tear, plastic bobbins tend to grow loose inside the bobbin housing . This makes it hard to maintain the right tension needed for sewing.
Consider using a new and good quality metal bobbin and see if that works.
8. Machine Running Slowly
There may be several reasons why your machine is running slowly or not working – lack of proper cleaning or maintenance, not using the machine for long, any part or tool not working properly, etc.
To avoid these problems, it is important to clean your sewing machine regularly. Remove dust and lint from beneath the needle plate, and see if the speed has increased.
Adjust the speed control as per instructions in the user manual.
Check the presser foot control and whether or not the bobbin winder is engaged properly.
9. Wavy Seams in Stretch Fabrics
If seams in your stretch fabrics are coming out as wavy, it might be a problem of the machine. However, it can also be lack of skills.
To address this problem, you need to first adjust the technique you are using to sew . The weight of your fabric can help the knits or stretch fabrics to stretch as you sew, but ensure it does not drape off the sewing table as you work.
Do not force the fabric to straighten as you sew; allow the feed dogs to work properly.
If you still find problems, adjust your presser foot’s pressure or you can use the walking foot. This will help feed the fabric layers consistently under the needle, giving the perfect seams for your stretch fabrics.
10. Jammed Sewing Machine
Jamming is one of the biggest problems you may face when working on your sewing machine.
If the machine gets worked while sewing, remove the fabric immediately . Next, remove the thread that has become jammed. For this you may need to remove the throat plate, the bobbin or other parts to take the jammed thread out and start sewing again.
Check the needle. If it is broken or slightly bent, it can result into getting the threads jammed.
11. Sewing Machine Suddenly Stopped while Working
This problem may arise if you have been stitching for a long time and at a low speed. To prevent the motor from getting overheated, the machine may stop itself.
In such cases, turn the power off and wait for at least 20 minutes before you start sewing again.
12. The Machine Light or Motor is Not Working
If you find that the sewing machine’s motor or light is not working, check if the power cord is plugged in properly .
Ensure the power strip is on and the wiring and/or the fuse in the outlet is okay.
13. The Motor/Light is Okay but the Machine is not Sewing
If you find the motor or light to working properly but the machine is not sewing, it can be caused due to a wide range of problems.
Check if there is a bobbin on the bobbin winder . If the machine is in the bobbin winding mode, it will not work.
The needle must be properly inserted and the foot control plugged in correctly. To free the pressure foot from any kind of obstruction, ensure the foot control can be completely depressed.
And if the presser foot hits the needle, replace it immediately.
14 The Stitch Forms Loops in Between
There may be several reasons why your stitch is getting in loops in between – the most common reason being a bobbin that isn’t wound properly .
Often less presser may cause the fabric to be loose when the stitch is formed. If the fabric is stretched tight while sewing, it can form loops. To prevent this, fine-tune the stitch tension.
Properly threading the machine can also prevent the stitches from getting in lumps.
15. Needle Gets Unthreaded Before You Start Stitching
After you spent ages threading the needle, it simply un-threads itself right before you start sewing! How annoying this is!
Delightfully, there is a quick fix to it.
Before you thread the machine, keep the needle at its highest point . Simply wind the handwheel towards yourself and check the needle until it reaches the highest point. Do not wind the handwheel backward or it can cause the thread to tangle while sewing.
Some advanced sewing machines also provide the option of “up/down” so you can automatically lower or raise the needle to its lowest or highest point.
16. Thread Shredding or Fraying Every time
If you find the thread to shred or fray frequently, there may be two reasons for this – either you are using a poor quality or old thread, or the needle size and the thread are incompatible .
Always use high-quality threads that are suitable for use in sewing machines.
Also the needle and the thread should be compatible. The needle must be large enough to allow the thread to pass through easily without pulling or catching.
17. The Bobbin Thread Frequently Breaks
Do you find the bobbin thread to break frequently, ensure it does not have too much of thread than required .
It is also important for the bobbin to be properly inserted. A damaged or inappropriate bobbin in your machine can also result in breaking.
Clean the bobbin case regularly and oil the shaft for efficient functioning.
18. Decorative Stitch Setting is Not Working
Are you using a good sewing machine that comes with an array of settings for decorative stitches? Unfortunately, these functions are not working and you do not know why, right?
Make sure you have set the right stitch width and length for the decorative stitch you want to create.
19. Uneven or Unattractive Stitches
To achieve beautiful stitches every time, make sure the presser foot placement, thread tension and stitch regulator are set appropriately.
Check if the machine is threaded properly and there is not too much tension on the top.
If the stitch is loose on the top, adjust the top tension to a lower range. If the bottom stitch is loose, change it to a higher range.
20. Needle Threader not Turning
Make sure the needle is up or otherwise, the needle threader will not turn. For this, you have to turn the handwheel until the needle reaches the highest position.
21. Unable to Do Reverse Sewing
Several machines do not provide the option of reverse stitching.
Alternatively, certain stitching functions like stretch stitch or buttonhole may not allow you to reverse stitch. You need to alter the setting to straight stitch or adjust the stitch control to reverse switch.
Conclusion :
If you find these common problems while working on your sewing machine , it is important to thoroughly check the techniques, functions and settings with the user manual.
Regular cleaning and proper maintenance of the sewing machine is a must. On finding a damaged or old part, get it fixed or replaced immediately to avoid bigger and costly repairs latter.

Manjula Krishna
She completed her MBA (Finance & Marketing) and later became a homemaker to take care of her daughter. She loves cooking, sewing and music. Mrs Manjula is also fond of testing out the latest kitchen and home appliances as and when they arrive in the market. Here on this blog, she shares all her findings with pros and cons that she encountered while using those appliances.
Related Posts
Singer 8280 Sewing Machine Review
How to Save Money on Amazon India Shopping?
Common WiFi Issues & Simple DIY Solutions
Leave a Reply Cancel reply
Your email address will not be published. Required fields are marked *
Save my name, email, and website in this browser for the next time I comment.
HomeDynamo.com is a participant in the Amazon Associates Program, an affiliate advertising program designed to provide a means for sites to earn advertising fees by advertising and linking to amazon.in.
Disclaimer : HomeDynamo.com is a participant in the Amazon Associates Program, an affiliate advertising program designed to provide a means for sites to earn advertising fees by advertising and linking to amazon.in Copyright © 2020-21 • Home Dynamo • About Us | Contact Us | Disclaimer | Privacy Policy
Sewing Machine is not stitching properly? How to troubleshoot your problem
Many of the problems that you experience when you operate a sewing machine can be prevented by properly setting up the machine and regular cleaning – but if you have developed problems that are beyond these and your sewing machine is not stitching properly, here are some solutions
Sewing machine stitching problems and solutions
Table of Contents
Step 1. Rethread the machine
When my sewing machine begins to stitch improperly, I typically start by rethreading it.
Very important – Do not thread the machine with the presser foot down.
One little missed step in the sequence of threading and your stitching will be ruined.
Check out this post that details how to put thread in sewing machine . If you suspect a problem with the hardware causing your problem, check out this post on sewing machine repair.
Make sure that you have selected the correct size needle appropriate for the thickness of the material you are sewing.
Step 2. Check if needle is inserted correctly
Once I changed the needle and from that moment, my thread started breaking. Apparently I inserted the needle the wrong way. The sewing machine often gives you skipped stitches, thread breaks, not taking the bobbin thread, etc. because the needle is not placed correctly. Put the needle, so the flat side is to the back or per your sewing machine manual.
Putting the flat side to the back is what mine says. Re-check this in your manual.(For an industrial machine, this is different – I had so much trouble when I first changed the needle; the seller of my sewing machine told me to put the needle in one way and I put it another way. I couldnt understand why the thread was breaking so much afterwards and kept checking everything but the needle)
Check the placement of your sewing machine Needle and if it is the currect size.
If you are not thoroughly familiar with your sewing machine – check out this post on different parts of the sewing machine
Step 3. If there are loose stitches, check tension
Check if the top thread is too loose or too tight. Check the thread tension. If it is too tight, skipped stitches could occur. Change the tension. Top stitching is loose because the bobbin tension is off, and if the backside stitching is looking off, change the top thread tension
Read more on setting the tension on a sewing machine here .
Step 4. Do a thorough cleaning
A regular sewing machine maintenance is recommended every 100 hours of your sewing machine working. Check out the post on the 3 steps to do sewing machine maintenance.
As a sewing machine vendor told me, the modern home sewing machines, which come with their inner components coated in grease ( comes with the label – do not oil), need yearly maintenance at the showroom by a professional.
So even after home maintenance, if your machine is not behaving or it is making unnatural sounds, it may be time for a visit to the nearest service center of your particular brand. It is recommended that you take it every 2 years, at a minimum for this deep cleaning. Do you do this?

My sewing machine has suddenly stopped while working – it is not stitching at all
Check if the electrical points are fine and the foot pedal is attached to the machine properly, before beginning to panic .
- Make sure the power cord is plugged into the wall and machine.
- Also, check the fuse and/or wiring in the outlet.
- Make sure the power strip is on.
Have you been sewing for a long time continuously? Your sewing machine may have stopped itself to prevent overheating of the motor. In this case, turn off the power and wait for 20 minutes before using it again
So what if the sewing machine will not form stitches ?
The needle may have come un-threaded. You may also have threaded the machine wrongly. When threading the machine, keep the presser foot up to release the tension. Check out this post on correctly threading the machine .
The needle may be inserted wrong or not all the way; Make sure that the needle is fully inserted and facing the correct directions as specified in the sewing machine manual. Blunt or bent needles also will result in stitches coming undone. Push the needle all the way up the clamp.
The needle may be wrong for the machine. Check out the different types of sewing machine needles you may need and the different needle sizes.
The bobbin may have run out or not been inserted correctly.
If the spool cap is the wrong size for the thread spool, this problem can occur. Replace the cap with the correct size in this case.
If the thread is not properly and fully pulled into the thread sensor guide also this problem can occur.
The motor/light is working but the machine not sewing
Check to see if there is a bobbin on the bobbin winder. Suppose the bobbin winder shaft is pressed to the right ( or however it is in your machine), it is in bobbin winding mode, and the machine will not work.
Check to see if foot control is plugged in properly; make sure foot control can be depressed completely and is free from obstruction.
Replace the presser foot if the needle hits the presser foot.
Ensure that needle is correctly inserted.
Stitching is not done properly – I am getting unattractive/uneven stitches
Check thread tension and presser foot placement and stitch regulator.
If the top stitches are looking alright but the bottom stitches look loose, either the machine is not threaded rightly or there is not enough tension on the top portion.
If the stitches are loose on the bottom of the material, change the top tension to a higher number. If the stitches are loose on the top, change to a lower number. Do not adjust anything on the bobbin case of modern home sewing machines – they are maintained as a constant, and should not be touched.
Make sure the thread has not come out of the bobbin case.
Lack of stabilizer, inferior thread, and lint build-up, incorrect needle placement also can result in unattractive stitches.
Try vertical instead of horizontal spool pin.
The fabric will not feed as you stitch
This may be due to many possibilities.
- The presser foot is not down.
- You may be using the incorrect foot.
- The feed teeth could be down or accidentally lowered; Ensure that the feed dog is raised when sewing. On most machines, you should see the teeth rise about 2mm above the needle plate on forward movement.
- Feel the teeth; do they feel sharp? If they are worn, the fabric will slip. Are they even? Examine the teeth when they are at their highest point and see if they are level; if not, replace them.
- Presser foot presser may have to be adjusted. If it is set too low, the fabric will not feed. If the material is too heavy, the presser may not be enough. Refer to your instruction manual on how to increase the pressure. Most machines have a dial or knob above the foot on top or to the side of the machine for this purpose.
- The stitch length may be too short, like near zero.
- Check for dust under the needle plate – dust-lint build-up could jam due to debris inside the sewing machine. Remove the needle plate and clean out the grooves between the teeth. If these are full of lint/fluff, they will stop the teeth from rising to the proper height.
- Make sure the needle plate is firmly seated. Another reason may be the needle plate hole is too big for the particular type of fabric.
- Check that thread is not knotted under the fabric.
The stitches fail to “grab” at the seam beginning
This occurs most often with lightweight/loosely woven fabrics – In case of such delicate fabrics, start the seams with an extra bit of fabric to prevent your presser foot from eating your fabric.
- Increase presser foot presser.
- Try a smaller needle.
- Use a straight stitch plate.
- Be sure threads are under presser foot.
- Make sure needle is fully inserted.
I am getting the occasional skipped stitches
This refers to missed stitches which result in one or two skipped stitches merging into one long stitch, occasionally. Maybe this has to do with a malfunctioning feed dog and it can be especially frustrating when doing a simple darning job as the fabric must move smoothly to sew over the holes.
Select a different type/size needle; If you are missing stitches, go up one size. Change to a stretch needle if the fabric calls for it. Sometimes the problem is with the needle point, like switching between ballpoint or sharp needle and seeing if the problem persists.
Pre-treat ( pre-wash) fabrics to remove excess sizing. The sizing can clog up the needle and the machine.Using too thick a thread with a fine needle will cause the machine to miss stitches.
Some fabric ( too thin or stretchy) can cause missed stitches. Try adding some interlining or stiffener; even tissue paper will work. I see skipped stitches every time I sew over elastic. Also, allow the feed dog to move the fabric rather than forcing the fabric with the hand, which usually results in a bend needle.
You can find a more detailed explanation in this post – Is your Sewing Machine Skipping Stitches? 7 Questions to ask .
The Sewing machine is not stitching in reverse.
Check whether the machine has the capacity for reverse stitching.
At times, some stitches, like buttonhole or stretch stitches maynot reverse stitch. So check your stitch control and adjust to straight stitch before reverse stitching.
Why is the fabric not feeding and moving straight when stitching?
This may be a result of worn-out or bent teeth on your needle plate. Check whether the presser foot is properly pressing down on the fabric as you sew – if it is not, it will be impossible to sew straight.
Cleaning of the teeth may be all you need to do if you are lucky because lint in the teeth can make your sewing wonky.
If you have a gut feeling that your machine needs a trained professional to look over the problem it is having, you are probably right. There are some things only a professional can fix.
For eg. you have broken gear inside the machine like the timing belt (you will know if the bobbin hook is not moving or taking up the thread when you move the hand wheel towards you, the bobbin thread is not catching into the needle even after you have tried all solutions like re-threading the needle or changing needle. This usually means your machine needs to be re-timed.
When the bobbin case jumps out and seems to be out of sync with your machine and the driver is damaged (The driver is the part that sits right below the bobbin- this moves the hook), the reverse mechanism is jammed, or the reverse gear is damaged, there is a funny smell coming from inside the machine, etc .
Some repairs should be done only by the company – when you are under warranty, most companies insist that you do not do the repairing by yourself or any external party. So wait for them to resolve the problem.
Stitching problems due to fabric characteristics
Sometimes problems arise due to the kind of fabric you are sewing, and you mistake it for a sewing machine problem.
How you sew with satin is very different from how you sew a wool ; Sewing knitted fabric often requires a different presser foot to accommodate the stretch, without which the fabric may pucker or run. How you sew with a fabric like polyester will be different from how you sew with a thicker fabric. Leather sewing requires a different set of tips than if you are sewing with a thin fabric.
Refer to the sewing machine Manual
The sewing machine manual you got when you purchased the machine should always be kept near your sewing machine at all times for easy reference anytime a problem arises. It should be thoroughly read before your first stitch. All the settings and maintenance information will be given in them. If you have lost it, you may contact the manufacturer through their online sites; some sewing machine manuals are available on their websites.
Related posts:
- Sewing Machine basics

How did you like this post?
Click on a star to rate it!
Average rating 5 / 5. Vote count: 1
No votes so far! Be the first to rate this post.
This article was written on May 18, 2016
& updated on March 3, 2024
Subscribe to get weekly notifications of posts in your email

Author: Sarina Tariq

Sewing Machine Needle sizes

How to use a Binding presser Foot on your sewing machine

Selecting the Best Beginners Sewing machine for making clothes (How to choose & what to buy)

Where to get Sewing machine manuals (Free)
182 thoughts on “Sewing Machine is not stitching properly? How to troubleshoot your problem”
thanks, interesting read
thank you very much
Cool + for the post
interesting for a very long time
Hello from Happykiddi.
Gorgeous view
Hello. And Bye.
Cool, I’ve been looking for this one for a long time
When sewing all stitches are perfect except for the 1st stitch. The upper thread on 1st stitch is showing through on the bottom. Why is this happening w/beginning 1 stitch? We have checked threading, bobbins, tension.
Did you hold the thread to the back as you started sewing?
My sewing machine suddenly stopped the wheel not moving i put oil and clean every parts but no use what i do please help
Please help.what should i do if the rotary hook of my riccar sewing machine is not rotating
Hi Can you check out this page to see if there is a solution
Thanks for such a great piece on sewing machines!!
My vintage Kenmore Model 95 (158.150) uses drop-in cams to achieve a satin or zigzag stitch and other decorative stitches. I had the machine thoroughly serviced, for $100, before moving out to a rural area. After being stored for a couple of years, I set out to sew, and found that it sews zigzag stitches at the set width, as long as I sew slowly, but as soon as I speed up, the stitch width drops to barely wider than straight. For some reason, the needle holder really only seems to want to sew to one side of center. I have cleaned and lubricated and lubricated and wrapped the machine in an electric blanket to help the lubricants travel and penetrate, but I haven’t solved the problem. Could it be wear, or a damaged part, rather than inadequate lubrication, causing this problem?
Are you sure that there is lint, or debris or extra lubricant which has hardened that may be affecting the movement of the needle and the stitch width mechanism? Also, Check the thread tension settings. Ensure that the upper and lower thread tensions are correctly adjusted for the type of fabric you are using. If nothing works, you may need to show a a professional technician to adjust the timing – this can cause stitch width problems . Or maybe certain parts of your vintage sewing machine have worn out, leading to this stitch width performance.
Good and helpful
Sorry, but I am looking for complete mechanical spear parts for my rewind Bobbin parts for my Jones Deluxe 1958 sewing machine, I do hope you can help because mine is shattered
What are common double needle lock stich machines problems and remedy action
Uneven tension is the most persistant problem. incorrect threading can cause a lot of problems – for upper thread and bobbin thread. Do not thread the machine with the presser foot down.
Hi I have a Bernina 535. I’m not really having any issues sewing, as in it doesn’t trouble me. There’s just one thing. Sometimes when I sew the material will jump up, and get completely tangled into the foot, ja d the only way to get it out is to remove the foot and slowly coax it out. The lady at the dealership where I bought it from says it’s because of the feedog or something and to place the fabric a whole 2-3cm behind the foot; don’t start at the edge. But when you look at the videos on the Bernina website, they don’t necessarily start so far in, the do also start on the edge. Any idea why the fabric jumps like that? I’d really, really appreciate any advice you can help me with. Thank you
Hi In my experience, this is a common problem when you sew with thin fabrics. Some machines have it prominently with most fabrics. You will have to hold on to the fabric or use a paper underneath along the edge and other solutions – read this post on sewing with thin fabrics. Have you tried using a straight stitch needle plate ? this has a narrow hole and chances of the fabric going in is less. Bestwishes
Are you sewing with thin fabrics when you experience this? The presser foot pressure may be too high, causing the fabric to bunch into the feed.Lighter fabrics may require less pressure, while thicker fabrics need. And start sewing slowly and then Gradually increase your speed.Check that the machine is threaded properly.
Thank you very much for adding to our knowledge. All these tips are beneficial for smooth machine operations.
I have a Kenmore model 1207. The needle continues to move when threading the bobbin even after unlocking the hand wheel. I can’t find anything on line that shows me how to fix this. There aren’t any sewing machine repair services nearby and I would love to fix it myself.
This is almost certainly due to the hand wheel ‘dragging’ on its shaft after the clutch is loosened for bobbin winding. You may need to remove an end cover to expose the motor mount. You need to remove the small knurled inner wheel that you turn to unlock the clutch. This may have an offset screw or a centre screw. Loosen the motor tensioner and remove the drive belt. The hand wheel can then be pulled off the shaft. Clean the shaft and inside the wheel with spirit etc, dry and apply a spot of light oil to the shaft and to the inside of the wheel. Reassemble.
Set upper thread tension to its lowest setting when you’re threading the bobbin. This reduces tension on the needle thread and should prevent it from moving while threading the bobbin.
I bought a vintage zigzag sewing machine it is a model Dom-b was made in Japan. It has a lot of different zigzag patterns and it depends on whether you have the needle in L.M.R. position on some of the patterns and it sews them great .But my problem is that it will not sew a straight stitch I have a manual and have done everything that it says to do but it still will not sew a straight line .Do you know how I can fix this . I have clean and oiled it hope that maybe it is stuck some how but that has not fixed it either.
Is this the Riccar brand? Nr 208 model? Because mine does the same. Cant sew straight
I have just recently got a vintage Dial-N-Sew model 516ss made by KOYO machine Industries Osaka Japan. And I can only get it to do zigzag also. Only has 2 dials on the front and both are numbered 1-5 and the smaller one has button hole options. But that is all. No straight stitch option or even shows a zigzag option, that’s just ALL it will do. So is it possible that they just made some machines to do zigzag only?
Oh, maybe your machine is designed specifically for zigzag stitching, and it does not have a straight stitch option.If the machine is working properly and you are able to create quality zigzag stitches, then it’s likely that it was designed this way.
Verify that the needle is positioned correctly for a straight stitch. When sewing zigzag patterns, the needle position might be adjusted to the left (L), middle (M), or right (R). For a straight stitch, it should be set in the center position (M).Adjust the stitch width to the shortest setting, which is typically used for a straight stitch. If everything else is fine, check if the machine is meant to sew only zigzag
I have a 25-year-old Viking # 1, not sufficiently maintained, I believe was permanently oiled. The hand wheel is locked & the machine frozen. Is this expensive machine repairable at a decent cost, or should I trash it?
Hi carol Sorry to hear that. Did you check the bobbin area ( Hook / Bobbin Case holder Assembly) – usually when that part is not aligned the wheel can get stuck.check if there is lint build up around the hook race (area around the bobbincase). Or check for any broken parts inside, in which case you will have to give it to a repairman.
I believe my 25-year-old Viking #1 is permanently oiled. If the cause of the hand wheel freezing up is because the oil has dried out, can this be repaired at a reasonable cost. or do I trash it? Thanks for your advice!
Hi Carol I am out of my depth here – Can you checkout this site https://vssmb.blogspot.com/2011/07/201-hook-assembly-removal.html with some good advice on restoring vintage sewing machines. Or post on this reddit board for vintage sewing https://www.reddit.com/r/vintagesewing/ Best wishes
If everything still looks great and is still frozen any ideas what else it could be?
Hi Pam Have you look at this post on simple sewing machine repair .
It is a best write up on troubleshootsewing machine problems. I enjoyed reading this article.I like how you have researched and presented these exact points so clearly.I am sure many people will come to read more about it in future. I have also found this resource Energysmith.co.nz useful and its related to what you are mentioning.
I am a new sewer and I’m having a major issue. I have a Brother CS6000i and used it yesterday and it was perfectly fine but today however, When I sew the presser foot doesn’t move as it did when I first used it. I looked up many videos and none seem to be related with the issue I’m having. PLEASE HELP.
Hi Kyah I think you mean the feed dog (the bed under the needle which moves the fabric) not the presser feet because presser feet doesnot move as you sew. You can loosen the screws of the needle plate and take it out and check whether any lint/thread is blocking (near the bobbin compartment or anywhere nearby) the movement of the feed dog. Other than that you will have to check all that is mentioned in this article one by one.
Hi I have a A new home classmate sewing machine I cannot get the needle arm to go up and down when I am hand cranking it or sewing with the presser foot but I took the screwdriver and pop the Cover off and the belts are fine it’s oiled but I can take a screwdriver to that screw that makes the arm go up and down and it goes up and downBut it won’t handcrank or so with the presser foot
Hi- I have a Brother CS6000i and my machine seems to be stuck in reverse, only sewing backwards. Sometimes, randomly, it will start working as normal again but I cannot rely on this. Does anyone know how to fix it?
Usually a reset can set this right. Turn off your sewing machine, unplug it, and let it sit for a few minutes. Then, plug it back in and turn it on. This can sometimes help reset the machine’s internal electronics. Check whether the reverse stitch lever or button is stuck or jammed in the reverse position.
Hi there – I’ve got a Janome J3-18 and have never had a problem with it – but today, trying to sew a face mask (!) the stitches just won’t form properly – bottom row of stitching is just a thread with regular little loops over it where the stitch hasn’t formed properly, so you can just pull the bottom thread out and all the stitches undo. I’ve tried bobbin tension, stitch length, bobbin tightening etc but to no avail…. HELP!
I have a juki DX5. When free motion quilting, the thread wraps around the thread lifter. I have changed needle, re-threaded and cleaned the bobbin area. The thread continues to break. I just don’t know what else to try. Don’t understand why it continues to knot around the thread lifter.
Hi Have you checked if the sewing machine tension is correctly set for free motion stitching? – both for the top thread and the bobbin thread. Though you usually don’t tinker with bobbin tension you have to do what you have to do in desperate situations. Did you read your sewing machine manual – may be the kind of machine you have needs some other adjustments for free motion quilting? Hope you find a solution soon
Hi Connie, I’m having exactly the same problem with my Janome JE918 (a very old model). Just wondered if you found the answer to your problem?
Carefully inspect the entire thread path for any rough spots, burrs, or areas where the thread might be catching. Adjust the presser foot pressure to accommodate the thickness of your quilting sandwich. If the pressure is too high, it can cause issues like thread breakage and knots.Quilt at a slower and more consistent speed. And adjust the tension – When free motion quilting, you typically reduce the upper thread tension.
Hi my machine is emel product the problem I have is that while working the machine will stop suddenly and it will not move to the front or to the back.hope their is any remedy to this,because that is what am facing right now
First and foremost, Make sure it’s properly plugged in properly, and the power source is functioning. Sometimes the plug comes loose and it may be causing problems. – though i am sure you have checked it. Check for any loose connections or issues with the foot pedal. Remove any thread snags or obstructions that might be hindering the machine’s movement.A bent or broken needle can halt the machine’s operation. Check if the needle bar is moving correctly when you manually turn the handwheel.
Hi, I have an empisal expression 889, the bobbin driver no longer moves or rotates,
What could be the cause?
Hi Johannes I am sorry – I hope someone who knows about the machine will read your query and answer. Hope that no thread is stuck anywhere.
Look for thread being stuck or dust. Check both the bobbin case and the upper thread tension area or above the needle are. Most Brother machine have a screw in the back that will open the area on top to clean and check for stuck thread. When upper thread keeps breaking it can get caught and cause the machine not to sew.
Thanks Judy
A common cause of a non-rotating bobbin driver is a thread jam or tangle in the bobbin area. Inspect the bobbin case and surrounding areas for any thread snags, lint, or debris that might be obstructing the rotation. Ensure that the bobbin case is correctly inserted, and it’s not cracked or misaligned. You may have to replace the bobbin case if it’s damaged.Mechanical problems within the bobbin driver or its associated components can also cause it to stop rotating. Over time, parts can wear out or become misaligned, leading to this issue.
My handwheel is hard to turn, then clogs the thread up. My singer is is 1116. I am trying to sew over elastic in making face masks. Help
Betsy O’brien
I have the same problem,Norma and I am also sewing masks. Please send me a reply to fix our problem
Hello, Please I have a old singer1119 manual machine and I use it to sew leather but I noticed it not sewing at all and I have checked the needle, thread and have even clean the needle plate but it still not sewing. I will appreciate it if you can attend to my request. Thank you
Make sure the feed dogs are engaged and properly moving the fabric forward. If they are not moving, the fabric won’t feed, and the machine won’t sew. Verify that the presser foot and needle bar height are correctly set. An incorrect setting may prevent the needle from penetrating the fabric properly. If the problem is more technical like the timing, it may require professional adjustment and should be addressed by a sewing machine technician.
Hi Norma Did you try to take up the feed dog part by loosening the screws there. May be something is stuck there. Whenever fabric gets stuck during sewing never forcefully pull the fabric out. Loosen the screws with a screwdriver, take up the feed dog , clean up and then put it back together. The repair person I went to told me that most machines get damaged when people frocefully pull the fabric out when it is stuck.
A needle designed for heavy or stretch fabrics may work better. You may also need to decrease the tension slightly to accommodate the elastic. Adjust the presser foot pressure if your machine allows it. Reducing the pressure can make it easier to sew over elastic without causing resistance.
I have an Elna 9000. The bobbin thread isn’t engaging. I took apart everything and cleaned lint, etc. and it’s still not working. Any suggestions would be helpful.
Noticed I have the model number incorrect. It should be 7000.
First, confirm that the bobbin is inserted in the bobbin case in the correct orientation and that it’s properly placed in the machine. Inspect the bobbin case to ensure that it’s in good condition and hasn’t been damaged. Sometimes, a worn or damaged bobbin case can lead to issues with bobbin thread engagement. If the bobbin case shows signs of wear, consider replacing it.Make sure the bobbin thread tension is correctly adjusted. If it’s too tight, the thread may not engage properly. Adjust the tension to match your fabric and thread.
Good day. I dont know why the tension of my sewing machine keeps falling off while sewing. Pls what can I do? Tobi
Hi Tobi Did you try the solutions mentioned in the post ?
Hey guys please help me my machine name is Zoje and it a flat one
the problem is that when I turned on a spark just came by and a white flame blew so now when I turn it now it not turning on so please guys help me what may be the problem of it
Hi May be the motor is damaged due to short circuit. Better to show it to a repair person for the particular machine. Unplug the powercord to prevent more damage.
Do not attempt to turn on the sewing machine again. Disconnect it from the power source, unplug it. Ensure that the machine is in a safe place and away from anything that could catch fire.If your sewing machine is under warranty, contact the manufacturer or the place of purchase for guidance on repair or replacement. Additionally, if you have insurance that covers accidental damage or electrical issues, you may want to look into filing a claim.
Thanks for this article, so I bought an electric sewing machine, and while I was still a beginner, as I began to sew, the machine stopped working, I was told that I pressed the machine the opposite way, then i have locked the neck of the machine accidentally… Please, what can I do to fix this.
Hi Atunwase Did you take it for repair?. If it is during the free service period they will come and repair it for free, right?
You will have to read through your sewing machine manual to see which lever you have locked. A damaged needle can cause the handwheel to become stuck and the machine will stop working. Check if the needle bar is moving correctly when you manually turn the handwheel.
- Search Please fill out this field.
- Martha's Blog
- Newsletters
- Sweepstakes
- DIY Projects & Crafts
3 Common Sewing Machine Problems (and How to Fix Them)
We consulted Becky Hanson of Singer Sewing Company to keep your sewing experience positively seamless.
Alexandra is a former digital editor for MarthaStewart.com.
When you're learning a new skill, a mistake or two is inevitable. It's all part of the learning curve. But even a skilled seamstress can fall victim to the dreaded skipped stitch or broken needle, or what's possibly the most annoying of all sewing machine headaches: thread bunching. When you hear that agitated whir from the machine—cue the internal "ugh" of despair—consider that to be your distress signal.
The details may vary a little depending on the make and model of your sewing machine—so we suggest that you get familiar with the mechanics of your machine —but the fundamentals are the same. Whether you're a seamless pro or a novice with needles, we have the no-sweat solutions for your most frustrating issues.
The Problem: Thread is bunching under the fabric.
THE SOLUTION:
You can have a perfectly straight stitch on the top, but a "bird's nest" forming on the bottom. So why the inconsistency? People tend to think that the bobbin is to blame; in fact, this couldn't be farther from the truth. The thread is snarling—usually, under the fabric—because there is no tension on the upper thread. Seems counterintuitive, right?
Still, here's what to do: First, raise the presser foot lifter and rethread the machine. This opens up the tension mechanism to receive the thread. Second, you will need to raise the take-up lever and needle to the highest position according to your machine's manual. This should help to confirm you have the right tension.
The Problem: Stitches are coming out uneven or skipping entirely.
Odds are, the secret culprit here is a needle that is broken, bent, or otherwise damaged. Experts recommend that you replace your needles every 16 hours of stitching time.
Another possibility is how you handle the fabric whilst sewing. If you have the tendency—and many of us do—of pulling the fabric from behind to make it go through the machine, the practice can result in unclean stitching and can even break your machine. This kind of force-feeding of the fabric works against the feed dogs (the metal teethlike ridges that grip the bottom of the fabric, coaxing it to move away from the needle as stitches are sewn). Work with the machine—don't force it.
The Problem: The needle keeps breaking.
This boils down to a single follow-up question, "Are you using the right needle?" Going up or down to the appropriately-numbered size can make a huge difference. Needles are sized from 8 to 18, depending on their use. A size 9 or 11 works best for delicate, lightweight fabrics like chiffon, silk, and organza. A size 14 works best for medium-weight fabrics like flannel, linen, and synthetic suedes. And a size 16 (or preferably) 18 is reserved for heavy-weight fabrics like denim. Therefore, using a size 9 needle on denim will inevitably break the needle. Additionally, are you using the right type—that is, ballpoint, regular point, or wedge point? For reference, you can check a full-size chart here .
STILL HAVING ISSUES? THIS THREE-STEP CHECKLIST CAN EASILY SOLVE MOST MACHINE MISHAPS.
1. Clean it out: When was the last time you did a thorough top-to-bottom wipe-down of your machine? Dust and lint can quietly and quickly accumulate in the bobbin area and tension assembly, so have your machine professionally serviced regularly. If you use it daily, a weekly cleaning is needed. For weekly use only, clean it once a month. And for occasional monthly use, clean it every three months.
2. Rethread your machine: Yes, even the slightest bump can affect your stitching. Check your bobbin, needle, and thread to make sure everything is in the right place.
3. Check your needle and thread: As we already mentioned, using the right size and type of needle is imperative. Additionally, you should use high-quality thread—it will have a nice, smooth filament and not be "fuzzy" or uneven in thickness. Thread does have a shelf-life—although different types age differently—so keep your collection of spools in rotation and stored properly (out of humidity and direct sunlight).
Feeling inspired? Watch how to make a garland using your sewing machine:
Related Articles
- Where to buy
- Warranty Registration
- e-Gift Card
5 Common Sewing Machine Problems & How To Fix Them At Home with SINGER®
15th Mar 2024

Sewing machines are invaluable tools for crafters and seamstresses, but they can encounter issues from time to time. Here, we'll address five common sewing machine problems and provide practical solutions that you can implement at home. With the right techniques and tools, such as the SINGER® Promise 1408 Sewing Machine and SINGER® SC220 Sewing Machine , you can keep your sewing projects on track.

1. Thread Bunching Under the Needle
One frustrating issue that sewists encounter is thread bunching, also known as 'birdnesting.' This occurs when the upper thread becomes tangled underneath the fabric. To resolve this, check the tension settings on your machine. Ensure that the upper thread tension is properly adjusted using the tension dials. Additionally, inspect the bobbin case to ensure it is inserted correctly. Clean the area to remove any dust or lint that may be causing obstructions. The SINGER® Sewing Machine Carry Case Travel Bag provides convenient storage for your machine and accessories, keeping them organised and protected.
2. Skipped Stitches
Skipped stitches can disrupt the flow of your sewing project. Often, this issue is caused by using the wrong needle size or type for the fabric. Ensure that you're using the appropriate needle for your project, and replace it regularly to prevent bending or blunting. Check the needle bar position to ensure it's correctly aligned. If the problem persists, consult a professional technician for further assistance with timing adjustments.
3. Needle Bending or Breaking
A broken needle can bring your sewing to a halt. Prevent needle breakage by using the correct needle type for your fabric and ensuring that it's not bent or blunt. SINGER scissors are essential for cutting fabric with precision, reducing the risk of needle damage. Regularly inspect your needle and replace it if any signs of wear are detected.
4. Thread Shedding
Thread shedding occurs when the thread unravels during sewing, leading to messy stitches. To address this issue, use the appropriate needle size and inspect the presser foot for any defects that may snag the thread. Lubricate dry thread with a sewing machine lubricant to prevent shedding. Additionally, keep your bobbin case free from scratches or nicks that may contribute to thread breakage.
5. Bobbin Thread Breaking
When the bobbin thread breaks, it can disrupt the stitching process. Check that the bobbin is inserted correctly according to the machine's instructions. Ensure that the bobbin tension is properly adjusted to match the upper thread tension. Replace old or damaged bobbins to prevent thread breakage. If necessary, seek professional assistance to correct any issues with the bobbin mechanism.
By addressing these common sewing machine problems with the appropriate techniques and tools, you can maintain smooth and efficient sewing sessions at home. Incorporate the tips outlined above and leverage the reliability of SINGER® sewing machines to overcome any challenges that arise. With proper care and maintenance, your sewing machine will continue to be a valuable asset for your creative projects.
Recently Viewed
- Learn to Sew
- Sewing Subscription Box
Sewing Machine Troubleshooting
- Terms and Conditions
- Disclosure Policy
Select Page

Are you constantly having problems with your sewing machine?
When I was learning to sew, it was frustrating when things went wrong. I didn’t know how to fix tension problems, prevent my needle from breaking, or always wind my bobbin evenly. Now I can fix almost any problem I encounter with my sewing machine. You can learn how, too!
I created a Sewing Machine Troubleshooting Guide that walks you through how to solve more than 20 of the most common sewing machine problems.
Your sewing machine is going to give you trouble sooner or later. It’s inevitable… With this troubleshooting guide , you’ll be prepared to tackle almost any problem your sewing machine throws at you.
I’m sure you’re with me on this one…
Getting your sewing machine repaired is not cheap. You’ll easily pay over $100 for a simple diagnostic service. Stop wasting money at the repair shop when you can easily solve most sewing machine problems yourself.
The eBook version of my guide only costs $2.99. That saves you a ton of money on sewing machine repairs.
Plus, if you can fix your sewing machine yourself, you won’t have to pack it up and wait several days for a repair technician to service it. You can have your sewing machine up and running again in a matter of minutes. That means more time sewing and less time crying!
Here are a few topics covered in my book:
- Broken Needles
- Skipped Stitches
- Puckered Seams
- Feed Dog Issues
- Funny Noises and Smells
- Uneven Tension
Many of the most common sewing machine problems can be prevented with proper machine maintenance and setup, but things still can go wrong. If you do develop a problem with your sewing machine, it’s nice to have this troubleshooting guide at hand.
Whether you’re trying to finish a sewing project under a deadline, or you just want to repair something simple, it’s frustrating when your sewing machine won’t cooperate. Take a deep breath and let me help you through your problems… Buy my sewing machine troubleshooting book and you’ll be sewing again in no time.
Here’s a Link to Buy My Book on Amazon: Sewing Machine Problems and How to Solve Them: A Troubleshooting Guide
Help others by sharing this post on Pinterest!

Privacy Overview
Pin it on pinterest.
- Skip to main content
- Skip to primary sidebar
Additional menu
Sewing Mastery
Master Your Sewing Machine
Our Best Sewing Machine Troubleshooting Tips
It never fails.
Sewing machines act up ONLY when you are using them. (Kind of like finding things in the last place you look…)
But seriously, when a sewing machine acts up, what are the first things to check?
Here are the 10 most common trouble areas of a sewing machine:
1. Change the Needle Needles are the easiest and cheapest part of a sewing machine to change yet is makes up 50% of the seam. Without a new needle, a sewing machine can not work correctly. End of discussion.
2. Clean the Machine Sewing machines need weekly if not daily removable of lint and fluff from underneath the throat plate. First, remove the throat plate and bobbin case to expose areas where lint gathers. Using a brush or a Q-tip, remove all visible lint and dust bunnies. If the machine requires oil, add a drop of oil after cleaning. Do not use canned air.
We found this FREE Craftsy class Sew Ready: Machine Basics with Amy Alan to be extra helpful for new sewers.
3. Check the Top Threading If there are huge loops on the back of the fabric, the problem is that the top thread is not in the tension disks. Be sure to thread the machine with PURPOSE. No wimpy threading! Firmly seat the thread in each groove and guide of the machine. If the machine is not threaded correctly it will not sew.
4. Quality Thread Sewing machines like a good thread. How can you tell if the thread is good? The thread that is from Grandma’s sewing box from the 1950s is old. A thread that is 2/$1.00 is not a great thread. Purchase thread from a quilt store or a store that sells sewing machines to be sure it is a quality thread. Sewing machines can run on a low-quality thread, but remember, thread makes up the other 50% of the seam. Are you sure it’s going to hold together after a few washings? Don’t take the chance. Always use good quality thread. Your sewing machine will thank you and you will have fewer headaches.
5. Bobbin thread not in the bobbin tension The bobbin too has its own tension. If the bobbin thread is not in its tension, the stitch will look unbalanced. Be sure the bobbin thread “clicks” into the bobbin tension.
6. Not having your machine cleaned annually Just like cars, sewing machines need regular tune-ups. Having a local sewing machine center professionally clean your sewing machine will help with many troublesome issues. Sewing machine technicians know how to keep all those moving parts perfectly aligned for precision stitching. If you want your sewing machine to last, have it serviced on an annual basis.
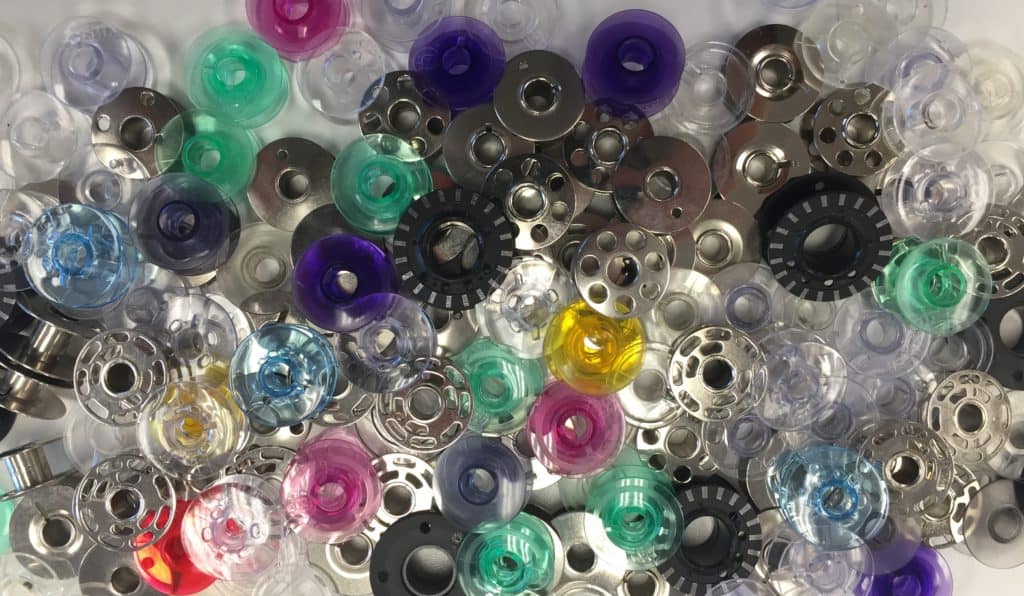
7. Wrong bobbin With so many different brands of sewing machines all taking a different size bobbin, it is easy to accidentally be using the wrong size. Just because a bobbin is a plastic bobbin does not mean it will fit your sewing machine. If you are unsure if you are using the right size of bobbins for your machine, take the sewing machine to a local sewing machine service center. They will be happy to confirm that you are using the correct size. If you have not had your machine serviced within the last year or two, have them service it while it is there.
8. Needle is not high enough Sounds simple but not getting the needle all the way up into position will make stitches not form correctly. This problem is often hard to spot. Loosen the needle screw and gently lift the needle up. Another way to check is by using the built-in needle threader. If the needle threader does not line up with the needle’s eye, the needle is not high enough.
9. The needle too small for the thread Thicker thread must go through a bigger needle. A needle’s groove down the front of the needle must fit the thread size. Small needles and thick thread are a bad combination.
10. Nicks in the throat plate Check the sewing machine’s throat plate opening for needle strikes or small rough nicks. If you have been breaking needles lately, there may be small burrs on the throat plate. Thread can get caught in these rough areas which leads to thread breaks or uneven stitching. A sewing machine technician can usually file these rough spots out.
These ten troubleshooting suggestions usually can fix common sewing machine problems. Beyond these simple fixes, it might be time to call a professional. Sewing machine service technicians are trained to spot common problems. They see sick machines every day.
If your sewing machine has reached the end of its life, say a short prayer and then SMILE…you get to go shopping for a NEW sewing machine!
Check out a variety of sewing machine and embroidery machine videos on SewingMastery to find which features are a must-have on your future machine.
JavaScript seems to be disabled in your browser. For the best experience on our site, be sure to turn on Javascript in your browser.
We use cookies to make your experience better. To comply with the new e-Privacy directive, we need to ask for your consent to set the cookies. Learn more .
- AUD - Australian Dollar
- USD - US Dollar
Creating an account has many benefits: check out faster, keep more than one address, track orders and more.
- Remove This Item
- Add to Cart Add to Cart Remove This Item
- Sewing Machine Troubleshooting
Sewing Machine Troubleshooting Guide
- You're currently reading page 1
5* Support Call us now
Free shipping over £30, secure & fast payments, hassle-free returns.

What are you looking for?

Fixing common sewing machine problems
Having problems with your sewing machine? Try our troubleshooting guides and machine manuals below, which offer solutions to the most common issues. If you’re still stuck, view our extensive list of FAQs at the Brother Solutions Center .
- Home Brother
- Fixing Common Sewing Machine Problems

Machine manuals
Access our complete list of sewing, quilting, embroidery and ScanNCut machine manuals to help you set up and maintain your Brother machine.
View Brother manuals

Brother SupportCenter App
At Brother we’re always ‘at your side’ and will be with you every step of your sewing journey. Our support app is only a click away, so download today.
What you will find on the app:
- Operation Manual (PDF format)
- Suggested combination of fabric, type of needle and thread
- How to use standard and optional accessories
- Stitch pattern chart
- How-to-use and How-to-make short videos
Download for iOS Download for Android
Do I need to register my machine warranty?
Fabric not feeding through my sewing machine.
If your sewing machine has drop feed, check that the feed has not been accidentally lowered. If it has, raise the feed to ensure the fabric will move forward.
If you have a mechanical machine, check that the foot is lowered before sewing . Computerised sewing machines will remind you to do this.
Check the stitch length on your machine – if it is too low the machine might not feed through enough.
My needle will not move, but the handwheel is free?
Check if the machine is in bobbin winding mode by sliding the bobbin winder shaft to the left. This will switch the machine back to sewing mode.
My sewing machine will not pick up the lower thread?
Why is my sewing machine skipping stitches.
Check and replace the needle as it may be bent. Re-thread the machine following the instructions in your manual and ensure that the foot is raised.
The thread should pull through the machine freely with no tension. If there is tension when pulling the thread, then the thread may be unsuitable for machine sewing and should be replaced with machine sewing thread from a reputable brand.
If you are using a stretch fabric, a ball point needle will give better results.
Never use a thread weight of lower than 20 as this may cause your machine to malfunction.
If the problem persists after replacing the needle and ensuring the correct needle and fabric combination. It’s possible there be a timing issue with your machine. Contact your Brother dealer to arrange a service or contact our customer service team.
Sewing machine not stitching?
Refer to your instruction manual for general set up of your machine.
Some common quick fixes:
- Check that the bobbin winder shaft is not pushed to the right; if it is, then push it to the left.
- Check the machine is threaded correctly ensuring the threading line on the hand wheel is at the top position (this puts the needle into the correct position for threading). Make sure the presser foot is lifted before threading the machine. Set your bobbin correctly into the machine. For top loading bobbins, the thread needs to be going around the bobbin in an anti-clockwise direction. Use the guides on your machine or refer to your instruction manual. If you have a mechanical machine, check that the foot is lowered before sewing. Computerised machines will remind you to do this.
Sewing machine thread keeps breaking
Try re-threading the top thread, ensuring the threading line indicator on the hand wheel is positioned to the top (this puts the thread take-up lever at threading point 3, the correct position for threading).
Use a good quality thread – it's common for inexpensive low-quality threads or threads designed for hand sewing to be the cause of what appears to be tension problems when there is nothing wrong with the machine. Using thread that does not pull through smoothly can cause thread breakages, poor stitching or damage to your machine. For best results, you should use a good quality, branded thread.
To check if your thread is suitable for use on a sewing machine thread your machine with the foot raised. The thread should pull through the machine with no tightness.
Thread bunching or "birds-nesting" of thread under the fabric
- re-threading the top thread ensuring the threading line indicator on the hand wheel is positioned to the top (this puts the thread take-up lever at threading point 3, the correct position for threading)checking you haven’t missed the take-up lever (this will cause the thread to gather under the material)
- re-threading the top thread, with your presser foot raised (threading your machine with the foot down will result in no tension being applied to the top thread because the tension discs are closed)checking the position of your bobbin case and resetting as per instruction manual checking the tension settings – if the setting is too low, reset the tension to setting number 4
My machine is sewing in reverse?
What to do when my needle threader won't work.
1) The needle is not raised to the highest position A) Raise to the highest position for mechanical machines position the line on the handwheel to the top(refer to upper threading in your manual, for electronic machines press the needle position button so that the needle returns to the top.
2) The needle is not installed correctly A) ensure the needle is fully inserted into the needle bar clamp before you tighten the screw and the flat part of the needle is to the back, please note singer and butterfly needles are not compatible, brother recommend Organ or Schmetz needles, 11/75 is the smallest needle you can use with the needle threader.
3) The hook of the needle threader is bent and does not pass through the eye of the needle A) Please contact your dealer for support or use the dealer locator to find your nearest repair centre. Please note needle threaders are not covered under warranty .

- You are here:
- Home »
- Blog »
- Sewing Machine Maintenance
- » Troubleshooting Husqvarna Sewing Machine (Fix & Repair Guide)
")
Troubleshooting Husqvarna Sewing Machine (Fix & Repair Guide)
- July 14, 2020
- / Sewing Machine Maintenance
- / By James V.
- / 40 COMMENTS
This world is not perfect and even though you invest a lot of money into the top sewing machine you will find one day a broken part or the machine won’t turn on. It will happen so be prepared for it by knowing what to do when it does happen.
The first thing you need to do when your Husqvarna sewing machine stops working is to check your warranty. Any work done by you could leave you in a precarious position as your warranty is voided and your protection is gone.
To learn how to fix your Husqvarna sewing machine after the warranty has expired, just continue to read our article. It has the information you need to do quick, easy to do repairs, and keep you on track in your sewing schedule.
Common Husqvarna Viking Sewing Machine Problems

There are a lot of common problems you will face when you own a Husqvarna sewing machine. Here are a few of those common problems you have to fix on your own:
Needle breaks or is bent - replace the needle.
Needle in the wrong way - remove the needle and reinsert it the right way.
Bobbin thread breaks - wind a new bobbin, replace the stitch plate, replace the bobbin.
Fabric not feeding - make sure the feed dogs are in the up position, increase stitch length.
Skipped stitches - check for a broken needle, change to the proper needle for fabric, re-thread top and bobbin threads, turn the machine off to reset, change to correct presser foot, make sure needle is inserted properly and in the right direction.
Thread cutter not working - remove the bobbin and clean area, make sure the thread cutter is turned on.
The machine will not sew - make sure the machine is plugged in, check foot control connection, model 20 put bobbin winder in left positions, model 30 put bobbin winder to the right position.
How to Take Apart a Husqvarna Sewing Machine
Removing the covers on different Husqvarna sewing machines may not be done in the same fashion. To remove the cover of the 150 E you need to remove the screw on the back panel first. Lift it up and it will come out.
Then go to the front panel and there is a screw at the rear and one hiding under the reverse lever. Push the reverse lever down to see it. Remove both screws and lift the panel off.
Next is the base plate and there is one lone screw that needs to come out. Now before you remove the front panel, you need to remove the stitch selector first. Once that is done you can remove the front panel.
Then if you have your owner’s manual look inside it to find the location of other screws if you need to take more parts off. Sometimes you do not have to if your repair is minor.
Husqvarna Sewing Machine Not Stitching

The first place to check is always your power supply. Make sure the machine is plugged in and the power button is turned on. Sometimes on the newer models, all you have to do is shut it down and let it reset itself for a couple of hours and the machine will start up again.
If you are plugged in, and the power button is on, check your foot control to see if there is a loose wire or other connection problems. Tighten up any loose wires or see if any part in the foot connector burned or shorted out. Replace those parts.
Some Husqvarna machines operate with parts in opposite positions. Check to see if your bobbin winder is in the sewing position. On some machines that position is to the left and on others that position is on the right.
Husqvarna Tension Problem
One source for this problem is that you did not clean your machine recently and dirt, loose threads, and fibers got in the way of the tension spring. Just clean your machine thoroughly and make sure you get the area where the tension spring is located.
Another source for this problem would be the bobbin. It may be wound too tightly or loosely, you will get inconsistent tension. Re-wind the bobbin if this is the cause. If the tension is not balanced you need to make sure the bobbin thread is wound right and then you go to the needle tension and adjust it to balance it out.
Then if the thread tension is too tight, you will have to loosen the top tension and then double-check the tension on the bobbin thread and the top thread. Make sure you threaded the machine correctly.
Sewing Machine Not Feeding

There are 3 possible origins of this problem. The first would be that the stitch length is set wrong so the machine will not work properly. It is possible that the previous user set the stitch length to 0 and forgot to change it back. Just change the setting and your machine should work again.
The second source for this problem is that the feed dogs are in the wrong position.. This happens if you were doing some free motion quilting. The feed dogs need to be out of position when doing that sewing technique. Just return the feed dogs to their correct position and you should be good to go.
The final source for this problem won’t be on all machines as it requires the presence of the free motion quilting set. If the setting is still turned on, then your machine won’t feed the fabric through the needle.
As an honorable mention, the presser foot may be set to high and you would need to lower it.
Husqvarna Sewing Machine Won't Zigzag
In this instance, you need to check your owner’s manual to find the proper stitch setting for this style of stitching. You will need to reset the stitch to the proper length and width before it will work again.
Or your bobbin area needs a good cleaning. Even though it may sound strange, a dirty bobbin area or machine will affect your stitch patterns. Then you may need to oil the zig-zag components to make sure they can move freely and respond to the machine’s directions.
Another possibility is that the tension is either too tight or too loose. In either case, your stitch patterns won’t work. Finally, check your timing. If the timing is off then the needle can’t grab the thread and the zig-zag pattern won’t show up on your fabric.
Husqvarna Machine Reverse Not Working

In some cases, like the Husqvarna 2000, the mechanism is stuck. All you need to do if this is the problem is to take your hairdryer and heat up the oil to loosen the mechanism. Then you will need to clean and oil the area to make sure the environment is at optimum levels.
Sometimes you may have to push the button in and out several times to get all the gunk out of the way before it will let you sew in reverse again. Or you may have a broken button and it would have to be replaced by a qualified repairman.
Then the most common source of this problem is that the machine needs a good cleaning. Get rid of all dust, dirt, old threads, and so on from your machine and then lubricate it. That should take care of the problem if the other two solutions do not work.
Husqvarna Foot Pedal Not Working
Okay, this problem can be found by simply looking at your foot pedal. Check the cord to make sure there are no breaks, cracks, or burns anywhere along the cord. Replace the foot pedal if there are.
Next, you should open up the foot pedal to see if there are any loose or broken wires. Repair the wires by tightening them back up or replacing them or the power cord.
Another option is that the foot pedal was not plugged into your machine correctly. Unplug it and plug it back in again to test that suggestion.
It also may be that your machine is not plugged in so your foot pedal cannot get any power. If you can’t find the problem it may be that the foot pedal is either broken beyond repair or it isn’t the problem after all.
Touch Screen Not Working

If you are having trouble with your touch screen there is one simple option you can do before visiting your local repairman. You have to go into your SET menu and push the touch screen to the adjust button. If that does not do it, then you need to pack the machine up and take it into an approved Husqvarna repairman.
You can also try shutting the machine off for a couple of hours to see if that time period resets the touch screen. But again, if that does not work, go to your repairman for help.
It is not a good idea to mess with the touch screen if you do not know anything about them or if you do not have the correct tools to work on it. You will end up doing more harm than good. Let the trained professionals do it because that is why they are paid the big bucks.
Viking Sewing Machine Keeps Jamming
One of the first steps you need to take is to turn the machine off and unplug it. Then open up the bobbin case, remove the bobbin and case till you see the hook. Clean the hook of any dirt, etc., and oil it. Rotate the handwheel in both directions to see if that frees up the machine. If so, then you are back on schedule.
Or your fabric may be the cause and you will have to gently, yet firmly tug on the fabric till you get it out of the machine and away from the needle. You may have to do some thread cutting here as well.
The machine may have a problem with too much thread in one spot. In this situation, you would have to remove the bobbin, the throat plate, and other areas and cut the thread that has jammed the machine.
If your needle is bent, then that would be another source for this problem. You would have to check your needle and replace it if it is.
Husqvarna Sewing Machine Stuck in Reverse

The most common source for this issue is that your machine is dirty and something is blocking the reverse lever or button from being moved out of position. A good cleaning and oiling is the solution in this case.
Or it could be that you have a broken lever or button that needs fixing and replacing. But try pushing the reverse button or lever in and out or up and down to unstick the mechanism.
A third source is common with some Husqvarna sewing machines. The reverse button gets locked in that position and you have to lightly lift the button up to get it to unlock. Or your feed dogs are dirty and won’t let the machine switch directions.
Cleaning that area will help unlock the reverse feature and get you moving again. Finally, reboot the machine if it is a computerized model.
Some Final Words
Repairing the common problems on your Husqvarna sewing machine is not a difficult task to do. The trouble comes in when your sewing machine is a new computerized version. In those cases, you should let the repairman handle the trouble.
As we said earlier, make sure your warranty has ended before you start fooling around with your sewing machine. Canceling your protection is not a smart thing to do even if it saves you a few bucks. Protect your warrant as well as your machine.
Related Posts
The Most Quiet Sewing Machine (How To Quiet a Noisy Machine)
How to Sharpen a Serger Blade (Serger Blade Sharpening Tips)
Needle Keeps Falling Out of Sewing Machine (How To Fix)
Leave a Comment:
Save my name, email, and website in this browser for the next time I comment.
40 comments
Janome Sewing Machine Problems: 9 Known Issues (Solved)

Janome sewing machines are known for their high-quality stitching and durability.
However, like any other sewing machine, Janome machines are prone to problems and malfunctions. These issues can range from simple problems like thread tangles and lint build-up to more complex issues like tension problems and jammed fabric feed.
If you’re experiencing problems with your Janome sewing machine, it’s important to address them as soon as possible.
Ignoring these issues can lead to more serious problems down the line, and may even result in the need for costly repairs or replacement.
Table of Contents
Machine Won’t Turn On
One of the most common problems with Janome sewing machines is that they won’t turn on.
This can be caused by a variety of issues, including:
- electrical problems,
- blown fuses,
- and faulty power cords.
Thread Tension Issues
One of the most common problems with Janome sewing machines is thread tension issues.
If the upper or lower thread tension is too loose or too tight, it can result in uneven stitches, thread breakage, or puckering.

To fix this problem, check the threading of the machine, and make sure that the thread is properly seated in the tension discs. You may also need to adjust the tension using the machine’s tension dial.
Bobbin Winding Problems
Another common issue that you may encounter is bobbin winding problems.
If the bobbin is not wound correctly, it can result in uneven stitches or thread breakage.
To fix this problem, make sure that the thread is properly wound around the bobbin, and that the bobbin is inserted correctly into the machine.
Bobbin-related issues can also occur with Janome sewing machines, such as:
- tangled or jammed thread,
- incorrect winding or insertion,
- or bobbin case problems.
To address these issues, you can check the bobbin for any debris or damage, and ensure that it’s inserted properly and oriented correctly.
You can also adjust the tension of the bobbin thread or the upper thread to achieve a balanced stitch.
Sewing Machine Jams or Stops
If your sewing machine jams or stops, it could be due to a variety of issues. One common cause is a bent or broken needle, which can result in the machine jamming or stopping mid-stitch.
Other causes could include a tangled thread or debris in the bobbin area.
To fix this problem, carefully remove the needle and any tangled threads, and clean the bobbin area of any debris.
Needle Breakage
Needle breakage is another common problem that you may encounter when using a Janome sewing machine.
This can be caused by a variety of factors, including using the wrong type of needle, sewing through thick fabrics, or sewing at too high of a speed.
To fix this problem, make sure that you are using the correct type of needle for the fabric you are sewing, and adjust the sewing speed as needed.
Machine Jamming
If your machine is jamming frequently, it could be due to a variety of issues, including a damaged feed dog or a worn out needle plate.
To fix this problem, try cleaning the feed dog and needle plate, and replace them if necessary.
Noise or Vibration Problems
If your sewing machine is making unusual noises or vibrations, it could be due to a variety of factors, including loose screws, worn out parts, or an unbalanced machine.
To fix this problem, try tightening any loose screws, replacing any worn out parts, or balancing the machine as needed.
Sewing Machine Not Feeding Fabric Properly
If your sewing machine is not feeding fabric properly, it could be due to a variety of factors, including a damaged feed dog or a worn out presser foot.
To fix this problem, try cleaning the feed dog and presser foot, and replace them if necessary.
Other Needle-Related Issues
Another common problem with Janome sewing machines is needle-related issues. These can include bent or broken needles, wrong size or type of needles, or needles that hit the bobbin case.
To prevent these issues, you should always use high-quality needles that are appropriate for your fabric and thread, and replace them regularly.
You should also make sure that the needle is properly aligned and inserted, and that the presser foot is lowered before sewing.
Machine Jams or Stops
Sometimes, Janome sewing machines can jam or stop working properly, which can be caused by various factors such as fabric jamming, incorrect threading, or motor problems.
To troubleshoot these issues, you should first unplug the machine and remove any obstructions or tangled threads.
You can then check the needle and bobbin for any damage, and make sure that the machine is properly lubricated and maintained.
Basic Maintenance You Need To Do
Here are some tips on how to maintain your Janome sewing machine:
Clean the Machine Regularly
Dust, lint, and thread particles can accumulate on your Janome sewing machine, which can affect its performance and even cause damage to its delicate parts.
You should clean your Janome sewing machine regularly by dusting it off with a soft brush or cloth, and removing any lint or debris from the bobbin area, feed dogs, and other parts using a lint brush or vacuum cleaner.
You should also wipe down the exterior of the machine with a damp cloth to remove any dirt or stains.
Oil the Machine
Proper lubrication is essential for the smooth operation of your Janome sewing machine.
You should oil your machine regularly according to the manufacturer’s instructions.
Use high-quality sewing machine oil and apply a drop or two to the designated oiling points, such as the needle bar, hook race, and motor bearings.
Be careful not to over-oil your machine, as this can cause clogs or damage.
Replace Needles and Parts Regularly
Needles are a crucial component of your Janome sewing machine, and they can become dull or damaged over time with use.
You should replace the needle regularly, especially if you’re working with heavy or dense fabrics that can cause more wear and tear.
You should also replace other parts such as the bobbin case, presser foot, and needle plate when they become worn out or damaged.
IMAGES
VIDEO
COMMENTS
Sewing Machine Problems and Solutions. #1 - Machine is Making Strange Noises. #2 - Sewing Machine Needle Getting Stuck. #3 - Sewing Machine Needles Breaking. #4 - Thread Bunching Up Under Your Fabric When Sewing. #5 - Sewing Machine Needle Keeps Hitting the Metal Plate. #6 - Fabric Not Feeding.
11. Thread inconsistently knots, loosens, or tangles. This can be an infuriating problem to track down. One minute, everything's sewing along just fine, and the next, your machine has tangled, skipped stitches, or knotted up the threads.
Sewing Machine Problem Solving: Thread Gathers Underneath Your Fabric. If the thread is bunching up under fabric, it will put an immediate stop on your sewing. The dreaded "bird's nest" on the underside of your fabric. The top thread looks okay but the underside is a total mess! I put this at the top of the list because it's so frustrating and ...
If there is no such setting on your machine, take off the throat plate and clean out all dust, thread, and lint. Oil the machine according to your sewing machine manual. If the feed dogs still do not work, troubleshoot the problem with your sewing machine manual. When all else fails, it may be time to take the machine in for repairs. 04 of 06.
Completely un-thread your sewing machine and re-thread it. Remember to always thread your machine with the presser foot up. Knotting thread on the bottom side is usually caused by upper threading errors. Check the bobbin and be sure it is threaded correctly and that the bobbin case is correctly threaded. Be sure the bobbin is positioned in the ...
13. The Motor/Light is Okay but the Machine is not Sewing. If you find the motor or light to working properly but the machine is not sewing, it can be caused due to a wide range of problems. Check if there is a bobbin on the bobbin winder. If the machine is in the bobbin winding mode, it will not work.
Check the thread tension. If it is too tight, skipped stitches could occur. Change the tension. Top stitching is loose because the bobbin tension is off, and if the backside stitching is looking off, change the top thread tension. Read more on setting the tension on a sewing machine here. Step 4.
2. Rethread your machine: Yes, even the slightest bump can affect your stitching. Check your bobbin, needle, and thread to make sure everything is in the right place. 3. Check your needle and thread: As we already mentioned, using the right size and type of needle is imperative. Additionally, you should use high-quality thread—it will have a ...
With the right techniques and tools, such as the SINGER® Promise 1408 Sewing Machine and SINGER® SC220 Sewing Machine, you can keep your sewing projects on track. 1. Thread Bunching Under the Needle. One frustrating issue that sewists encounter is thread bunching, also known as 'birdnesting.'. This occurs when the upper thread becomes tangled ...
I created a Sewing Machine Troubleshooting Guide that walks you through how to solve more than 20 of the most common sewing machine problems. Your sewing machine is going to give you trouble sooner or later. It's inevitable… With this troubleshooting guide, you'll be prepared to tackle almost any problem your sewing machine throws at you.
Start by changing your needle, rethreading your machine, and checking the bobbin. Sew a few stitches on a test swatch of fabric. If you still notice the problem, dig deeper. Clean your machine, check the presser foot and adjust the tension. Most of the time, one of these issues is the culprit.
Always use good quality thread. Your sewing machine will thank you and you will have fewer headaches. 5. Bobbin thread not in the bobbin tension. The bobbin too has its own tension. If the bobbin thread is not in its tension, the stitch will look unbalanced. Be sure the bobbin thread "clicks" into the bobbin tension. 6.
Our guide can help you solve sewing machine problems, like looping, snapped needles, puckering or missing stitches, and more. The store will not work correctly when cookies are disabled. ... There are many reasons why the sewing machine needle will not move and becomes jammed. I will put these in order. 1. The bobbin winder may be still be ...
Do you have a problem with your sewing machine? Try these 5 DIY repairs at home BEFORE sending it to your local repair shop. The Quilt Behind Me:https://sewy...
Are you having sewing machine problems? We are going to be troubleshooting 3 of the most common sewing machine issues in this video tutorial. This is lesson ...
Learn the most common issues that cause sewing machine problems and how to fix them. Watch this video for helpful tips and links to related videos.
One of the most common problems with Singer sewing machines is thread tension issues. This can cause stitches to be too tight or too loose. Make sure that you are using the correct thread tension setting for the fabric you are using. If the tension is still not correct, try re-threading the machine and adjusting the tension again.
The thread should pull through the machine freely with no tension. If there is tension when pulling the thread, then the thread may be unsuitable for machine sewing and should be replaced with machine sewing thread from a reputable brand. If you are using a stretch fabric, a ball point needle will give better results.
To remove the cover of the 150 E you need to remove the screw on the back panel first. Lift it up and it will come out. Then go to the front panel and there is a screw at the rear and one hiding under the reverse lever. Push the reverse lever down to see it. Remove both screws and lift the panel off.
One of the most common problems with Janome sewing machines is thread tension issues. If the upper or lower thread tension is too loose or too tight, it can result in uneven stitches, thread breakage, or puckering. To fix this problem, check the threading of the machine, and make sure that the thread is properly seated in the tension discs.