Microsoft Excel
11 minute read

11 Best Excel Presentation Tips in 2024

Brandon Pfaff
Facebook Twitter LinkedIn WhatsApp Email

Join the Excel conversation on Slack
Ask a question or join the conversation for all things Excel on our Slack channel.
There’s more to a spreadsheet than just the numbers on the page. It is equally important to make your spreadsheets look professional, easy to read, and visually appealing to your viewers.
The same way a lawyer with a crooked tie and disorganized papers might raise an eyebrow in court, your Excel presentation won’t hit the right marks with your audience if it looks clumsy and bland, no matter how many hours of research goes into making it or how important the information contained within it is.
Whether you are creating a spreadsheet for personal use, to pass information to your team or share with your project manager, the secrets locked away in this post will be of immense use to you. Let’s take a look at the best Excel presentation tips to help you create standout spreadsheets .
Free Excel crash course
Learn Excel essentials fast with this FREE course. Get your certificate today!
1. Get a template online
If you are a busy person, and you cannot fit an Excel presentation design into your schedule, enter the ex machina: pre-made Excel templates. You can choose from an array of purpose-specific templates with beautiful designs, fonts, and colors. Simply enter your values to customize it, and you are ready to go.
Of course, using a template means you will not get better at designing things yourself. If getting things done is your priority instead of getting better at designing presentations, then, by all means, use a template and be done with it. On the other hand, if you want to know how to make your Excel presentation better on your own, then find someone to teach you or stick around until the end of this post.
Check out our 50 best Excel templates to make your life easier and our 33 Excel business templates for workplace productivity .
2. Name your worksheets correctly
Excel presentation is all about clarity. For this single reason, the importance of a correct and reliable project or worksheet name cannot be overemphasized. It could be a sentence, a phrase or just a word. Just make sure it is easy to understand by you or by anyone you will be sharing the file with.

You also must make sure it is distinct from the names of other worksheets stored on your computer. After all, what is the use of all the tips you will learn here today if you will not be able to find the worksheet you applied them on?
3. Define your header/title
Your header and title can be anything but it needs to stand out. Your header must be able to speak to the reader and make the reader know at first glance what the header is.

To do this, try a larger font for your header, underline and embolden it. You should center align it and use a different font color. It has to stand out but also blend with the template color scheme and overall aesthetic look. You can also use a different readable for your header. Just remember, we want to make it distinct, not isolated.
Step up your Excel game
Download our print-ready shortcut cheatsheet for Excel.
4. Dos and don'ts of fonts
Full transparency: Fonts make or break your spreadsheet. Always use a uniform font for your data, you can use the same font for your header or you can change that of the header. You can use three fonts in a single presentation and that is the recommended maximum, else you would be pushing it. In this case, less is infinitely better.
These are the guidelines to follow in selecting the right format for your font.
Here is a quick tip, fonts of the sans-serif group are the best for your Excel spreadsheet if readability is your goal. Calibri, Helvetica, Arial or Playfair are few examples. If used with the right alignment, spacing, and color, they can bring out the best in your Excel presentation.

This ultimately depends on your presentation but officially, font 12 is often advised with double spacing to improve readability. As stated earlier, the header font can be larger. The headers should be larger than sub-headers which in turn should be larger than data fonts.

You want to create a sharp contrast between the text color and the background colors e.g. a light color text on a dark background and vice versa. This is where the "zebra stripes" rule comes in, which will be discussed later in the post.
People don’t often use the alignment tool in Excel. If you want to make your presentation look beautiful and business-like , you will need to maximize the alignment feature.

5. Create space for breathing room
When you see tightly packed, clumsy or wordy text or spreadsheet, your brain automatically gets tired of reading it before you even start. But when there is breathing space and the spreadsheet is divided up into categories, it becomes more pleasant to the eyes and ripe for interpretation by the brain.
This brings us to the B2 rule. Try to start your presentation on column B, row 2. Leaving the A column and the first row blank. It works like magic. You should also make sure that the column and row dimensions are the same.

Additionally, don't autofit the height and width of your document. You need to have flexibility and creative control of your workspace. Instead, manually adjust the height and width so that they have just enough white space but not too much to give your presentation some breathing room and improve readability.
6. Add an image
Whether it’s a photograph, an artistic sketch or your logo, images go a long way in making your spreadsheet better. Images make your presentation look official and possess the professional feel in many of the beautiful presentations you have seen. Pictures speak a thousand words. While Excel is not designed to accomplish the kind of presentation you can make in PowerPoint, a picture will help you to drive the point home and make your presentation memorable.

7. Go off the grid
Do you know that erasing all grid lines apart from those of your result will have people asking how you did it and if you used the same Excel software they use? Try it today. In your spreadsheet
Go to the View tab on the ribbon.
- Under the Show section, uncheck the box next to Gridlines .

8. Zebra stripes: Excel jungle law
Zebra stripes are alternating dark and light colors on rows lying on top of each other. This helps in a number of ways. First, it has this aesthetic feel that makes your work seem orderly, especially if you are displaying hundreds of rows of data. Second, it helps correlation and readability. A reader can track a row from the right-hand side to the far left and not lose track of what row his or her eyes are set upon.

You can zebra stripe using many methods. When you create a table in Excel, by default this will be zebra striped (Tip- select your data and use the shortcut Ctrl + T on a PC or ^ + T on a Mac to quickly create a table). On the Design tab, under Table Styles, you can change the color and style of your zebra stripes.
It can also be done using a formula in conditional formatting if desired. Conditional formatting is done by highlighting values that satisfy certain requirements (e.g. all odd-numbered rows). It can be copied from cell to cell using the painter tool in the Home toolbar.
9. Use charts, tables , and graphs
Most presentations are incomplete without some form of visual representation. Whether table, graph or chart, you need to visually represent your raw data in mediums that would be understood in a single glance. Charts, graphs, and tables should not be underestimated, especially if you have cumbersome data spanning many columns and rows.
In the Excel ecosystem, the chart, graph, and table features are like symbiotic siblings. You need them to bring out the beauty in the brevity of your work.

10. Create cell styles
Excel has many preset cell styles but you can create your own custom styles that will be more customized, and easier to use and edit because you created it. This is actually an alternative to getting a template if graphics consistency is your goal. After creating a beautiful spreadsheet with the above information, you can save the style so that you can apply it to future presentations.

Now your presentation is perfect with the right feel and style. Simply highlight the cells with your design for saving, then go to the Home toolbar, click on "more" at the base of the style gallery, then select "new cell style". A style dialog box will open, name the style, edit its properties and save.
If it isn't broken and it works efficiently, why change it? You can, however, add a touch of variability by changing the color palette from time to time.
11. Show restraint
You have learned all of these tips and you are ready to start your presentation - be careful of overdoing it. Use color sparingly and don't combine too many tips at once. You need to tread the fine line between underwhelming and too much to find the "just enough" middle ground. Make sure your presentation is perfectly balanced, as all things should be.
Ultimately, the way your Excel presentation turns out depends on how well you communicate your data to your audience. Although, it does help to know the psychology of colors, good fonts. Browse beautiful spreadsheet presentations online to figure out what the "best" looks like. But at the end of the day, the ball is in your court and we hope that your dedication to practicing, sharpening and perfecting your presentation skills in Excel will be rewarded with cheers.
Ready to design your own Excel presentations?
If you would like to sum up the data on your Excel spreadsheet so that its insights are conveyed in a straight-forward manner, then follow this step-by-step guide. You’ll end up with a presentation that summarizes your data in a way that’s painless to analyze.
If you’re eager to brush up on your Excel skills, check out our Excel course and master the fundamentals to boost your productivity.
Loved this? Subscribe, and join 453,981 others.
Get our latest content before everyone else. Unsubscribe whenever.

Brandon is a full time CPA specializing in all things tax. When he is not serving clients, he enjoys spending time with his wife and son, real estate investing, and sipping fine bourbon.

Recommended
Excel Challenge 41: Transforming Data With Excel Functions
Take this Excel challenge to move and convert data in different formats using Excel functions. Which formulas will you use to organize this group of marathon runners?

Excel Challenge 40: Create a Custom Excel Calculator
Would you like to build your own Excel calculator? It might be easier than you think! Take the challenge and see how our community members solved it.

Sort Functions in Excel — How to Use SORT and SORTBY
Excel sort functions are superior to manual sorting methods because they will automatically update the sort order without user intervention.
© 2024 GoSkills Ltd. Skills for career advancement
- SUGGESTED TOPICS
- The Magazine
- Newsletters
- Managing Yourself
- Managing Teams
- Work-life Balance
- The Big Idea
- Data & Visuals
- Reading Lists
- Case Selections
- HBR Learning
- Topic Feeds
- Account Settings
- Email Preferences
Present Your Data Like a Pro
- Joel Schwartzberg

Demystify the numbers. Your audience will thank you.
While a good presentation has data, data alone doesn’t guarantee a good presentation. It’s all about how that data is presented. The quickest way to confuse your audience is by sharing too many details at once. The only data points you should share are those that significantly support your point — and ideally, one point per chart. To avoid the debacle of sheepishly translating hard-to-see numbers and labels, rehearse your presentation with colleagues sitting as far away as the actual audience would. While you’ve been working with the same chart for weeks or months, your audience will be exposed to it for mere seconds. Give them the best chance of comprehending your data by using simple, clear, and complete language to identify X and Y axes, pie pieces, bars, and other diagrammatic elements. Try to avoid abbreviations that aren’t obvious, and don’t assume labeled components on one slide will be remembered on subsequent slides. Every valuable chart or pie graph has an “Aha!” zone — a number or range of data that reveals something crucial to your point. Make sure you visually highlight the “Aha!” zone, reinforcing the moment by explaining it to your audience.
With so many ways to spin and distort information these days, a presentation needs to do more than simply share great ideas — it needs to support those ideas with credible data. That’s true whether you’re an executive pitching new business clients, a vendor selling her services, or a CEO making a case for change.
- JS Joel Schwartzberg oversees executive communications for a major national nonprofit, is a professional presentation coach, and is the author of Get to the Point! Sharpen Your Message and Make Your Words Matter and The Language of Leadership: How to Engage and Inspire Your Team . You can find him on LinkedIn and X. TheJoelTruth
Partner Center
- Generative AI
- Office Suites
- Collaboration Software
- Productivity Software
- Augmented Reality
- Emerging Technology
- Remote Work
- Artificial Intelligence
- Operating Systems
- IT Leadership
- IT Management
- IT Operations
- Cloud Computing
- Computers and Peripherals
- Data Center
- Enterprise Applications
- Vendors and Providers
- Enterprise Buyer’s Guides
- United States
- Netherlands
- United Kingdom
- New Zealand
- Newsletters
- Foundry Careers
- Terms of Service
- Privacy Policy
- Cookie Policy
- Copyright Notice
- Member Preferences
- About AdChoices
- E-commerce Affiliate Relationships
- Your California Privacy Rights
Our Network
- Network World
10 spiffy new ways to show data with Excel
It's time to dump the pie charts and move to donuts or even waterfalls to show off your data in ways people can better grasp..

Have you noticed that people groan when you pop open a spreadsheet to share your brilliant data insights? Maybe it’s not you — or your audience — that’s to blame. Maybe you suffer from Dull-and-Overused-Chart-Syndrome?
Here are 10 charts that can present data in clever ways that make it easy for people to grasp what you’re talking about. They don’t require people to squint and overthink; instead, these charts do to your data what a photo does to everything else: Show not tell.
You can stop boring everyone with the same old pie slices. Try serving doughnuts or showing them a waterfall. It’s more fun.
Sparklines: A heads-up display for your data
In-cell charts are like a heads-up display for your data, providing an immediate visual context in spreadsheets. The Sparkline feature, introduced in Excel 2013, lets you select data from rows or columns of cells and display line, column or handy win/loss charts.

It’s easy! Just select a range of cells next to the data you want to chart, then click Insert on the UI ribbon and click Line in the Sparklines group (you can also click Column or Win/Loss). In the Create Sparklines dialog box, click in the Data Range text box and select the rows or columns of data you want to depict. The Location Range text box should show the cells used to hold the Sparkline graphs, but you can adjust this by selecting the text in that box and using the mouse to select a row or column of cells. Click OK, and the in-cell charts appear, displaying the data. Select the Sparkline chart cell, click the Design item in the Ribbon, and play with the formatting options to get the look you want.
Make failures jump out with in-cell charts
Sparklines are handy. I especially like the Win/Loss option that displays iconography and color based on whether a value is positive or negative. Use it to, say, normalize regional sales data against projection and flag underperformers. But what if you want to embed visual context within the cell itself, rather than off to the side? Time for some conditional formatting and in-cell charts!

Select a range of data, click the Conditional Formatting item in the Ribbon, and click Icon Sets, then one of the simple options under Directional. Now each data cell displays an arrow icon. But these aren’t aligned relative to zero (and it’s visually quite busy).
So, with the range selected, click Conditional Formatting, Manage Rules, and double-click the rule you just created. In the Edit Rule Description dialog box, set the two top Icon drop downs to No Cell Icon, and the two top Value items to 0. Click the ‘greater than’ drop down and set the first the “>” and the second to “>=”. Set both Type drop downs to Number. In the bottommost Icon item, set the icon to a red down arrow. Click OK and OK again. Now, all negative cells (and only negative cells) are flagged.
Put your smarts on the table
Tables are one of my favorite features in Excel, thanks to the powerful Filter feature that can sort and filter even the largest data sets with a mouse click. But a hidden benefit is the magic it affords your charts. For instance, add a new column of data to the end of a table, and the linked chart automatically expands to add the new data series. Nice.

To Table-ize a data range, select the relevant cells (including header rows and columns) and click Insert, then Table in the Ribbon menu. Make sure the My Table Has Headers checkbox is checked, then click OK. Boom! The data gets some handy formatting and adds filter drop-down controls along the header row. Now, with an embedded chart displayed next to your data, enter a new header row item and some underlying data in the cells below it. As soon as you hit return in the header row cell, your chart resizes and sets aside a new item on the chart axis. As you add data to each cell, the chart updates to display the new data.
Even better, Tables bring the useful magic of Filters to your charts. Suppose you have a table with monthly budget figures from 100 field offices. You can visualize only offices in, say, Ohio, by clicking the Filter drop down in the State column, then unchecking the Select All checkbox, before scrolling down to Ohio in the list and checking it. Click OK and the chart updates.
Sunburst charts: so much better than pie!
The new sunburst chart type in Excel 2016 is incredibly useful for understanding the relationship among data, taking nested hierarchies of data and showing how the granular elements combine to populate larger data groups. Think of it as a multi-level pie chart.

Sunburst charts in Excel do their thing by reading the structure of your data set. For instance, our fictional company has three strategic product lines (widgets, controllers, connectors) and keeps a spreadsheet that tracks sales for these product lines across industrial, specialized, and consumer markets. They further break these categories out by industry (automotive, medical, etc.). Once the data is properly laid out, select the relevant cells and click Insert, Chart, Recommended Charts, and click the All Charts tab, then click Sunburst from the list.
Waterfall charts for clean, clear data
Office 2016 introduces a new chart type to Excel’s arsenal — the waterfall chart. It’s great for showing how positive and negative values contribute to a total — like tracking the worth of a financial portfolio over time or visualizing income and expenses. Unlike a line chart, which reveals trends, a waterfall chart emphasizes individual gains and losses.

To create a waterfall chart, make a simple two-column array, with months in the left column and dollar amounts (positive and negative) in the right. Select the array and click Insert and click the Recommended Charts icon. Then click the All Charts tab on the insert Charts dialog box. Click Waterfall in the right pane and click OK. A rather poorly formatted chart greets you.
Next, we will rein in that Y axis so the hefty Start amount doesn’t swamp the other data. Right-click the Y-axis labels and click Format Axis. In the Axis Options pane, enter 15400 and click OK. Then click the Number item and in Category select Currency and, in the Decimal places box that appears, type 0, and press Enter. Finally, set that first data point on the chart as a Total item. Click on the first column in the chart and click on it again so that only that column is highlighted (the others should look faded). In the Format Data Point pane, click the Series Options icon and then check the Set as total checkbox. The selected column now turns gray.
Mmm… doughnuts
Pie charts can be the worst. They lack the visual precision of stacked column charts, and they’re often crowded, reducing smaller data points to inscrutable wedges. What’s more, they invite abuse, in the form of baroque 3D pies and extracted slices that can confuse hapless viewers.
That’s why you might consider serving doughnuts the next time you reach for an Excel pie chart. Like pie charts, doughnut charts are great for visualizing contributions to a total. But the additional white space and less common usage make them a refreshing change of pace on the corporate charting circuit.

To create a doughnut chart, select your data, then click Insert, click the Insert Pie or Doughnut Chart icon, and click Doughnut Chart. To tailor the presentation, right-click the chart body and click Format Data Series. In the pane that appears, change the Doughnut Hole Size value to somewhere around 60%. (I find the default 75% is too skinny.)
Roll your own project-tracking Gannt chart
You can turn a stacked bar chart into a project-savvy Gannt chart.
Make a four-column table with “Start,” “Stage,” “Date” and “On Task” across the top row. In Cells B2 through B7, enter project stages like Plan, Build, Approve, etc. In Cell A2, under Start, enter the start date for the first stage item, then in Cells D2 through D7 (under On Task), enter the number of days for each stage to complete. In Cell C2 enter “=A2” and format the cell as General. You’ll see a number like 43205, which is Excel’s time/date code needed for the chart layout. Finally, in C3 enter “=C2+D2”, then copy and paste this formula into cells C4 through C7.
Select the cells you’ve entered from Column B through D and click Insert. Click the column chart icon and then the stacked bar chart. Now let’s bring the chart into focus. Right-click the X-axis labels and click Format Axis. In the Axis Options pane, click the Number item and, in Category, select Date from the drop-down. In Type, select a shorter date format. Then, at the top of the pane under Bounds, in the Minimum text box, enter the value from Column C of the first item in your task list. It should be something like 43205. You’ll note that the Stages are in reverse order. Right-click the vertical axis and click Format Axis. In the Axis Options pane, click the Categories in Reverse Order checkbox.
Show your goal with a thermometer chart
Want to visualize an achievement against a goal? How about a fundraiser trying to raise $20,000? A thermometer chart is great for this.

We’ll keep it simple with a four-cell array with Goal and Donations on the left, and $20,000 and $16,425 on the right. Select the cells, click Insert in the Ribbon, click the Column Chart icon and then click on the Clustered Column Chart item. Click the Switch Row/Column icon in the Ribbon so the chart box displays a “1” in the X-axis label.
Right-click the smaller Donations bar and click Format Data Series. Then click Secondary Axis in the Series Options pane. The bar will disappear behind the larger Goal bar and a secondary Y-axis label appears. Right click the left axis, click Format Axis, and then enter 20000 in the Maximum box in the Axis Options pane. Do the same for the right (secondary) axis.
Empty the Goal bar by right-clicking it, clicking the Fill & Line icon in the pane, and clicking No fill and setting the Border to a black line. Format the Donations bar with a fill color of your choice and setting the border to No line. Clean up the chart by deleting the right axis and the X-axis labels. Also, tighten up the left axis in the Format Axis pane. In Axis Options, set the Number Decimal places box to 0. Add tick marks as you wish.
Charts that change as you enter data
Here’s a trick: an Excel chart that displays specific data from a large array based on your input.

You do this with the (incredibly useful) MATCH and OFFSET functions, which pluck data from an array and present it in cells that the chart is linked to. Let’s say you have seven columns representing years and 12 rows representing sales reps, with the cells containing yearly sales amounts.
In the column to the right of the last column, enter the following formula in each cell:
=OFFSET($A$1,ROW()-1,MATCH($J$1,$B$1:$H$1,0))
This tells Excel to look in the header row of the array for a value that matches the year to cell J1, so Excel can use the OFFSET function to pull the data from that year and display it in the cells in column I. So, if you enter 2014 in Cell J1, the formulas in Column I display the data that’s in the cells under 2014 (in this case, Column E). Now, all you have to do is create a chart that uses column A for its X-axis and Column I for its data. The column will update to display the data for whatever year you enter into Cell J1. Nifty.
More ways to that dynamic chart
OK, let’s take this a step further and update a line chart based on a scrollable list.

Just below the same array of data we used in the last slide, we’ll use the handy OFFSET and MATCH functions to add cells to Row 15, with formulas that pull sales data based on which rep’s name is entered into Cell A18. These formulas are in cells A15 through H15 and read as follows:
=OFFSET($A$1,MATCH($A$18,$A$1:$A$13,0)-1,COLUMN()-1)
Select Cells A1:H1 (X-axis values) and Cells A15:H15 (rep name and related sales data) and click Insert, Recommended Charts, and select Line chart from the top of the list. Now set up the drop-down list control to read names from Cells A2:A13. Click on A18, click the Data tab in the Ribbon, and click Data Validation and then Data Validation again. Click List from the Allow Drop-Down control, then click in the Source box and use the mouse to select cells A2 through A13. Click OK.
Now when you click on A18, a drop-down control appears. Click it and you’ll see a scrollable list of all your reps’ names. Select one and not only does A18 update to show that name, but the cells in Row 15 all update with that reps’ data, and the linked chart updates as well.
Related content
The pc industry has a lot to thank apple for, how visual collaboration supercharges devops: from ideation to it stack optimization, seeing is believing, openai fixes issues with chatgpt after an outage affected some users, amd and intel take on nvidia with new ai chips and pricing strategies, from our editors straight to your inbox, show me more, how ai will kill the smartphone.

Robotics makers embrace Nvidia digital twins to create autonomous AI-run factories

Qualcomm marks its foray into Windows PCs with next-gen AI chips

Podcast: Why computing now feels like ‘disposable technology’

Podcast: The AI hype squad hits some major bumps

Why are people still bad at video calls?

Why computing now feels like ‘disposable technology’

The AI hype squad hits some major bumps

- - Presentation Design
- - Report Design
- - Marketing
- - Motion Graphics
- - Interactive Design
- - Design with AI
How to Create Powerful Presentations Using Excel

TL;DR Transform raw Excel data into compelling presentations with our 15-step guide. Learn to set objectives, clean data, select appropriate charts, and incorporate interactive elements for engaging and effective presentations. Enhance your storytelling and data visualization skills to create powerful, dynamic presentations.
Introduction
Sometimes, we receive data in Excel and are tasked with transforming this raw data into powerful presentations. Excel is not just for spreadsheets; its powerful data manipulation capabilities make it an excellent tool for creating presentations, especially when dealing with large datasets or when you need to display data-driven insights dynamically. This guide provides 15 detailed steps to help you turn Excel data into compelling presentations effectively.
Detailed Steps to Create Engaging Presentations Using Excel

- Set Your Objectives
- Clearly define the purpose of your presentation.
- Identify the core message you want to convey.
- Understand your audience's needs and expectations.
- Set actionable goals for what your presentation should achieve.
- Align your presentation structure to these objectives for maximum impact.
- Organize Your Data
- Separate raw data and analysis into different sheets for clarity.
- Group similar data together to facilitate easier analysis.
- Use named ranges to make data references clearer.
- Organize data chronologically or categorically based on the presentation flow.
- Maintain a clean and organized data setup to avoid confusion during visualization.
- Clean Your Data
- Remove any irrelevant or redundant data.
- Correct all errors and inconsistencies in the data set.
- Use Excel functions like TRIM to clean text data.
- Standardize data formats (dates, numbers, etc.) across your dataset.
- Check for and resolve any missing data issues.
- Select Appropriate Charts
- Choose charts that best represent the nature of your data.
- Consider the impact of different chart types on data interpretation.
- Use bar or column charts for comparisons among categories.
- Opt for line charts to display trends over time.
- Employ pie charts to show proportions within a whole.
- Utilize Advanced Chart Options
- Explore Excel’s specialized charts like radar or waterfall for complex data.
- Customize chart colors, labels, and legends for better readability.
- Use trend lines or data labels to add meaningful insights to charts.
- Employ dual-axis charts for comparing different datasets on the same chart.
- Utilize 3D charts to enhance visual appeal, but use sparingly to avoid distortion of data.
- Link Data Dynamically
- Connect charts to live data sources to ensure real-time data updates.
- Use Excel’s Data Model to integrate data from multiple sources.
- Apply dynamic formulas like INDEX and MATCH to make charts responsive.
- Employ data validation techniques to ensure data integrity.
- Set up dynamic ranges to auto-adjust as data grows.
- Incorporate Interactive Elements
- Use slicers and timelines for interactive data segmentation.
- Implement PivotTables to summarize large datasets dynamically.
- Add form controls like buttons and sliders to make the presentation interactive.
- Design your slides to respond to user inputs or selections.
- Ensure interactive elements are intuitive and clearly contribute to the narrative.
- Design a Dashboard
- Combine multiple data visualizations on a single screen for a unified view.
- Ensure each component of the dashboard provides unique but complementary information.
- Use consistent design elements across all visuals for a cohesive look.
- Make sure the dashboard is easy to read and navigate.
- Include interactive elements in the dashboard to engage the audience.
- Automate with Macros
- Use macros to streamline repetitive tasks, enhancing presentation efficiency.
- Automate data updates and visual adjustments with VBA scripts.
- Write macros that help navigate through the presentation smoothly.
- Ensure macros are tested and error-free to avoid glitches during the presentation.
- Provide button triggers for macros on the Excel interface for easy access.
- Narrative Flow
- Structure your presentation to tell a coherent story.
- Begin with an introduction that outlines key points.
- Build the body of your presentation with data-driven analysis.
- Conclude with a strong, data-supported conclusion.
- Transition smoothly between sections to keep your audience engaged.
- Maintain Design Consistency
- Use a uniform color scheme, font style, and layout across all slides.
- Apply consistent formatting rules for all data visuals.
- Design templates that can be reused for future presentations.
- Ensure that the visual design supports the data narrative.
- Avoid overdesigning that may distract from the data itself.
- Test and Iterate
- Conduct dry runs to test the flow and functionality of your presentation.
- Invite feedback from peers to refine content and design.
- Make iterative adjustments based on practical trials and feedback.
- Test on different devices to ensure compatibility.
- Finalize the presentation after thorough testing and refinement.
- Prepare Backups
- Save copies of your presentation in multiple formats.
- Ensure you have both digital and physical backups available.
- Regularly update your backups to reflect the latest changes.
- Store backups in different locations to mitigate risk.
- Consider cloud storage options for easy access and additional security.
- Have a contingency plan in place in case of technical issues.
- Add Supporting Notes
- Embed comments within your Excel cells to provide additional context.
- Use the notes section for personal reminders during the presentation.
- Prepare detailed explanations that can be referred to if questions arise.
- Keep notes concise and relevant to the data being presented.
- Ensure all notes are hidden from the audience view but accessible to you.
- Peer Review
- Share your presentation with colleagues or experts for feedback.
- Encourage constructive criticism to refine your presentation.
- Consider diverse perspectives to enhance the presentation’s appeal.
- Implement suggested changes that align with your objectives.
- Conduct a final review session to ensure all feedback has been addressed.
Mastering Excel for presentations transcends basic data visualization—it transforms how we communicate and persuade with data. This expertise not only empowers you to deliver insights in a compelling manner but also enhances your strategic influence within your organization or client base. Through the careful integration of data, design, and narrative, your presentations become not just informative but transformative, inspiring action and facilitating decision-making. The steps outlined in this guide equip you with the tools to turn complex data into captivating stories that resonate deeply with your audience. Embrace these practices to elevate your presentations from mundane to memorable, ensuring that every data point not only informs but also inspires and engages.
Are you ready to leverage your Excel data into powerful narratives that not only inform but also inspire and persuade? Visit INK PPT today and discover how our expert design services can amplify your presentation impact. At INK PPT, we don't just design slides; we craft stories that engage, inform, and motivate your audience to action. Elevate your presentations with us—where data meets design and storytelling.

Discover how we can create magic in your communication
%20(1).jpg)
About the Author

Ankush Dahiya - Unleashing Possibilities
My journey is all about forging connections and unleashing the potential of our ventures. Whether it's nurturing partnerships, shaping strategies, or discovering new horizons for our business, I'm your go-to person.
Read The latest Related Blog

Discover the Best Presentation Design Agencies in Bangalore

The Best Social Media Design Companies in India

Experience Excellence with your presentations.
%20(1).png)
Excel Visualization: A Guide to Clear Data Presentation for Beginners
I once struggled with dull data tables.
Numbers clustered in rows and columns become a blur. But with Excel visualization , you can empower your audience to make informed decisions based on the data presented. Excel charts and graphs replace chaos, revealing patterns and trends.
Convey ideas efficiently with the right visual. It’s not just about creating a chart; it’s about making data understandable and engaging.
In this article, I’ll guide you step-by-step on transforming your Excel data into insightful visuals.
Let’s get started!
Table of Contents
Understanding the Basics of Excel Visualization
Excel provides various visualization options, whether 2D or 3D versions, standard, stacked, or 100% stacked options. It’s all about finding the right fit that best represents your data and message.
The Excel Charting Interface
Let’s start with creating a chart in Excel.
When you click on the Insert tab in Excel, you’ll see various chart types that you can use to visualize your data.

The Excel charting interface provides a wide range of options, from line and area charts to bar and column charts. When you click on a chart, the ‘ Chart Tools ’ contextual tab provides additional features for customizing your charts.
Types of Data for Visualization
Excel visualization data can be broadly categorized into numerical, categorical, and time-series data.
- Numerical data includes values that can be measured, such as sales figures or temperature readings.
- Categorical data includes information such as names, labels, or groups.
- Time-series data involves values measured over time, such as stock prices or website traffic.
Excel offers different chart types depending on your data type.
Selecting the Right Chart Type
Selecting the right chart type is half the battle for effective data visualization in Excel.
Pie charts are best for part-to-whole comparisons. Use line charts for time series or trends. Bar or column charts are the most suitable for categorical comparisons.
However, consider more advanced chart types for more complex data sets.
Scatter plots are excellent for correlation analysis , while histograms and box plots are ideal for distribution analysis of quantitative data.
It’s all about understanding your data and determining the best way to display it.
Steps for Visualizing Data in Excel – Creating Basic Charts
Creating basic charts in Excel is a fundamental skill for anyone looking to present data in a visual format.
Excel offers a variety of chart types, each with unique properties and use cases. The key to successful chart creation in Excel is understanding these different chart types and knowing how to present your data most effectively with them.
Organizing Your Data
Before you dive into creating Excel charts, it is crucial to organize your data correctly .
Well-organized data will make the charting process easier and the resulting charts more meaningful. Ensure your data is clean, error-free, and arranged clearly and logically.
This will make it easier to select the data for your charts and create visuals that effectively communicate your data analysis results.
Pie and Donut Chart
Pie charts are popular for showing the proportion of different categories within a whole. While visually appealing, they are often misused and can lead to misleading interpretations.
Generally, they are most effective when comparing a few categories representing parts of a whole.
On the other hand, donut charts are a variation of pie charts with a hole in the middle (as the name implies!). Like pie charts, they can display multiple data series, but they should be used sparingly.
To create a pie chart in Excel:
- Select the data you want to visualize
- From the “ Insert ” tab, choose “ Pie ” from the chart options.
- You can customize your chart by changing the colors, adding labels, and adjusting other settings in the “ Format Chart Area ” pane.
Here’s a video guide on how to create a donut chart:
Line and Area Chart
Line and area charts are handy when dealing with time-series data . These charts plot data points on a graph and connect them with a line, allowing you to see trends over time.
Check out this video for a step-by-step guide on how to create a line chart:
One of the business essentials when working with line and area charts is customizing the axis and gridlines. This can help make your chart more readable and meaningful .
The “ Format Axis ” pane allows you to customize the axis labels, adjust the scale, and add gridlines.
Column and Bar Graph
Bar and column charts are Excel’s most commonly used chart types. They are excellent for comparing different categories of data.
While bar charts and column charts are often used interchangeably, there is a difference: A bar chart presents data horizontally , while a column chart presents data vertically . This distinction can influence how easily your audience interprets the chart.
You can also choose between a stacked or clustered bar and column chart layout.
In a stacked chart , data series are stacked on each other, while in a clustered chart , they are placed side by side.
To create a bar or column chart:
- Select the data
- Then choose either “Bar” or “Column” from the chart options in the “ Insert ” tab
- Remember to format the chart and the axis labels to make the chart easier to understand
Advanced Charting Techniques
In this section, I’ll describe how to present complex data in a visually appealing and easily understandable format. Since each dataset is unique, treat these charts as ideas for meaningfully presenting your data.
Combination Charts
This type of chart combines the features of line and column charts, allowing you to present mixed data more comprehensively.
For example, when you have a target and actual data for comparison , a combination chart can be the perfect tool for visualization.
Clicking the Chart Design tab on the ribbon allows you to change the chart type and create a customized combination chart.

This allows you to have your target values in columns and the actual values marked along the line, which provides a clearer visualization of your data.
Trendlines and Data Analysis
Another essential feature of Excel charts is the ability to add trendlines. These can be linear, polynomial, or moving average trendlines.
A trendline graphically displays trends in your data , and you can extend it beyond the actual data to predict future values.
Along with trendlines, interpreting R-squared values is also crucial in data analysis. This will help you understand the relationship between your dependent and independent variables, thus enhancing your analysis results.
Check out our detailed how-to post on adding trendlines to Excel charts .
Conditional Formatting in Charts
Conditional formatting is another advanced charting technique in Excel that can enhance your data visualization. You can also add data bars, color scales, and icon sets.
These features allow you to customize your charts based on certain conditions, making it easier for your audience to understand your data. Applying these formatting options enables you to create more engaging and visually appealing charts for your data presentation.
Creating a Tornado Chart in Excel
Tornado charts are particularly effective when comparing and contrasting different variables . A well-crafted tornado chart can help you visualize how changes in several factors can impact a specific outcome – for example, the impact of inflation on NPV and IRR results.
Here’s a video showing you how to create a tornado chart:
Designing a Funnel Chart in Excel
Funnel Charts in Excel are highly effective tools for monitoring sales processes or any other process that narrows down over time.
Here are two quick methods for designing funnel charts in Excel:
Building a Waffle Chart in Excel
Waffle charts, also known as square pie or waffle bar charts, are a great way to visualize individual data points compared to the whole data set. They are a fun and engaging way to present percentages or proportions.
Here is a simple method for creating waffle charts:
Data Visualization Tips – Enhancing Chart Aesthetics
The aesthetics of your Excel chart play a significant role in how effectively your data is communicated.
A visually appealing chart is easier to understand and engages your audience. Enhancing chart aesthetics involves working with various chart elements and features, such as colors, styles, and data labels.
Adding data labels, for instance, provides additional information on your chart, making it easier to interpret.
Besides, you can customize the chart’s colors and styles to match your presentation theme or company branding.
Check out this post for more information on good dashboard design principles .
Working with Chart Elements
Working with chart elements can significantly improve the readability and effectiveness of your data visualization.
Some key chart elements you can manipulate include titles, legends, and data labels.
- Data labels provide additional context to your data and can be customized to suit your chart
- Modify axis labels and gridlines to adjust their appearance and improve readability. Check out this video on how to add gridlines to your Excel charts:
These chart elements can enhance your aesthetic appeal and make your data easier to interpret.
Customizing Chart Colors and Styles
Spicing up your Excel charts is easier than you think.
The ‘ Chart Design ‘ tab in the Excel ribbon allows you to alter your charts’ aesthetics significantly.
Navigate to the ‘ Chart Styles ‘ section, and you’ll see various styles for your chart.
Looking for a bit more customization? No problem! Simply click the ‘ Change Colors ‘ dropdown and choose a color scheme.

You can use Excel’s preset color schemes or create a custom color palette for brand consistency. Minor visual changes can significantly affect your chart’s overall look and feel.
3D Charts and Effects
Adding a third dimension to your charts can make them pop . But be careful.
While 3D effects can add a specific wow factor, they can also lead to misinterpretations of your data if they are not used properly.
To add 3D effects to your charts, click the ‘ Chart Styles ‘ and choose a style with 3D effects.
Remember, though, that 3D effects should be used sparingly and only when they can enhance the understanding of the data. Overuse of these effects can lead to cluttered, confusing charts. When it comes to 3D effects, less is often more .
Advanced Excel Graphics
Beyond the basic charts, Excel offers advanced graphics capabilities to take your data presentation to the next level.
This includes using Sparklines, shapes, and icons, among other features.
Sparklines are mini-charts within individual cells, each representing a row of data. They give a quick snapshot of trends, helping you understand your data at a glance.
Excel offers line, column, and win/loss types of Sparklines that you can add with the Quick Analysis tool.
Using Shapes and Icons

Remember to appropriately format these shapes and icons to convey the right message and not distract from the data.
Portraying a Story Through Data
Excel visualization is not just about creating charts or diagrams; it’s about telling a story with your data. This is where the concept of data storytelling comes in.
It’s about using visualization tools to highlight key points and trends in your data, making it easier for your audience to understand and absorb.
It’s not unlike creating a plot in a novel where rows and columns of data are the characters, and the chart is the narrative arc. Every element should convey your story effectively and compellingly, from simple bar charts to intricate trend analysis.
Exporting and Sharing Your Visualizations
Once you’ve created your data visualization in Excel, it’s important to know how to share it! This involves exporting the visual representation of data in a format that others can easily access.
Whether you’re sharing a simple bar graph or a complex infographic, the export method will depend on the intended use of the chart/graphic.
This process can be as simple as saving your chart as an image or embedding Excel visuals in PowerPoint presentations and documents.
Saving Charts as Images
One of the simplest ways to share visualizations is by saving them as images .
To do this, right-click the chart and select ‘Save as Picture.’ Several image formats are available, each with its uses.
For instance, JPEG is great for photographic images, while PNG is ideal for images with transparent backgrounds. However, it’s important to consider the resolution of your image. High resolution is crucial for clear, crisp images, especially if they’re intended for print.
Embedding Excel Visuals in Presentations and Documents
Embedding them in presentations and documents is another way to share your Excel visualizations.
This can be done in two ways: linking and embedding .
- Linking refers to connecting the original Excel file and the document where it’s inserted. Any changes made to the original file will automatically update in the document (assuming the link isn’t broken ).
- Embedding involves inserting a copy of the chart into the document. While this won’t update automatically, it ensures that the chart will always be available, regardless of the status of the original file.
Both methods have advantages and should be chosen based on your specific needs.
Frequently Asked Questions
What are some common mistakes for beginners to avoid in data visualization with excel.
Common mistakes include overcrowding the chart with too much data, using inappropriate chart types, neglecting to label axes or data points clearly, and choosing colors or styles that reduce readability.
What are the best practices for presenting Excel data visually to a non-technical audience?
Focus on simplicity and clarity .
Use straightforward chart types, avoid technical jargon, and highlight key takeaways. Ensure your charts are well-labeled, and use annotations or callouts to draw attention to important data points.
What are some resources to learn more about Excel visualization?
For more tips and tricks, visit my YouTube channel . Alternatively, look at Chandoo’s training, where I learned many excellent dashboard design ideas.
Can Excel visualization help in career development?
Absolutely! Proficiency in Excel visualization is a valuable skill in many industries.
It’s especially relevant in fields like data science, finance, marketing, and others involving large amounts of data. Effectively communicating data through graphical representation can give you a significant advantage in your professional journey.
Leave a Comment Cancel reply
Save my name, email, and website in this browser for the next time I comment.
- Business Essentials
- Leadership & Management
- Credential of Leadership, Impact, and Management in Business (CLIMB)
- Entrepreneurship & Innovation
- Digital Transformation
- Finance & Accounting
- Business in Society
- For Organizations
- Support Portal
- Media Coverage
- Founding Donors
- Leadership Team

- Harvard Business School →
- HBS Online →
- Business Insights →
Business Insights
Harvard Business School Online's Business Insights Blog provides the career insights you need to achieve your goals and gain confidence in your business skills.
- Career Development
- Communication
- Decision-Making
- Earning Your MBA
- Negotiation
- News & Events
- Productivity
- Staff Spotlight
- Student Profiles
- Work-Life Balance
- AI Essentials for Business
- Alternative Investments
- Business Analytics
- Business Strategy
- Business and Climate Change
- Design Thinking and Innovation
- Digital Marketing Strategy
- Disruptive Strategy
- Economics for Managers
- Entrepreneurship Essentials
- Financial Accounting
- Global Business
- Launching Tech Ventures
- Leadership Principles
- Leadership, Ethics, and Corporate Accountability
- Leading Change and Organizational Renewal
- Leading with Finance
- Management Essentials
- Negotiation Mastery
- Organizational Leadership
- Power and Influence for Positive Impact
- Strategy Execution
- Sustainable Business Strategy
- Sustainable Investing
- Winning with Digital Platforms
Creating Data Visualizations in Excel: What to Keep in Mind

- 14 Oct 2021
One of the most valuable and abundant resources businesses have at their disposal is data. With vast amounts of data being generated every minute of every day, the insights gleaned can inform virtually every business decision —often resulting in favorable outcomes.
There are many data visualization tools on the market designed for creating illustrations for business purposes. Fortunately, one of the most popular and easy-to-use options is likely already installed on your computer: Microsoft Excel.
If you don’t have access to Microsoft Excel, consider using free options like Google Sheets for a similar, albeit more limited, experience.
While Excel isn’t visualization software, it’s a versatile, powerful tool for professionals of all levels who want to analyze and illustrate datasets. Here are the types of data visualizations you can create in Excel and the steps involved in doing so, along with some tips to help you along the way.
Access your free e-book today.
Types of Data Visualizations in Excel
There are different data visualization techniques you can employ in Excel, depending on the data available to you and the goal you’re trying to achieve, including:
- Area charts
- Scatter plots
Other visualization techniques can be used to illustrate large or complex data sets. These include:
- Gantt charts
- Highlight tables
- Bullet graphs
More advanced visualizations, such as those that include graphic elements like geographical heat maps, may not be possible to create in Excel or require additional tools.
Related: 6 Data Visualization Examples to Inspire Your Own
How to Create Data Visualizations in Excel
The steps involved in creating data visualizations in Excel depend on the type of graph or chart you choose. For basic visualizations, the process is largely the same. More complex datasets and illustrations may require additional steps.
To craft a data visualization in Excel, start by creating an organized spreadsheet. This should include labels and your final dataset.
Then, highlight the data you wish to include in your visual, including the labels. Select “insert” from the main menu and choose the type of chart or graph you’d like to create. Once you’ve made your selection, the visualization will automatically appear in your spreadsheet.
Right-click on the chart or graph to edit details, such as the title, axes labels, and colors. Doing so will open a pop-up or side panel that includes options to add a legend, adjust the scale, and change font styles and sizes.
Your browser cannot play the provided video file.
Tips for Creating Visualizations in Excel
1. choose the right type of visualization.
To create an effective data visualization, it’s critical to choose the right type of chart or graph. Consider the type of data you’re using, the size of your dataset, and your intended audience.
A mismatch between the type of data being leveraged and the visual used to present it can be detrimental to viewers’ understanding of the information. Whether you’re working with qualitative or quantitative data, for example, impacts how you should display the information.
Your intended audience also influences how simplified or complex your illustration should be. For instance, when presenting to a large audience or high-level stakeholders, it’s helpful to distill your presentation to highlight key trends and insights rather than individual data points.

2. Remove Irrelevant or Inaccurate Data
Ultimately, your visualization’s quality is only as good as that of the data you use. For this reason, it’s important to clean data after it’s been collected to remove any irrelevant or inaccurate information. This process is often referred to as data wrangling or data cleaning.
Failure to thoroughly clean data prior to using it can be detrimental to its integrity and lead to inaccurate or misleading data visualizations .
Related: What Is Data Integrity & Why Does It Matter?
3. Provide Context For the Visualization
If necessary, include a key or legend and additional context to help viewers make sense of your illustration.
For example, consider a heatmap that shows the frequency of COVID-19 infections in a location over a specific period. To form a clear understanding of the information being presented, viewers need to know details such as the period being examined, the data source, and what each color means.
This context is important because it helps viewers interpret the information being displayed. Without a key clearly defining the coloring system, for instance, it would be virtually impossible to know what each color indicates, rendering the heatmap useless.
4. Tell A Story
Finally, the key to crafting a compelling visualization is to use data to tell a story. If the data illustrates a trend or supports a hypothesis, your visualization should make that clear. After all, the purpose of visualizations is to present findings in a way that’s easy for viewers to digest and understand.
Telling a story not only makes your visualization more interesting and engaging but also aids in data-driven decision-making . In addition, it helps stakeholders understand the essence of your findings and, in turn, informs their decision-making processes .

Making Data-Backed Business Decisions
Data visualization is a powerful tool when it comes to addressing business questions and making informed decisions. Learning how to create effective illustrations can empower you to share findings with key stakeholders and other audiences in a manner that’s engaging and easy to understand.
You don’t have to be in an analytics or data science role to take advantage of data visualizations. Professionals of all levels and backgrounds can develop data skills to more effectively communicate within their organizations and make informed decisions.
Are you interested in improving your analytical skills? Learn more about Business Analytics —one of the three courses that comprise CORe —which teaches you how to apply analytical techniques in Excel to solve real business problems.

About the Author
- Chart Guide
- Data Makeover
0 comments
Visualizing Data in Excel: A Comprehensive Guide

By STC
July 15, 2023
Explore the diverse data visualization possibilities in Excel that aid in analyzing and interpreting your data effectively.
Introduction
Welcome to our comprehensive guide on visualizing data in Excel. In this article, we will delve into the world of data visualization and provide you with valuable insights on how to create compelling visual representations of your data using Excel. Whether you are a beginner or an experienced Excel user, this guide will equip you with the knowledge and techniques to effectively communicate your data through visually appealing charts and graphs.
Why Data Visualization Matters

Data visualization is a powerful tool that enables us to make sense of complex datasets. It allows us to identify patterns, trends, and outliers that might not be immediately apparent in raw data. Visualizing data in Excel not only enhances our understanding of the information at hand but also enables us to communicate our findings to others in a clear and concise manner.
Getting Started with Excel Charts
- Selecting the Right Chart Type Choosing the appropriate chart type is crucial for effectively representing your data. Excel offers a wide range of chart options, including bar charts, line charts, pie charts, scatter plots, and more. Consider the nature of your data and the message you want to convey when selecting the most suitable chart type.
- Formatting and Customization Excel provides extensive formatting and customization options to refine the appearance of your charts. From adjusting axis labels to modifying colors and styles, these features allow you to create visually appealing charts that align with your brand or presentation requirements.
- Adding Data Labels and Annotations To enhance the clarity of your visualizations, Excel enables you to add data labels and annotations. These labels provide additional context and make it easier for your audience to interpret the information being presented. You can include axis labels, data point labels, and explanatory text to further enrich your charts.
Advanced-Data Visualization Techniques
- Creating PivotCharts PivotCharts are a powerful feature in Excel that allows you to visualize data from pivot tables. By summarizing and aggregating data, pivot tables provide a comprehensive overview that can be transformed into dynamic and interactive charts. Utilizing PivotCharts enables you to explore and analyze complex datasets with ease.
- Utilizing Advanced Charting Features Excel offers advanced charting features that can take your visualizations to the next level. From trendlines and error bars to 3D charts and sparklines, these tools allow you to add depth and sophistication to your data representations. Experimenting with these features can help you create visually striking charts that captivate your audience.
Best Practices for Effective Data Visualization
To ensure your data visualizations have maximum impact, keep the following best practices in mind:
- Simplify and Declutter Avoid cluttering your charts with excessive information or unnecessary embellishments. Focus on the key message you want to convey and remove any elements that distract from that message. Remember, simplicity is key when it comes to effective data visualization.
- Use Color Strategically Colors can evoke emotions and draw attention to specific areas of your charts. Use color strategically to highlight important data points or to group related information. However, be mindful of accessibility considerations and ensure that your color choices are accessible to individuals with color vision deficiencies.
- Tell a Story with Your Data Data visualization is not just about presenting numbers; it’s about telling a story. Structure your visualizations in a way that guides your audience through a narrative. Start with an introduction, present the main findings, and conclude with a clear takeaway or call to action.
In conclusion, mastering the art of visualizing data in Excel can significantly enhance your ability to analyze and communicate complex information. By selecting the right chart types, utilizing advanced techniques, and following best practices, you can create visually compelling representations that effectively convey your data’s story. We hope this comprehensive guide has provided you with the knowledge and inspiration to create outstanding data visualizations in Excel. Start exploring the power of data visualization today and unlock new insights from your data.
Check StoryTelling with Charts – The Full Story

About the author
We are passionate about the power of visual storytelling and believe that charts can convey complex information in a captivating and easily understandable way. Whether you're a data enthusiast, a business professional, or simply curious about the world around you, this page is your gateway to the world of data visualization.
Never miss a good story!
Subscribe to our newsletter to keep up with the latest trends!
- Skip to main content
- Skip to header right navigation
- Skip to site footer
My Online Training Hub
Learn Dashboards, Excel, Power BI, Power Query, Power Pivot
Data Visualization in Excel

Ever felt overwhelmed by a massive spreadsheet filled with data, wondering how to make sense of it all?
In today's fast-paced environment, being able to quickly visualize and interact with your data is crucial for making informed decisions.
Here's how you can transform a sea of data into an insightful and interactive dashboard in Excel, all within 20 minutes.

Table of Contents
Dashboard design tips video, download completed excel dashboard & data, design tips guide to creating excel dashboards, additional resources.
For step-by-step instructions check out the video below.

Enter your email address below to download the sample workbook.
1. Prepare Your Data and Dashboard Sheet
Before diving into the creation of the dashboard, I'll start by organizing my data. For this example, I used a sales dataset spanning 12 months, categorized by seller, product, state, sales, and profit.

I formatted the data in an Excel Table to allow for automatic updating of my dashboard.
I prepared five PivotTables to support the charts I plan to insert on the dashboard.

Get up to speed with PivotTables here .
2. Designing Your Dashboard Canvas
The foundation of a good dashboard is its design. Begin by setting the dashboard's background color.
Click the arrow at the intersection of the row and column labels to select the whole sheet, then apply the cell fill color.
I'm using a dark indigo, providing a visually appealing contrast for my charts and data elements. This is on a newly inserted blank sheet in my Excel workbook.

3. Inserting Titles and Subtitles
To provide clear understanding, insert a main title, "Sales Performance Dashboard," and a subtitle indicating the time frame, "January - December 2024."

4. Highlighting Key Figures
At the top of your dashboard, highlight important figures like total sales, profit, and profit margin. Microsoft 365 users can use icons (available free for from within Excel) next to each figure to visually represent their meaning - a telemarketer for sales and a money symbol for profit. These icons not only draw attention but also aid in quick comprehension.

I'll come back to the pie chart for the profit margin.
5. Creating and Positioning Charts
The visual heart of your dashboard will be the charts:
- Sales by Month: A column chart showing trends over time.

- Sales by Salesperson and Category: Two bar charts providing insights into sales distribution.

- Map Chart: Though Excel doesn't directly support creating map charts from PivotTables, you can trick it by copying the PivotTable data as values and then inserting a filled map chart.

- Profit Margin: I created an icon from a pie chart. I removed the legend and title and made it very small to fit beside the headline figure:

6. Interactivity with Slicers
To allow users to interact with the dashboard, insert Slicers for different categories like seller, category, and state. This lets users customize the view to see exactly what's relevant to them.

Ensure these slicers are formatted to match the dashboard's color theme and are positioned strategically for easy access.
Connect the Slicers to each dashboard through the Report Connections menu (right-click > Report Connections):

Check out this post on custom formatting Slicers .
7. Finishing Touches
With all elements in place, use shapes and formatting tricks to give each visual element its own distinct space, enhancing overall readability.
I added a rounded rectangle shape behind each chart and slicer in a shade slightly lighter than the background:

For the border, apply an inner shadow:

Creating an effective dashboard doesn't have to be a time-consuming process. With some preparation and the right techniques, you can turn your raw data into a dynamic tool for exploration and decision-making in no time.
If you're interested in diving deeper into dashboard creation, consider taking my Excel Dashboard course .
This transformation from raw data to an interactive dashboard not only simplifies data analysis but also empowers users to make more informed, data-driven decisions quickly and efficiently. Whether you're in business, academia, or any field that relies on data, mastering these skills can significantly enhance your productivity and analytical capabilities.

CIMA qualified Accountant with over 25 years experience in roles such as Global IT Financial Controller for investment banking firms Barclays Capital and NatWest Markets.
Mynda has been awarded Microsoft MVP status every year since 2014 for her expertise and contributions to educating people about Microsoft Excel.
Mynda teaches several courses here at MOTH including Excel Expert , Excel Dashboards , Power BI , Power Query and Power Pivot .
More Excel Dashboard Posts

Excel Skills Employers Want

Interactive Excel Dashboards in 3 Steps

Quick and Easy Data Analysis in 10 Minutes

Personal Budget in Excel

Project Management Dashboard Dynamic Periods

Excel Infographic Tools

AI Dashboard Design

Dark Themed Excel Dashboards

Custom Excel Dashboard Backgrounds

Embedding Excel Dashboards in a Web Page

Reader Interactions
May 15, 2024 at 8:25 am
It seems like I can’t get the practice workbook for this course without signing up to get the newsletter. I already get that. That’s how I found out about this course. I don’t want another copy of the newsletter. Is that the only way to get the workbook is to allow another copy of the newsletter to be sent to me?
Philip Treacy
May 15, 2024 at 8:35 am
If you enter your email address in the form to download the file, you won’t get 2 copies of the newsletter. An email address can only be in the mailing list once.
But I’ll email you a copy of the file for your convenience.
Leave a Reply Cancel reply
Your email address will not be published. Required fields are marked *
Save my name, email, and website in this browser for the next time I comment.
Current ye@r *
Leave this field empty

Excel Tutorial: How To Make Graphical Presentation In Excel
Introduction.
When it comes to analyzing and presenting data, graphical presentations in Excel can be a game-changer. These visual representations of data not only make it easier to understand complex information but also help in making informed decisions. In this tutorial, we will take you through the process of creating graphical presentations in Excel and explore the benefits of incorporating visuals into your data analysis.
Key Takeaways
- Graphical presentations in Excel are crucial for understanding complex data and making informed decisions.
- Understanding the basics of creating graphical presentations is essential, including the different types of graphs and charts available in Excel.
- Selecting the appropriate data and organizing it effectively is key to creating effective graphical presentations.
- Utilizing Excel's advanced features and customization options can elevate the visual appeal and insights provided by graphical presentations.
- Adding finishing touches such as visual elements and annotations can enhance the overall look and clarity of graphical presentations.
Understanding the basics of creating graphical presentations in Excel
Graphical presentations are an essential tool for visualizing data and conveying information in a clear and concise manner. In Microsoft Excel, creating graphical presentations is a straightforward process that can greatly enhance the impact of your data. In this tutorial, we will explore the basics of creating graphical presentations in Excel.
Excel offers a wide range of graph and chart types, each suited for different data sets and presentation purposes. Some of the most commonly used graph and chart types in Excel include:
- Column and Bar Charts: These charts are used to compare values across different categories.
- Line Charts: Line charts are useful for showing trends and changes over time.
- Pie Charts: Pie charts are ideal for displaying the proportion of different categories in a data set.
- Scatter Plots: Scatter plots are used to show the relationship between two variables.
When creating a graphical presentation in Excel, it's important to include key components that help convey the information effectively.
The title of the graph or chart should clearly indicate the subject of the presentation.
Axis Labels
Axis labels are essential for providing context to the data being presented. The x-axis and y-axis should be clearly labeled to indicate what each represents.
The data being used for the graphical presentation should be clearly defined and organized to ensure accuracy and relevance.
By understanding the different types of graphs and charts available in Excel and the key components of a graphical presentation, you can effectively create visual representations of your data that are both impactful and easy to understand.
Selecting the appropriate data for your graphical presentation
When creating graphical presentations in Excel, it is essential to carefully choose the data that best suits the intended visualization. Here are some key points to consider:
- Look for trends or patterns: Data that shows clear trends or patterns are ideal for graphical representation. This can include sales figures over time, survey responses, or market trends.
- Comparing data: Data that needs to be compared across different categories or variables, such as product sales by region or customer demographics, can be effectively presented graphically.
- Highlighting relationships: If you want to showcase the relationship between different sets of data, such as correlation between variables or cause-and-effect relationships, graphical representation can be very effective.
- Clean and structured data: Ensure that your data is clean and well-structured before importing it into Excel. This includes removing any unnecessary columns or rows, and organizing the data in a logical manner.
- Use proper labels and headers: Clearly label your data and use headers to identify different categories or variables. This will make it easier to interpret and visualize the data in Excel.
- Convert text to numerical values: If your data includes text that needs to be represented graphically, such as categories or labels, consider converting them to numerical values or using a numerical equivalent for easier graphing in Excel.
- Remove outliers or irrelevant data: If there are outliers or irrelevant data points that could skew the visualization, consider removing them or addressing them separately to ensure the accuracy of the graphical presentation.
Step-by-step guide to creating graphical presentations in Excel
Excel is a versatile tool not only for data analysis and calculations but also for creating visually appealing graphical presentations. In this tutorial, we will walk you through the process of creating simple bar or pie charts using Excel's chart tools and then show you how to utilize Excel's graph customization features to enhance the visual appeal of your presentation.
A. Creating a simple bar or pie chart using Excel's chart tools
Excel's chart tools make it easy to create visually stunning bar or pie charts to represent your data. Follow these simple steps:
- Select your data: Start by selecting the data that you want to include in your chart. This will typically be a range of cells containing your data.
- Insert a chart: Once you have selected your data, go to the "Insert" tab and select the type of chart you want to create, such as a bar chart or a pie chart.
- Customize your chart: Excel will automatically generate a basic chart based on your selected data. You can then customize the chart by adding titles, labels, and modifying the colors and styles to suit your presentation.
- Finalize your chart: Once you are happy with the appearance of your chart, you can further customize it by adding data labels, adjusting the axis scales, or adding a trendline.
B. Utilizing Excel's graph customization features to enhance the visual appeal of your presentation
Excel offers a range of graph customization features that allow you to enhance the visual appeal of your presentation. Here's how to make the most of these features:
- Modify chart elements: Excel allows you to modify various elements of your chart, such as the axis titles, data labels, and gridlines. You can also add or remove chart elements to make your chart more visually appealing.
- Change chart styles: Excel provides a range of pre-set chart styles that you can apply to your chart to change its appearance. You can also manually adjust the colors, fonts, and effects to create a custom look for your chart.
- Add visual effects: Excel allows you to add visual effects to your chart, such as shadows and glows, to make it stand out. You can also adjust the transparency of chart elements to create a more subtle and polished look.
- Format data series: Excel enables you to format individual data series within your chart, allowing you to highlight specific data points or make certain elements stand out.
Adding the finishing touches to your graphical presentation
Once you have created your graphical presentation in Excel, it's time to add the finishing touches to make it visually appealing and easy to understand for your audience.
Visual elements play a crucial role in making your graphical presentation stand out. Here are a few tips on how to use colors and fonts effectively:
- Use a cohesive color scheme: Select a color palette that complements your data and helps in conveying your message effectively. Avoid using too many colors that can make the presentation look cluttered.
- Choose readable fonts: Use clear and legible fonts for your titles, labels, and annotations. Make sure the font size is appropriate for the audience to read comfortably.
- Emphasize important data points: Use different colors or fonts to highlight important data points or trends in your presentation.
Titles, legends, and annotations help provide context and clarity to your graphical presentation. Here's how to effectively incorporate these elements:
- Include a descriptive title: A clear and concise title helps the audience understand the purpose of the graphical presentation. It should convey the main message or insight from the data.
- Utilize legends for clarity: If your graphical presentation includes multiple data series or categories, use a legend to provide clarity on what each element represents.
- Add annotations for additional information: Annotations can help provide additional context or explanations for specific data points. They can be used to highlight outliers, trends, or any other important details in the visualization.
Utilizing trendlines, sparklines, and other advanced chart elements to provide deeper insights
When creating graphical presentations in Excel, it's important to go beyond basic charts and graphs to provide deeper insights. Utilizing advanced features such as trendlines and sparklines can help you achieve this.
- Adding trendlines to your charts can help you identify and visualize patterns and trends in your data. This can be especially useful for predicting future values based on historical data.
- Customizing trendlines allows you to further refine your graphical presentation, adjusting the type of trendline (e.g., linear, exponential, polynomial) to best fit your data.
- Interpreting trendlines is essential for understanding the implications of the data. You can use the equation of the trendline to make predictions or analyze the relationship between variables.
- Integrating sparklines into your data tables or dashboards can provide a quick and concise visualization of trends and variations, without taking up too much space.
- Customizing sparklines allows you to adjust the appearance and layout to best suit your graphical presentation, ensuring clarity and effectiveness.
- Interpreting sparklines involves understanding the patterns and variations they display, providing quick insights into the data at a glance.
Exploring additional tools and features to further customize and polish your graphical presentation
Excel offers a range of additional tools and features to help you further customize and polish your graphical presentation, elevating it to a professional level.
Data Labels and Callouts
- Adding data labels to your charts can provide additional context and clarity, allowing viewers to easily interpret the data points.
- Using callouts to highlight specific data points or trends can draw attention to key insights, making your graphical presentation more impactful.
Interactive Elements
- Utilizing interactive elements such as drop-down menus, buttons, or sliders can make your graphical presentation more engaging and dynamic, allowing viewers to interact with the data.
- Creating interactive dashboards with linked charts and tables can provide a comprehensive view of the data, allowing for seamless exploration and analysis.
Formatting and Design
- Applying consistent formatting across all elements of your graphical presentation can create a cohesive and professional look, enhancing visual appeal and readability.
- Using design elements such as color schemes, fonts, and shapes can help convey a specific message or theme, adding depth and personality to your graphical presentation.
In conclusion, this tutorial covered the essential steps for creating graphical presentations in Excel . We discussed the process of selecting the data, choosing the appropriate chart type, customizing the design, and adding final touches to enhance the visual appeal. Now that you have the knowledge and tools at your disposal, I encourage you to start creating your own graphical presentations in Excel. Practice makes perfect, and with a little creativity, you can transform your data into compelling visuals that effectively communicate your message.

Immediate Download
MAC & PC Compatible
Free Email Support
Related aticles

The Benefits of Excel Dashboards for Data Analysts

Unlock the Power of Real-Time Data Visualization with Excel Dashboards

Unlocking the Potential of Excel's Data Dashboard

Unleashing the Benefits of a Dashboard with Maximum Impact in Excel

Exploring Data Easily and Securely: Essential Features for Excel Dashboards

Unlock the Benefits of Real-Time Dashboard Updates in Excel

Unleashing the Power of Excel Dashboards

Understanding the Benefits and Challenges of Excel Dashboard Design and Development

Leverage Your Data with Excel Dashboards

Crafting the Perfect Dashboard for Excel

An Introduction to Excel Dashboards

How to Create an Effective Excel Dashboard
- Choosing a selection results in a full page refresh.
Four ways to improve your data presentation in Excel
1. Add a watermark text or a picture to the workbook with your company branding

See Adding watermarks to workbook for more details.
2. Add a background picture by choosing a graphics file to serve as a wallpaper for a spreadsheet like the wallpaper that you usually see on your Windows desktop:

See Adding a background image to the spreadsheet for more details.
3. Use conditional formatting to highlight cells in the worksheet:

See Applying Conditional Formatting for more details.
4. Use the drop-down list to simplify entering a value from the predefined set like countries, states, types, etc.

See Creating a Drop-Down List in a Cell for more details.
See also this tip in French: Quatre façons d'améliorer votre présentation de données dans Excel .
Please, disable AdBlock and reload the page to continue
Today, 30% of our visitors use Ad-Block to block ads.We understand your pain with ads, but without ads, we won't be able to provide you with free content soon. If you need our content for work or study, please support our efforts and disable AdBlock for our site. As you will see, we have a lot of helpful information to share.

Adding a header and footer to the worksheet
Data Analysis and Visualization with Excel (A Complete Guideline)
In this article, we will show you how to perform data analysis and visualization with Excel. There are three stages in data analysis and visualization. To begin, we will show you how to do data processing. Then, we will describe how to analyze data with various Excel features and functions. We will explore pivot tables, data sorting, data validation, and many more techniques. At the end, we will explore how to visualize data with different useful charts.
Data analysis and visualization with Excel is very significant for gaining valuable insights and understanding patterns and outliers of a dataset.

Download Practice Workbook
You can download this practice workbook while going through the article.
What is Data Analysis and Visualization?
Data Analysis is a process of collecting, organizing, and analyzing raw data to find relevant information. This information is vital to make data driven decisions. By doing data analysis, we can get valuable insights into the dataset and ensure accuracy in our decision making.
On the other hand, visualization is basically the graphical representation of the dataset. Different types of charts can help us to understand our data points and identify patterns, trends, and outliers of the dataset. Visualization makes our raw data more comprehensible and accessible.
Excel comes with many powerful features and functions for data analysis and visualization.
Steps of Data Analysis and Visualization with Excel
When it comes to data analysis and visualization with Excel, we will use the following steps.
1. Data Processing 2. Data Analysis 3. Data Visualization
We will explore these steps at length in the following sections.
1. Data Processing
In this section, we will learn about data processing. This is the first step of data analysis and visualization. It has the following segments.
1.1. Data Collection
First, you have to collect information. The information should be collected in a systematic way from a trustworthy source. The source can be any database, online platform, or any web page. Then this data needs to be further processed.
1.2. Data Organization
After collecting the data, the next step is to organize the data in such a way that it is easily understandable to people. The data can be arranged in a tabular form with a clear title and headings.
1.3. Data Cleaning
The organized data may require further cleaning. It may include blank spaces, unwanted empty cells, and duplicate values. So, data cleaning is basically making the dataset accurate and errorless.
Here, we have processed our dataset accordingly. The dataset contains the sales quantity of products such as mobiles, laptops, and televisions of a company. The sales quantity is provided monthly basis. We will use this dataset for our data analysis and visualization with Excel.

2. Data Analysis
There are many techniques for data analysis in Excel. We will show you these techniques one by one.
2.1. Use Excel Functions
There are numerous functions available in Excel for data analysis. Let us walk you through some useful functions and their applications.
2.1.1. Use SUM Function
We can use the SUM function to find out the total number of mobile, laptop, and television sold in a year.
- Go to cell C17 and put the following formula.
- Select cell C17 and use Fill Handle to AutoFill data in range D17:E17 .

2.1.2. Use INDEX & MATCH Functions
You can use the combination of INDEX & MATCH functions to find out the sales quantity of a particular product for any month.
- Go to cell G5 and type the name of any month there.
- Go to cell H5 and put the following formula.
- You will see the sales quantity of mobiles for that particular month.
- You can change the month name in cell G5 and the sales quantity of mobile will be shown in cell H5 .

Formula Breakdown
MATCH(G5,B5:B16,0) : The MATCH function searches for the value of cell G5 within a specified range B5:B16 . The 0 indicates that it must be an exact match. Result : 7
2.1.3. Use VLOOKUP & MATCH Functions
You can use the combination of VLOOKUP & MATCH functions to get the sales quantity of any product for any month.
- Go to cell H4 and put the name of any month there.
- Go to cell H5 and put the product name there.
- Go to cell H6 and put the following formula.

You can see the sales quantity of the product for the given month in cell H6 .
MATCH(H5,B4:E4,0) : The MATCH function searches for the value of cell H5 within a specified range B4:E4 . The 0 indicates that it must be an exact match. Result : 3
2.1.4. Combine SUM & SUMIFS Functions
We can combine the SUM & SUMIFS functions to get the number of products sold for any month.
- Go to cell G5 and put the name of the month.
- You will see the total number of products for that month.

SUMIFS(C5:C16,B5:B16,G5) : The SUMIFS function sums the value of range C5:C16 but it only includes those values where the corresponding cells of range B5:B16 match the value of cell G5 . Result : 125
SUMIFS(D5:D16,B5:B16,G5) : The SUMIFS function sums the value of range D5:D16 but it only includes those values where the corresponding cells of range B5:B16 match the value of cell G5 . Result : 272
SUMIFS(E5:E16,B5:B16,G5) : The SUMIFS function sums the value of range E5:E16 but it only includes those values where the corresponding cells of range B5:B16 match the value of cell G5 . Result : 147
2.1.5. Apply MAX, INDEX & MATCH Functions
You can apply the MAX function to get the most quantity sold in a month for a particular product. Then you can use the INDEX & MATCH functions to find out the month in which the product was sold the most.
- Go to cell G6 .
- Put the following formula to find the maximum number of laptops sold in a month.

- Then go to cell H6 .
- Put the following formula to find the name of that month.

2.2. Apply Conditional Formatting
You can apply conditional formatting to understand the relative quantity of individual products sold over the span of 12 months.
- Select range C5:C16 .
- Go to the Home tab >> select Conditional Formatting >> Data Bars .
- Now select any fill color to highlight the cells.

- Do the same steps for range D5:D16 and range E5:E16 as well.

2.3. Use Pivot Table
- Go to the Insert tab >> Pivot Table >> From Table/Range .

- A dialog box will appear. Set the dialog box as shown below.
- Put the following range as the Table/Range .
- Set location of the pivot table in cell G4 of the Existing Worksheet and press OK .

- Now set the PivotTable Fields as shown below. Drag the fields in different areas.

- You will have the pivot table with the grand total of the products.

2.4. Sort a Product
You can sort any product in ascending or descending order. We will sort the dataset in descending order with respect to the Mobile column .
- Go to the Home tab >> Sort & Filter >> Sort Largest to Smallest .

- Select Expand the selection >> press Sort .

- The dataset will be sorted according to the sales quantity of mobile phones in descending order.

2.5. Filter Data
- Select range B4:E16 .
- Go to the Home tab >> Sort & Filter >> Filter .

- You will have the filter icons in all the columns.
- Select the filter icon of the Month column .
- Choose the month you want to see and click on OK .

- You will see the filtered data of that month only.

2.6. Use What-If Analysis Feature
Excel comes with a strong feature named What-If Analysis . It is a combination of techniques and tools that help you to predict the impact on the results of your formulas and models. It comes with the following features.
Goal Seek: This feature predicts the value of a parameter to achieve a specific output. You need to specify the target value and Excel will determine the input value in such a way that it reaches the desired outcome.
Scenario Manager: In this feature, you can define different scenarios for different inputs. You can switch between the inputs to see how the output varies.
Data Table: It allows you to create a table and evaluate multiple results based on input values. You can use these tables with one or two variables to see how different inputs affect the output.
We will show you an example of the Goal Seek feature. The total units of television sold is 1564 . We want to generate a revenue of $1564000 . We will find the unit price of televisions required to reach this revenue.
- Put the following formula in cell H7 .
- Go to the Data tab >> What-If Analysis >> Goal Seek .

- Set the Goal Seek dialog box as shown below.

- You will get the unit price in cell H6 that is required to reach desired revenue which is $1564000 .

2.7. Apply Data Validation
You can use data validation to choose any month from a given list. Here, we will find the sales quantity of laptops for any month.
- Select cell G5 .
- Go to the Data tab >> select Data Validation .

- Data Validation dialog box will appear.
- Choose List in the Validation criteria .
- Set Source location as follows.

- You will have a dropdown in cell G5 .
- Select any month from the dropdown list.

- You will see the sales quantity of laptops for that month.

2.8. Use Excel Table
We can create a table to filter data, automate formulas and find parameters like sum, average, maximum, minimum, and so on.
- Select range B4:C16 .
- Go to the Insert tab >> Table .

- Check the My table has headers option.

- The table will be created.
- Select Total Row from the Table Design tab.

- You will see the total number of televisions in cell C17 .

- You will also have a drop-down in cell C17 . From there you can choose any parameter you want to see.

2.9. Use Analyze Data Feature
- Go to the Home tab >> Analyze Data .
- You will find different options like pivot tables and charts to analyze your dataset.

If you do not see the Analyze Data option in your Home tab, you have to customize it.
- Right-click on the Home tab >> select Customize Ribbon .
- Add a New Group >> set its position >> select All Commands >> find Analyze Data from the list >> Add this to the newly created group >> click OK .

2.10. Use Analysis ToolPak Add-in
You can perform a wide range of analysis using the Analysis ToolPak add-in. Follow the steps below to activate it.
- Go to the File tab.
- Select Options .
- Excel Options dialog box will appear.
- Select Add-ins >> Excel Add-ins in the Manage field >> Press Go .

- Check the option Analysis ToolPak >> click OK .

2.10.1. Analyze Descriptive Statistics
Now we will do some analysis with the sales quantity of laptops.
- Go to the Data tab >> Data Analysis .

- Data Analysis dialog box will appear.
- Select Descriptive Statistics >> press OK .

- Descriptive Statistics dialog box will appear.
- Set the input range, output range, and other properties as shown below.

- You will see the descriptive statistics of laptop in your worksheet.

2.10.2. Analyze Anove: Single Factor
Now we will talk about the Anova analysis. Anova stands for Analysis of Variance . It is a statistical method to compare the means of two or more groups and determine if there is any significant difference between the groups.
- The Data Analysis dialog box will appear.
- Select Anova: Single Factor >> press OK .

- Anova: Single Factor window will appear.

- You will find the analysis in your worksheet.

3. Data Visualization
After data analysis, we will try to visualize our dataset. Data visualization is the way to understand the pattern of the dataset. It also helps us to identify the outliers.
3.1. Excel Column Chart
- Go to the Insert tab >> click on the columns icon drop-down >> select a suitable column chart.

- You will have the column chart in your dataset. Give it a suitable title.

3.2. Excel Bar Chart
- Go to the Insert tab >> click on the columns icon drop-down >> select a suitable bar chart.

- You will have the bar chart in your dataset. Give it a suitable title.

3.3. Excel Line Chart
- Go to the Insert tab >> click on the line chart icon drop-down.
- Select Line with Markers under the 2-D Line category.

- You will have the line chart in your dataset. Give it a suitable title.

3.4. Excel Pie Chart
- Go to the Insert tab >> click on the pie chart icon drop-down >> select an appropriate 2-D or 3-D pie chart.

- You will see the pie chart showing the sales quantity of mobiles in your worksheet.

3.5. Excel Doughnut Chart
- Select range B4:B16 >> press the Ctrl button >> select range D4:D16 .
- Go to the Insert tab >> click on the pie chart icon drop-down >> select the chart under the Doughnut category.

- You will see the doughnut chart showing the sales quantity of laptops in your worksheet.

Advanced Data Visualization
1. excel waterfall chart.
A waterfall chart is a unique chart that shows how positive and negative values contribute to the total. With waterfall charts, it is easy to understand the variation of values over a period of time. We will show you a waterfall chart for the sales quantity of televisions.
- Select range B4:B16 >> press the Ctrl button >> select range E4:E16 .
- Go to the Insert tab >> click on the waterfall chart drop-down >> select the chart under the Waterfall category.

- You will see the waterfall chart showing the sales quantity of televisions.

2. Animated Column Chart
Animated column chart displays data dynamically with animation effects. It does not create a static chart but rather the chart elements change or update over time, making it easier for you to understand the trend or pattern or the data points.
- Go to the Animated Chart worksheet.
- Go to the Developer tab >> Visual Basic .

- Select Insert >> Module .

- Paste the following code in your VBA Macro Editor .
- Press the Run button or F5 key to run the code.

- You will see the animated column chart in the Animated Chart worksheet.
VBA Breakdown
- These nested loops go through and copy values from myRng range to myArr array, one by one.
- These lines select cell G4 in the Animated Chart worksheet and add a new chart to the sheet.
- This line sets the chart type to a clustered column chart.
- These lines activate the chart object, cut, and paste it into the Animated Chart worksheet.
- These nested loops iterate through each cell in the myRng range and set its value from the myArr array. After setting each value, the DoEvents function allows the system to process events and update the screen to show the changes. Then, there is a time delay specified by the delay_time variable before moving to the next row. This is how animated chart effect is created.
Things to Remember
There are a few things to remember in data analysis and visualization with Excel.
- Instead of typing from a list, use Data Validation to ensure accurate data entry.
- Refresh your pivot table whenever you update your dataset.
- While using Data Analysis add-in, be careful with the selection of your input and output range.
Frequently Asked Questions
1. Why should I use Anova? Anova is used to compare the trend difference between multiple datasets. It shows the variation of averages between multiple groups, how categorical variables affect outcome, and analyzes the validity of the given dataset. So, it is very useful for data analysis.
2. What is the difference between inferential and descriptive statistics? Inferential statistics make predictions about a large group with a relatively smaller dataset. On the other hand, descriptive statistics describe various parameters of a dataset by summarizing it.
3. What is the advantage of using the Analyze Data feature? Analyze Data feature comes with a lot of useful functions and tools, customizable capabilities, user friendly interface, and automated calculation techniques. It is much more flexible and far better than manual data analysis techniques.
In this article, we have explored data analysis and visualization with Excel in detail. By mastering these techniques, you can confidently analyze and visualize your data. If you have any questions regarding this essay, don’t hesitate to let us know in the comments. Also, if you want to see more Excel content like this, please visit our website, and unlock a great resource for Excel-related content.
What is ExcelDemy?
Tags: Visualisation in Excel

Md. Abu Sina Ibne Albaruni holds a BSc in Mechanical Engineering from Bangladesh University of Engineering and Technology. He is a dedicated employee of the ExcelDemy project. He has written quite a large number of articles for ExcelDemy. Besides, he has expertise in VBA. He efficiently automates Excel issues using VBA macros and actively engages in the ExcelDemy forum, offering valuable solutions for user interface challenges. His areas of interest in work and study span MATLAB, Machine Learning,... Read Full Bio
Leave a reply Cancel reply
ExcelDemy is a place where you can learn Excel, and get solutions to your Excel & Excel VBA-related problems, Data Analysis with Excel, etc. We provide tips, how to guide, provide online training, and also provide Excel solutions to your business problems.
Contact | Privacy Policy | TOS
- User Reviews
- List of Services
- Service Pricing

- Create Basic Excel Pivot Tables
- Excel Formulas and Functions
- Excel Charts and SmartArt Graphics
- Advanced Excel Training
- Data Analysis Excel for Beginners

Advanced Excel Exercises with Solutions PDF

Power Pivot: Powerful data analysis and data modeling in Excel
Power Pivot is an Excel add-in you can use to perform powerful data analysis and create sophisticated data models. With Power Pivot, you can mash up large volumes of data from various sources, perform information analysis rapidly, and share insights easily.
In both Excel and in Power Pivot, you can create a Data Model, a collection of tables with relationships. The data model you see in a workbook in Excel is the same data model you see in the Power Pivot window. Any data you import into Excel is available in Power Pivot, and vice versa.
Note: Before diving into details, you might want to take a step back and watch a video, or take our learning guide on Get & Transform and Power Pivot.
Top features of Power Pivot for Excel
Import millions of rows of data from multiple data sources With Power Pivot for Excel, you can import millions of rows of data from multiple data sources into a single Excel workbook, create relationships between heterogeneous data, create calculated columns and measures using formulas, build PivotTables and PivotCharts, and then further analyze the data so that you can make timely business decisions—all without requiring IT assistance.
Enjoy fast calculations and analysis Process millions of rows in about the same time as thousands, and make the most of multi-core processors and gigabytes of memory for fastest processing of calculations. Overcomes existing limitations for massive data analysis on the desktop with efficient compression algorithms to load even the biggest data sets into memory.
Virtually Unlimited Support of Data Sources Provides the foundation to import and combine source data from any location for massive data analysis on the desktop, including relational databases, multidimensional sources, cloud services, data feeds, Excel files, text files, and data from the Web.
Security and Management Power Pivot Management Dashboard enables IT administrators to monitor and manage your shared applications to ensure security, high availability, and performance.
Data Analysis Expressions (DAX) DAX is a formula language that extends the data manipulation capabilities of Excel to enable more sophisticated and complex grouping, calculation, and analysis. The syntax of DAX formulas is very similar to that of Excel formulas.
Tasks in Power Pivot or in Excel
The basic difference between Power Pivot and Excel is that you can create a more sophisticated data model by working on it in the Power Pivot window. Let’s compare some tasks.
How the data is stored
The data that you work on in Excel and in the Power Pivot window is stored in an analytical database inside the Excel workbook, and a powerful local engine loads, queries, and updates the data in that database. Because the data is in Excel, it is immediately available to PivotTables, PivotCharts, Power View, and other features in Excel that you use to aggregate and interact with data. All data presentation and interactivity are provided by Excel; and the data and Excel presentation objects are contained within the same workbook file. Power Pivot supports files up to 2GB in size and enables you to work with up to 4GB of data in memory.
Saving to SharePoint
Workbooks that you modify with Power Pivot can be shared with others in all of the ways that you share other files. You get more benefits, though, by publishing your workbook to a SharePoint environment that has Excel Services enabled. On the SharePoint server, Excel Services processes and renders the data in a browser window where others can analyze the data.
On SharePoint, you can add Power Pivot for SharePoint to get additional collaboration and document management support, including Power Pivot Gallery, Power Pivot management dashboard in Central Administration, scheduled data refresh, and the ability to use a published workbook as an external data source from its location in SharePoint.
Getting Help
You can learn all about Power Pivot at Power Pivot Help .
Need more help?
You can always ask an expert in the Excel Tech Community or get support in Communities .
Top of Page

Want more options?
Explore subscription benefits, browse training courses, learn how to secure your device, and more.

Microsoft 365 subscription benefits

Microsoft 365 training

Microsoft security

Accessibility center
Communities help you ask and answer questions, give feedback, and hear from experts with rich knowledge.

Ask the Microsoft Community

Microsoft Tech Community

Windows Insiders
Microsoft 365 Insiders
Was this information helpful?
Thank you for your feedback.
Home Blog Design Understanding Data Presentations (Guide + Examples)
Understanding Data Presentations (Guide + Examples)

In this age of overwhelming information, the skill to effectively convey data has become extremely valuable. Initiating a discussion on data presentation types involves thoughtful consideration of the nature of your data and the message you aim to convey. Different types of visualizations serve distinct purposes. Whether you’re dealing with how to develop a report or simply trying to communicate complex information, how you present data influences how well your audience understands and engages with it. This extensive guide leads you through the different ways of data presentation.
Table of Contents
What is a Data Presentation?
What should a data presentation include, line graphs, treemap chart, scatter plot, how to choose a data presentation type, recommended data presentation templates, common mistakes done in data presentation.
A data presentation is a slide deck that aims to disclose quantitative information to an audience through the use of visual formats and narrative techniques derived from data analysis, making complex data understandable and actionable. This process requires a series of tools, such as charts, graphs, tables, infographics, dashboards, and so on, supported by concise textual explanations to improve understanding and boost retention rate.
Data presentations require us to cull data in a format that allows the presenter to highlight trends, patterns, and insights so that the audience can act upon the shared information. In a few words, the goal of data presentations is to enable viewers to grasp complicated concepts or trends quickly, facilitating informed decision-making or deeper analysis.
Data presentations go beyond the mere usage of graphical elements. Seasoned presenters encompass visuals with the art of data storytelling , so the speech skillfully connects the points through a narrative that resonates with the audience. Depending on the purpose – inspire, persuade, inform, support decision-making processes, etc. – is the data presentation format that is better suited to help us in this journey.
To nail your upcoming data presentation, ensure to count with the following elements:
- Clear Objectives: Understand the intent of your presentation before selecting the graphical layout and metaphors to make content easier to grasp.
- Engaging introduction: Use a powerful hook from the get-go. For instance, you can ask a big question or present a problem that your data will answer. Take a look at our guide on how to start a presentation for tips & insights.
- Structured Narrative: Your data presentation must tell a coherent story. This means a beginning where you present the context, a middle section in which you present the data, and an ending that uses a call-to-action. Check our guide on presentation structure for further information.
- Visual Elements: These are the charts, graphs, and other elements of visual communication we ought to use to present data. This article will cover one by one the different types of data representation methods we can use, and provide further guidance on choosing between them.
- Insights and Analysis: This is not just showcasing a graph and letting people get an idea about it. A proper data presentation includes the interpretation of that data, the reason why it’s included, and why it matters to your research.
- Conclusion & CTA: Ending your presentation with a call to action is necessary. Whether you intend to wow your audience into acquiring your services, inspire them to change the world, or whatever the purpose of your presentation, there must be a stage in which you convey all that you shared and show the path to staying in touch. Plan ahead whether you want to use a thank-you slide, a video presentation, or which method is apt and tailored to the kind of presentation you deliver.
- Q&A Session: After your speech is concluded, allocate 3-5 minutes for the audience to raise any questions about the information you disclosed. This is an extra chance to establish your authority on the topic. Check our guide on questions and answer sessions in presentations here.
Bar charts are a graphical representation of data using rectangular bars to show quantities or frequencies in an established category. They make it easy for readers to spot patterns or trends. Bar charts can be horizontal or vertical, although the vertical format is commonly known as a column chart. They display categorical, discrete, or continuous variables grouped in class intervals [1] . They include an axis and a set of labeled bars horizontally or vertically. These bars represent the frequencies of variable values or the values themselves. Numbers on the y-axis of a vertical bar chart or the x-axis of a horizontal bar chart are called the scale.

Real-Life Application of Bar Charts
Let’s say a sales manager is presenting sales to their audience. Using a bar chart, he follows these steps.
Step 1: Selecting Data
The first step is to identify the specific data you will present to your audience.
The sales manager has highlighted these products for the presentation.
- Product A: Men’s Shoes
- Product B: Women’s Apparel
- Product C: Electronics
- Product D: Home Decor
Step 2: Choosing Orientation
Opt for a vertical layout for simplicity. Vertical bar charts help compare different categories in case there are not too many categories [1] . They can also help show different trends. A vertical bar chart is used where each bar represents one of the four chosen products. After plotting the data, it is seen that the height of each bar directly represents the sales performance of the respective product.
It is visible that the tallest bar (Electronics – Product C) is showing the highest sales. However, the shorter bars (Women’s Apparel – Product B and Home Decor – Product D) need attention. It indicates areas that require further analysis or strategies for improvement.
Step 3: Colorful Insights
Different colors are used to differentiate each product. It is essential to show a color-coded chart where the audience can distinguish between products.
- Men’s Shoes (Product A): Yellow
- Women’s Apparel (Product B): Orange
- Electronics (Product C): Violet
- Home Decor (Product D): Blue

Bar charts are straightforward and easily understandable for presenting data. They are versatile when comparing products or any categorical data [2] . Bar charts adapt seamlessly to retail scenarios. Despite that, bar charts have a few shortcomings. They cannot illustrate data trends over time. Besides, overloading the chart with numerous products can lead to visual clutter, diminishing its effectiveness.
For more information, check our collection of bar chart templates for PowerPoint .
Line graphs help illustrate data trends, progressions, or fluctuations by connecting a series of data points called ‘markers’ with straight line segments. This provides a straightforward representation of how values change [5] . Their versatility makes them invaluable for scenarios requiring a visual understanding of continuous data. In addition, line graphs are also useful for comparing multiple datasets over the same timeline. Using multiple line graphs allows us to compare more than one data set. They simplify complex information so the audience can quickly grasp the ups and downs of values. From tracking stock prices to analyzing experimental results, you can use line graphs to show how data changes over a continuous timeline. They show trends with simplicity and clarity.
Real-life Application of Line Graphs
To understand line graphs thoroughly, we will use a real case. Imagine you’re a financial analyst presenting a tech company’s monthly sales for a licensed product over the past year. Investors want insights into sales behavior by month, how market trends may have influenced sales performance and reception to the new pricing strategy. To present data via a line graph, you will complete these steps.
First, you need to gather the data. In this case, your data will be the sales numbers. For example:
- January: $45,000
- February: $55,000
- March: $45,000
- April: $60,000
- May: $ 70,000
- June: $65,000
- July: $62,000
- August: $68,000
- September: $81,000
- October: $76,000
- November: $87,000
- December: $91,000
After choosing the data, the next step is to select the orientation. Like bar charts, you can use vertical or horizontal line graphs. However, we want to keep this simple, so we will keep the timeline (x-axis) horizontal while the sales numbers (y-axis) vertical.
Step 3: Connecting Trends
After adding the data to your preferred software, you will plot a line graph. In the graph, each month’s sales are represented by data points connected by a line.

Step 4: Adding Clarity with Color
If there are multiple lines, you can also add colors to highlight each one, making it easier to follow.
Line graphs excel at visually presenting trends over time. These presentation aids identify patterns, like upward or downward trends. However, too many data points can clutter the graph, making it harder to interpret. Line graphs work best with continuous data but are not suitable for categories.
For more information, check our collection of line chart templates for PowerPoint and our article about how to make a presentation graph .
A data dashboard is a visual tool for analyzing information. Different graphs, charts, and tables are consolidated in a layout to showcase the information required to achieve one or more objectives. Dashboards help quickly see Key Performance Indicators (KPIs). You don’t make new visuals in the dashboard; instead, you use it to display visuals you’ve already made in worksheets [3] .
Keeping the number of visuals on a dashboard to three or four is recommended. Adding too many can make it hard to see the main points [4]. Dashboards can be used for business analytics to analyze sales, revenue, and marketing metrics at a time. They are also used in the manufacturing industry, as they allow users to grasp the entire production scenario at the moment while tracking the core KPIs for each line.
Real-Life Application of a Dashboard
Consider a project manager presenting a software development project’s progress to a tech company’s leadership team. He follows the following steps.
Step 1: Defining Key Metrics
To effectively communicate the project’s status, identify key metrics such as completion status, budget, and bug resolution rates. Then, choose measurable metrics aligned with project objectives.
Step 2: Choosing Visualization Widgets
After finalizing the data, presentation aids that align with each metric are selected. For this project, the project manager chooses a progress bar for the completion status and uses bar charts for budget allocation. Likewise, he implements line charts for bug resolution rates.

Step 3: Dashboard Layout
Key metrics are prominently placed in the dashboard for easy visibility, and the manager ensures that it appears clean and organized.
Dashboards provide a comprehensive view of key project metrics. Users can interact with data, customize views, and drill down for detailed analysis. However, creating an effective dashboard requires careful planning to avoid clutter. Besides, dashboards rely on the availability and accuracy of underlying data sources.
For more information, check our article on how to design a dashboard presentation , and discover our collection of dashboard PowerPoint templates .
Treemap charts represent hierarchical data structured in a series of nested rectangles [6] . As each branch of the ‘tree’ is given a rectangle, smaller tiles can be seen representing sub-branches, meaning elements on a lower hierarchical level than the parent rectangle. Each one of those rectangular nodes is built by representing an area proportional to the specified data dimension.
Treemaps are useful for visualizing large datasets in compact space. It is easy to identify patterns, such as which categories are dominant. Common applications of the treemap chart are seen in the IT industry, such as resource allocation, disk space management, website analytics, etc. Also, they can be used in multiple industries like healthcare data analysis, market share across different product categories, or even in finance to visualize portfolios.
Real-Life Application of a Treemap Chart
Let’s consider a financial scenario where a financial team wants to represent the budget allocation of a company. There is a hierarchy in the process, so it is helpful to use a treemap chart. In the chart, the top-level rectangle could represent the total budget, and it would be subdivided into smaller rectangles, each denoting a specific department. Further subdivisions within these smaller rectangles might represent individual projects or cost categories.
Step 1: Define Your Data Hierarchy
While presenting data on the budget allocation, start by outlining the hierarchical structure. The sequence will be like the overall budget at the top, followed by departments, projects within each department, and finally, individual cost categories for each project.
- Top-level rectangle: Total Budget
- Second-level rectangles: Departments (Engineering, Marketing, Sales)
- Third-level rectangles: Projects within each department
- Fourth-level rectangles: Cost categories for each project (Personnel, Marketing Expenses, Equipment)
Step 2: Choose a Suitable Tool
It’s time to select a data visualization tool supporting Treemaps. Popular choices include Tableau, Microsoft Power BI, PowerPoint, or even coding with libraries like D3.js. It is vital to ensure that the chosen tool provides customization options for colors, labels, and hierarchical structures.
Here, the team uses PowerPoint for this guide because of its user-friendly interface and robust Treemap capabilities.
Step 3: Make a Treemap Chart with PowerPoint
After opening the PowerPoint presentation, they chose “SmartArt” to form the chart. The SmartArt Graphic window has a “Hierarchy” category on the left. Here, you will see multiple options. You can choose any layout that resembles a Treemap. The “Table Hierarchy” or “Organization Chart” options can be adapted. The team selects the Table Hierarchy as it looks close to a Treemap.
Step 5: Input Your Data
After that, a new window will open with a basic structure. They add the data one by one by clicking on the text boxes. They start with the top-level rectangle, representing the total budget.

Step 6: Customize the Treemap
By clicking on each shape, they customize its color, size, and label. At the same time, they can adjust the font size, style, and color of labels by using the options in the “Format” tab in PowerPoint. Using different colors for each level enhances the visual difference.
Treemaps excel at illustrating hierarchical structures. These charts make it easy to understand relationships and dependencies. They efficiently use space, compactly displaying a large amount of data, reducing the need for excessive scrolling or navigation. Additionally, using colors enhances the understanding of data by representing different variables or categories.
In some cases, treemaps might become complex, especially with deep hierarchies. It becomes challenging for some users to interpret the chart. At the same time, displaying detailed information within each rectangle might be constrained by space. It potentially limits the amount of data that can be shown clearly. Without proper labeling and color coding, there’s a risk of misinterpretation.
A heatmap is a data visualization tool that uses color coding to represent values across a two-dimensional surface. In these, colors replace numbers to indicate the magnitude of each cell. This color-shaded matrix display is valuable for summarizing and understanding data sets with a glance [7] . The intensity of the color corresponds to the value it represents, making it easy to identify patterns, trends, and variations in the data.
As a tool, heatmaps help businesses analyze website interactions, revealing user behavior patterns and preferences to enhance overall user experience. In addition, companies use heatmaps to assess content engagement, identifying popular sections and areas of improvement for more effective communication. They excel at highlighting patterns and trends in large datasets, making it easy to identify areas of interest.
We can implement heatmaps to express multiple data types, such as numerical values, percentages, or even categorical data. Heatmaps help us easily spot areas with lots of activity, making them helpful in figuring out clusters [8] . When making these maps, it is important to pick colors carefully. The colors need to show the differences between groups or levels of something. And it is good to use colors that people with colorblindness can easily see.
Check our detailed guide on how to create a heatmap here. Also discover our collection of heatmap PowerPoint templates .
Pie charts are circular statistical graphics divided into slices to illustrate numerical proportions. Each slice represents a proportionate part of the whole, making it easy to visualize the contribution of each component to the total.
The size of the pie charts is influenced by the value of data points within each pie. The total of all data points in a pie determines its size. The pie with the highest data points appears as the largest, whereas the others are proportionally smaller. However, you can present all pies of the same size if proportional representation is not required [9] . Sometimes, pie charts are difficult to read, or additional information is required. A variation of this tool can be used instead, known as the donut chart , which has the same structure but a blank center, creating a ring shape. Presenters can add extra information, and the ring shape helps to declutter the graph.
Pie charts are used in business to show percentage distribution, compare relative sizes of categories, or present straightforward data sets where visualizing ratios is essential.
Real-Life Application of Pie Charts
Consider a scenario where you want to represent the distribution of the data. Each slice of the pie chart would represent a different category, and the size of each slice would indicate the percentage of the total portion allocated to that category.
Step 1: Define Your Data Structure
Imagine you are presenting the distribution of a project budget among different expense categories.
- Column A: Expense Categories (Personnel, Equipment, Marketing, Miscellaneous)
- Column B: Budget Amounts ($40,000, $30,000, $20,000, $10,000) Column B represents the values of your categories in Column A.
Step 2: Insert a Pie Chart
Using any of the accessible tools, you can create a pie chart. The most convenient tools for forming a pie chart in a presentation are presentation tools such as PowerPoint or Google Slides. You will notice that the pie chart assigns each expense category a percentage of the total budget by dividing it by the total budget.
For instance:
- Personnel: $40,000 / ($40,000 + $30,000 + $20,000 + $10,000) = 40%
- Equipment: $30,000 / ($40,000 + $30,000 + $20,000 + $10,000) = 30%
- Marketing: $20,000 / ($40,000 + $30,000 + $20,000 + $10,000) = 20%
- Miscellaneous: $10,000 / ($40,000 + $30,000 + $20,000 + $10,000) = 10%
You can make a chart out of this or just pull out the pie chart from the data.

3D pie charts and 3D donut charts are quite popular among the audience. They stand out as visual elements in any presentation slide, so let’s take a look at how our pie chart example would look in 3D pie chart format.

Step 03: Results Interpretation
The pie chart visually illustrates the distribution of the project budget among different expense categories. Personnel constitutes the largest portion at 40%, followed by equipment at 30%, marketing at 20%, and miscellaneous at 10%. This breakdown provides a clear overview of where the project funds are allocated, which helps in informed decision-making and resource management. It is evident that personnel are a significant investment, emphasizing their importance in the overall project budget.
Pie charts provide a straightforward way to represent proportions and percentages. They are easy to understand, even for individuals with limited data analysis experience. These charts work well for small datasets with a limited number of categories.
However, a pie chart can become cluttered and less effective in situations with many categories. Accurate interpretation may be challenging, especially when dealing with slight differences in slice sizes. In addition, these charts are static and do not effectively convey trends over time.
For more information, check our collection of pie chart templates for PowerPoint .
Histograms present the distribution of numerical variables. Unlike a bar chart that records each unique response separately, histograms organize numeric responses into bins and show the frequency of reactions within each bin [10] . The x-axis of a histogram shows the range of values for a numeric variable. At the same time, the y-axis indicates the relative frequencies (percentage of the total counts) for that range of values.
Whenever you want to understand the distribution of your data, check which values are more common, or identify outliers, histograms are your go-to. Think of them as a spotlight on the story your data is telling. A histogram can provide a quick and insightful overview if you’re curious about exam scores, sales figures, or any numerical data distribution.
Real-Life Application of a Histogram
In the histogram data analysis presentation example, imagine an instructor analyzing a class’s grades to identify the most common score range. A histogram could effectively display the distribution. It will show whether most students scored in the average range or if there are significant outliers.
Step 1: Gather Data
He begins by gathering the data. The scores of each student in class are gathered to analyze exam scores.
After arranging the scores in ascending order, bin ranges are set.
Step 2: Define Bins
Bins are like categories that group similar values. Think of them as buckets that organize your data. The presenter decides how wide each bin should be based on the range of the values. For instance, the instructor sets the bin ranges based on score intervals: 60-69, 70-79, 80-89, and 90-100.
Step 3: Count Frequency
Now, he counts how many data points fall into each bin. This step is crucial because it tells you how often specific ranges of values occur. The result is the frequency distribution, showing the occurrences of each group.
Here, the instructor counts the number of students in each category.
- 60-69: 1 student (Kate)
- 70-79: 4 students (David, Emma, Grace, Jack)
- 80-89: 7 students (Alice, Bob, Frank, Isabel, Liam, Mia, Noah)
- 90-100: 3 students (Clara, Henry, Olivia)
Step 4: Create the Histogram
It’s time to turn the data into a visual representation. Draw a bar for each bin on a graph. The width of the bar should correspond to the range of the bin, and the height should correspond to the frequency. To make your histogram understandable, label the X and Y axes.
In this case, the X-axis should represent the bins (e.g., test score ranges), and the Y-axis represents the frequency.

The histogram of the class grades reveals insightful patterns in the distribution. Most students, with seven students, fall within the 80-89 score range. The histogram provides a clear visualization of the class’s performance. It showcases a concentration of grades in the upper-middle range with few outliers at both ends. This analysis helps in understanding the overall academic standing of the class. It also identifies the areas for potential improvement or recognition.
Thus, histograms provide a clear visual representation of data distribution. They are easy to interpret, even for those without a statistical background. They apply to various types of data, including continuous and discrete variables. One weak point is that histograms do not capture detailed patterns in students’ data, with seven compared to other visualization methods.
A scatter plot is a graphical representation of the relationship between two variables. It consists of individual data points on a two-dimensional plane. This plane plots one variable on the x-axis and the other on the y-axis. Each point represents a unique observation. It visualizes patterns, trends, or correlations between the two variables.
Scatter plots are also effective in revealing the strength and direction of relationships. They identify outliers and assess the overall distribution of data points. The points’ dispersion and clustering reflect the relationship’s nature, whether it is positive, negative, or lacks a discernible pattern. In business, scatter plots assess relationships between variables such as marketing cost and sales revenue. They help present data correlations and decision-making.
Real-Life Application of Scatter Plot
A group of scientists is conducting a study on the relationship between daily hours of screen time and sleep quality. After reviewing the data, they managed to create this table to help them build a scatter plot graph:
In the provided example, the x-axis represents Daily Hours of Screen Time, and the y-axis represents the Sleep Quality Rating.

The scientists observe a negative correlation between the amount of screen time and the quality of sleep. This is consistent with their hypothesis that blue light, especially before bedtime, has a significant impact on sleep quality and metabolic processes.
There are a few things to remember when using a scatter plot. Even when a scatter diagram indicates a relationship, it doesn’t mean one variable affects the other. A third factor can influence both variables. The more the plot resembles a straight line, the stronger the relationship is perceived [11] . If it suggests no ties, the observed pattern might be due to random fluctuations in data. When the scatter diagram depicts no correlation, whether the data might be stratified is worth considering.
Choosing the appropriate data presentation type is crucial when making a presentation . Understanding the nature of your data and the message you intend to convey will guide this selection process. For instance, when showcasing quantitative relationships, scatter plots become instrumental in revealing correlations between variables. If the focus is on emphasizing parts of a whole, pie charts offer a concise display of proportions. Histograms, on the other hand, prove valuable for illustrating distributions and frequency patterns.
Bar charts provide a clear visual comparison of different categories. Likewise, line charts excel in showcasing trends over time, while tables are ideal for detailed data examination. Starting a presentation on data presentation types involves evaluating the specific information you want to communicate and selecting the format that aligns with your message. This ensures clarity and resonance with your audience from the beginning of your presentation.
1. Fact Sheet Dashboard for Data Presentation
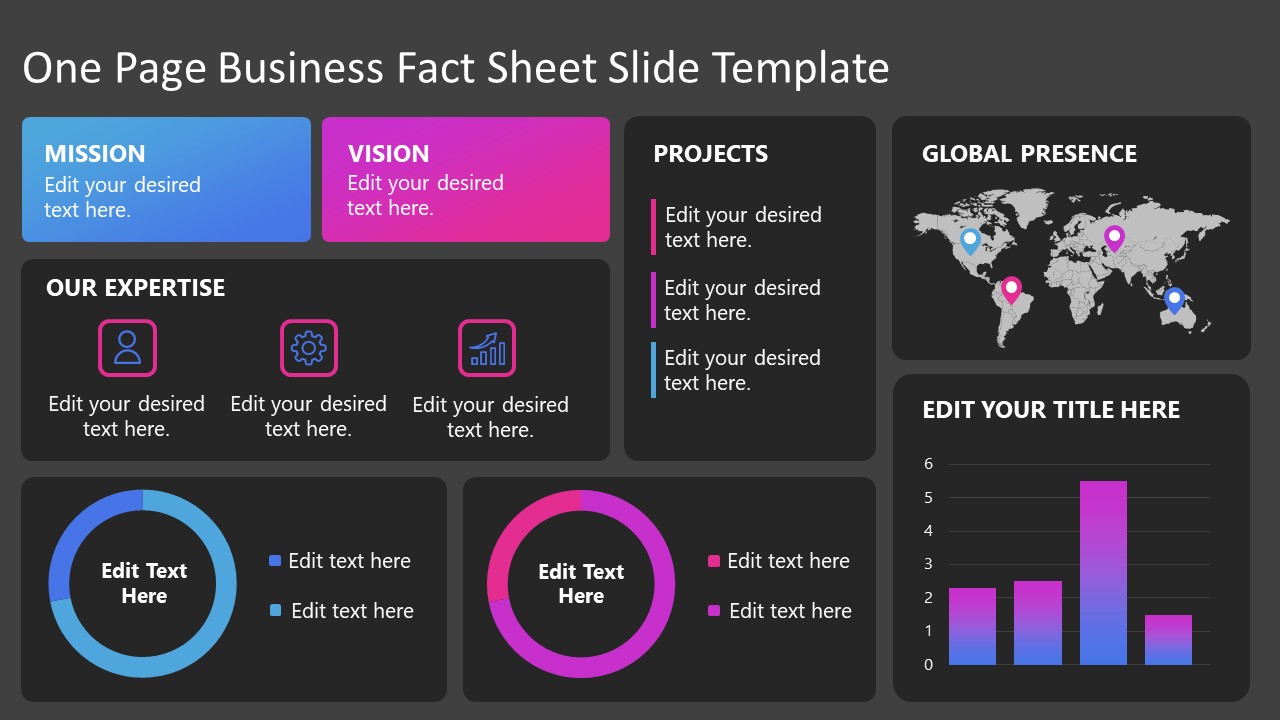
Convey all the data you need to present in this one-pager format, an ideal solution tailored for users looking for presentation aids. Global maps, donut chats, column graphs, and text neatly arranged in a clean layout presented in light and dark themes.
Use This Template
2. 3D Column Chart Infographic PPT Template
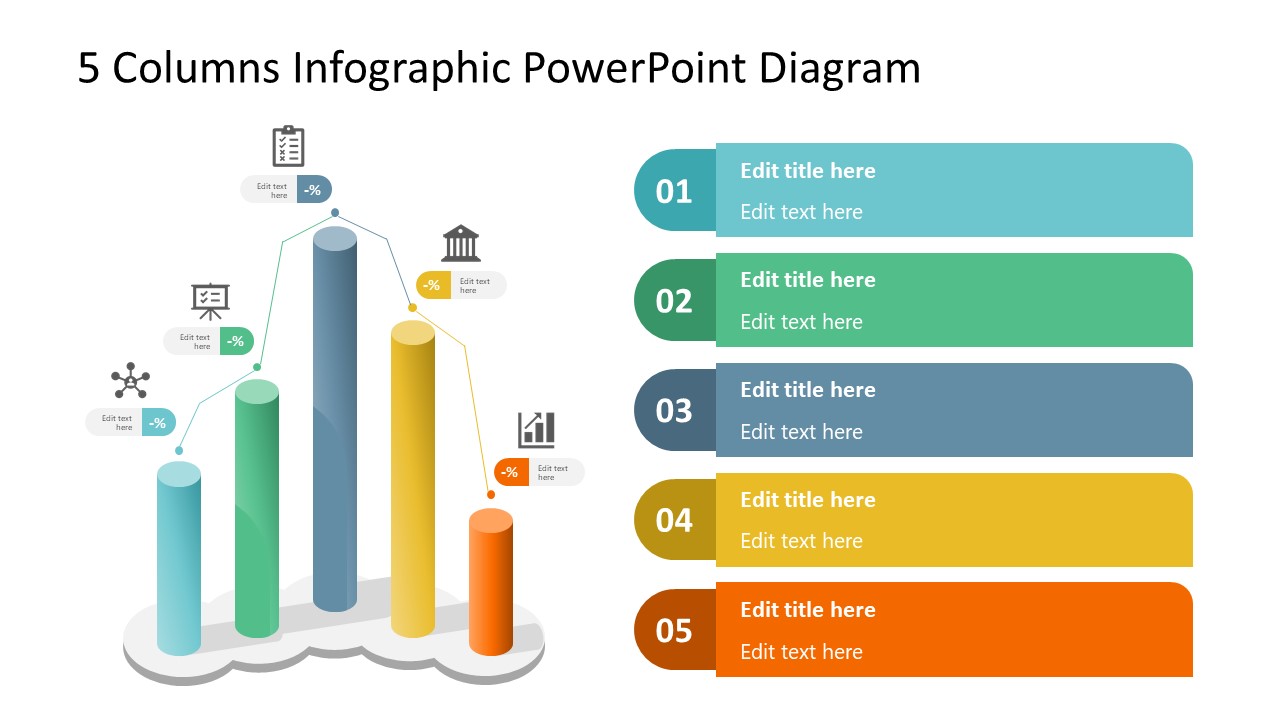
Represent column charts in a highly visual 3D format with this PPT template. A creative way to present data, this template is entirely editable, and we can craft either a one-page infographic or a series of slides explaining what we intend to disclose point by point.
3. Data Circles Infographic PowerPoint Template
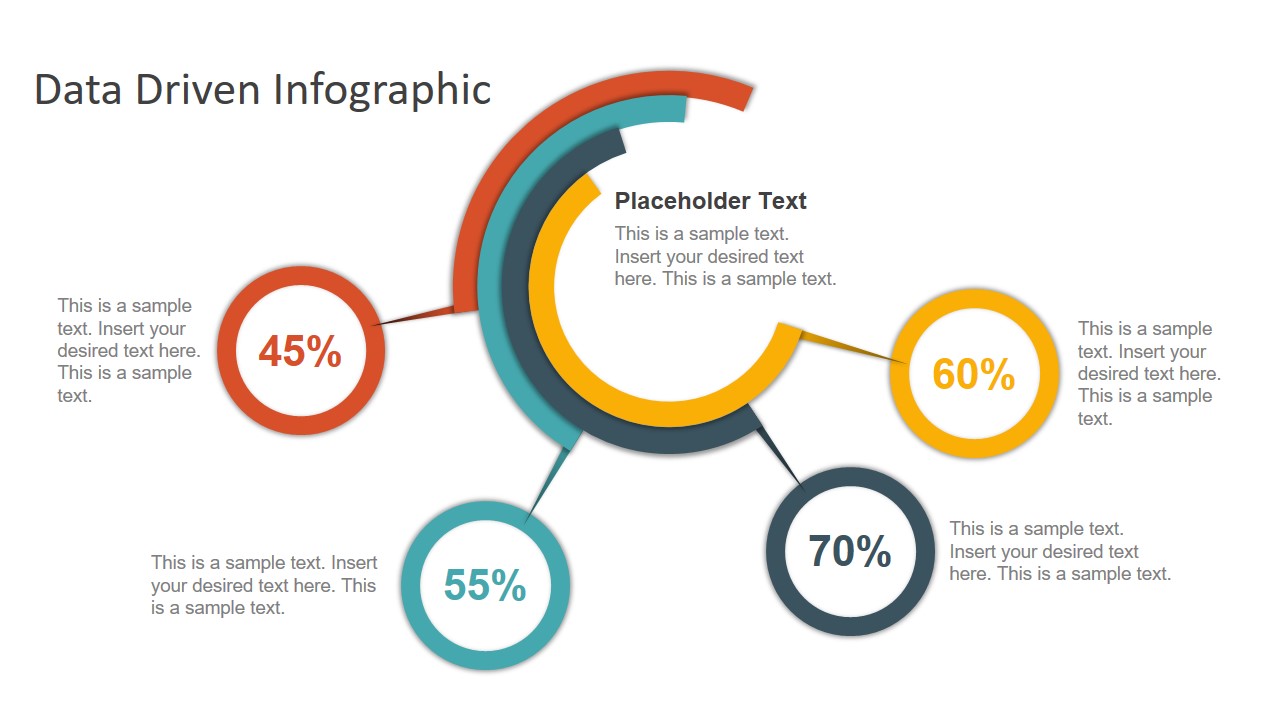
An alternative to the pie chart and donut chart diagrams, this template features a series of curved shapes with bubble callouts as ways of presenting data. Expand the information for each arch in the text placeholder areas.
4. Colorful Metrics Dashboard for Data Presentation
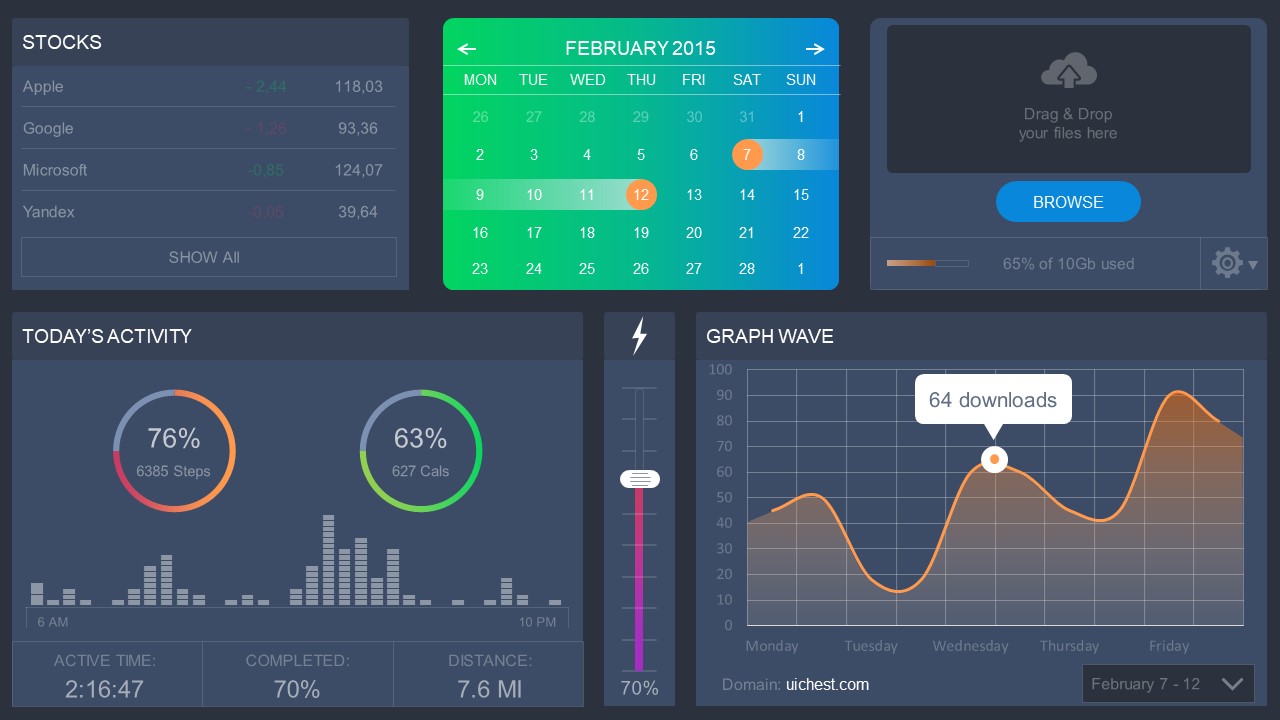
This versatile dashboard template helps us in the presentation of the data by offering several graphs and methods to convert numbers into graphics. Implement it for e-commerce projects, financial projections, project development, and more.
5. Animated Data Presentation Tools for PowerPoint & Google Slides

A slide deck filled with most of the tools mentioned in this article, from bar charts, column charts, treemap graphs, pie charts, histogram, etc. Animated effects make each slide look dynamic when sharing data with stakeholders.
6. Statistics Waffle Charts PPT Template for Data Presentations
This PPT template helps us how to present data beyond the typical pie chart representation. It is widely used for demographics, so it’s a great fit for marketing teams, data science professionals, HR personnel, and more.
7. Data Presentation Dashboard Template for Google Slides
A compendium of tools in dashboard format featuring line graphs, bar charts, column charts, and neatly arranged placeholder text areas.
8. Weather Dashboard for Data Presentation

Share weather data for agricultural presentation topics, environmental studies, or any kind of presentation that requires a highly visual layout for weather forecasting on a single day. Two color themes are available.
9. Social Media Marketing Dashboard Data Presentation Template
Intended for marketing professionals, this dashboard template for data presentation is a tool for presenting data analytics from social media channels. Two slide layouts featuring line graphs and column charts.
10. Project Management Summary Dashboard Template
A tool crafted for project managers to deliver highly visual reports on a project’s completion, the profits it delivered for the company, and expenses/time required to execute it. 4 different color layouts are available.
11. Profit & Loss Dashboard for PowerPoint and Google Slides
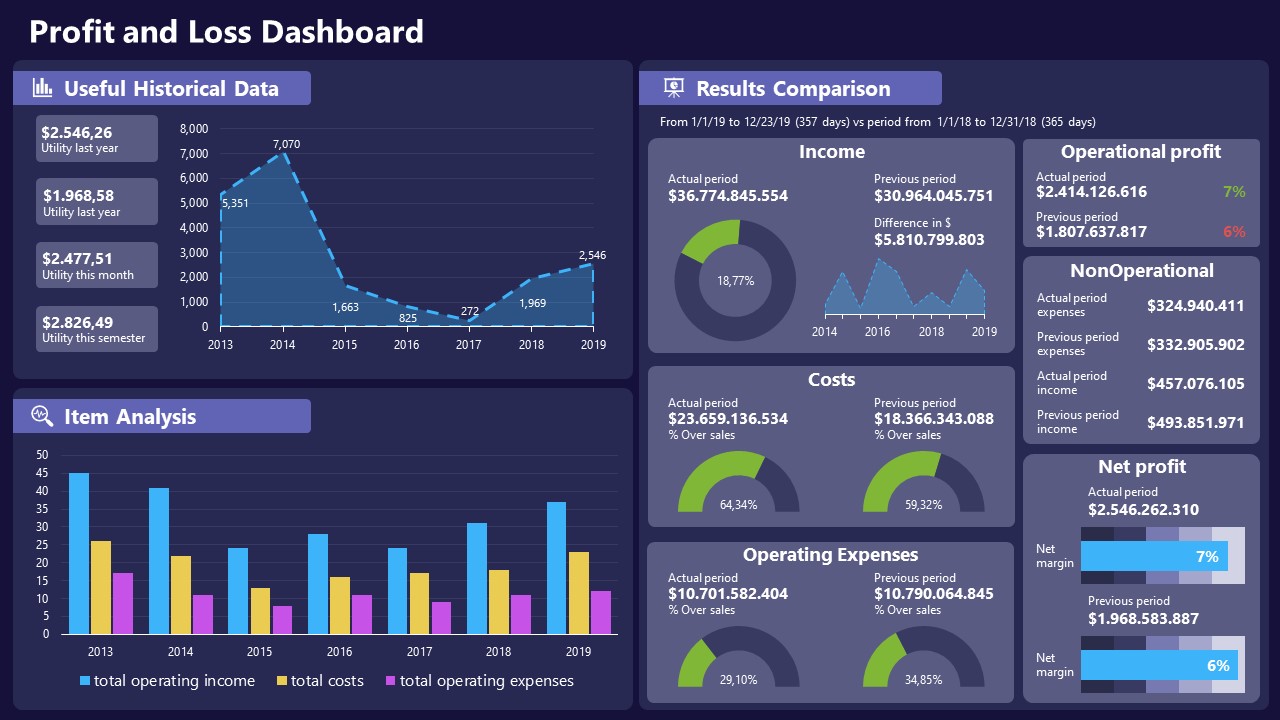
A must-have for finance professionals. This typical profit & loss dashboard includes progress bars, donut charts, column charts, line graphs, and everything that’s required to deliver a comprehensive report about a company’s financial situation.
Overwhelming visuals
One of the mistakes related to using data-presenting methods is including too much data or using overly complex visualizations. They can confuse the audience and dilute the key message.
Inappropriate chart types
Choosing the wrong type of chart for the data at hand can lead to misinterpretation. For example, using a pie chart for data that doesn’t represent parts of a whole is not right.
Lack of context
Failing to provide context or sufficient labeling can make it challenging for the audience to understand the significance of the presented data.
Inconsistency in design
Using inconsistent design elements and color schemes across different visualizations can create confusion and visual disarray.
Failure to provide details
Simply presenting raw data without offering clear insights or takeaways can leave the audience without a meaningful conclusion.
Lack of focus
Not having a clear focus on the key message or main takeaway can result in a presentation that lacks a central theme.
Visual accessibility issues
Overlooking the visual accessibility of charts and graphs can exclude certain audience members who may have difficulty interpreting visual information.
In order to avoid these mistakes in data presentation, presenters can benefit from using presentation templates . These templates provide a structured framework. They ensure consistency, clarity, and an aesthetically pleasing design, enhancing data communication’s overall impact.
Understanding and choosing data presentation types are pivotal in effective communication. Each method serves a unique purpose, so selecting the appropriate one depends on the nature of the data and the message to be conveyed. The diverse array of presentation types offers versatility in visually representing information, from bar charts showing values to pie charts illustrating proportions.
Using the proper method enhances clarity, engages the audience, and ensures that data sets are not just presented but comprehensively understood. By appreciating the strengths and limitations of different presentation types, communicators can tailor their approach to convey information accurately, developing a deeper connection between data and audience understanding.
[1] Government of Canada, S.C. (2021) 5 Data Visualization 5.2 Bar Chart , 5.2 Bar chart . https://www150.statcan.gc.ca/n1/edu/power-pouvoir/ch9/bargraph-diagrammeabarres/5214818-eng.htm
[2] Kosslyn, S.M., 1989. Understanding charts and graphs. Applied cognitive psychology, 3(3), pp.185-225. https://apps.dtic.mil/sti/pdfs/ADA183409.pdf
[3] Creating a Dashboard . https://it.tufts.edu/book/export/html/1870
[4] https://www.goldenwestcollege.edu/research/data-and-more/data-dashboards/index.html
[5] https://www.mit.edu/course/21/21.guide/grf-line.htm
[6] Jadeja, M. and Shah, K., 2015, January. Tree-Map: A Visualization Tool for Large Data. In GSB@ SIGIR (pp. 9-13). https://ceur-ws.org/Vol-1393/gsb15proceedings.pdf#page=15
[7] Heat Maps and Quilt Plots. https://www.publichealth.columbia.edu/research/population-health-methods/heat-maps-and-quilt-plots
[8] EIU QGIS WORKSHOP. https://www.eiu.edu/qgisworkshop/heatmaps.php
[9] About Pie Charts. https://www.mit.edu/~mbarker/formula1/f1help/11-ch-c8.htm
[10] Histograms. https://sites.utexas.edu/sos/guided/descriptive/numericaldd/descriptiven2/histogram/ [11] https://asq.org/quality-resources/scatter-diagram

Like this article? Please share
Data Analysis, Data Science, Data Visualization Filed under Design
Related Articles

Filed under Design • March 27th, 2024
How to Make a Presentation Graph
Detailed step-by-step instructions to master the art of how to make a presentation graph in PowerPoint and Google Slides. Check it out!

Filed under Presentation Ideas • January 6th, 2024
All About Using Harvey Balls
Among the many tools in the arsenal of the modern presenter, Harvey Balls have a special place. In this article we will tell you all about using Harvey Balls.

Filed under Business • December 8th, 2023
How to Design a Dashboard Presentation: A Step-by-Step Guide
Take a step further in your professional presentation skills by learning what a dashboard presentation is and how to properly design one in PowerPoint. A detailed step-by-step guide is here!
Leave a Reply
Byte Bite Bit
How to Embed Excel into PowerPoint: A Step-by-Step Guide
Embedding Excel data into PowerPoint presentations can transform a mundane slide deck into a dynamic and data-driven display. Imagine not just telling your audience about sales growth, but showing them with real-time data from Excel! Learning how to embed Excel into PowerPoint can save us time and enhance our presentations with up-to-date and interactive content.

We’ll explore the different methods to make this magic happen. We’ve all been there, fumbling with screenshots or manually updating charts. By embedding Excel, we cut down the hassle and increase efficiency. Plus, what’s more engaging than seeing live data in action during a presentation?
Whether you’re a PowerPoint newbie or a seasoned pro, mastering this technique is a game changer. It opens doors to seamless transitions between detailed data analysis and high-level summaries without ever leaving your slide deck. Stick with us, and we’ll walk you through the essentials to make your next presentation stand out!
- 1.1 Using Copy and Paste
- 1.2 Embedding an Excel File
- 1.3 Linking Excel Data to PowerPoint
- 2.1 Maintaining Data Integrity
- 2.2 Optimizing File Size and Performance
- 3.1 Dynamic Data Updates
- 3.2 Customizing Visual Elements
- 4 Conclusion
Key Methods for Embedding Excel Data in PowerPoint
When looking to embed Excel data into PowerPoint, there are several effective methods that stand out. We’ll look into copying and pasting data directly, embedding an entire Excel file, and linking Excel data, each with its own set of steps and benefits.
Using Copy and Paste
This is probably the most straightforward method. We start by opening both the Excel file and the PowerPoint presentation. In Excel, select the range of cells we want to copy by highlighting them.
Next, hit Ctrl + C to copy the data. Switch over to PowerPoint, navigate to the desired slide, and hit Ctrl + V to paste.
Pro Tip: Use the “Paste Special” options in PowerPoint to keep the source formatting by selecting “Keep Source Formatting” or other paste options.
This technique is great for quick data inclusion but doesn’t automatically update if changes are made in Excel.
Embedding an Excel File
For a more integrated approach, embedding works wonders. Begin by saving the Excel file on our computer. In PowerPoint, navigate to the slide where we want to embed the file.
Go to the Insert tab and click Object . In the dialog box, choose Create from file and browse to select our Excel file.
Key Options: Check the box to Display as icon if we want a clickable icon instead of a visible table.
Once embedded, the data is contained within the PowerPoint, making it portable but static unless manually updated.
Linking Excel Data to PowerPoint
To ensure our data remains up-to-date, linking is the best solution. Open both Excel and PowerPoint. Select the range of cells in Excel that we want to link, then copy it using Ctrl + C .
Back in PowerPoint, right-click the target slide and choose the Paste Special option. Here, select Paste Link to create a dynamic link.
Important: The linked data will update in PowerPoint whenever the original Excel sheet is edited.
However, be aware that the PowerPoint file will require access to the original Excel file location to update data. This method combines ease with real-time accuracy, making it ideal for regularly updated presentations.
Formatting and Layout Considerations
Ensuring your Excel data integrates smoothly within PowerPoint requires careful attention to formatting and layout. Addressing data integrity and performance optimization is vital for a seamless presentation experience.
Maintaining Data Integrity
Retaining the integrity of your Excel data when embedding it into PowerPoint is pivotal. We should always ensure that our charts, tables, and text maintain their intended formatting. This includes:
- Selecting the right cells: Highlight the precise data you need.
- Using destination styles: This helps match the presentation’s design.
For charts, ensuring that the axes, labels, and legends are not distorted is crucial. Text should remain legible and consistent with the original Excel document. Proper alignment of rows and columns ensures that the table data is easy to read and compare.
Optimizing File Size and Performance
Large embedded Excel files can slow down PowerPoint, affecting performance and usability. To optimize this:
- Reduce unnecessary data: Only embed essential parts of the worksheet.
- Compress images in charts: This helps reduce overall file size.
- Link to data instead of embedding: When feasible, linking can considerably decrease the file size.
Being mindful of the file size ensures that our presentation remains responsive. Properly managing the layout and design by judiciously using tables and charts goes a long way in maintaining a smooth experience.
By adhering to these practices, we can present polished and efficient PowerPoint slides incorporating our vital Excel data.
Advanced Techniques and Best Practices
When embedding Excel sheets into PowerPoint, adopting advanced techniques can elevate the presentation’s effectiveness. We’ll focus on keeping data dynamic and visually compelling, ensuring your integrations are both functional and visually appealing.
Dynamic Data Updates
One of the best features of embedding Excel into PowerPoint is enabling dynamic data updates .
To maintain real-time accuracy, we can link the Excel file instead of pasting static data. By selecting “Link” in the Insert Object dialog, the PowerPoint slide will update whenever the original Excel file changes. This connection keeps the data fresh without manual updates.
It’s crucial to frequently refresh data on embedded objects, especially before crucial presentations, to capture the latest insights.
Customizing Visual Elements
Visual appeal enhances the impact and clarity of embedded Excel objects. We can customize these elements to fit the PowerPoint theme and design aesthetic.
Firstly, always use the “Keep Source Formatting” option. This ensures that the embedded sheets maintain their original Excel formatting, which preserves the readability and visual consistency of the data.
We can also manipulate the size and placement of the Excel object. Resizing the object to fit appropriately on the slide helps in maintaining a clean and professional look. Aligning and tidying up charts and tables make the presentation look polished.
Additionally, inserting icons or data call-outs can highlight key metrics or trends. This visual customization isn’t just about beautification; it aids in data interpretation and draws attention to crucial points without cluttering the slide with too much text.
Incorporate these techniques to make Excel data more engaging and integrated seamlessly into your PowerPoint presentations.
When embedding Excel into PowerPoint, we combine the strengths of both Microsoft Office programs.
Embedding allows for seamless integration, providing access to dynamic Excel data within PowerPoint slides.
This mix can enhance presentations significantly.
Connecting an Excel file to a PowerPoint presentation offers many benefits, such as:
- Real-time data updates
- Enhanced data visualization
- Avoids copy-paste errors
However, it comes with a few disadvantages:
- Increased file size : Makes the presentation heavier and slower to load.
- Requires Microsoft Office subscription : Essential to fully utilize these features.
- Learning curve : Mastering this integration might need some training.
Joining the right training courses and connecting with communities of experts can mitigate the learning curve.
Frequently asked questions often include topics such as:
- How to maintain data updates?
- How to link specific worksheet sections?
- What are the best practices for managing larger file sizes?
Ensuring that our teams are proficient with these tools can not only make our presentations more impressive but also more accurate and engaging.
Related posts:
- How to Play PowerPoint Slides Automatically Without Clicking: Step-by-Step Guide
- How to Add Hyperlink in PowerPoint: A Step-by-Step Guide
- How to Do a Voice Over on PowerPoint: Easy Steps for Professionals
- How to Add Notes to PowerPoint: Enhance Your Presentations with Ease
- How to Add Music to PowerPoint: Step-by-Step Guide for Seamless Presentations
- How to Create an Org Chart in PowerPoint: Step-by-Step Guide for Beginners
- How to Wrap Text in PowerPoint: A Step-by-Step Guide
Leave a Comment Cancel reply
Save my name, email, and website in this browser for the next time I comment.
How-To Geek
Google sheets vs. microsoft excel: which should you use.
Yes, they're both spreadsheet platforms, but they're actually very different.
Quick Links
Data analysis, data visualization, collaboration, simplicity vs. advanced tools, speed and lagging, other features.
Choosing whether to use Excel or Sheets can be a difficult decision. Excel is widely known for its advanced features, while Google Sheets is famous for its collaboration power. Let's examine these traditions—and some other important features—so you can decide which program is truly the best for you.
Spreadsheets are primarily designed to enable quick data calculation and analysis. Whether you have two columns or two hundred columns, you can make the spreadsheet do the complex mathematical work for you. What's more, if you're new to working on spreadsheets, both Sheets and Excel have formula creation tools to walk you through the process—simply click the fx icon in Excel or the ∑ icon in Sheets, and you'll see easy-to-follow formula creation guidance appear on-screen.
While both Sheets and Excel have extensive formulas to choose from, Excel is the better option for its specific focus on this area. For example, whether you're using Excel for the web or the desktop app , there's a dedicated Formulas tab, where you can browse the different functions available depending on the task you want to carry out, a feature not yet supported by Sheets.
Excel also offers advanced functions that Google Sheets doesn't yet have, including the TAKE function (lookup and reference), the GROUPBY and PIVOTBY functions (data aggregation), and STOCKHISTORY (financial).
There are some advanced data analysis tools at your disposal if you're using Google Sheets through an organization or education edition—Google's Connected Sheets lets you analyze data through BigQuery without the need for .csv exports, but you'll need some training to get used to it.
Verdict —Whether you're looking for basic or complex data analysis tools, Excel really is the winner, even if you're using the free Excel for the web version of the program. Excel's dedicated Formulas tab means you can navigate the functions more easily, and its more advanced formulas mean that you can analyze and automate your data more comprehensively.
Once you've manipulated your data using the functions and formulas available in Excel or Sheets, you might want to present the information in a chart. You can either do this through the Chart option on the Insert tab in either program, or by first creating a pivot table that makes it easier for you to present your chart in more specific and custom ways.
If you go for the first option ( creating a chart directly from the raw data in your spreadsheet ), where Excel prevails is through its recommended charts . Excel reviews the data you want to present graphically and offers suggestions as to which charts would work best for that information. This saves you time scouring the many options available for the perfect visual representation of your numbers.
If you prefer to use a pivot table, you can do this in both Excel and Sheets , and both give you the option to choose what is displayed in the columns and rows, whether you apply filters, and what overall totals you want to include.
Having created your pivot table, there are several options to choose from in either program, whether that be to reformat your pivot table, reorder your data, or add more information. However, if you want to get the most out of your pivot table, you'll need to access Excel's desktop app, where you can create a pivot chart tied to the data in your pivot table, change the field items and sets, insert slicers, or move your pivot table through a dedicated PivotTable Analyze tab .
When you strip the two programs back to their fundamental chart data visualization, Sheets and Excel for the web both offer very similar charts and chart amendment options. But unsurprisingly, given it's only available through a paid subscription, Excel's desktop app offers significantly more choices and variants of its charts, useful if you're looking to create a comprehensive dashboard or a more visual spreadsheet.
Verdict —If you're looking to visualize your data for free, both Excel for the web's and Google Sheets' pivot tables and charts are equally good options. However, if you're looking for more chart options or more table analysis tools, you might consider subscribing to Microsoft 365 for access to the desktop app.
In short, Google Sheets was built for live collaboration. As soon as you share a Google Sheet with someone else (providing you give them editing access to the worksheet), you can both work on it at the same time.
You can see who else is viewing or editing the sheet by looking in the top-right corner, where their initial will appear in a circle. Even more impressively, once you've added other people to your worksheet, you can chat in real time within the Sheets workbook.
Changes made by others update instantly on the worksheet, and if they're adding data to a cell, it's grayed out so that you can't type in the same cell at the same time.
Excel also facilitates real-time collaboration, but it's far less intuitive. When someone you have shared your workbook with opens it, it can take a few seconds for their presence to appear on your screen, and changes they make can take a while to sync with your copy. What's more, while Excel lets you directly email people collaborating on your worksheet, the in-program chat facility is only available if you've subscribed to a Microsoft 365 Business package.
Verdict —While both Excel and Sheets allow collaboration, Google's product is much better for real-time joint work, and the in-program chat facility is available as a default option, making collaboration even more seamless.
Whether Excel or Sheets is better for general use depends on whether you're looking for advanced features and how savvy you are with spreadsheet technology.
Having been around for many more years than Google Sheets, Excel is far more advanced, with more menus, tabs on the ribbon, groups within each tab, and functions overall. This means that you can do a lot more in Excel than you can in Sheets. This is true for the free web-based version of Excel, and even more so for the subscription-only Excel desktop app. While this might lead you to conclude that Excel is the better program, to make full use of its features, you'll need to become an expert, and navigating its interface can take years to master.
While being relatively less useful if you want to create a complex spreadsheet, Google Sheets is much better for simplicity. The interface is far more navigable and intuitive, and with its fewer menus and tabs, you can get your head around Sheets much more quickly than you can with Excel.
Verdict —If you're a spreadsheet power user and want more complex functions and options, Excel is for you. However, if you want to create a relatively more straightforward spreadsheet, go for Google Sheets.
Comparing the speeds of Excel and Sheets heavily depends on whether you're using the Excel app or Excel for the web. Excel's desktop app uses your computer's processor to process data, which (assuming you have a decent PC) means that the software works much more quickly than the browser-based Google Sheets and Excel for the web. These web-based spreadsheet programs can be slowed down significantly if you have large data quantities, many functions working simultaneously, or significant formatting.
If you're using a Chromebook, you can download a desktop version of Google Sheets to speed up your spreadsheet, but this option isn't available on most other computers.
Verdict —Most web-based programs work more slowly than their desktop counterparts. If you have a heavily loaded worksheet, Excel's desktop app will certainly work more quickly for you, especially if you have a powerful PC, but if you only have a simple spreadsheet, you shouldn't encounter too many processing speed issues using Google Sheets or Excel for the web.
- Form syncing—Excel for the web and Google Sheets both work in real time with their form counterparts. Microsoft Forms introduced the ability to sync your data to Excel for the web in early-2024 (though you can't live-sync to the Excel desktop app), and Google Forms has worked in tandem with Google Sheets since its inception.
- AutoSave—As Google Sheets and Excel for the web are online programs, as soon as you create a new spreadsheet, they both upload your work to the cloud. To turn on AutoSave on the Excel desktop app, you first have to sign in to OneDrive before saving your sheet manually.
- Offline work—Whether you're working on Excel for the web or Google Sheets, if your internet connection drops out, your sheet will automatically re-sync once you get back online. The Excel desktop app doesn't need an internet connection at all, but remember to save your work manually, as AutoSave won't work if your device is offline.
Excel and Sheets aren't the only spreadsheet options for you to consider. Why not try out some of these free alternatives instead?
Welcome Back!
It looks like you already have created an account in GreatLearning with email . Would you like to link your Google account?
1000+ Courses for Free
Forgot password
If an account with this email id exists, you will receive instructions to reset your password.
Get free access to
1000+ courses with certificates
Live sessions from industry experts
Industry salary insights and benchmarks
Have an account?
By signing up/logging in, you agree to our Terms and condition • Privacy Policy
We've sent an OTP to CHANGE
Setting up your account...
- Free Courses
- Data Science free courses
Free Data Science Courses
These free Data Science courses can be a great way to learn skills or launch a career in data science. They will equip you to interpret and analyse data and communicate actionable data derivations. Enrol for free and get a certificate upon completion.
- Data Science
- For College
- Masterclasses
- Machine Learning
- Courses in Hindi
- Live Master Class
- Intermediate
- 30 mins - 1 hour
- 1 - 3 hours
Introduction to Data Science
Data science foundations, python for data science, r for data science, excel for data science for beginners, data preprocessing, sql for data science, data science mathematics, probability basics, data visualization with power bi.
PES University
M.Tech in Data Science and Artificial Intelligence
DEDICATED CAREER SUPPORT
Scholarships upto ₹25K

University of Texas - McCombs
PGP in Data Science and Business Analytics
Dedicated Career Support
Scholarships upto ₹50K

Great Lakes Executive Learning
PGP in Data Science and Engineering (Data Science Specialization)
Dedicated Placement Assistance

Northwestern University
MS in Data Science Programme
Live Sessions
Success stories

SecOps Engineer

Bandhan Bank
Team Trainer

Altem Technology

Soft Talk India

And thousands more such success stories..
Popular Upskilling Programs
PG Program in Artificial Intelligence & Machine Learning
#1 Ranked AI Program
PGP in Data Science and Engineering (Bootcamp)
Post Graduate Diploma in Management (Online)
Scholarships upto ₹15K
PG Program in Cloud Computing
360° Cloud Learning
Generative AI for Business with Microsoft Azure OpenAI Program
Artificial Intelligence PG Program for Leaders
No Programming Exp Required
Design Thinking: From Insights to Viability
Live Faculty Interaction
Learn Data Science For Free & Get Completion Certificates
Data Science is a subdomain of computer science and technology that utilizes scientific techniques, processes, algorithms, and systems to extract derived information and insights from structured and unstructured data. It is an interdisciplinary field that combines computer science, mathematics, statistics, and other related fields to analyze, predict, and visualize data. Data science has integrated modern businesses and has been used to improve decision-making, identify new opportunities, and solve complex problems.
Data science is used in various industries, including finance, healthcare, education, and marketing. It is used to identify patterns and relationships in data, uncover hidden insights, and make accurate predictions. For example, data science can be applied to analyze customer purchasing patterns, identify potential customer segments, and develop targeted marketing campaigns. It can also detect fraud, optimize pricing, and predict future trends.
Data science is also used to power Artificial Intelligence and Machine Learning. Machine Learning algorithms use data science to learn from data and make predictions. Data science is used to train and test machine learning models, identify correlations, and draw conclusions from complex data sets.
Data science can also create predictive models and simulations. Data scientists can identify patterns and relationships, build models, and simulate future outcomes and scenarios by analyzing data. This can be used to make more informed decisions and create better strategies.
Data science has become an increasingly important part of the modern world, and its applications are proliferating. It can revolutionize how we do business, make decisions, and interact with data. With the right strategies and techniques, data science can improve the efficiency and accuracy of data-driven decisions and enable businesses to gain deeper insights into their customers, operations, and markets.
Data Science Tasks
Data Science tasks involve the analysis of large and complex datasets to discover hidden patterns, correlations, and insights. Data Science tasks involve a combination of techniques and processes, including data mining, machine learning, predictive analytics, and visualization. Data Science tasks aim to use data to gain knowledge and insights that improve a business or other organization's operations.
Data Science gathers and cleans data from multiple sources. This process includes collecting data from various sources, such as databases, websites, surveys, and other sources. After the data is collected, it must be cleaned and analyzed to identify patterns, correlations, and insights. The data must also be organized and structured to make it easier to work with.
Data Science tasks also include
- Creating predictive models. Predictive models use data to forecast future outcomes. These models are used to make investments, business strategies, and product development decisions.
- Using visualization tools to represent data in an easy-to-understand format. Popular visualization tools include charts, tables, and graphs. Visualization tools help organizations make better decisions by providing clear insights into the data.
- Communicating the results of the data analysis. This includes creating reports and presentations that explain the findings to stakeholders and other decision-makers.
Data Science tasks are an essential part of any organization's operations. Data Science professionals use their technical skills and knowledge to help organizations gain valuable insights from their data. By understanding and interpreting data, organizations can make better decisions and create strategies to help them achieve their goals.
Great Learning Academy offers a variety of free Data Science courses online that can help you gain the expertise and knowledge you need to pursue a career in the field. These courses typically focus on helping you gain a better understanding of the fundamentals of Data Science, such as programming languages, algorithms, and data manipulation. No matter which type of free Data Science course you choose, you can be sure that you'll be well-equipped with the knowledge and skills necessary to pursue a successful career in the field. With various free Data Science courses, you can learn about various concepts under the subject online for free.
Register for the Data Science certificate course if you want to get professionally certified.
Explore new and trending free online courses

Prompt Engineering for ChatGPT
")
Getting Started with Gemini (Bard)

Generative AI for beginners

ChatGPT for HR

Artificial Intelligence with Python

Introduction to Cyber Attacks

Microsoft Azure Application

Robotics and AI

Business Intelligence using Excel

Complete TOEFL Prep Course

Interview Preparation using Bard

Customer Service Essentials

Introduction to Google Ads Campaign

TallyPrime Tutorial

Google Bard for Coders

Basics of Data Visualization for Data Science

Complete IELTS Prep Course

GRE Prep Course
DATA SCIENCE
Data Scientist
Data engineer, data analyst.
IT & SOFTWARE
Data Manager

Frequently Asked Questions
There's no prior experience necessary to begin, but before you learn advanced courses, complete basic courses to have strong computer skills and develop an interest in gathering, interpreting, and presenting data.
These courses include 1-8 hours of video lectures. These courses are, however, self-paced, and you can complete them at your convenience.
Upon completing these free Data Science courses, you will gain a wide range of knowledge and skills, including an understanding of the fundamentals of data science, algorithms and machine learning, data analysis and visualization, programming languages such as Python and R, and the tools and applications used in data science. Additionally, you will gain experience with data wrangling, predictive modeling, and data-driven decision-making.
Yes. You will have lifetime access to these courses after enrolling in them and access to certificates after completing the course.
Yes. After completing them successfully, you will receive a certificate of completion for each course.
These are free courses; you can enroll in them and learn for free online.
Data scientists are in great demand right now, and it's an excellent choice to start a career in data science. Unfortunately, the majority of those who attempt to learn data science fail because their approach needs to be revised with errors that impede their advancement. You can therefore choose to learn from the Data Science course for beginners to escalate your learning in Data Science and programming from basics.
Data science is a large field of study that is expanding, which means there will be plenty of chances in the future. The discipline of data science is anticipated to become increasingly specialized as employment functions get more specialized. Because it has been revealing outstanding solutions and wise decisions across numerous industries, data science is crucial for organizations.
Jobs that are directly related to Data Science are
- Business Intelligence Analyst
- Data Mining Engineer
- Data Architect
- Data Scientist
Great Learning Academy offers a wide range of high-quality, completely free Data Science courses. From beginner to advanced level, these free courses are designed to help you improve your Data Science and programming skills and achieve your goals. All these courses come with a certificate of completion, so you can demonstrate your new skills to the world. Start learning today and discover the benefits of free Data Science courses!
These courses have no prerequisites. Anybody can learn from these courses for free online.
These free Data Science courses give you a competitive edge in your professional life. Register for the Applied Data Science course to further gain professional knowledge after completing these free courses.
To learn Data Science basics and advance concepts from these courses, you need to,
- Go to the course page
- Click on the "Enroll for Free" button
- Start learning the Data Science course for free online.
Refer & Win >
Premium course worth ₹15,000/-
Services & Software

Get Microsoft's upgraded Pro OS for a small fraction of the regular price, but only while the sale lasts.

Our Top Picks
From VPNs to playlists for your pup, here’re all the best services and software of 2023.

Latest Stories
We help you decide which services to keep, try or cancel.

10 Very Entertaining Sci-Fi Movies to Stream on Max Right Now

'Star Wars: The Acolyte': Release Date and How to Watch From Anywhere

Best Identity Theft Protection and Monitoring Services for 2024

Today's Wordle Hints and Answer: Help for June 4, #1081

Today's NYT Connections Hints and Answers: Help for June 4, #359

Peacock Is Offering a Year of Streaming for $20

No, You Can't Disable Google AI Overviews. But There Are Tricks to Avoid It

Ticketmaster Breach: What We Know So Far

Tired of Stale Netflix Picks? Browse 36,000 Categories With Netflix's Secret Menu

How to Opt Out of Instagram and Facebook Using Your Posts for AI

Congress leader Sachin Pilot says it was INDIA bloc's optimistic narrative vs BJP's Mandir-Masjid narrative. "... The states in which the BJP expected to increase its numbers, like West Bengal, Haryana and Rajasthan, the people have rejected them there... The issues we brought up were liked by the people... Our narrative was optimistic, BJP's narrative was Mandir-Masjid, Hindu-Muslim and Mangalsutra. The people may have not liked it... Who would have taken the credit if they (BJP) had gone above 400?... Those who wanted the credit have to accept that the public did not give them their expected mandate...," he said.
Karnataka Lok Sabha election results 2024: Former Karnataka CM Bommai makes successful debut
Former Karnataka Chief Minister Basavaraj Bommai made his successful debut in the Lok Sabha polls, almost a year after the BJP fared poorly in the Assembly polls held when he was at the helm. Currently, an MLA from Shiggaon, he was picked for the Haveri seat, as the sitting MP, Shivakumar Udasi, had announced his retirement from electoral politics after the current term ends. Bommai won the seat defeating Anandswamy Gaddadevarmath of Congress by a margin of 43,513 votes on Tuesday, marking his shift to national politics. He secured 7,05,538 votes and Gaddedevarmath 6,62,025. Since the announcement of his candidature, Bommai by and large camped in the constituency strategising and campaigning, and was hardly seen canvassing for party candidates in other segments, despite him being among a BJP's key campaigners, as a former CM. The 64-year-old had stepped in as the chief minister, mainly due to the backing of B S Yediyurappa, who was asked by the BJP central leadership to step down in July 2021.
Election results 2024: Hate politics, false promises led to decline in BJP's performance in LS polls, says Owaisi
Asaduddin Owaisi, the AIMIM president, attributed the BJP's underwhelming performance in the Lok Sabha elections to the party's decade-long politics of hatred and alleged false promises made to the people. Owaisi, who secured a fifth consecutive term as the Hyderabad MP, expressed his willingness to offer support if Narendra Modi fails to secure a third term as prime minister. "We have publicly taken a stand that we will stop BJP," he told reporters. Despite the ongoing vote counting, Owaisi believed that the BJP might fall short of the magic number of 272 seats on its own. The latest Election Commission data indicated that the BJP was leading in 240 seats. Owaisi asserted that the people had grown weary of the BJP's politics of hatred, while the youth were frustrated with the country's unemployment, and the farmers were dissatisfied. He argued that those who cherish the Constitution perceived Modi's call for '400 paar' (more than 400 LS seats) as an attempt to "finish" the Constitution. "The verdict has come, and if Modi ji forms the government now, then he has to come to the Parliament with the support of allies. It will be a good scene to watch," he said and added that Modi should introspect on the results. Owaisi congratulated Telangana Chief Minister A Revanth Reddy on the Congress party's victory in eight out of 17 seats in the state. He criticized the BRS for openly supporting the BJP in Lok Sabha constituencies within the state, deeming it a flawed political strategy. When asked about aligning with the INDIA bloc, Owaisi clarified that his party is not a part of the alliance. However, he stated, "If such a situation arises where a non-BJP, non-NDA person comes forward to become prime minister, then we will definitely support. But, we don't know whether such a scenario will arise or not." Owaisi expressed gratitude to the voters, including women, youth, and senior citizens, for his victory in the Hyderabad constituency, where he defeated BJP's K Madhavi Latha by a margin of over 3.38 lakh votes.
Lok Sabha election results 2024: BJP-led NDA forming its third successive government, grateful to people: PM Modi
Prime Minister Narendra Modi declared on Tuesday that the BJP-led NDA will establish its third consecutive government, attributing the victory to the determination of Viksit Bharat, the principle of 'Sabka Sath Sabka Vikas', and the unwavering faith of the people in India's Constitution. Addressing party workers and leaders at the BJP central office following the Lok Sabha poll results, PM Modi expressed gratitude to the people for placing their trust in the BJP and the National Democratic Alliance (NDA). He emphasized that this marks the first instance since 1962 where a government that completed two full terms has secured a third successive term in office, creating "new history" after six decades. The Prime Minister specifically highlighted BJP's performance in Odisha, where the party is set to form the government for the first time, while also achieving impressive results in the state's Lok Sabha polls. "On this sacred day, it is confirmed that NDA is forming the government for the third time. We are grateful to the people, they reposed full faith on the BJP, NDA. This is the victory of the world's largest democracy, it is a victory of strong faith on India's Constitution, it is the victory of the resolve of Viksit Bharat. It is the victory of 'Sabka Sath Sabka Vikas'," he said. PM Modi also commended the Election Commission for successfully conducting the world's largest democratic exercise, praising their efficiency in the face of scorching heat. He acknowledged the effective work of the security forces and expressed pride in the credibility of India's election process and system. As the Prime Minister arrived at the party headquarters, BJP workers welcomed him, with some raising chants of "Jai Jagannath". According to the latest trends from the Election Commission, the NDA is leading or has won 291 seats, while the INDIA bloc has secured or is leading on 234 seats. The BJP alone is poised to win 240 seats.
Lok Sabha Election Results: Poll verdict moral defeat for Modi, will talk with INDIA bloc if past allies to be contacted, says Congress
The Congress party has declared the Lok Sabha election results as a mandate against Prime Minister Narendra Modi, calling it his "political and moral defeat". In a joint press conference, Congress leaders Mallikarjun Kharge, Sonia Gandhi, and Rahul Gandhi announced that the INDIA bloc allies will meet on Wednesday to discuss their future course of action, including the possibility of approaching former partners JD(U) and TDP for government formation. Rahul Gandhi emphasized that the INDIA bloc will make decisions collectively and act accordingly. The election results showed the BJP falling short of the majority mark, while the Congress is set to win 99 seats, nearly doubling its 2019 tally. Kharge stated that the election results are a victory for democracy and the people, who have sent a clear message against PM Modi. The Congress chief claimed that the party and the INDIA alliance faced a hostile environment during the elections, with the government machinery creating obstacles at every step. He asserted that the people saw through the lies spread by the prime minister about the Congress manifesto and believed that another term for Modi would lead to an attack on the Constitution. Rahul Gandhi described the election as a fight to save the Constitution, with the poor and marginalized standing up to protect it. He expressed pride in the people of India for resisting the attack on the Constitution and stated that the Congress and the INDIA bloc have provided the country with a new, pro-poor vision. Gandhi also drew a parallel between the BJP's declining seats and the falling Adani stocks, suggesting a direct correlation between Modi and Adani. He thanked the electorate of Uttar Pradesh for supporting the Congress and protecting the Constitution. When asked about his decision regarding the Wayanad or Rae Bareli seat, Gandhi said he had not yet made a decision. Lastly, he commented on the victory of Congress candidate K L Sharma in Amethi, stating that Sharma's long-standing work in the area made his victory certain.
Lok Sabha election results: NDA's return to power for third term shows people's faith in Modi's vision, says BJP
The Bharatiya Janata Party (BJP) declared on Tuesday that the Lok Sabha election victory for its alliance highlights the public's trust and belief in Prime Minister Narendra Modi's vision of a developed India, known as "Viksit Bharat". Amit Shah, the Home Minister, stated on the social media platform X that the National Democratic Alliance's (NDA) third consecutive win in the national election demonstrates that people's confidence lies solely in Modi. The voters' support is a testament to the prime minister's efforts over the past decade to improve the lives of the poor and farmers, revive heritage, and promote women's self-respect. Rajnath Singh, the Defence Minister, affirmed that the NDA's electoral success is a triumph of Modi's policies and his commitment to the well-being of the underprivileged. The people of India have expressed their immense trust in Modi's leadership, he added. Singh further stated, "Modiji is going to become the prime minister for a third time and under his leadership, we will work with new energy and enthusiasm to realise the dream of a developed India." Shah emphasized that "this victory of the NDA is a reflection of people's unwavering faith in Modi who has devoted his life for the country". He added that with this mandate, a "New India" is prepared to further propel and strengthen the nation's development journey. Singh noted that over the last 10 years, India has reached a point where not only its citizens but also all nations have confidence in its ability to provide leadership and a new direction to the world while becoming more developed. J P Nadda, the BJP president, commended Modi's leadership and praised the party's allies for their efforts. He added that the people of the country have once again placed their trust in the strong government led by the prime minister. Although the BJP lost its majority in the polls, the results of which were announced on Tuesday, the alliance it leads has comfortably surpassed the crucial threshold of 272 seats.
India Election Results 2024: Opposition despite being united could not win as many seats as BJP got on its own, says PM Modi
Prime Minister Narendra Modi, while addressing supporters at the BJP headquarters, highlighted the party's remarkable performance in the recent elections. He emphasized that even though the opposition parties came together, they were unable to match the number of seats secured by the BJP alone. "Opposition despite being united could not win as many seats as BJP got on its own," PM Modi stated, underlining the overwhelming support and trust the party has garnered from the electorate. The Prime Minister's words reflected the BJP's strong position and its ability to outperform the combined efforts of the opposition parties. The address by PM Modi to the gathered supporters at the BJP headquarters served as a celebration of the party's electoral success and a testament to its enduring popularity among the masses.
Lok Sabha election results: 'Unprecedented moment in India's history', says PM Modi expressing gratitude as NDA poised to form government
As the BJP-led NDA is set to form the government following the Lok Sabha election results, Prime Minister Narendra Modi expressed his gratitude to the people of India for placing their trust in the alliance for the third consecutive time. He described this moment as unparalleled in the nation's history and thanked his family for their love and blessings. In a post on X, the Prime Minister assured the citizens that the government would work with renewed energy, enthusiasm, and resolve to fulfill their aspirations. PM Modi also conveyed his heartfelt appreciation and congratulations to all the workers for their dedication and tireless efforts. He secured his third consecutive victory from Varanasi, defeating Congress candidate Ajay Rai by a margin of 1,52,513 votes. According to the latest ECI trends, the NDA is leading in 293 seats, while the INDIA bloc is ahead in 232 seats. The BJP alone is leading or has won 240 seats. In the previous Lok Sabha elections in 2014 and 2019, the BJP had secured a majority on its own, winning 282 seats in 2014 and increasing its tally to 303 seats in 2019. The Lok Sabha polls were conducted in seven phases from April 19 to June 1.
Election Results: 'Resounding victory for good governance', says PM Modi after BJP's historic win in Odisha assembly polls
Prime Minister Narendra Modi expressed his gratitude to the people of Odisha following the Bharatiya Janata Party's (BJP) unprecedented victory in the state, ending Chief Minister Naveen Patnaik's more than two-decade-long reign. The Prime Minister pledged that the BJP would spare no effort in realizing the aspirations of the people and elevating Odisha to new levels of development. "Thank you Odisha! It's a resounding victory for good governance and celebrating Odisha's unique culture. BJP will leave no stone unturned in fulfilling the dreams of people and taking Odisha to new heights of progress. I am very proud of all our hardworking Party Karyakartas for their efforts," PM Modi said in a post on X. The BJP secured a majority in the Odisha assembly for the first time, winning 78 out of 147 seats, while the Biju Janata Dal won 51 seats. Prime Minister Modi also expressed his appreciation to the people of Andhra Pradesh, where the NDA achieved a significant victory, unseating Jagan Mohan Reddy's government. He assured that the government would strive for the comprehensive development of the state. "Andhra Pradesh has given an exceptional mandate to NDA! I thank the people of the state for their blessings. I congratulate @ncbn Garu, @PawanKalyan Garu and the Karyakartas of @JaiTDP, @JanaSenaParty and @BJP4Andhra for this emphatic victory. We will work for the all-round progress of AP and ensure the state prospers in the times to come," the Prime Minister stated on X. The BJP formed an alliance with the Telugu Desam Party, led by Chandrababu Naidu, and Pawan Kalyan's JanaSena Party in Andhra Pradesh. The NDA secured a landslide victory, winning 163 out of the 175 seats in the Andhra Pradesh assembly. The TDP won 134 seats, the JanaSena Party won 21 seats, and the BJP won 8 seats. As the counting of votes for the Lok Sabha elections nears completion, the Bharatiya Janata Party-led National Democratic Alliance (NDA) is leading in approximately 300 constituencies, while the INDIA bloc, contrary to predictions, is leading in over 230 seats. The majority of exit polls had forecasted a consecutive term for Prime Minister Narendra Modi, with several of them projecting a two-thirds majority for the ruling BJP-led NDA.
Election Results: Rashtrapati Bhavan closed for general public ahead of swearing-in-ceremony
The swearing-in-ceremony of the Council of Ministers is set to take place at Rashtrapati Bhavan in the coming days. As a result, the visit in Circuit -1 will be closed to the general public from June 5 to 9, according to an official statement released on Tuesday. It is anticipated that a meeting of the Union Cabinet will convene on Wednesday, presided over by Prime Minister Narendra Modi. The tallying of votes for the Lok Sabha elections is currently in its concluding stages, with the BJP emerging as the party with the most seats. In a tweet, PM Modi expressed his gratitude, stating, "People have placed their faith in NDA, for a third consecutive time! This is a historical feat in India's history. I bow to the Janata Janardan for this affection and assure them that we will continue the good work done in the last decade to keep fulfilling the aspirations of people." The Prime Minister also acknowledged the efforts of the party workers, adding, "I also salute all our Karyakartas for their hard work. Words will never do justice to their exceptional efforts."
Election results 2024: First time since 1962 any government has come to power for third time, says PM Modi
Prime Minister Narendra Modi addressed the nation, highlighting the historic achievement of his government's re-election for a third consecutive term, a feat unseen since 1962. He emphasized, "After 1962, for the first time, a govt has comeback to power for the third time after being in power twice back to back." The Prime Minister also noted the significant political shifts in various states across the country. He pointed out that the Congress party had been completely defeated in Arunachal Pradesh, Andhra Pradesh, Odisha, and Sikkim. Furthermore, he confidently stated, "BJP is going to form govt in Odisha." Modi acknowledged the BJP's success in Kerala, a state where the party had previously struggled to gain a foothold. He praised the dedication and sacrifices made by the party workers in the region, saying, "BJP won a seat in Kerala as well, our party workers in Kerala have made a lot of sacrifices..."
Lok Sabha election results: PM Modi praised the Election Commission of India
PM Modi says, "I also thank the Election Commission of India for conducting such a large-scale election exercise. Every Indian is proud of the credibility of India's election process and system."
...On this sacred day, it is confirmed that NDA is making govt for the 3rd time. We are grateful to the people...
Prime Minister Narendra Modi
Election Results 2024: PM Modi begins his address to BJP workers with chants of "Jai Jagannath"
BJP has swept Odisha Assembly elections
Election Results 2024: This is a victory of people's faith in Constitution: PM Modi on poll verdict
Prime Minister thanked voter saying, 'This is a victory of people's faith in Constitution'.
Election Results 2024: BJP national president JP Nadda praises PM Modi
BJP national president JP Nadda says, "We all know that be it elections or to lead the country, PM Modi has always led the country, party and the people from the front. I congratulate him..." Nadda asserts that PM Modi has consistently led the country, the BJP, and the people from the front, whether it is during elections or in governing the nation. The statement implies that Modi has been a strong and effective leader, taking charge and setting an example for others to follow. Nadda's congratulatory message suggests that Modi has achieved something significant or reached a milestone, although the specific reason for the congratulations is not mentioned in the given statement. The statement reflects the BJP's support for and confidence in PM Modi's leadership, highlighting his role in the party's electoral successes and his governance of the country.
Lok Sabha election results | Amit Shah: BJP's key strategist who rose to become one of the most influential figures in Indian politics
Although Prime Minister Narendra Modi's leadership of the BJP is credited with influencing many of the party's electoral outcomes, Amit Shah, the party's senior strategist, is also regarded as the major architect of the party's meteoric rise. However, the Lok Sabha elections did not go as planned. However, Shah defeated his closest Congress opponent, Sonal Patel, by an astounding margin of more than 7.44 lakh votes to win the Gandhinagar Lok Sabha seat in Gujarat. According to the most recent statistics and trends available on the Election Commission's website, the BJP won 126 seats and led in 114, but it looked like it would not be able to secure a majority to form its government at the Center on its own.
Lok Sabha election results: Dhols, firecrackers at BJP headquarter as party celebrates poll result
At the Bharatiya Janata Party (BJP) headquarters in Delhi, an atmosphere of jubilation prevailed as supporters and party workers celebrated the victory of the BJP-led National Democratic Alliance (NDA) in the Lok Sabha elections. The scenes were reminiscent of fervor and dedication, with supporters sounding 'shankha', beating 'dhol', and chanting slogans in honor of Prime Minister Narendra Modi as the NDA emerged victorious, poised to form the government at the Centre. One remarkable instance of dedication was demonstrated by Ratan Rajan, a staunch party supporter who embarked on a remarkable journey of 1,117.2 km from Bihar to Delhi on his bicycle to be part of the celebrations. Expressions of faith and spirituality were evident as supporters performed pujas, offered veneration to images of PM Modi, and chanted religious hymns like Hanuman Chalisa, reflecting their belief in auspicious omens. Artistic expressions of support were also witnessed, with supporters showcasing their admiration for the Prime Minister through self-drawn paintings depicting PM Modi as Lord Ram and creative displays like painting the party's Lotus symbol on plastered hands. Despite acknowledging setbacks in regions like Uttar Pradesh, BJP leaders displayed grace in accepting the people's verdict, expressing confidence in PM Modi's leadership and the party's ability to forge ahead. In Delhi, the BJP secured victory on six out of seven seats, including the Chandni Chowk seat won by Praveen Khandelwal, reaffirming the party's stronghold in the region and underscoring its electoral success in the Lok Sabha elections.
Lok Sabha election results Live: Visit of Rashtrapati Bhavan (Circuit -1) will remain closed for general public from June 5 to 9
Visit of Rashtrapati Bhavan (Circuit -1) will remain closed for the general public from June 5 to 9, 2024, due to preparation for the forthcoming event of the swearing-in-ceremony of the Council of Ministers, as informed by the Rashtrapati Bhavan.
Election Result 2024: PM Modi reaches BJP headquarters in Delhi, to address the party workers shortly
In the wake of the resounding victory in the 2024 Lok Sabha elections, Prime Minister Narendra Modi has arrived at the Bharatiya Janata Party (BJP) headquarters in Delhi, poised to address party workers and supporters. Prime Minister Narendra Modi's address at the BJP headquarters signifies a momentous occasion for the party, reflecting the culmination of months of tireless campaigning and the culmination of the electoral process. As Modi addresses the enthusiastic gathering, the event serves as a testament to the BJP's strength and resilience, paving the way for a new chapter of governance and progress under the leadership of the NDA.
Election Result News: NDA performs strongly in metros while INDIA bloc dominates rural areas
In the aftermath of the Lok Sabha elections, a distinct electoral pattern has emerged, highlighting the contrasting preferences of urban and rural voters across India. Urban Strongholds: NDA's Command in Metropolitan Cities The National Democratic Alliance (NDA) has showcased formidable strength in major metro cities, clinching significant leads in urban centers like Delhi, Bangalore, and Pune. Delhi: The BJP maintains its stronghold, leading in all seven constituencies, affirming its appeal among urban voters. Bangalore: Urban voters largely favor the BJP, with the party's representatives securing leads, showcasing the alliance's urban appeal. Pune: The NDA has garnered favorable outcomes, securing leads in multiple constituencies within the city, bolstering its urban support base. Rural Resonance: INDIA Bloc's Triumph in Countryside In contrast, the INDIA bloc, comprising various opposition parties, has resonated strongly with rural populations, gaining substantial support in rural regions across the country. Rural Appeal: The bloc has garnered significant leads in rural areas such as Chhattisgarh's Korba, Uttar Pradesh's Aonla, Basti, and Lalganj, reflecting its appeal to agrarian communities and rural voters. Exceptional Cases: NDA's Near-Sweep in States Like Odisha, Gujarat, and Madhya Pradesh Despite the general trend, the NDA has nearly secured a clean sweep in both rural and urban areas in states like Odisha, Gujarat, and Madhya Pradesh, showcasing its widespread appeal across diverse demographics.
UP Lok Sabha Election Results: Rajnath Singh, a formidable BJP leader from Uttar Pradesh with grassroots connect
Rajnath Singh, a stalwart in Indian politics known for his grassroots connect and moderate demeanor, has been a formidable figure in the Bharatiya Janata Party's (BJP) expansion across Uttar Pradesh. Hailing from Chandauli district in Uttar Pradesh, Singh's journey from a student activist with the Akhil Bharatiya Vidyarthi Parishad (ABVP) to the helm of the BJP as its national president showcases his commitment and leadership prowess. His resounding performance in the ongoing Lok Sabha elections indicates his continued influence, with Singh poised to retain the prestigious Lucknow Lok Sabha seat by a significant margin. Born on July 10, 1951, in a farmer's family in Babhora village, Singh received his education in Uttar Pradesh, completing his MSc in Physics from Gorakhpur University. He initially worked as a lecturer before delving into politics. Singh's political career took off in 1974, and his ascent was swift. He served in various capacities, from MLA to MLC, and held ministerial positions in both state and central governments. Notably, he became the Union Surface Transport Minister in the Vajpayee government and later served as the Chief Minister of Uttar Pradesh. As the Union Home Minister in Prime Minister Modi's first tenure, Singh earned acclaim for his strategic initiatives and commitment to national security. His subsequent role as Defence Minister saw him spearheading critical measures to bolster India's defence capabilities along the border with China and enhance domestic defence manufacturing. Throughout his career, Singh has been revered for his inclusive leadership style and ability to forge alliances across party lines. His journey from a humble background to the apex of Indian politics exemplifies dedication, vision, and resilience. As Rajnath Singh continues to shape the political landscape, his influence and leadership remain indispensable, solidifying his legacy as a statesman and strategist in Indian politics.
Lok Sabha Elections 2024: Union cabinet meeting likely to be held tomorrow, in Delhi.
A crucial Union Cabinet meeting is anticipated to take place tomorrow in Delhi, marking a significant development in the nation's governance. With important matters on the agenda, the meeting is poised to address key issues concerning the administration and policy-making at the highest level of government. The gathering is expected to convene in the capital city, bringing together top officials and ministers to deliberate on various pressing matters of national importance.
Lok Sabha Elections 2024: Amit Shah and JP Nadda head to BJP HQ amidst party's triumph in Lok Sabha Elections 2024
In a celebratory procession, Union Home Minister Amit Shah and BJP chief JP Nadda depart for the BJP headquarters in Delhi following the party's resounding victory in the Lok Sabha Elections 2024. Amidst an atmosphere charged with euphoria and triumph, Shah and Nadda embark on their journey to the party headquarters, symbolizing the BJP's remarkable achievement in the electoral arena. The BJP's emphatic win in the 2024 Lok Sabha elections underscores the party's enduring appeal and widespread support among the electorate. As Shah and Nadda make their way to the BJP headquarters, they carry with them the collective jubilation and enthusiasm of the party faithful. With their leadership instrumental in navigating the BJP to yet another electoral triumph, Shah and Nadda's presence at the party headquarters signifies a momentous occasion for the BJP cadre and supporters across the nation. As the BJP celebrates its victory, Shah and Nadda's arrival at the party headquarters heralds the dawn of a new era of governance and leadership under the BJP's stewardship.
Former MP CM Shivraj Singh Chouhan attains massive victory in Vidisha

Lok Sabha Election Results 2024: This victory of BJP for the third time is the result of the tireless hard work of our workers, says Amit Shah in a post on X
Union home minister Amit Shah took to X and said, "This victory of BJP for the third time is the result of the tireless hard work of our workers. For this victory, I congratulate the National President of BJP, JP Nadda and all the BJP workers working hard in every part of the country. For BJP, its workers are its biggest asset. The hard work with which all of you have sought blessings of the people for Modi Ji by going door to door, street to street from North to South and East to West is truly commendable. I heartily congratulate all of you for this Herculean effort"
Lok Sabha Election Results 2024: Hope in defeat for India opposition figurehead, says Rahul Gandhi
Rahul Gandhi, scion of India's political dynasty, once poised as the nation's future leader, has weathered the highs and lows of two decades in politics, culminating in the recent Lok Sabha elections where his Congress party faced a resounding defeat at the hands of Prime Minister Narendra Modi's BJP. Initially hailed as the torchbearer of a new era for the Congress party, Gandhi's journey has been marked by setbacks and challenges. Despite being seen as the natural successor to his family's political legacy, Gandhi struggled to galvanize support and articulate a compelling vision for the party. The electoral defeats suffered by Congress under his leadership only served to underscore the party's dwindling influence and the uphill battle faced by Gandhi himself. His attempts to counter the BJP's Hindu-first agenda often fell short, overshadowed by Modi's populist appeal and the BJP's formidable electoral machinery. Yet, in the face of adversity, Gandhi embarked on a transformative journey in 2022, shedding his image of entitlement and privilege by engaging with ordinary citizens across the country. His efforts to connect with voters on a personal level were seen as a genuine attempt to bridge the gap between the political elite and the masses. Born into a family steeped in political legacy, Gandhi's entry into politics was marked by tragedy, with the assassinations of his grandmother Indira Gandhi and father Rajiv Gandhi. Despite his privileged upbringing, Gandhi chose to immerse himself in grassroots politics, eventually ascending to the helm of the Congress party in 2017. However, Gandhi's leadership was marred by criticism and ridicule, with his detractors dubbing him "pappu" for his perceived lack of political acumen. His struggles with Hindi oratory and the BJP's relentless attacks further eroded his credibility as a leader. Amidst legal battles and electoral setbacks, Gandhi's resolve remained unshaken. Despite relinquishing his official position as Congress party president, he continues to be a prominent voice within the party, advocating for democratic values and accountability in government. While the recent electoral defeat may have dealt a blow to Gandhi's political ambitions, it also underscores his resilience in the face of adversity. As India grapples with the challenges of a changing political landscape, Rahul Gandhi's journey remains a testament to the enduring spirit of democracy and the pursuit of a more inclusive and equitable future.
Lok Sabha Election Results 2024: Union cabinet meeting likely to be held tomorrow in Delhi
Union cabinet meeting is likely to be held on June 5 in Delhi. The results for the Lok Sabha elections 2024 were announced on June 4. The stage is set for NDA 3.0 government in India despite INDIA bloc's impressive performance.
Lok Sabha Election Results 2024: Morale booster for JD(S) as it wins 2 out of 3 contested seats in Karnataka
The recent Lok Sabha elections in Karnataka have brought a mixed bag of results for the Janata Dal (Secular) [JD(S)], highlighting both triumph and turmoil for the regional party amidst alliance dynamics and scandalous controversies. Party state President and former Chief Minister H D Kumaraswamy secured victory from Mandya, while the sitting MP Prajwal Revanna, facing probes on allegations of sexual abuse, failed to retain his seat in Hassan. However, JD(S) candidate M Mallesh Babu emerged victorious from Kolar. Reacting to Revanna's defeat, Kumaraswamy acknowledged certain issues within the party, stating, "It was known to all. Certain issues cannot be discussed openly. We will try to rectify things where we have lost." Revanna, currently in custody of the Special Investigation Team probing the cases, faced allegations of sexual abuse after explicit videos reportedly circulated in Hassan just before the Lok Sabha polls. The election was crucial for JD(S) following its dismal performance in the 2023 Assembly polls, prompting the party to forge an alliance with BJP. This strategic move seemed to pay off as JD(S) won two out of the three seats it contested. With JD(S) demonstrating its strength in the old Mysuru region, the alliance with BJP proved beneficial. Kumaraswamy alleged Congress' attempts to weaken JD(S) but credited the voters of the old Mysuru region for standing by the party. The BJP-JD(S) alliance, considered successful at the ground level, aimed to leverage the strengths of both parties. The performance in this election showcased JD(S)'s influence in the old Mysuru region and the Vokkaliga community. Kumaraswamy emphasized the natural alliance between BJP and JD(S), reflecting the acceptance of this partnership by the people of Karnataka. Amidst scandalous controversies and political maneuvers, JD(S) managed to secure victories, reaffirming its position as a significant political force in Karnataka's electoral landscape.
Lok Sabha Election Results 2024: PM Modi expresses gratitude for NDA's exceptional mandate in Andhra Pradesh
Prime Minister Narendra Modi took to X to express his gratitude for the exceptional mandate given to the NDA in Andhra Pradesh. He thanked the people of the state for their blessings and congratulated N. Chandrababu Naidu, Pawan Kalyan, and the workers of TDP, Jana Sena Party, and BJP for the emphatic victory. PM Modi affirmed the commitment to work for the all-round progress of Andhra Pradesh, ensuring prosperity for the state in the times ahead.
2024 Election Results: Delhi Congress concedes defeat in LS polls
Delhi Congress Chief Devender Yadav expressed gratitude to party workers and voters for their steadfast support to India Bloc candidates in the Lok Sabha elections. Despite disappointing outcomes, Yadav pledged to fortify grassroots cadres and lead the party back to prominence in the national capital. In a statement, Yadav acknowledged the voters' verdict and assured a vigorous resurgence of the Congress in Delhi. He highlighted the robust response received by Congress and India Bloc candidates in various assembly segments, affirming the party's enduring strength at the grassroots level. While early trends indicated setbacks for the BJP-led NDA in key states like Uttar Pradesh, Haryana, and Rajasthan, the BJP maintained a lead in all seven Lok Sabha seats in Delhi. Despite this, Yadav encouraged Congress workers to persevere, emphasizing that victory was inevitable through sustained dedication and effort.
Lok Sabha Elections 2024: 'Unprecedented moment ... People have placed faith in NDA for 3rd time': PM Modi
In a momentous declaration following the triumph of the National Democratic Alliance (NDA) in the Lok Sabha elections, Prime Minister Narendra Modi hailed the people's unwavering faith in the alliance for the third consecutive term. "This is an unprecedented moment in the history of India," PM Modi said on X, reflecting on the significance of the electoral mandate. Expressing gratitude for the overwhelming support, PM Modi extended heartfelt thanks to his family for their love and blessings. He assured the nation of advancing towards fulfilling their aspirations with renewed energy, enthusiasm, and determination. Acknowledging the dedication and tireless efforts of party workers, PM Modi congratulated them for their unwavering commitment to the cause. The resounding victory marks a significant milestone for the NDA, underscoring the trust and confidence reposed by the people of India in the alliance's leadership and vision for the nation.
Election Results 2024: BJP debutant Rajiv Bharadwaj defeats former Union minister Anand Sharma in Kangra LS seat
BJP candidate Rajiv Bharadwaj secured victory in the Kangra Lok Sabha seat on Tuesday, triumphing over former Union minister and Congress nominee Anand Sharma by a substantial margin of 2,51,895 votes. Bharadwaj, a relative of former chief minister Shanta Kumar, clinched 6,32,793 votes, while Sharma garnered 3,80,898 votes. Debuting in elections at the age of 62, Bharadwaj, a grassroots BJP worker and a doctor by profession, resonated with the local electorate, presenting himself as a native candidate. In contrast, Sharma, hailing from Shimla, faced the challenge of being labeled an "outsider." Centering his campaign on local issues and emphasizing the achievements of the Modi government along with the construction of the Ram temple in Ayodhya, Bharadwaj crafted a five-year agenda for Kangra. Accepting his defeat graciously, Sharma, a four-time Rajya Sabha member, expressed, "Contesting from Kangra was a splendid experience. I accept my defeat humbly and congratulate Rajiv Bharadwaj for his success." He extended gratitude to the Congress leadership and colleagues for their trust, acknowledging that Kangra was historically a BJP stronghold. "I am thankful to the people of Kangra and Chamba for their love and affection," he added. The Kangra parliamentary constituency comprises 13 assembly segments from Kangra district and four from Chamba district.
Lok Sabha Election Results 2024: Shiromani Akali Dal leader Harsimrat Kaur Badal wins from Bathinda
Shiromani Akali Dal (SAD) leader Harsimrat Kaur Badal won from Punjab's Bathinda Lok Sabha seat.
Election Results 2024: 'INDIA bloc will take a final call', Rahul Gandhi on sitting in Opposition or taking shot at govt formation
Rahul Gandhi, expressing his first reactions to the impressive performance of his party and the INDIA bloc partners in the Lok Sabha elections, stated on Tuesday that it was a struggle to safeguard the Constitution and its institutions from the continuous assault of the ruling party. Regarding whether to sit in the Opposition or take steps towards forming a government at the Centre, Rahul Gandhi mentioned that the next course of action would be decided during the upcoming INDIA bloc meeting scheduled for Wednesday. During a press conference on Tuesday evening, Rahul Gandhi emphasized that the Congress consistently raised concerns about the 'erosion' of Constitutional institutions, and the election results affirmed the perception that the 'Constitution is in peril'. He further commented, “The election outcomes have unequivocally sent a message that the people do not endorse the leadership of PM Modi and HM Amit Shah.” Acknowledging a ‘portion of the media’, he appreciated their contribution to the battle against the 'authoritarian' regime. “While some were overt in their efforts, others clandestinely supported the cause,” he remarked. An evidently jubilant Rahul Gandhi — who secured victory in both the Lok Sabha constituencies he contested, from Kerala's Wayanad and Raebareli in Uttar Pradesh, with significant margins — also extended congratulations to the INDIA bloc partners for their strong performance in the Lok Sabha polls. Congress President Mallikarjun Kharge termed the election results as a ‘political and moral setback’ for the 'individual' (Narendra Modi) who sought votes in his name. “Congress fought the elections under extremely challenging circumstances. Our financial resources were restricted, and those who opposed the oppressive regime were silenced. Nevertheless, we continued the struggle and presented a formidable opposition against the authoritarian regime,” Kharge asserted.
Lok Sabha Election Results 2024: Tejasvi Surya wins from Karnataka's Banglore South
BJP Yuva Morcha national president and sitting MP, Tejasvi Surya won from Karnataka's Banglore South Lok Sabha constituency.
Lok Sabha Election Results 2024: Dimple Yadav wins from Mainpuri Lok Sabha seat, Akhilesh leads in Kannauj

2024 Election Results: Dimple Yadav wins from Mainpuri Lok Sabha seat, Akhilesh leads in Kannauj
Dimple Yadav, wife of Akhilesh Yadav, has emerged victorious from the Mainpuri Lok Sabha seat, while Akhilesh and three other members of the Yadav clan are comfortably leading in their respective constituencies, as per Election Commission data. The Samajwadi Party (SP) had fielded five members of the Yadav family in the Lok Sabha elections. Akhilesh Yadav is leading by a significant margin of 1,70,076 votes over BJP's Subrat Pathak in Kannauj, according to the latest figures from the EC's website at 7 pm. Dimple secured victory from the Mainpuri Lok Sabha seat by a substantial margin of 2,21,639 votes, defeating her nearest rival BJP's Jaiveer Singh. She garnered 5,98,526 votes, while Singh received 3,76,887 votes. BSP candidate Shiv Prasad Yadav managed to secure 66,814 votes. In Azamgarh, SP's Dharmendra Yadav is leading by a margin of 1,61,035 votes over BJP's Dinesh Lal Yadav 'Nirahua'. Meanwhile, in Firozabad, SP leader Ram Gopal Yadav's son Akshay Yadav is leading by a margin of 89,312 votes against BJP's Vishwadeep Singh. In Badaun, SP leader Shivpal Yadav's son Aditya Yadav is leading over BJP's Durvijay Singh Shakya by 35,252 votes, as of 7 pm. Initially, the party had nominated Shivpal for this seat, but later it was given to his son Aditya.
Election Results: SP leader Dimple Yadav receives winning certificate as she wins from Mainpuri seat
SP leader Dimple Yadav received a winning certificate as she won from Uttar Pradesh's Mainpuri Lok Sabha seat.
2024 India Election Results: Dalit leader Virendra Kumar clinches eighth term in Lok Sabha, Pankaj Choudhary set for seventh
Union Minister Virendra Kumar, a prominent Dalit leader, has secured victory in the Tikamgarh constituency in Madhya Pradesh for the eighth consecutive time. Similarly, Pankaj Choudhary, a Union minister of state for finance and a prominent OBC figure, is on track to win his seventh term in the Lok Sabha from Maharajganj in Uttar Pradesh, leading by over 36,000 votes as of 6 pm. Several other candidates are also poised to secure multiple terms in the Lok Sabha: BJP's Inderjit Singh, a five-time parliamentarian, is leading in Gurgaon by a margin of 77,594 votes. Former Madhya Pradesh Chief Minister Shivraj Chouhan, contesting from Vidisha, is set to secure a sixth term, leading by over 8.21 lakh votes. Trinamool Congress' Sudip Bandhopadhyay from Kolkata Uttar is likely to win his sixth term, leading by over 49,000 votes. AIMIM Chief Asaduddin Owaisi is likely to retain the Hyderabad seat for a fifth term, leading by over 3.38 lakh votes. Shiromani Akali Dal's Harsimrat Kaur Badal is leading in Bhatinda and may secure her fourth term, with a margin of 50,000 votes. Congress leader Shashi Tharoor has retained the Thiruvananthapuram seat for the fourth consecutive time, with a margin of 16,077 votes. JDU's Nalanda MP Kaushalendra Kumar is heading for a fourth term, leading by over 1,35,608 votes. Additionally, several candidates are set to secure a hat-trick: Prime Minister Narendra Modi is leading in Varanasi. Union Minister Nitin Gadkari is leading in Nagpur. BJP leaders Jitendra Singh from Udhampur, Jugal Kishore from Jammu, Bhola Singh from Bulandhshar, and Shiv Sena's Shrirang Barne from Maval in Mumbai are also leading. Union Minister Rajnath Singh is leading in Lucknow. BJP's Mahesh Sharma from Gautam Buddha Nagar, Sakshi Maharaj from Unnao, Hema Malini from Mathura, and Satish Kumar Gautam from Aligarh are also poised for victory.
India Election Results 2024: BJP concedes defeat in Ayodhya, where PM Modi opened grand Ram temple
The Bharatiya Janata Party (BJP) suffered a significant setback in Uttar Pradesh, particularly in the Ayodhya constituency, where the inauguration of a grand Hindu temple by Prime Minister Narendra Modi just months earlier was seen as a crucial event for the party's electoral prospects. Despite the high-profile temple inauguration dedicated to Lord Ram, the BJP appears to be facing heavy losses in the key state. The opposition Samajwadi Party and Congress are leading in more than half of Uttar Pradesh's 80 seats, including in Ayodhya city within the Faizabad constituency. The temple inauguration fulfilled a longstanding promise by the BJP, which had made it a centerpiece of its campaign rhetoric during the extensive election period in the Hindu-majority nation. However, despite the symbolic significance of the temple, voters seem to have prioritized concerns such as unemployment and high inflation over religious issues. The incumbent BJP lawmaker from Faizabad, Lallu Singh, expressed regret to party workers, acknowledging the party's failure to secure victory in the Ayodhya parliamentary region. Singh had been elected to parliament twice before, in 2014 and 2019, during previous BJP electoral successes in Uttar Pradesh. However, according to the latest trends from the Election Commission, there has been a reduction in the BJP's seat count in the state, raising questions about the effectiveness of religious appeals in the face of pressing economic concerns. Some analysts suggest that voters were dissatisfied with the BJP's performance on developmental issues, despite the significance of the temple inauguration. Local sentiments in Ayodhya also reflect a mix of satisfaction with the temple's construction and frustration over issues such as inadequate compensation for businesses affected by the redevelopment of the area. This suggests that voters are not solely swayed by religious or caste-based politics but also prioritize tangible development and economic progress. The construction of the Ram temple followed a decades-long dispute over the site, culminating in a Supreme Court order for its construction after the demolition of a historic mosque in 1992. While the temple's completion was a significant event, its electoral impact underscores the complexity of voter priorities in contemporary India.
Lok Sabha Election Results 2024 LIVE: Former Punjab CM Charanjit Channi wins from Jalandhar, BJP's Rinku finishes second

India Lok Sabha Election Results 2024: Sule thanks people of Baramati for supporting her in LS polls
NCP (SP) candidate Supriya Sule, poised for victory in the Baramati Lok Sabha seat, expressed her gratitude to the people of her constituency for their overwhelming support. She dedicated her impending win to their unwavering backing. The electoral battle for the Baramati seat, traditionally held by the Pawar family, gained significant attention as Sunetra Pawar, wife of Sule's cousin Ajit Pawar, contested against her. This marked the first instance of two Pawar family members competing in an election. Sule's current lead in Baramati exceeds 40,000 votes, with her securing 2,93,739 votes compared to Sunetra Pawar's 2,52,902 votes. In her remarks, Sule emphasized the importance of unity and collective responsibility post-election. She urged for harmony and avoidance of past electoral tensions, asserting that such occurrences were not in line with Maharashtra's political ethos. Sule stressed the need to uphold the honor, pride, and cultural heritage of Maharashtra throughout the electoral process. Reflecting on the intense campaign witnessed during the Lok Sabha elections, she emphasized the importance of conducting future elections with dignity and respect. Sule characterized her victory and the Maha Vikas Aghadi's success as triumphs for the people. She acknowledged the steadfast support of party workers, attributing the party's strength to their dedication, particularly during challenging times.
Lok Sabha Election Results LIVE: Mixed bag results for next generation of political families
In the 2024 Lok Sabha elections, the next generation of political dynasties has shown a mixed performance, with some candidates poised for victory while others face challenging odds. Among those securing a favorable outcome, BJP's Karan Bhushan Singh, son of former Wrestling Federation of India chief Brij Bhushan Sharan Singh, emerged victorious in Kaiserganj, Uttar Pradesh, garnering over 5,71,263 votes. Bansuri Swaraj, daughter of the late BJP stalwart Sushma Swaraj, is leading with 4,19,071 votes from the New Delhi constituency. In Maharashtra, Shrikant Shinde, son of Chief Minister Eknath Shinde from the Shiv Sena, maintains a significant lead in the Kalyan seat, with a margin of over 2.5 lakh votes. However, not all political scions have fared as well. Suspended JD(S) leader Prajwal Revanna, grandson of former Prime Minister H.D. Deve Gowda, trailed by over 42,000 votes from the Hassan Lok Sabha seat in Karnataka. Similarly, Rohini Acharya, daughter of RJD supremo Lalu Prasad, faced tough competition in Saran against BJP's Rajiv Pratap Rudy. On the other hand, Congress president M. Mallikarjun Kharge's son-in-law Radhakrishna Doddamani clinched victory in the Gulbarga Lok Sabha seat in Karnataka with a margin of 27,205 votes. Anil Antony, son of senior Congress leader A.K. Antony, maintained a lead in Pathanamthitta Lok Sabha constituency in Kerala, securing over 3.67 lakh votes. Soumendu Adhikari, younger brother of BJP's Suvendu Adhikari, also held a lead in Kanthi, West Bengal. In West Bengal's Maldaha Dakshin constituency, Isha Khan Choudhury of the Congress, son of former Union minister Abu Hasem Khan Choudhury, led with 5,61,330 votes. While some political scions celebrate their victories, others face the challenge of navigating through a competitive electoral landscape.
India Election 2024 Results | Cong's K L Sharma wins Amethi Lok Sabha seat by defeating Smriti Irani by margin of 1,66,022 votes: EC
In a significant electoral upset, Congress candidate K.L. Sharma emerged victorious in the Amethi Lok Sabha constituency, defeating Union Minister Smriti Irani by a substantial margin of 1,66,022 votes, as confirmed by the Election Commission. This outcome marks a notable reversal of fortune in a constituency that garnered considerable attention due to its historical significance and high-profile candidates.
India Lok Sabha Election Results 2024: BJP ahead in 10 of 11 LS seats in Chhattisgarh; minister Agrawal leads, Baghel trails
The ruling Bharatiya Janata Party (BJP) maintained a commanding lead in 10 out of the 11 Lok Sabha constituencies in Chhattisgarh, as per the latest trends emerging on Tuesday. State Minister Brijmohan Agrawal notably surged ahead by over 5 lakh votes against his closest Congress competitor in the prestigious Raipur seat. As the counting of votes commenced at 33 centers early Tuesday morning, the BJP candidate Agrawal secured an impressive 9,61,906 votes, leading by a significant margin of 5,23,644 votes over Congress nominee Vikas Upadhyay in Raipur. In the Durg seat, BJP's incumbent Lok Sabha MP Vijay Baghel maintained a considerable lead of 4,25,129 votes over Congress's Rajendra Sahu. Meanwhile, in the closely watched Rajnandgaon constituency, former Chief Minister and Congress candidate Bhupesh Baghel trailed by a margin of 44,621 votes against BJP's sitting MP Santosh Pandey. In the Bastar seat, which is afflicted by Naxalite insurgency and reserved for Scheduled Tribes, BJP's Mahesh Kashyap held a lead of 55,105 votes over Congress's prominent leader Kawasi Lakhma. Other significant leads include BJP's Tokhan Sahu in Bilaspur, Chintamani Maharaj in Surguja, Radheshyam Rathiya in Raigarh, Rupkumari Chaudhary in Mahasamund, and Bhojraj Nag in Kanker. The Congress managed to secure a lead only in the Korba seat, where sitting MP Jyotsna Mahant held a margin of 38,372 votes over BJP's Saroj Pandey. These developments mark a substantial electoral performance for the BJP in Chhattisgarh, where in the 2019 polls, the party had won nine Lok Sabha seats compared to Congress's two.
Election Results 2024 LIVE | INDIA bloc to take call Wednesday on approaching former partners: Rahul
The INDIA bloc, led by Congress leader Rahul Gandhi, is slated to convene on Wednesday to deliberate on whether to engage with former partners such as the JD(U) and the TDP in exploring possibilities for government formation at the Centre. Addressing a press conference, Gandhi emphasized the forthcoming meeting with alliance members to deliberate on this matter. When questioned about the potential outreach to parties affiliated with the NDA, Gandhi stated, "We are going to have a meeting with our partners tomorrow. These questions will be raised and answered there." He underscored the importance of collective decision-making within the alliance, affirming, "We won't say anything without asking the opinion of our allies. Our alliance will decide tomorrow, and whatever they decide, we will act on that." Reflecting on the broader significance of the general elections, Gandhi characterized them as a battle to safeguard the Constitution, noting, "India's poorest and backward stood up to save the Constitution."
Election Results 2024: PM Narendra Modi should immediately resign as he has lost credibility, says West Bengal CM Mamata Banerjee
Following a remarkable victory in West Bengal, Chief Minister Mamata Banerjee stated that Prime Minister Narendra Modi should step down due to a loss of credibility. After months of intense competition in the state, the Mamata Banerjee-led Trinamool Congress is leading with 29 out of 42 seats. The BJP holds 12 seats, and Congress has secured 1 seat, according to the latest updates from the Election Commission of India.
Lok Sabha election results 2024: What Rahul Gandhi said on chances of government formation by INDIA bloc
"We will hold a meeting with our alliance partners tomorrow. These questions will be raised and answered there. We won't make any statements without asking our alliance partners," Rahul Gandhi said.

COMMENTS
If you decide or can figure out which data comparison you want to make, choosing the right chart type is very easy: Pie, doughnut, or area: Use for part-to-whole data comparison. Bar, cylinder, cone, or pyramid: Use for a whole-to-whole data comparison. Line or column: Use for a time-series data comparison. Scatter or bubble: Use for a correlation data comparison in Excel.
6. Add an image. Whether it's a photograph, an artistic sketch or your logo, images go a long way in making your spreadsheet better. Images make your presentation look official and possess the professional feel in many of the beautiful presentations you have seen. Pictures speak a thousand words.
TheJoelTruth. While a good presentation has data, data alone doesn't guarantee a good presentation. It's all about how that data is presented. The quickest way to confuse your audience is by ...
To tailor the presentation, right-click the chart body and click Format Data Series. In the pane that appears, change the Doughnut Hole Size value to somewhere around 60%. (I find the default 75% ...
Detailed Steps to Create Engaging Presentations Using Excel. Set Your Objectives. Clearly define the purpose of your presentation. Identify the core message you want to convey. Understand your audience's needs and expectations. Set actionable goals for what your presentation should achieve.
To create a pie chart in Excel: Select the data you want to visualize. From the " Insert " tab, choose " Pie " from the chart options. You can customize your chart by changing the colors, adding labels, and adjusting other settings in the " Format Chart Area " pane. Here's a video guide on how to create a donut chart:
Follow these steps to create a pivot table: Select your data: Before creating a pivot table, you need to select the data range that you want to analyze. Insert a pivot table: Go to the "Insert" tab and click on "PivotTable." This will open a dialog box where you can select the data range for your pivot table.
Tips for Creating Visualizations in Excel. 1. Choose the Right Type of Visualization. To create an effective data visualization, it's critical to choose the right type of chart or graph. Consider the type of data you're using, the size of your dataset, and your intended audience.
Creating PivotCharts. PivotCharts are a powerful feature in Excel that allows you to visualize data from pivot tables. By summarizing and aggregating data, pivot tables provide a comprehensive overview that can be transformed into dynamic and interactive charts. Utilizing PivotCharts enables you to explore and analyze complex datasets with ease.
Click the arrow at the intersection of the row and column labels to select the whole sheet, then apply the cell fill color. I'm using a dark indigo, providing a visually appealing contrast for my charts and data elements. This is on a newly inserted blank sheet in my Excel workbook. 3. Inserting Titles and Subtitles.
A. Creating a simple bar or pie chart using Excel's chart tools. Excel's chart tools make it easy to create visually stunning bar or pie charts to represent your data. Follow these simple steps: Select your data: Start by selecting the data that you want to include in your chart. This will typically be a range of cells containing your data.
See Adding a background image to the spreadsheet for more details. 3. Use conditional formatting to highlight cells in the worksheet: See Applying Conditional Formatting for more details. 4. Use the drop-down list to simplify entering a value from the predefined set like countries, states, types, etc. See Creating a Drop-Down List in a Cell for ...
Let's discuss some Excel presentation tips that will help you present data in a compelling and visually appealing format. 1. Charts and Graphs. Effectively providing a visual summary of data using graphs and charts is an important presentation technique. But it's just as easy to make a confusing chart as it is to make a helpful one.
1. Data Processing. In this section, we will learn about data processing. This is the first step of data analysis and visualization. It has the following segments. 1.1. Data Collection. First, you have to collect information. The information should be collected in a systematic way from a trustworthy source.
Learn to create information-rich, visually compelling PowerPoint presentations driven by Excel data. ... and—best of all—easy to update. It all starts in Excel. Gini begins with an example ...
Then, head to the Insert tab and click "Recommended Charts" in the Charts section of the ribbon. Excel will analyze your data and provide recommendations in the Insert Chart window. On the Recommended Charts tab, you can review the suggestions on the left and then check out a preview and brief description on the right.
Select Analysis ToolPak from Add-ins and click on the Go. 5. Select the checkbox for the Analysis ToolPak and click OK. To access Analysis ToolPak Click on the Data tab and then from the Analysis group click On Data Analysis. The Analysis ToolPak adds the following functionality to Excel: · Anova: Single Factor.
A Guide to Effective Data Presentation. Financial analysts are required to present their findings in a neat, clear, and straightforward manner. They spend most of their time working with spreadsheets in MS Excel, building financial models, and crunching numbers.These models and calculations can be pretty extensive and complex and may only be understood by the analyst who created them.
Power Pivot is an Excel add-in you can use to perform powerful data analysis and create sophisticated data models. With Power Pivot, you can mash up large volumes of data from various sources, perform information analysis rapidly, and share insights easily. In both Excel and in Power Pivot, you can create a Data Model, a collection of tables ...
Excel offers a quicker way. Click the first cell, hold down the Ctrl key, and click a second cell. Look at the status bar at the bottom and you'll see the sum of the cells calculated for you. Keep ...
It's the identical range of data! The magic happens in the display of it. Charts are the key to success in the presentation of data and information. The table data above, transformed into a stunning, easy-to-read visual. How to Present Data and Numbers in Presentations. We've learned that the best way to present data is with charts.
Step 1: Define Your Data Hierarchy. While presenting data on the budget allocation, start by outlining the hierarchical structure. The sequence will be like the overall budget at the top, followed by departments, projects within each department, and finally, individual cost categories for each project. Example:
About this Guided Project. In this project, you will learn the foundation of data analysis with Microsoft Excel using sales data from a sample company. You will learn how to use sorting and filtering tools to reorganize your data and access specific information about your data. You will also learn about the use of functions like IF and VLOOKUP ...
Cell References. A cell reference is the name of a cell or range of cells in your Excel workbook, and you can use these in formulas. For example, if you click cell A1 and type. =SUM(A2+A3) into the formula bar, you're telling Excel to reference cells A2 and A3, and add their values together. There are three types of cell references in Excel ...
Linking Excel Data to PowerPoint. To ensure our data remains up-to-date, linking is the best solution. Open both Excel and PowerPoint. Select the range of cells in Excel that we want to link, then copy it using Ctrl + C. Back in PowerPoint, right-click the target slide and choose the Paste Special option. Here, select Paste Link to create a ...
Excel also offers advanced functions that Google Sheets doesn't yet have, including the TAKE function (lookup and reference), the GROUPBY and PIVOTBY functions (data aggregation), and STOCKHISTORY (financial).. There are some advanced data analysis tools at your disposal if you're using Google Sheets through an organization or education edition—Google's Connected Sheets lets you analyze data ...
Supply Chain Analytics. Specialization. Learn Data Science or improve your skills online today. Choose from a wide range of Data Science courses offered from top universities and industry leaders. Our Data Science courses are perfect for individuals or for corporate Data Science training to upskill your workforce.
Free Data Science Courses. These free Data Science courses can be a great way to learn skills or launch a career in data science. They will equip you to interpret and analyse data and communicate actionable data derivations. Enrol for free and get a certificate upon completion. Premium programs from top universities.
All the news and tips you need to get the most out of services, apps and software you use every day. Explore by Topics. All Tech Mobile Home Entertainment VPN Computing Services & Software Gaming ...
Lok Sabha Election Results 2024: Follow live updates on the vote counting process and get the latest developments on the BJP-led NDA and the opposition's INDIA bloc. Stay with TOI for real-time ...