Everything You Need to Know About Acrylic Painting
Everything you need to know about acrylic painting.
Acrylic paint is a versatile medium that allows artists to bring their artistic vision to life. It offers the flexibility to create detailed work, layering, and textured impasto techniques. Not only is acrylic paint less expensive than oil paint, but it also provides great value for your money. In this article, we will explore the basics of acrylic painting, including color selection, types of paint, painting surfaces, brushes, palettes, and the painting process.

Choosing Colors
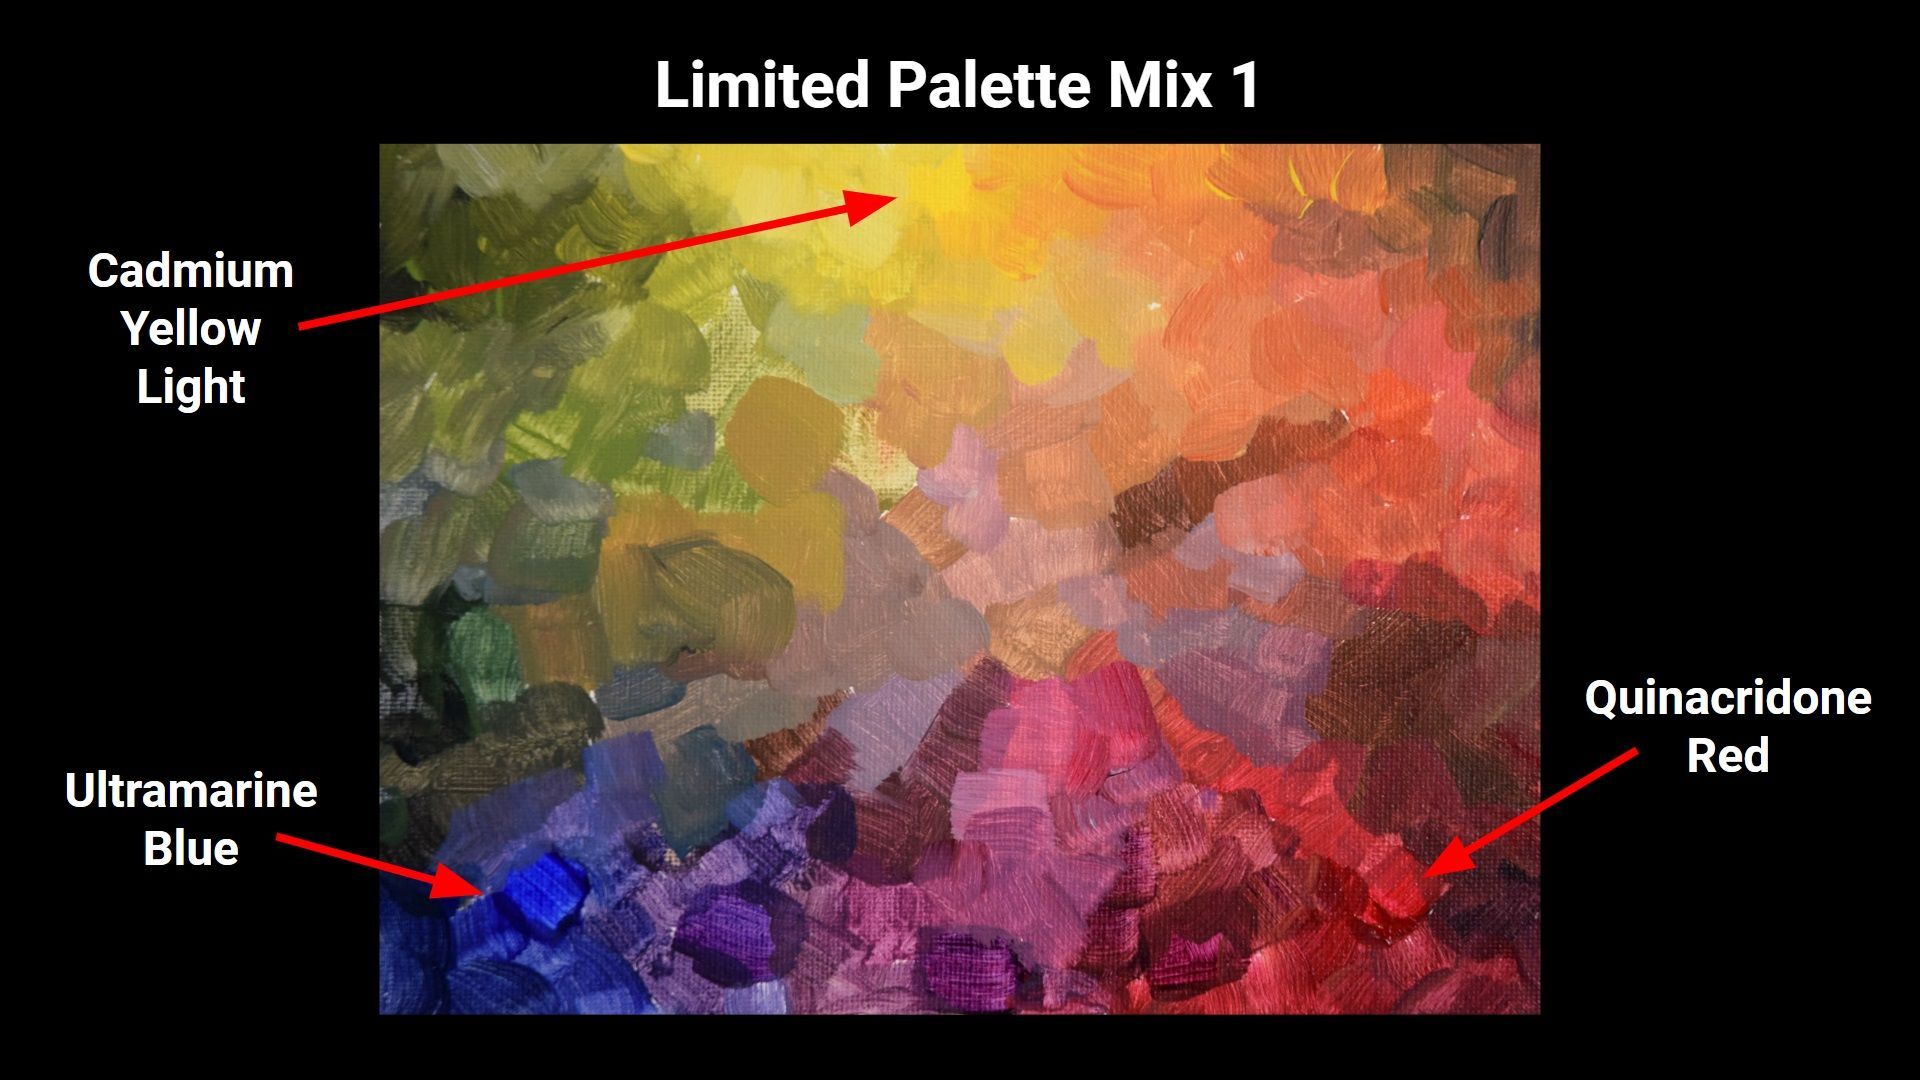
When it comes to choosing colors for your acrylic palette, you don't need to buy a large number of colors. In fact, you can create almost any color you want with just a few pigments. I recommend starting with a yellow, a red, and a blue, along with white and black. With these primary colors, you can mix a wide range of hues.
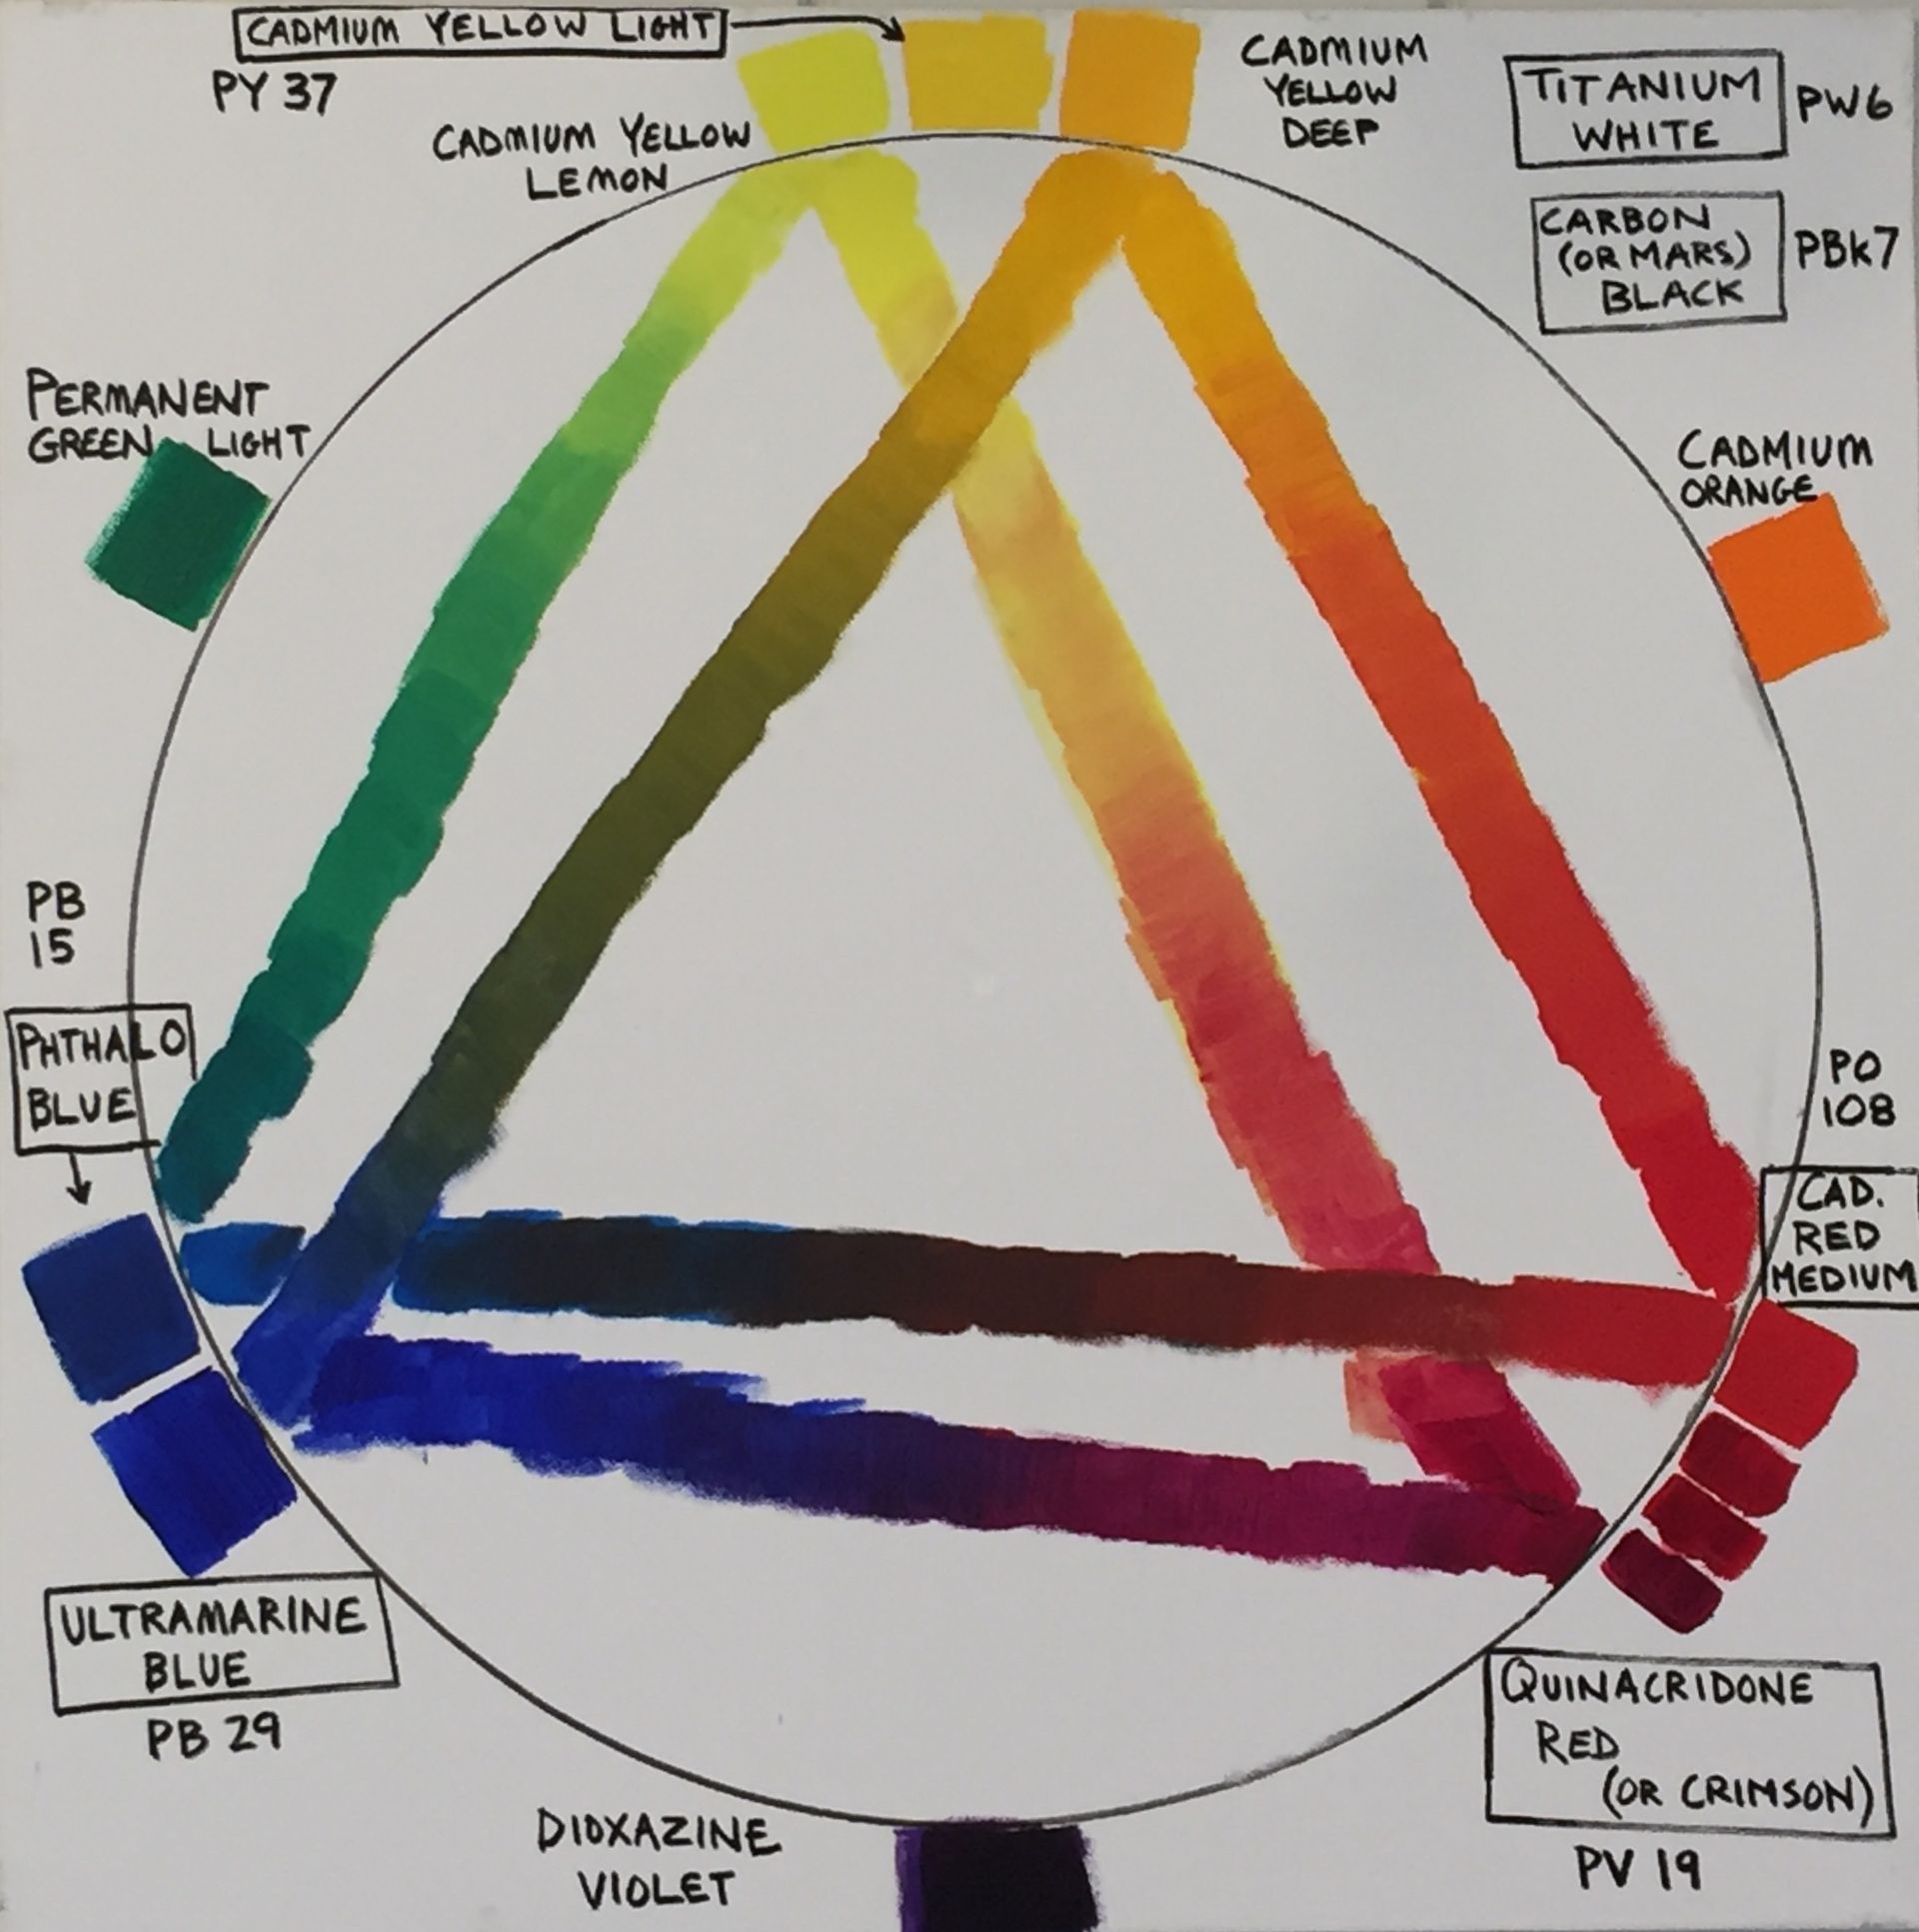
It's important to note that there are different variations of each primary color available in the market. Each combination of different primary colors creates a nuanced and unique shade. If you're unsure where to start, I recommend using cadmium yellow light, cadmium red, ultramarine blue, titanium white, and Mars black. However, the use of black in art is a topic of debate. Some artists argue that it can muddy colors and create an unnatural look. Ultimately, the decision to use black is up to you and your artistic preference.

If you want to create your own deep, dark black alternative, my favorite combination is phthalo green plus cadmium red. This mixture creates a beautiful and rich black. However, be cautious when using phthalo green, as it is a strong color and can easily overpower other pigments.
Types of Acrylic Paint
Acrylic paint comes in different consistencies, including heavy body, medium or soft body, and fluid acrylics. Heavy body acrylics have a thick consistency and are ideal for palette knife work or creating textured effects. Medium or soft body acrylics have a medium consistency, providing a balance between heavy body and fluid acrylics. Fluid acrylics, as the name suggests, are very thin and are great for creating washes and glazes. Personally, I use heavy body acrylics for my paintings.
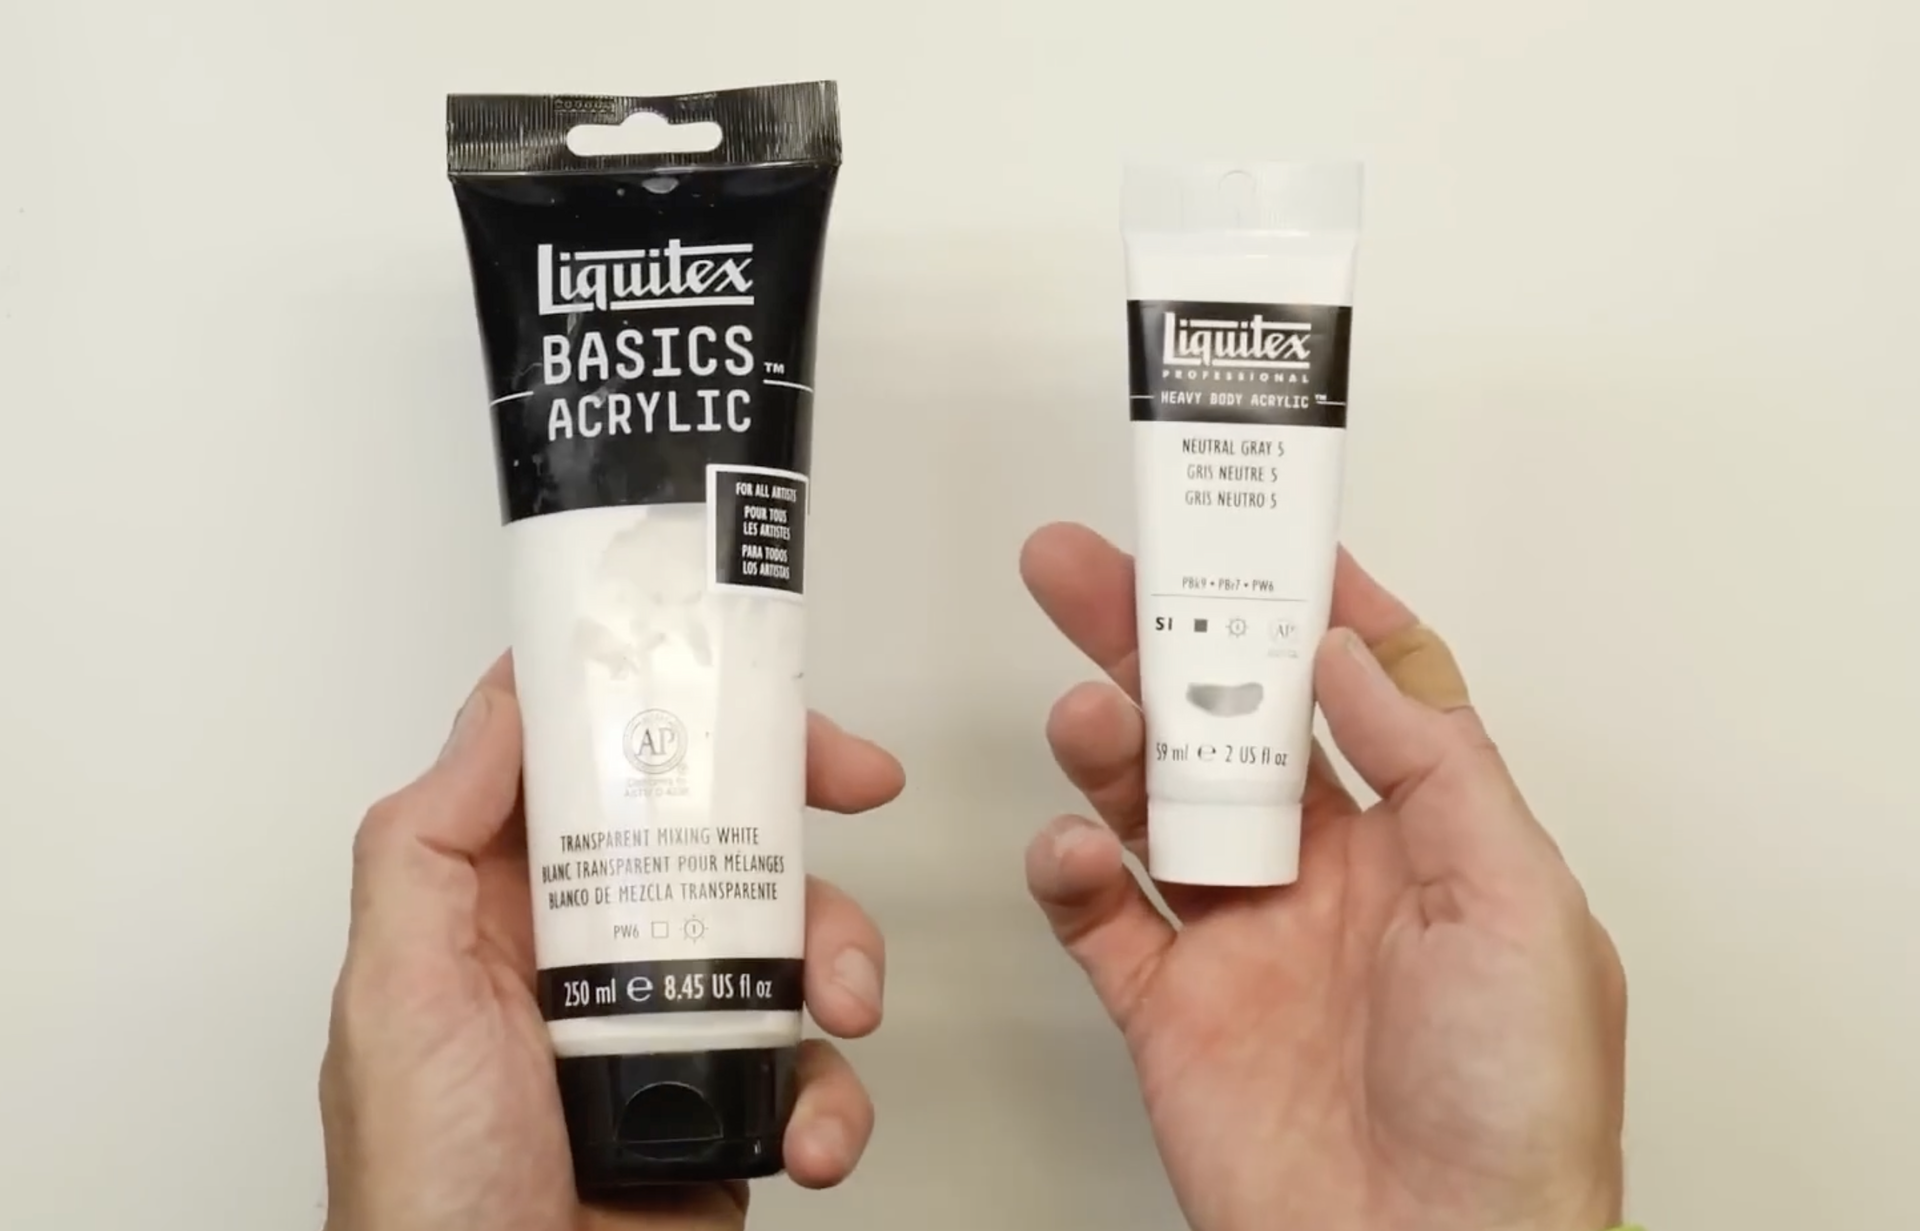
Student Grade vs. Artist Grade Paint
When shopping for acrylic paint, you may come across student grade and artist grade options. The main difference between the two is the amount of binder and pigment in the paint. Artist grade paint contains a higher concentration of pigment, resulting in better coverage and color intensity. I always recommend investing in artist grade paint whenever possible. However, if you're on a tight budget, make sure to at least get artist grade paint for titanium white and any yellow you use, as student grade cadmium yellow does not provide sufficient coverage.
Painting Surfaces
Acrylic paint can adhere to a variety of surfaces, giving you plenty of options for your artwork. The most popular surface for acrylic painting is canvas, which is versatile and comes in various sizes and mounted options. Canvas panels are also a great option, as they are lightweight and easy to transport. If you prefer a smoother surface, you can paint on wood or MDF (medium-density fiberboard). Just make sure to apply a layer of gesso to prepare the surface for painting.
Gesso: The Acrylic Primer
Gesso is an acrylic primer that prepares your surface for painting. Most canvases bought from stores already have gesso applied, so you don't need to buy gesso unless you're painting on wood or MDF. Gesso creates a smooth and even surface for your paint to adhere to, ensuring better color vibrancy and longevity.
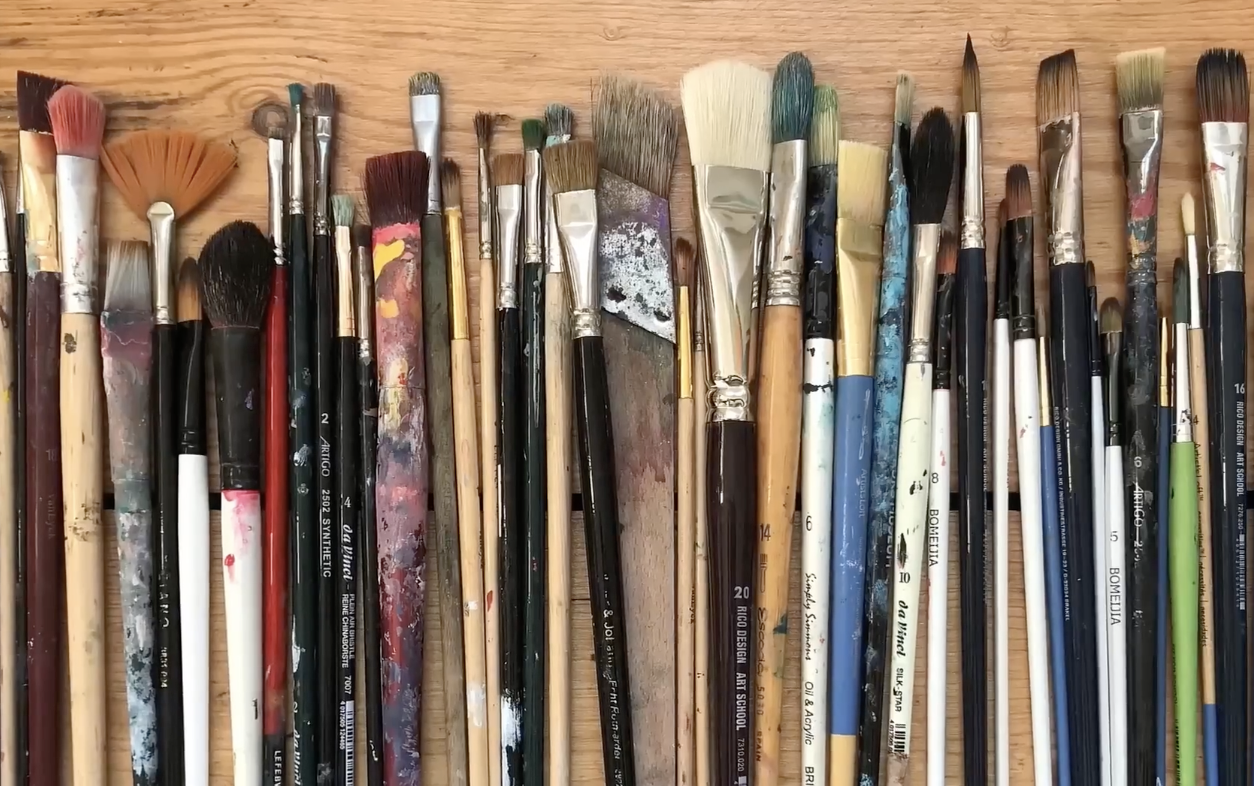
Brushes: Synthetic is the Way to Go
When it comes to brushes for acrylic painting, it's best to use synthetic brushes. Natural hair brushes, such as those made from hog bristle, are not suitable for acrylic paints. This is because natural hair brushes soak up water when cleaning, which can cause them to become misshapen and lose their effectiveness. Synthetic brushes, on the other hand, are designed to withstand the water used to clean off acrylic paint.
There are different types of brushes available, including flats, filberts, and rounds. The choice of brush type ultimately comes down to personal preference. I recommend buying a few brushes to start with and experimenting to see which ones you prefer. Princeton's Catalyst and Aspen series are both excellent options that offer high-quality synthetic brushes.
The Palette: Masterson Sta-Wet Palette
While you can use anything from a paper plate to glass as a palette, I highly recommend using the Masterson Sta-Wet Palette. This palette comes in different sizes and has a lid that can be sealed to keep your paints wet. It also comes with a special type of paper that soaks up water without deteriorating. Underneath the paper, there is a sponge that can be wet with water to keep your paints moist for a longer period of time.
For a detailed set-up guild for this palette, check out our article here !
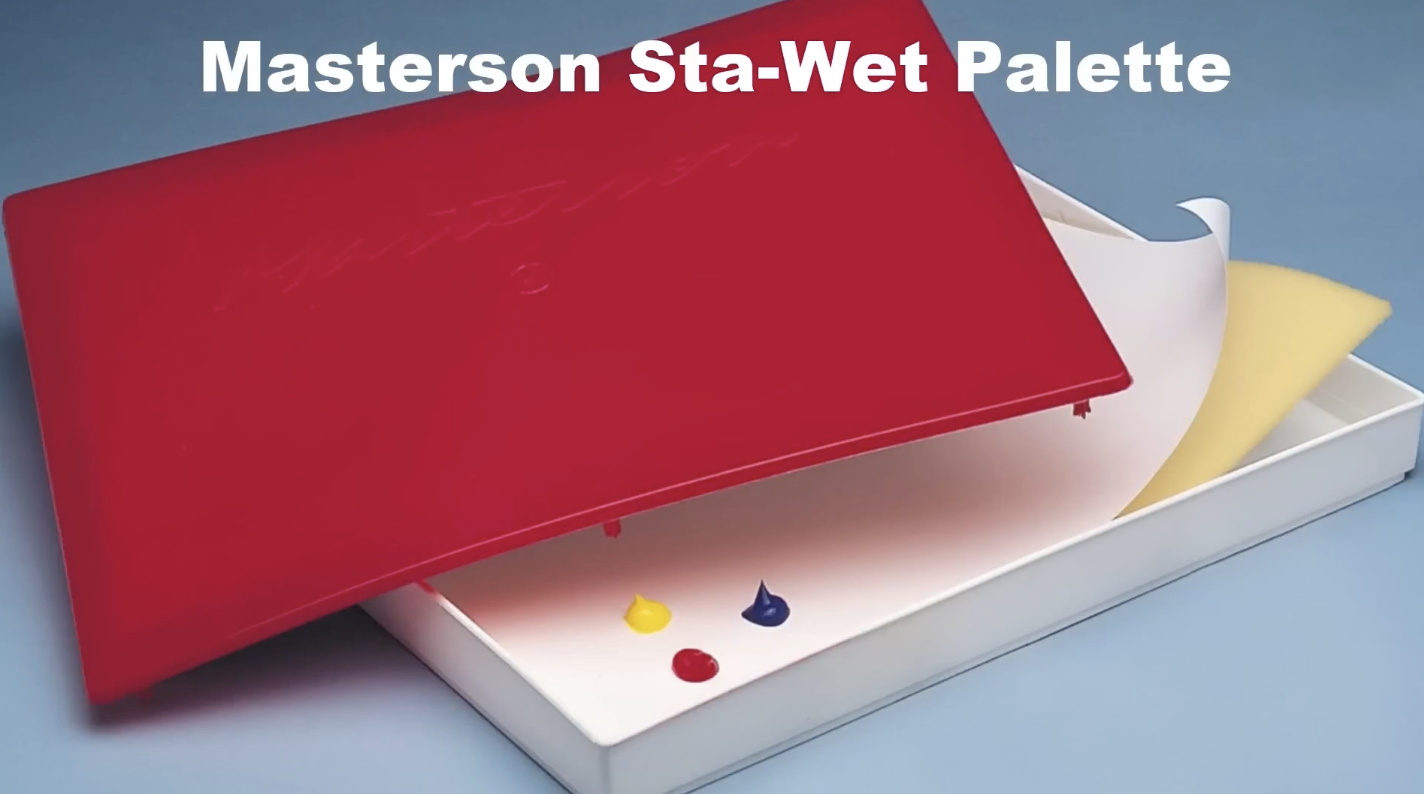
The Masterson Sta-Wet Palette allows you to mix and blend colors easily, giving you more time to create nuanced and harmonious paintings. When organizing your palette, it's helpful to think about color theory and how colors mix together. Place your primary colors (yellow, red, and blue) in the corners of your palette, and mix your secondary colors in between. Add black and double the amount of white in the corners, as white is often used in larger quantities when mixing with other colors.

When mixing colors, consider using complementary colors to create more grayish tones. For example, mixing red with green can result in beautiful grayish colors, especially when adding a touch of white. By organizing your palette in this way, you can easily go back to a specific color and figure out how you created it.
To learn how to mix colors effectively, create small charts by making as many combinations and mixtures of colors as possible. Write down the exact colors you're using and experiment with different sets of colors. This will help you understand how different colors work together and allow you to make informed choices when painting.
The Painting Process: A Five-Step Framework
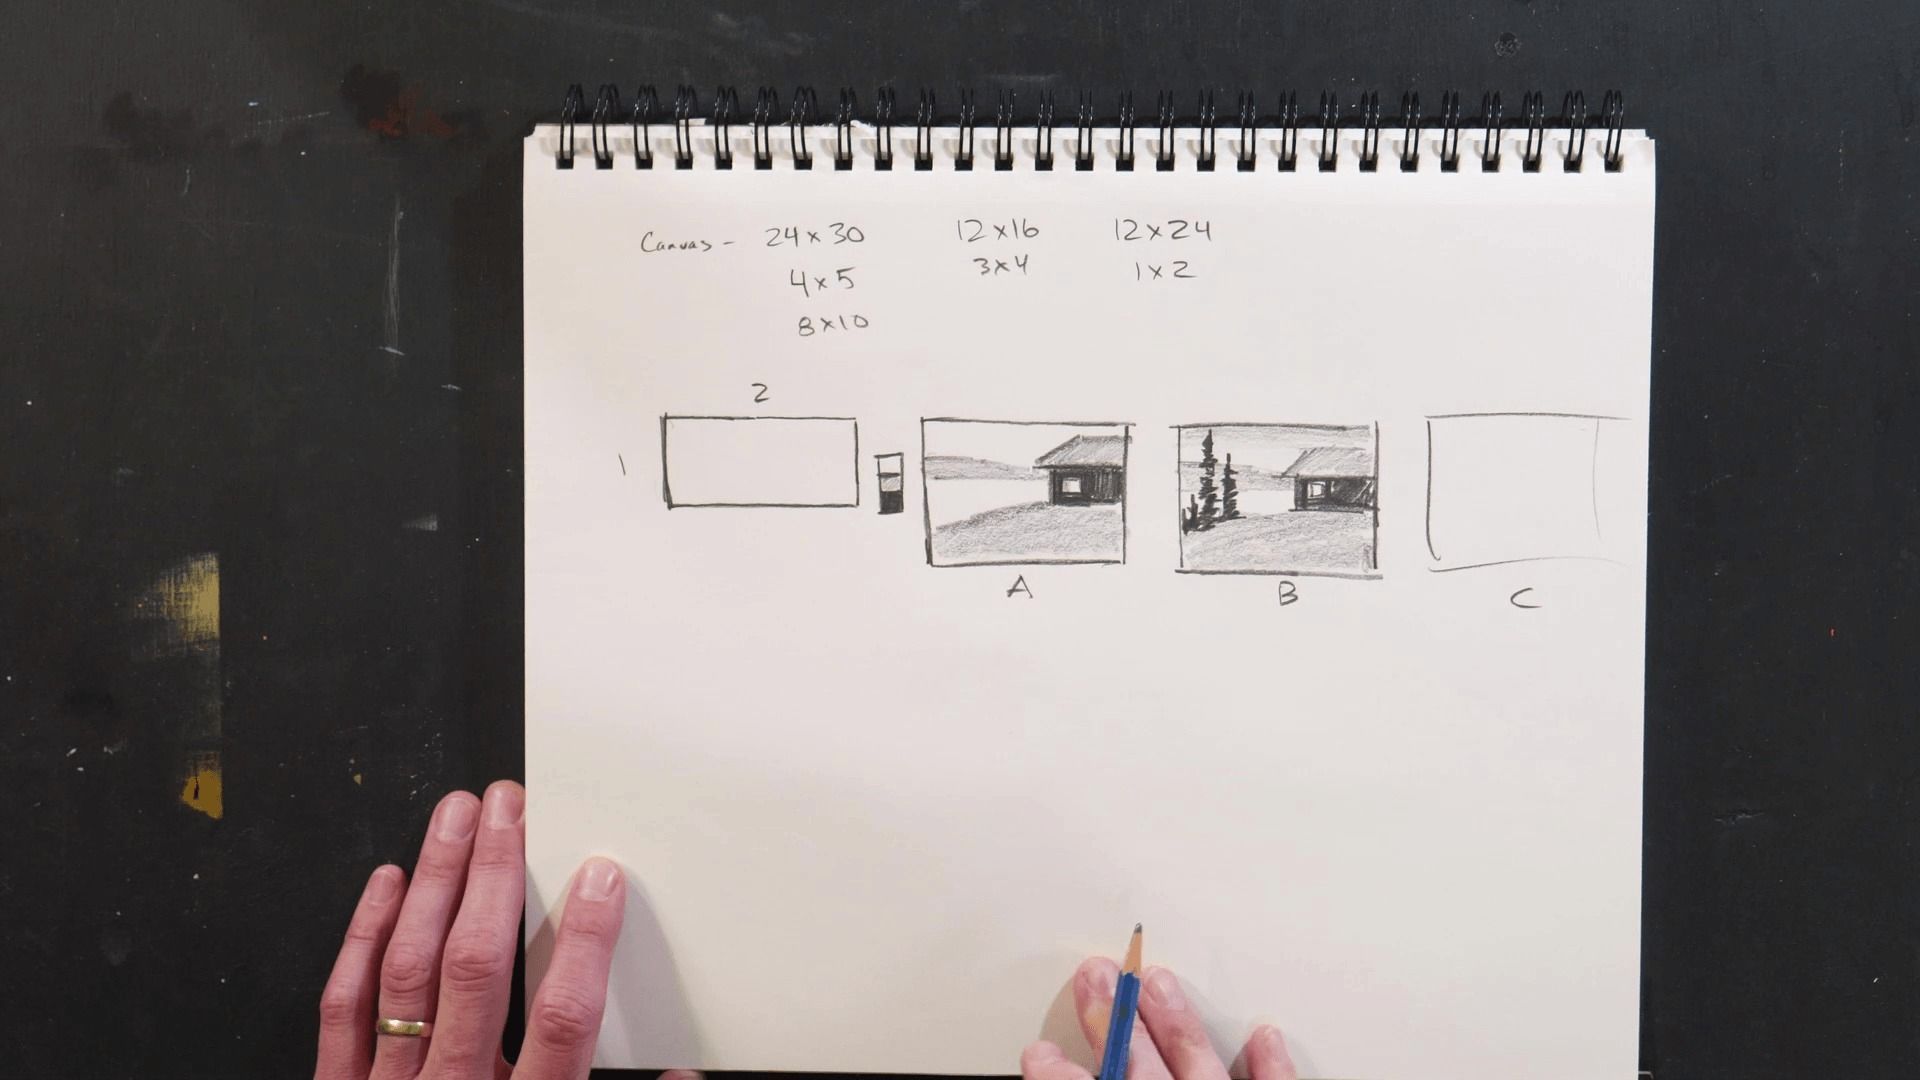
To achieve a successful painting, it's important to plan and have a clear vision of what you want to create. The first step is to design your painting. Take a few minutes to do a thumbnail sketch and work on the overall composition and design. This will save you time and frustration later on.
The second step is to draw your design onto your canvas or painting surface. Ensure that your drawing is accurate before moving on to the next step.
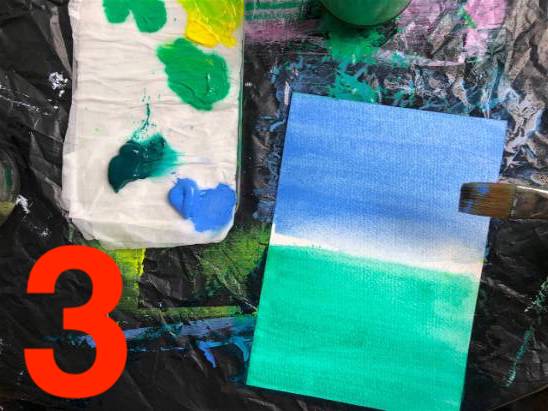
Next, block in the main colors and values of your painting. This step helps establish the overall tone and mood of your artwork.
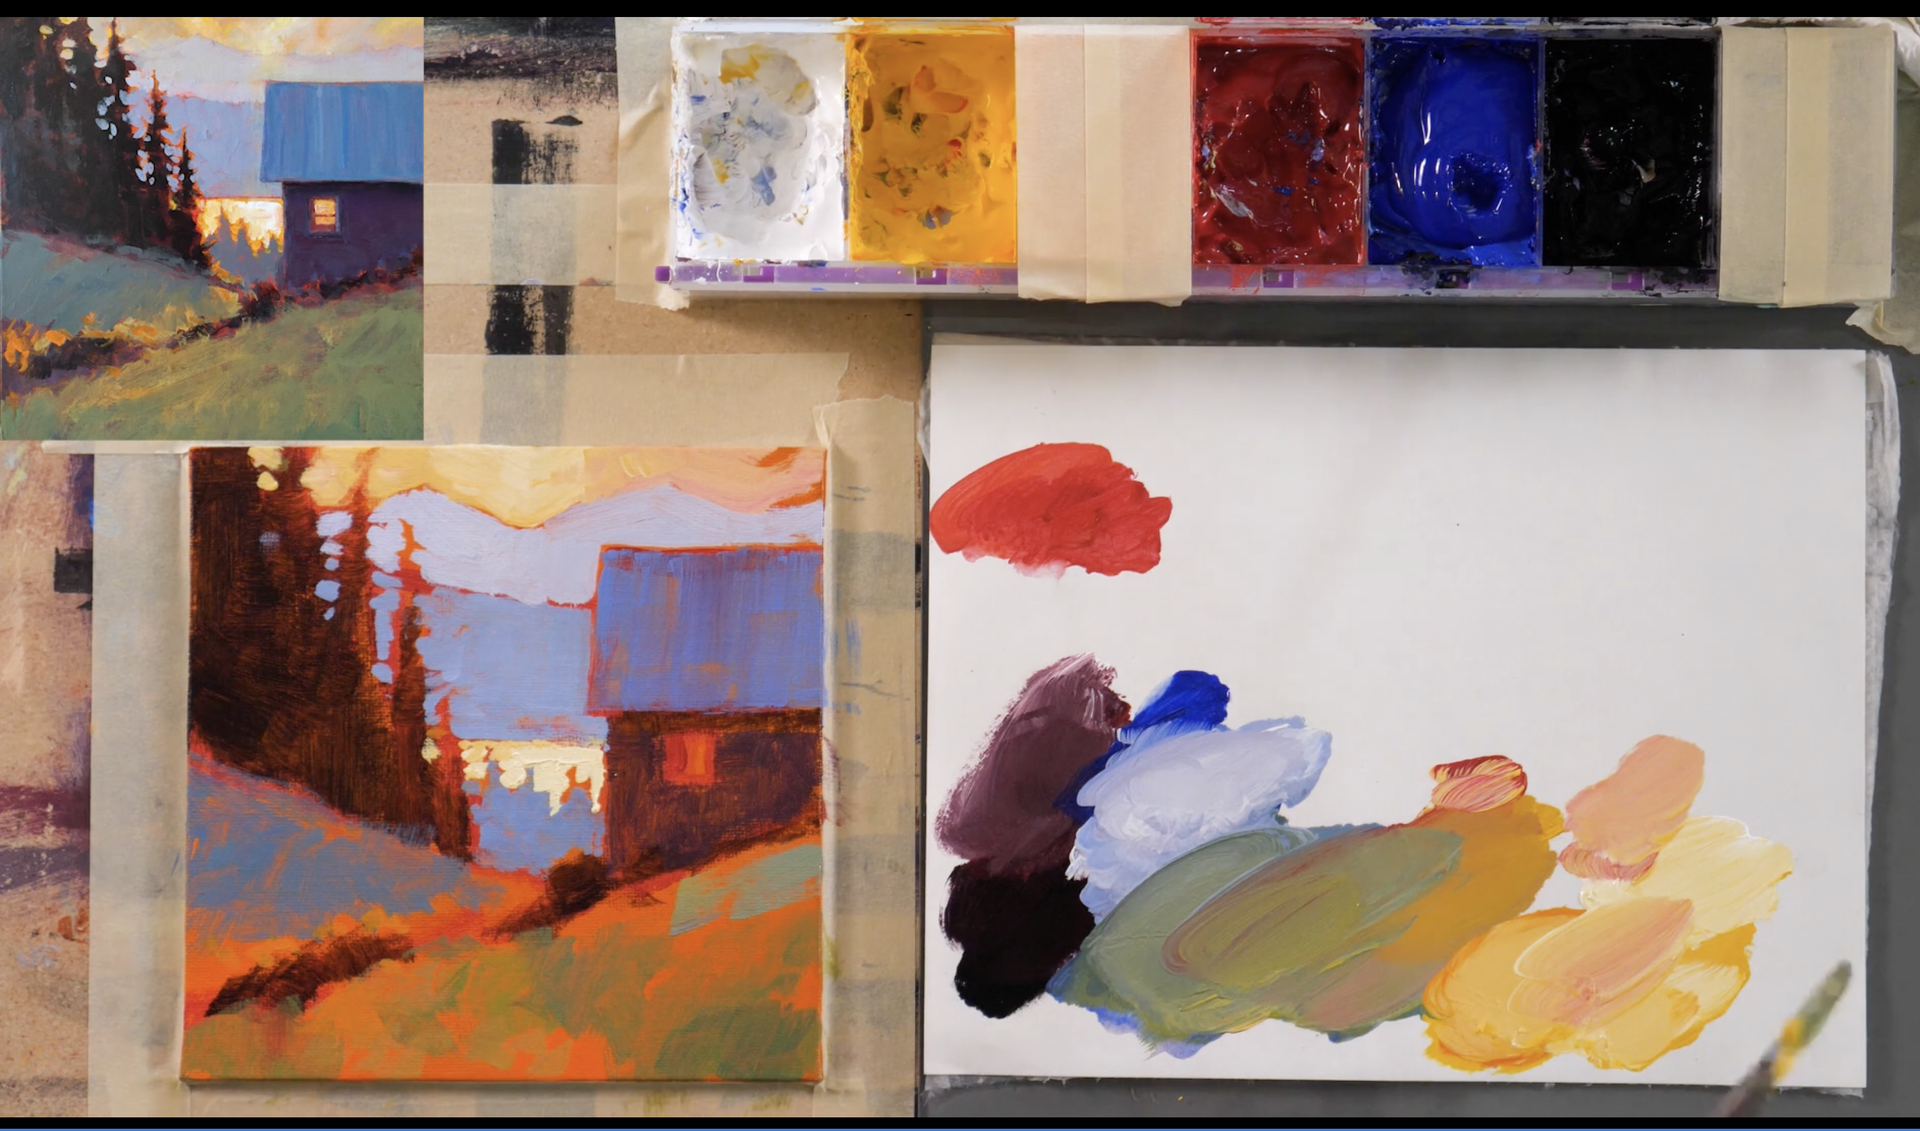
Once the main colors are blocked in, refine and adjust the values, shapes, and lighting. This is where you can add details and make any necessary corrections.
Finally, finish your painting by adding the final touches and refining any areas that need further attention. Take the time to evaluate each part of the painting along the way. If you notice any flaws or areas that need improvement, make the necessary corrections before moving on to the next step. By breaking up the painting process into these five steps, you can evaluate your progress and make adjustments as needed.
Out of all the steps in the painting process, I believe that the most important step is the first one: design. Having a strong and well-thought-out design sets the foundation for a successful painting. No matter how great your brush strokes or colors are, if the overall design is lacking, the painting will not be as impactful. Taking just five minutes at the beginning of your painting to work on the design and composition can save you hours of frustration later on.
Your Artistic Journey
As you embark on your creative journey, there are a few things that will greatly help you along the way. First, make a plan to paint and set aside dedicated time in your schedule for your artistic pursuits. Don't be ashamed to prioritize this time for yourself and your passion.
Second, find friends or a community to share your creative journey with. Painting is much more enjoyable when you have others to support and inspire you. Joining a group or finding like-minded individuals can provide valuable feedback and encouragement.
Third, never stop learning from others. Art is a continuous learning process, and there is always something new to discover. Be open to learning from other artists, whether through workshops, classes, or online resources. Embrace the role of a student, and you'll continue to grow and improve.
Fourth, don't be afraid to experiment and think outside the box. Try different techniques, tools, and approaches to push yourself beyond your comfort zone. Incorporate elements that you admire from other artists into your own work. This experimentation will lead to new discoveries and expand your artistic horizons.
Lastly, embrace mistakes and failures. They are an inevitable part of the creative process. Instead of being discouraged by mistakes, see them as opportunities for growth and learning. Set a goal to try new things and embrace the unexpected. By doing so, you'll open up new pathways of learning and discover new techniques and styles that you may love.
Above all, remember to have fun on your artistic journey. Painting is a creative and expressive outlet, and it should bring you joy and fulfillment. Embrace the process of growth and self-discovery as you explore your own unique artistic voice.
If you have any questions or need further guidance, feel free to email us at [email protected]. Also, be sure to visit acrylicuniversity.com, where we provide resources and encouragement for artists like you.
Remember, you are loved and believed in. Happy painting!

What I Learned From This Nocturne Master Copy

How to take a Painting From Good to GREAT

A Complete Guide on How to Paint Water with Acrylic Paints
Acrylic university.
We are your home for growing and flourishing in your art and creativity. Live classes, premium courses, mentoring, and the best art community out there.
Cookie Policy | Privacy | Terms of Service
Quick Links
All Rights Reserved | Acrylic University
Acrylic Painting Techniques: 19 Techniques to Improve Your Skills
Use these acrylic painting techniques to improve your art and elevate the appearance of your acrylic paintings.
For many of these techniques, you’ll only need your tube paint and brushes. But for some of the more advanced techniques, you may need extra mediums and slightly different tools such as softer brushes.
Learn how to make your acrylic paintings look more professional and achieve specific effects using these techniques.
Disclaimer: Fine Art Tutorials is a reader supported site. When you make purchases through links on this site, we may earn a small commission at no extra cost to you.
Acrylic painting techniques
For each technique, I’ll run through the supplies you need and how to try the technique yourself.
Create texture with the impasto acrylic painting technique

Impasto is an incredibly fun technique that artists use to create vibrant works with depth and texture.
What supplies do you need for the impasto technique using acrylic paint?
To create texture with acrylic paint, you don’t need too many extra supplies. All you really need is heavy body paint and stiff brushes. You won’t need to add any water to the paint mix.
Golden’s Heavy Body paint is high quality, highly pigmented, has a thick texture and retains brush strokes on the canvas.
When choosing a brush for the impasto technique, choose one that is stiff but springy. These Princeton Catalyst brushes emulate the stiff properties of hog hair, making it feel easy to move thick paint.
To add to the body of paint, or make it more thick and three dimensional in appearance, look at the Liquitex Modelling Paste . Apply thick paint with a palette knife , stiff brush or a silicone catalyst wedge .
How to paint with the impasto technique
To paint with the impasto technique, first think of how you will approach the painting.
One approach is layering texture, waiting for paint applications to dry in between. This way you can create depth and variety by using different colours layered on top of one another. By layering broken brush strokes on top of previous dried layers, the colours from the previous layers of the painting can shine through.
Think about the brush strokes and marks you’re making. Will you use short sharp strokes like Monet and Van Gogh, or pile the paint on creating almost sculptural pieces?
If you want to create vibrant colour combinations, you could even think about mixing the colour on the canvas, as opposed to mixing it on the palette first. Monet was famed for using colours straight from the tube and mixing them on the canvas. When looking at your reference, look for underlying colours and tones that you could incorporate into the painting.
For a more in depth look at this technique, with tips on choosing a subject and planning composition, refer to our impasto tutorial .

Artists who want to seamlessly blend colours onto their canvas usually gravitate towards oil paint due to its slow drying nature. However, it’s possible to increase the open working time of acrylic paint.
Use Golden Open Acrylic paints , as these dry at the same rate as oil paints (around 1-2 days). If you already have a set of acrylic paints, then you could extend their open working time with a medium. Any of the Golden Open Mediums will make paint dry slower.
Softer brushes are best for blending paint. If you use soft body acrylic paint , get an extra soft brush to blend colours together. The Da Vinci Casaneo in the square shape would work perfectly for this. A large slightly springier brush like the Isacryl brush in the flat or filbert shape would blend slightly thicker paint better.
For a more in depth look at how to blend acrylics and step by step guides using two different blending methods, take a look at our blending acrylic paint tutorial .
Alla Prima (wet on wet) with acrylic paint

Alla prima is the technique of applying layers of paint on top of wet layers. The painting, or section of the painting should be finished before the first application of paint dries.
It’s a fast, fun and spontaneous way of painting, that can yield gestural and textural results. Colours swirl together, appearing loose and painterly.
A drawback of acrylic paint that makes it difficult to use the alla prima technique is its fast drying nature. If you want to try painting wet on wet, you will need a slow drying medium , or to use Golden Open Acrylics . The slower the paint dries, the better. As it will give you longer to complete the painting. I also recommend using stiff brushes , especially in later stages of the painting as you will have to increase the thickness of paint in consecutive layers.
Start by blocking in colours, or by creating an underdrawing. Then layer paint onto the canvas in the colours that you see in your reference. Gradually increase the thickness of the paint as you apply more layers. The thickest and lightest highlights should be applied last.
If you make a mistake, scrape the paint away with a palette knife . Paint can be applied to your surface with a stiff brush, a palette knife or catalyst wedge.
Check out our alla prima painting guide to learn this technique in more detail.
Acrylic painting in layers
This is an approach to acrylic painting that goes hand in hand with blocking in, underpainting and glazing.
Acrylic paint dries fast, so it’s possible to create works with hard edges with relative speed. Increase the open working time of paint to create blended layers with a fluid retarder . By combining these techniques, creating layered pieces with a variety of hard and blended edges, you can create realistic looking artworks.
Blocking in acrylic painting technique

The only supplies you need for this technique are tube paint and a medium stiff brush . You can optionally thin your tube acrylic paint with water to make it runny in texture.
Blocking in an acrylic painting forms the first stage of the painting process. The purpose of this technique is to cover the canvas, so the white of the gesso ground isn’t visible. Block in basic shapes of colours you see in your reference.
For example, if you’re painting a mountain scene, a distant mountain may appear broadly blue-grey in tone with light grey highlights where snow is reflecting light. For the blocking in stage, you would paint the blue-grey colours. Then wait for it to dry and layer the lighter highlights on tops.
To be successful at using this technique, you’ll have to think of your painting in layers. You’ll have to see these layers in your painting reference.
For a more detailed tutorial, check out our blocking in technique guide .
Underpainting

The underpainting technique can be used with oil and acrylic paint.
The purpose of this technique is to create a monochromatic layer. Spread a layer of paint thinned with water evenly over the surface. This type of underpainting method is called a toned ground or imprimatura. It works well with transparent earth colours like burnt umber or burnt sienna. It functions to create a mid toned ground, which helps artists establish value relationships between colours more easily.
Another underpainting method is using a colour like burnt umber and titanium white to create a tonal underpainting. Establish the values, form and composition of a piece. Colour layers are then applied on top in glazes or opaque layers.
To learn more about this technique, read our underpainting tutoria l . It’s aimed at oil painters but all the techniques can be applied to acrylic painting.
Glazing acrylic paint
Glazing is the technique of applying transparent colours on top of one another to alter the colour profile of previous layers. This is a slightly more advanced technique than the previous two and can take some practice to master. It’s a famous technique in oil painting, used by old masters such as Rembrandt. This technique enabled artists to create detailed and realistic paintings.
There are many ways of using this technique. For example, change the colour temperature of a section of your painting to warm or cool. Apply a glaze over the entire painting to create a more unified appearance (almost like adding a filter to your painting). Use a glaze to deepen shadows or increase colour contrasts.
This technique is also useful for painting subtle shifts in skin tone. Burnt umber works wonderfully in shadows in portraits.
You could also use this technique to render details in a portrait. For example, use the transparency of the glaze to paint almost imperceptible pores on the skin, or fine wisps of hair.
As you can imagine, to paint such fine layers, you’ll need a medium to make paint runny and transparent. This glazing medium by Winsor & Newton increases the transparency and fluidity of the paint layer. It also strengthens the paint film. You’ll also need soft body acrylic paint, from a professional brand, like Golden’s Fluid Acrylic paints . Look out for colours that are transparent or semi transparent. Information about pigment transparency will be on the paint tube, or on the website. Another tool you will need to paint glazes is a soft brush. Isabey Isacryl brushes are soft, but are also springy.
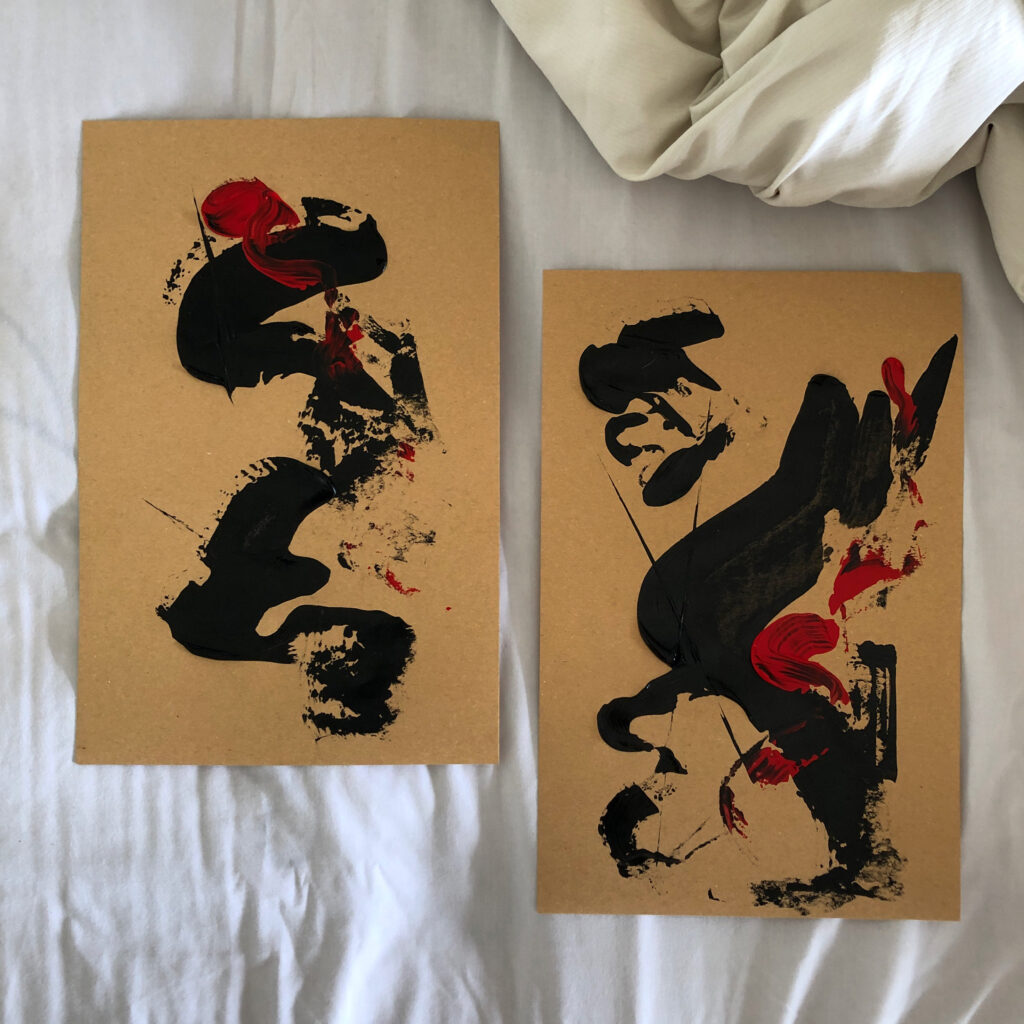
Apply colour to the surface without wetting the brush first. Wipe excess paint on a paper towel and create marks on your canvas. This technique can emulate the effects of charcoal and create dry, broken texture that lends itself to portrait painting.
Paint can be thinned with water to create washes that look similar to ink. Wet your brush, dip into the acrylic paint colour and spread evenly across the surface. This technique works well with slightly softer brushes like Isabey Isacryl .
Pouring acrylic paint
Pouring acrylic paint onto a surface is an incredibly satisfying technique to try, that can yield beautifully organic yet intricate looking results.
To create pour paintings, you’ll need a few different pour painting supplies . This includes Fluid Acrylic Paints and a pouring medium . Get cups, gloves, mixers and pouring strainers in this set . To achieve cells , you’ll need to mix a few drops of silicone oil in each colour cup. Then use a heat gun once poured onto the canvas to get rid of air bubbles. There are a multitude of different acrylic pouring techniques you can use, like dirty pour , flip cup , swiping and more!
Mix one colour per cup with the pour medium. You should read up on the ratio of medium to paint to use, find it on the pouring medium product page. For example, Schmincke specify to use their medium at any ratio up to 45% acrylic colour. Mix the medium with the paint in each cup using a stir stick. Then layer paint by pouring the individual cups one by one into a clean cup. Tip the cup with all the paint upside down onto the canvas. Then use the heat gun to get rid of bubbles.
For a more in depth tutorial, check out this beginner’s guide to acrylic pouring . If you want to find the best pouring mediums and paints for fluid art , check out our guide.
Airbrushing is a technique that can be used with Fluid Acrylic paint . You’ll also need an airbrush tool to spray paint onto canvas or paper. Use a medium, like Golden’s Airbrush Medium to reduce the viscosity of the paint.
Airbrush is an art in itself, the thin viscosity of Fluid Acrylic paint means it won’t clog in the airbrush tool. It’s recommended to use a nozzle of .2mm or higher and paint can be sprayed through an airbrush at 25-50 p.s.i.
The technique of airbrushing gives the artist superior control over the paint and ability to create subtle colour gradations. This technique allows artists to create realistic works and render fine details.
Other mark making and brushwork techniques
Apply paint in splatters.
Liquitex splatter brushes are made for this technique! The long bristles enable you to create unique splatter patterns.
To create splatter effects on the canvas, you’ll need a stiff brush with long bristles (like the Liquitex brush) and soft body acrylic paint . Wear some gloves and cover your work surface, as it can get messy. Pull the bristles back with your fingers, then release onto your surface. Or you could flick the brush itself. Use this technique to create abstract pieces, stars, or ocean foam.
Jackson Pollock would use a number of different tools and mark making techniques such as paint splatter in his abstract expressionist pieces.

Sgraffito is the technique of scratching into wet paint so that colours are revealed from layers beneath. Create patterns in the wet paint by scratching with the end of a brush or a palette knife.
Use this technique in portraiture by creating a toned underpainting in a transparent earth colour like burnt umber and scratch off highlights in the hair. Rembrandt used this technique to reveal highlights on strands of hair in his self portrait.
Create three dimensional works
By incorporating modelling paste in the paint mixture, you can create sculptural, three dimensional works. It improves the adhesion of paint layers, so it can also be applied on its own before acrylic paint is layered onto the canvas. One way of using the medium is to create volume and structure on the canvas, then paint on top of it.
Add texture to the paint with dry additives
Add dry mediums such as marble dust or mica flakes to acrylic paint gel medium or to the paint itself. Dry mediums all have their own individual properties. Mica flakes will provide opalescent and iridescent effects. Add mica flakes to transparent mediums like acrylic paint gel for the best effects. Equally, mica flakes can be sprinkled on top of a wet paint film to make a painting sparkle.
Dabbing with a sponge
Using a sponge to apply paint can yield some varied effects. If you want to create a texture appearance, dab a dry sponge loaded with thick paint onto your canvas. You will create peaks of paint with broken almost grainy appearing texture. If you wet the sponge and use fluid paint , you can create a soft blended appearance.
Stippling is the art of dotting paint onto the canvas. This is a technique commonly used with pencil medium. Get a round brush with short hair, an old worn down brush works well with this technique. Use the dotting action, with dots closer together in areas you want to appear shaded.
Mix colours on the canvas
Mix colours directly on the canvas instead of on the palette. Monet was famed for doing this. This technique can create vibrant and varied areas of colour. Colours are mixed together and therefore the pigments appear purer than if they were combined. Use a palette knife on the canvas for the best mixing results.
Scrape paint
Use this technique in abstract painting. Layer on colour, then use a Catalyst Wedge tool to remove paint from the surface. You’ll be left with a thin, mixed layer of transparent paint. Play around with this technique and colours until you achieve the desired effect.
Acrylic painting techniques for beginners
The impasto technique is a perfect for beginners to experiment with. It’s fun, and feels immediate and spontaneous. Thick texture adds a new dimension to artwork. For beginners, I would recommend sketching out your painting first so you know how the different elements are going to fit together. Then mix all your colours before you start applying paint. Get a stay wet palette to keep colours wet for longer.
All other techniques on this list would be suitable for beginners to get started with, however glazing and alla prima may take some practice to master. If you’re interested in learning how to acrylic paint from scratch, check out our list of the best acrylic painting tutorials .
Acrylic painting techniques: Pin it!
If you’ve found anything on this site especially useful, you can make a donation to me through PayPal. I take a lot of time to research and write each topic, making sure each tutorial is as detailed as possible and I make all my content freely available. Any small donation (even the price of a cup of coffee!) can help me to cover the running costs of the site. Any help from my readers is much appreciated :).
Follow the link in the button below to support this site.
Leave a Reply Cancel reply
Your email address will not be published. Required fields are marked *
Save my name, email, and website in this browser for the next time I comment.
Acrylic Painting School
Painting blog by Masha Eretnova

73 Acrylic Painting Techniques For Beginners to Paint like a Pro
Last Updated on November 28, 2023 by Masha Eretnova
Acrylic painting is a versatile, fun-to-use, and very performant medium. A beginner starts to paint with a wet brush on a dry canvas, but there is so much to explore.
Technically, I’ve learned what acrylic painting techniques are called after I tried them experimenting.
Be curious, be creative and you will find your own techniques.
No time for research?
I got you covered – all acrylic painting techniques for beginners are here!
I’ve tried to briefly describe the principle of each technique and to illustrate it with a short video.

This article may contain affiliates. It means if you purchase anything using my links, it will have no extra costs for you, but I will receive a tiny commission that will support this website. Thank you!
ACRYLIC PAINTING TECHNIQUES FOR BEGINNERS
I love painting and the creative process can be a real therapy.
Using different tools, and mediums, using my own fingers, I like to explore art. I hope these techniques will inspire you too.
Related posts:
- The Best Brush for Acrylic Paint on Canvas
- 38 Best Canvas for Acrylic Painting for Beginners that Professionals use
- 21 Best Acrylic Paint Brands for Beginners and Professional Artists
- 51 Simple Acrylic Painting Tips for Beginners & Pros
What is Acrylic Paint?
Acrylic paint is a water-based medium, like gouache and watercolor.
It dries very fast, and forms a water-resistant glossy film.
Unlike oils it doesn’t need any smelly thinners, but unlike watercolors or gouache it is also solid film once dry – no amount of water will revive it.
Acrylics are versatile and thus – many techniques can be usedin painting on canvas or other surfaces.
What is Acrylic Paint? Ultimate Acrylics 101 – Full guide to understand the nature and main features of acrylics.
#1 Dry brushing

Artist grade professional acrylic paint comes in heavy body, high viscosity form.
Dry brushing means that you do not dilute paint with water, you do not wet your brush.
You directly apply paint from your palette or tube with a dry brush on a dry surface .
Dry brushing creates uneven strokes, an interesting coverage with a bit of texture.
It is a very simple technique. You can load the brush and make thick strokes, or load your brush with a little bit of paint and create transparent uneven lines and shades.
To succeed try different brushes before painting, if you want more uneven coverage, use older brushes.
You can always combine this technique with regular wet brushing and layering.
#2 Washing or watercolor imitation

Acrylic paint is water based and water soluble.
That’s why a group of techniques include adding water to the paint, as basically acrylics are quite thick and heavy.
To create washing effect add about 50% water to acrylic paint.
Acrylic paint washes are widely used as backgrounds.
Even if we can dilute acrylic paint and use it as watercolor, please remember, that acrylics are very fast-drying, especially when applied in thin layers, and they cannot be reopen after they dry – they become water-resistant.
Comparing to watercolor, acrylic acting as watercolor is less forgiving.
To thin acrylics you can actually use not only water, as water may affect the overall quality of the paint and its permanence.
But you can use other methods to thin acrylics, such as mediums – I made a simple guide and list of best thinners , feel free to use it.
#3 Stippling

Stippling is a painting technique when you create a pattern, a texture, using small dots .
To make dots with acrylic paint you usually will use a brush, but in general you can use pen, sticks, or any other tools.
You are free to apply one layer of dots, or to make a multilayer painting to show depth.
You control the size of dots, they could be tiny, or quite big.
The best use of this technique is landscape, especially trees.
It is fine to combine this technique with others or paint the whole piece using only stippling.
Stippling is also considered to be the case when you use a brush to dabb the color into the surface (not only making dots).
Stippling is similar but not the same as Pointillism. Pointillism tries to make illusion of blended colors by using dots of different colors.
#4 Hatching
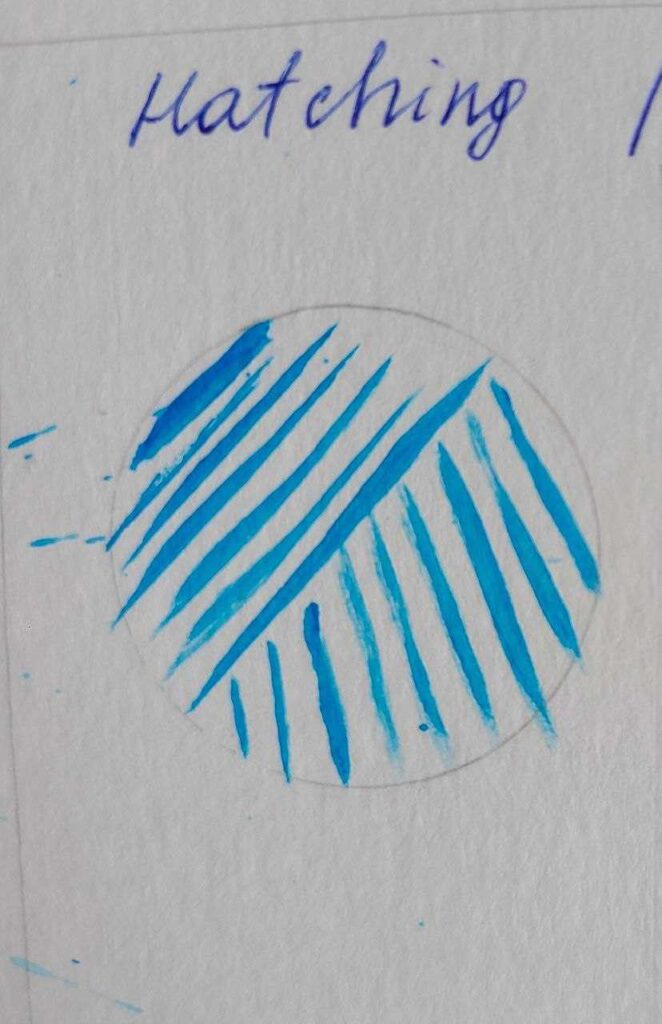
Hatching is a similar to stippling technique, but instead of dots you have lines.
You create a pattern in 1 or multiple layers using lines of size and thickness of your preference.
For basic layers use darker colors and be consistent with brushstrokes, line should look similar.
Hatching is mostly used with pencils, but with acrylics this technique can be also used.
for ex., to create background or shades, as hatching helps to paint dense, deep in color areas.
#5 Flicking or Splattering

Flicking, also called splattering, is a fun and easy to use technique:
- you load your brush with thinned paint. This will not work as you think with heavy body paint.
- place it on top of your painting.
- splatter by tapping the handle or flicking the brush or pulling the bristles
This technique is more common for abstract painting, especially to create interesting details and effects.
But also widely used to paint stars or freckles.
Be careful and do not overdo – it can become messy and less artistic.
Also keep in mind, that using this technique you absolutely need to protect floor or surface you paint on, as splatters can be everywhere!
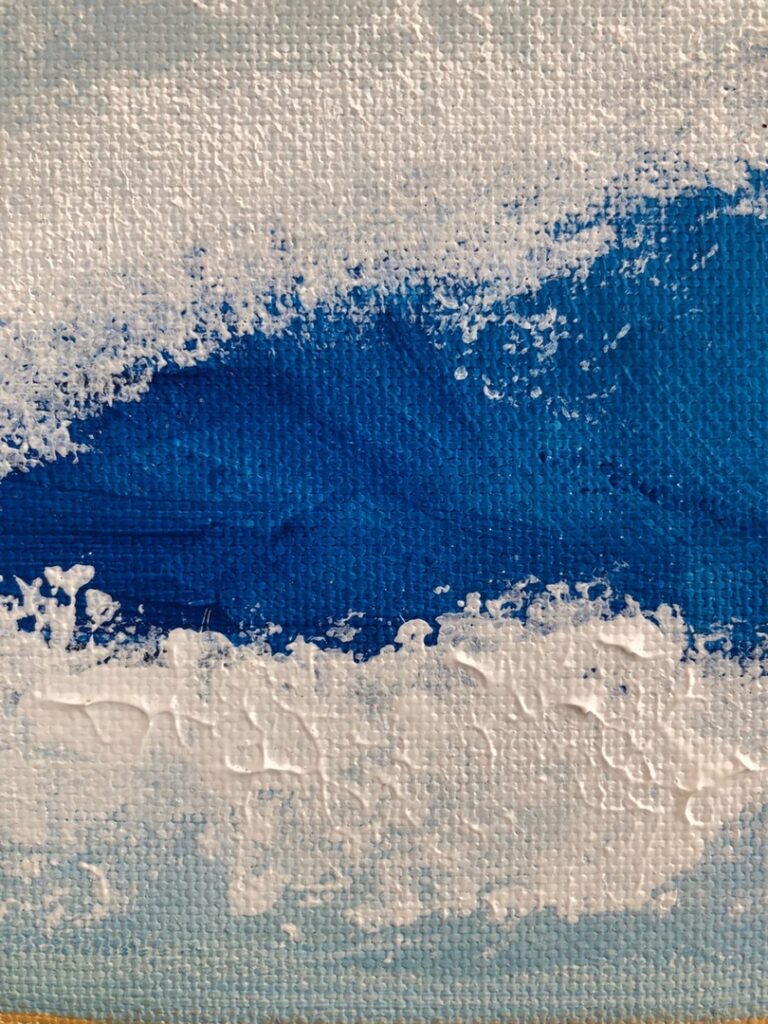
Dabbing is another fun and easy to apply technique.
You need a sponge or a piece of towel (paper towel, I even used old normal towel) dipped into the paint.
The whole process is just loading paint and dabbing the surface.
Use stencils to dabb a shape, or use dabbing for painting backgrounds.
It can be smooth or with texture, depending on how much paint you will use each time.
This foamy wave was created with a make up sponge in several layers.
#7 Detailing
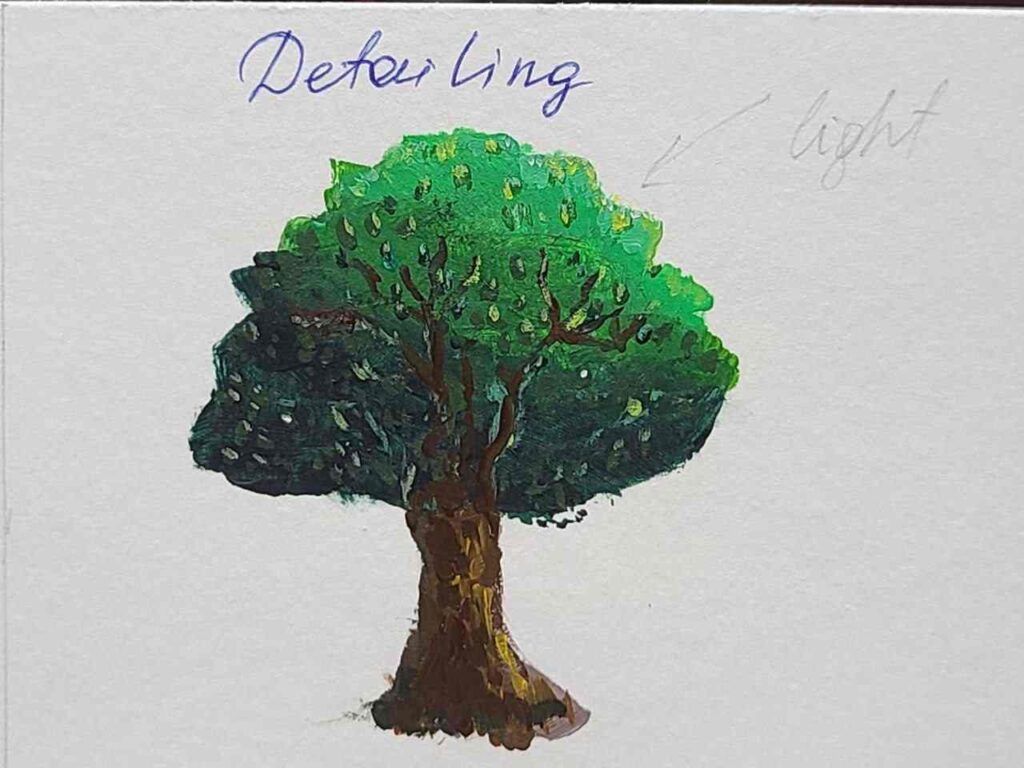
Detailing is the way to create extremely detailed paintings using detail brush.
This technique needs time to master, patience and delicacy, but the result is worth it!
The key to this technique is the right detail brush: use synthetic brushes for acrylic paint. Some brands offer sets of details brushes, for ex., this set of 10 brushes .
If you prefer to buy brushes individually, look for liners, detail brushes, riggers, I love Princeton Velvetouch Series 3950.
To paint details you need to thin the acrylic paint to an inky consistency or use acrylic ink – it is important that the paint was homogenous, easy to flow and control.
Some tips for detailing with acrylics:
- apply paint with light touch.
- let the painting dry completely before you paint details. Paint details last.
- depending on how it is more comfortable for you: use an easel or lay your painting horizontally.
- keep a paper towel to erase mistakes immediately.
#8 Wet-on-wet blending
Wet on wet is a basic technique for watercolor and blending technique for some oil paintings and acrylic paint, and gouache too.
As acrylics are fast-drying wet-on-wet technique is not widely used.
Basically what you do: you apply the first color and while it is still open (acrylics stay wet for 10-20 min) you directly apply second color and blend them immediately on the surface to create a gradient.
If you are using this technique you may need to slow down the drying process, use on of these 15 methods to make acrylic paint dry slower , or simply spray the paint with a little bit of water.
Please make sure you let your paint dry fully as uneven drying can lead to cracking .
#9 Wet brush on dry canvas

Wet the brush on dry surface is the standard technique for painting.
You have a jar with water, you wet the brush, and apply paint with wet brush.
You can also add water to the paint, mix it to the uniform consistency and apply in layers to the canvas.
If you painting on canvas for the first time, use this step-by-step guide .
#10 Painting with a Palette knife
Painting with a palette knife , as form of impasto technique, is used in abstract painting, portrait and landscape painting a lot.
Usually we use a palette knife to mix colors, but it is much more fun to paint with them.
You can directly apply the paint in the surface and shape it using palette knives to create texture and thick layers.
While for abstract painting is quite easy to use palette knife, if you’re aiming to paint a portrait using palette knives, you’ll need some time and practice.
You can apply paint using the blade or create lines using the edge of the knife, you can also scratch paint with a palette knife or just create a smooth coverage, like a cake.
#11 Glazing

Glazing means applying layers of glaze. Glaze is a thin, semi-transparent paint layer.
Glaze is never used alone, glazing is a number of the thin layers that will create depth and modify the colors: each glaze will be applied once another is dried, so they will not blend.
The effect is then different from mixing 2 colors.
- Apply an underlying color
- Apply several glazes
To work with glazing, you need to thin the acrylic paint, as you need fluid and transparent layers. Use water or special thinners.
I will not call this technique an easy one, first – as it requires a glazing medium, second you need to know color chart and color theory to understand how the color can interact.
#12 Sgraffito

Sgraffito is a painting technique when we scratch, as it comes from Italian sgraffire – “to scratch”.
This technique adds an interesting effect: from top layer scratches we see the layer below, ex. when we painting hairs, trees, water, abstract.
How to use scgraffito technique:
- apply the layer that you want to be visible through scratches and let it dry.
- apply the top layer
- scratch the top layer while it is still wet (you have up to 30 min, if you need more use extenders or other slow-drying methods) .
To scratch you can use any tool you have at yours, or special silicone or rubber tools , or paint shapers.
#13 Expressive brushstrokes

Sometimes we want to get rid of visible brushstrokes, but it is, in fact, a whole technique – expressive brushstrokes.
This technique reminds me oil painting with thick, visible, buttery brushstrokes creating volume, texture and depth.
For this technique, a good brush is the key to success. I reviewed 20+ brushes for acrylic painting here .
There is even a book about brushstroke techniques – Brushstrokes: Acrylic: Effortless painting with minimal tools and materials .
#14 Under-painting technique

Underpainting technique comes to us from a very old and academic tradition – you need to build a sketch, an underpainting, for your future painting.
Usually, an underpainting is made with a main color in contrast with the whole piece, some artists use brown-ish tones.
Painting, you will normally cover the underpainting or leave it as shade or accents.
It is usually made in washes, quickly.
#15 Layering

Layering is the most basic and necessary building painting technique for acrylics.
It is simply means that you apply paint in thin layers, letting them dry in between (if you don’t have any other ideas and technique in mind).
With layers you’are mowing from dark to light colors , from background to details.
It needs your full attention, patience and time (not as much as with oil, as acrylics are fast-drying).
#16 Paint in blocks of color
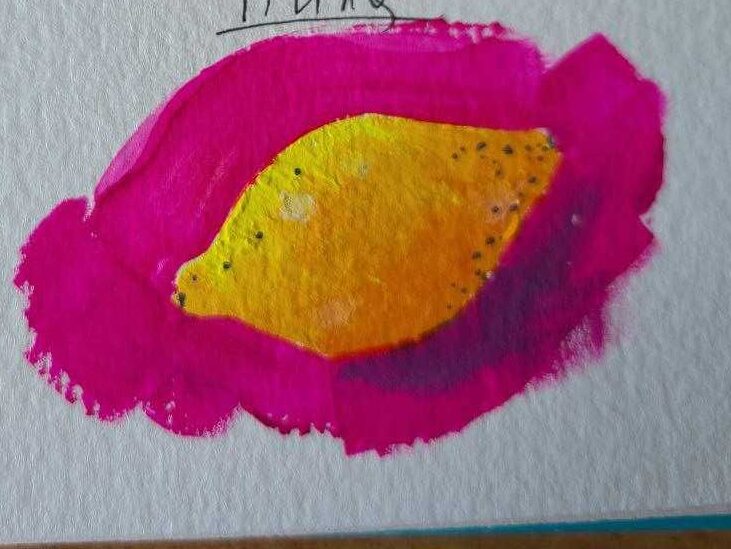
Blocking is only one of the step in traditional painting, it creates color areas according to light/shadow parts.
And it prepares your painting for adding details.
Look at the lemon, it has 3 visible blocks of colors: bright yellow, medium yellow and yellow-orange almost red.
Look at the tree – 3 visible blocks.
Light area, warm color where the light comes, hald-tone and shadow.
However, contemporary artists often use blocking as a style on its own, without following it up with detailing.
#17 Only partially mixed colors

Usually, we mix colors to achieve a tone we need on the palette or directly on the surface.
Only partially mixed colors can create an amazing effect:
- apply one color on the surface
- apply another color or colors
- start mixing them with palette knife, but just slightly mix them, not until they will form a new color,
- apply two or more colors next to each other on the surface
- using dry brush or a palette knife go over the colors
Great technique mostly for abstract painting. I use it a lot, to be honest.
#18 Paint with a family of tones
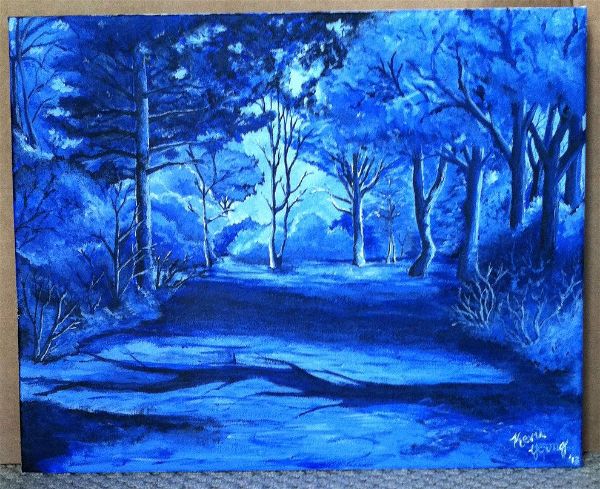
This can be an idea for a whole painting: you choose the main, primary, tone, then you mix different tones using Titanium white , for ex., and paint using only this group of colors.
It works very well with flowers – to create shades, depth, detail and delicate touch. It will also work for sceneries.
This technique require a lot of time for preparation, time for making swatches, practice (to know exactly how much to mix) and patience.
#19 Flat color technique

Flat color technique means that you create even, solid, uninterrupted, and completely uniform in brushstroke, and color intensity area of a color.
The edges are usually hard.
Perfect for backgrounds (if it fits your idea), and abstract art.
To work with flat colors, you need a good brush , master your brush techniques, use opaque and high-quality paint.
Do not thin paint too much for this technique, and if your paint is not opaque enough try to mix it with more opaque colors or try other methods to make acrylics mire opaque .
For me flat colors remind contemporary art, digital art and illustrations.
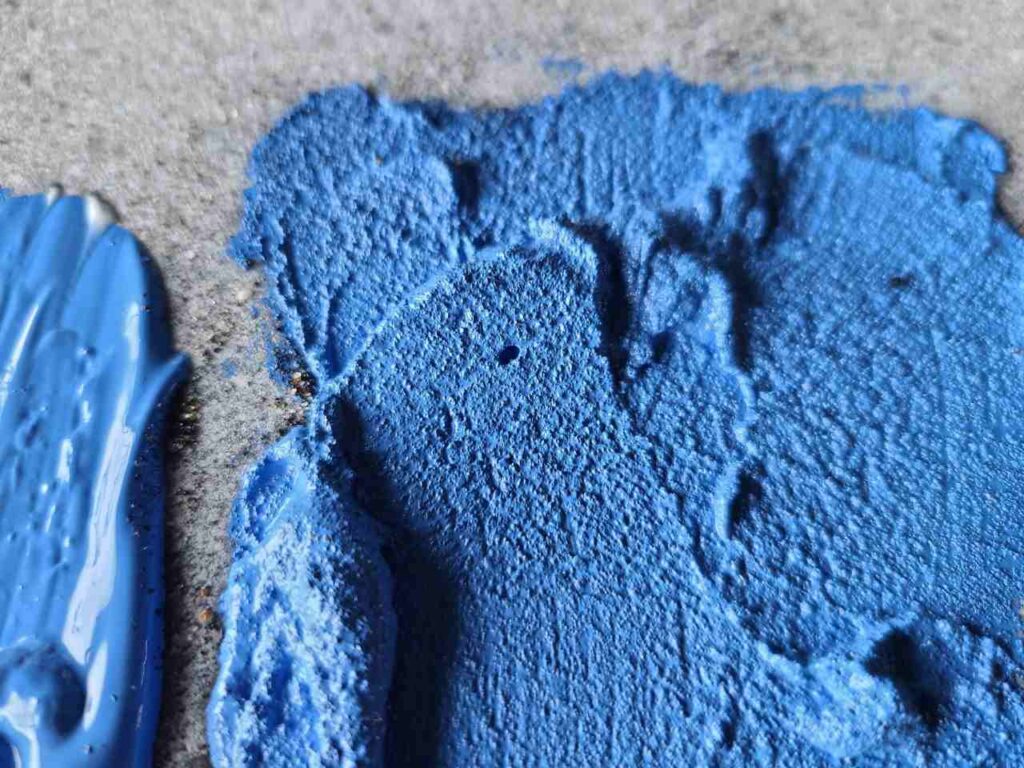
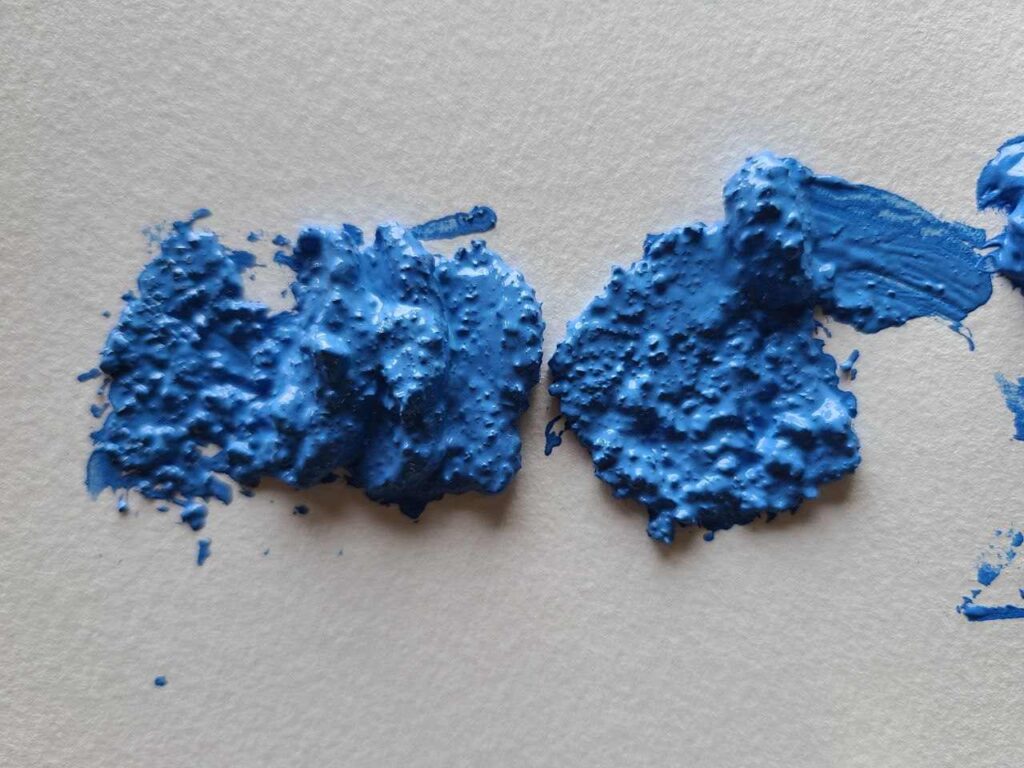
#20 Acrylic impasto painting technique
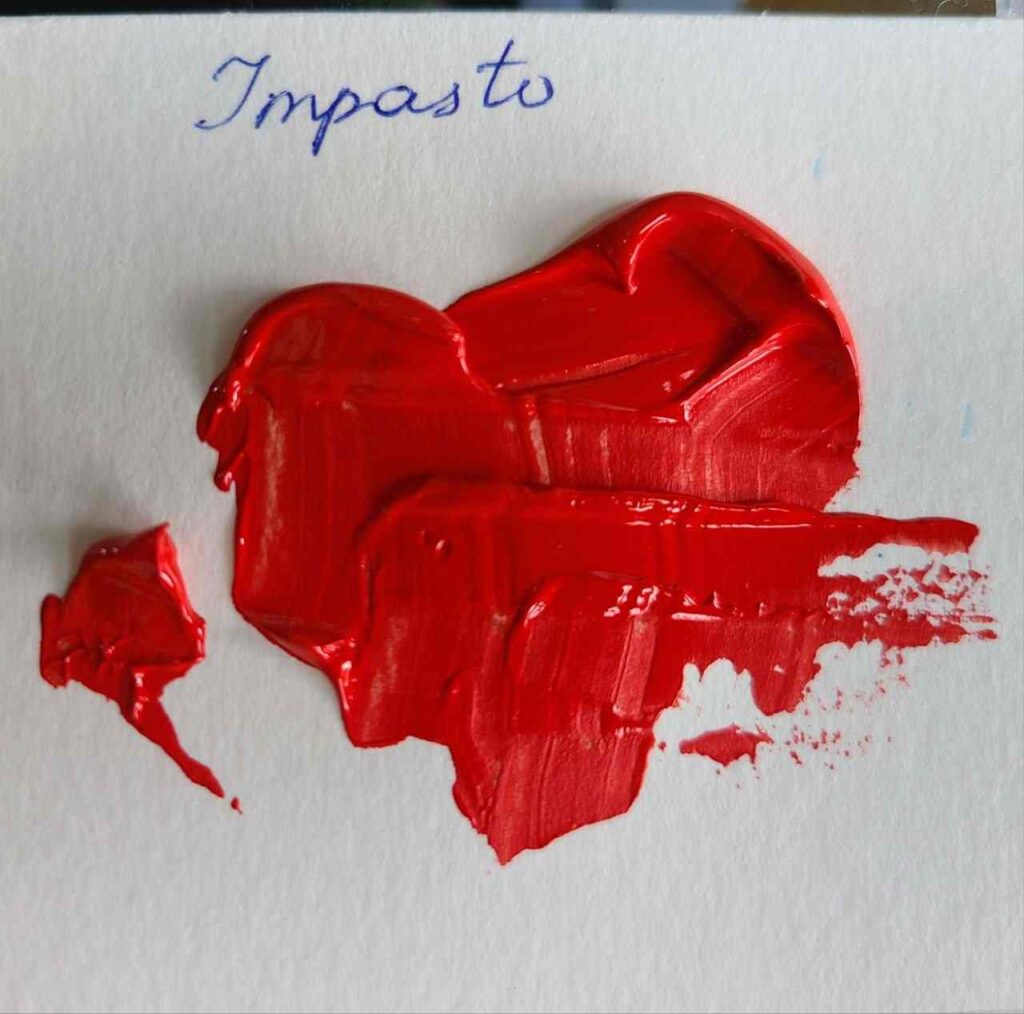
Impasto technique needs heavy body paint or extra gel mediums to create thick, textured, original paintings, to create dimension.
I mostly use impasto for abstract painting, but it can be easily used for any other style.
To work with impasto you need heavy body paint, impasto or gel medium or a modeling paste , and a palette knife.
As this technique suggests creating textures, you may need more open time than regular acrylic paint can offer. In this case use retarders. Do not use water with impasto technique.
You can also create a basic impasto layer and than glaze it or paint it, once it is fully dried.
#21 Stenciling
Stenciling implies using stencils – you can buy them or cut from paper or any other material (to reuse them).
You can also use tapes to create needed shapes or cut some cardboard but it won’t be perfect (see pic).
- use stenciling to color an area
- use different stencils in layers
- use a stencil to create a painting inside it
For stenciling you do not need fluid paint, use soft body paint, brushes, sponges or spraying to color the areas.

#22 Painting with fingers
Painting with fingers can be fun not only for kids, and it is the easiest and “cheapest” painting technique – you only need your fingers.
- fingers and palm have unique texture and pattern
- blending is very easy and smooth with fingers
- you fingers can create dots, lines, combining fingers, you can use different colors at once – different colors on each finger, and so on, and so forth…
Always keep towels around and wear apron to protect yourself – acrylics are hard to wash off from clothes.
Sounds creative, right?

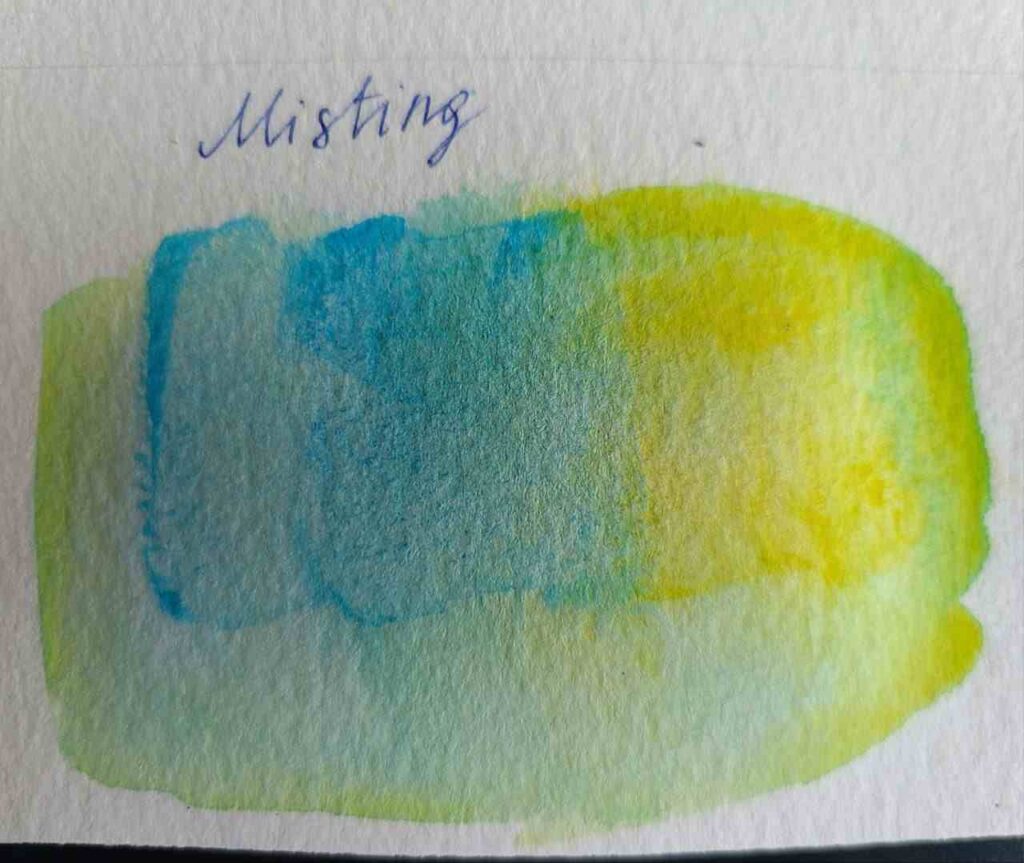
#23 Misting
Misting is a wet technique.
You paint and then mist painted areas while they are still wet or semi dry to create runny paint or work longer with paint.
Use an old spray bottle with wetting spray or water.
#24 Acrylic Pouring

Acrylic pouring is a new art trend. It is quite easy and extremely free and creative process.
You need fluid paint, floetrol , a hair dryer and a canvas to start.
Acrylic pouring may be considered as abstract painting.
The main process is pouring fluid acrylic colors on the surface and move the surface to make colors interact and create dynamic pattern. You can also create effect using a straw or a hairdryer.
Try a ready-to-use acrylic pouring sets to save money.
Read my ultimate tutorials list 33 WOW Acrylic Pouring Techniques for Beginners and Advanced Artists that I’m curating, showing you the best techniques and the best pour painters around the world.
To get the best results consider picking one of the popular color palettes: 38 Stunning Paint Pouring Color Combinations
#25 Scumbling

Scumbling is a technique to create smoky effects and soft blends of color.
The main goal of scumbling is to highlight bottom layer with a broken top layer.
Usually we use white color for scumbling.
- You need a dry brush or cloth
- Rub small quantities of paint over a dry layer to expose the color underneath.
Thinned paint or transparent does not work for scumbling, try to use heavy body, opaque paint.
#26 Hydro Dipping with Acrylics
Initially started with special hydrographic paints and spray paints, hydro dipping is now can be done with acrylic paint and even nail polish for fun.
It is an easy and unique way to customize your Nike, ornaments, phone case, guitars and skateboards, and anything you have in mind!
Professionals hydro dip cars detailing!
However, spray paints work better for hydro dips than acrylic.

27 – Toothbrush splatters
Use old toothbrush to create splatters for night sky, galaxy paintings and added effects.
You can use dry toothbrush or slightly wet it, but watered down acrylic paint will splatter better.
Can splatter directly on paper or over painted (and dried) area.

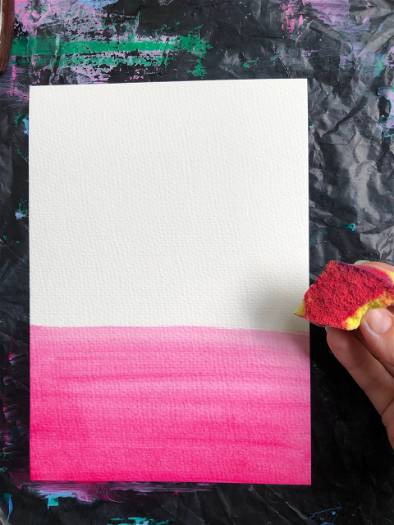
28 – Dry rough sponge
Use the rough side of the sponge.
Dip in the paint and dab.
Try not to go over the same area many times as it will not add more texture while the painting is still wet.
Easy to use for waves foam, flowers and greenery in the background, snow, clouds, etc.

29 – Wet sponge
Wet sponge or a foam brush can be used to create large washes, blend the paint, and create drips.
A wet sponge holds a looot of water.
Great tool for drips and blending depending on how much water you will soak in.
30 – Sponge blending
Sponges make blending very easy, with soft edges.
You can use any sponge: from make up to dish washing one.
The downside of using a sponge is that it soak too much water too quickly, so don’t make it too wet.

31 – Q-Tips
Using Q tips to apply acrylic paint is super fun and fits adults, amateurs, kids and school projects.
- get a bunch of Q-tips and load them with paint to make flowers like lilacs.
- load each Q-tip with different color
- draw around with markers or paint.
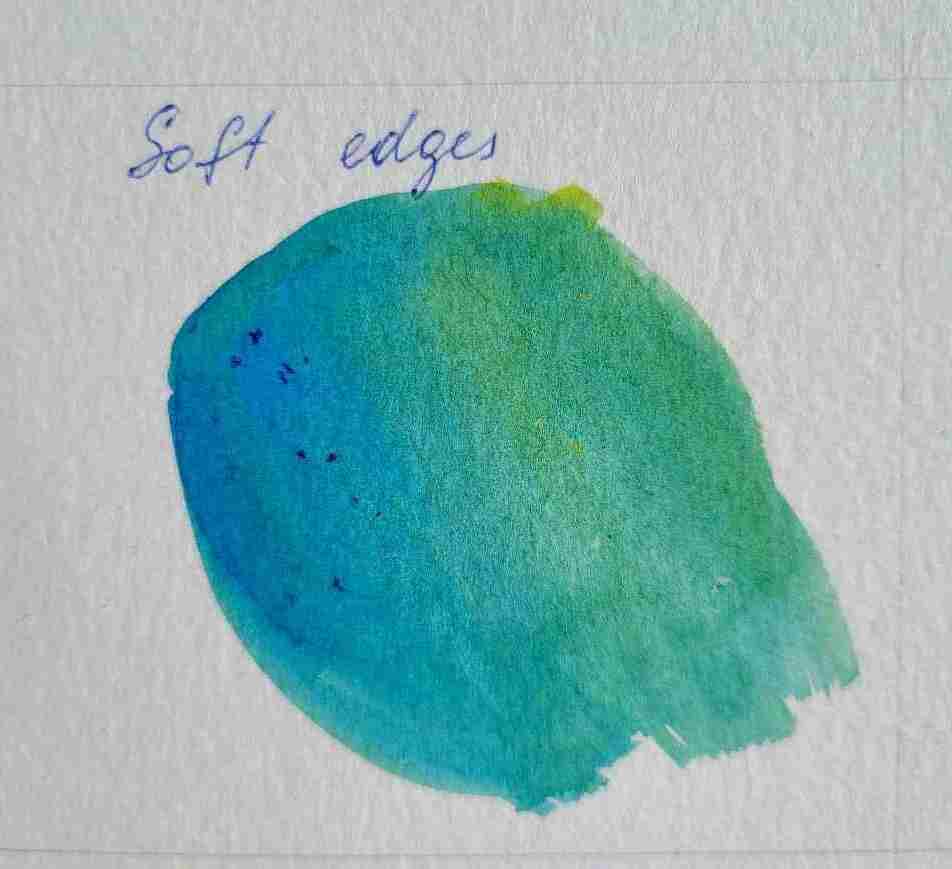
32 – Soft Edges
Soft edges technique means that you don’t leave sharp visible lines in between colors.
Soft edges are subtle and smoother and you cannot really tell where one color stops and another one starts.
You can soften edges with a dry brush or a mop brush.
Great technique for shadows.

33 – Hard Edges
Hard edges are bold and immediately draw attention.
Two colors have visible clear edges and are very distinctive.
Used mostly in abstract painting.

34 – Dripping Isopropyl Alcohol
Alcohol based products and acrylic paint are not “friends”.
As soon as a drop of alcohol touches the painted area (with still wet paint), acrylic paint runs away and doesn’t flow anymore in the area covered with alcohol.

35 – Dripping Water
Add water to acrylic paint.
Use a wet brush and paint an area.
While the acrylic paint is still wet, add some drops of water.
They will immediately create dendrites-alike shapes.

36 – Drip marks
Watered down paint or fluid paint runs and flows easily.
If you will hold your canvas at an angle or place it vertically, you can apply thinned paint on the top and it will drip down.
If using mixed colors it will create beautiful effect.

37 – Smudging
Smudging is widely used in charcoal and pencil painting to create shades.
You can use the same technique with acrylic paint, but instead of your finger you will use a dry brush.
Place as many colors as you want on the canvas, then with circular motions smear them together.
Technique is also good for blendingon canvas with soft edges.
38 – Mix acrylic paint with sand
One of my favorite acrylic painting techniques that add texture to canvas.
You can approach it in 2 ways:
- mix acrylic colors with sand directly
- color sand and dry it – so you have colorful sand.
39 – Mix acrylic paint with coffee
A DIY painting technique to add coarse texture is to add coffee to your acrylic paint.
It doesn’t guarantee archival qualities.
But, the texture is very unique and application is easy both on paper (though it can be too heavy) and canvas.
Read also: Can you use curcuma for painting? My Turmeric Painting Experiment

40 – Crackle
Normally if our acrylic painting cracks we panick.
Yet, in many cases, cracks are beautiful. And the technique,as well as the medium is called crackle.
Acrylic paint naturally cracks if the underlying layer is too thick.
But you can better use a crackle medium for guaranteed results.

41 – Pumice
There are fine to extra coarse pumice gel mediums for acrylic paint on the market.
It adds visible texture and volume and dries to hard coarse (or fine) film.
Simply mix ith paint and apply.

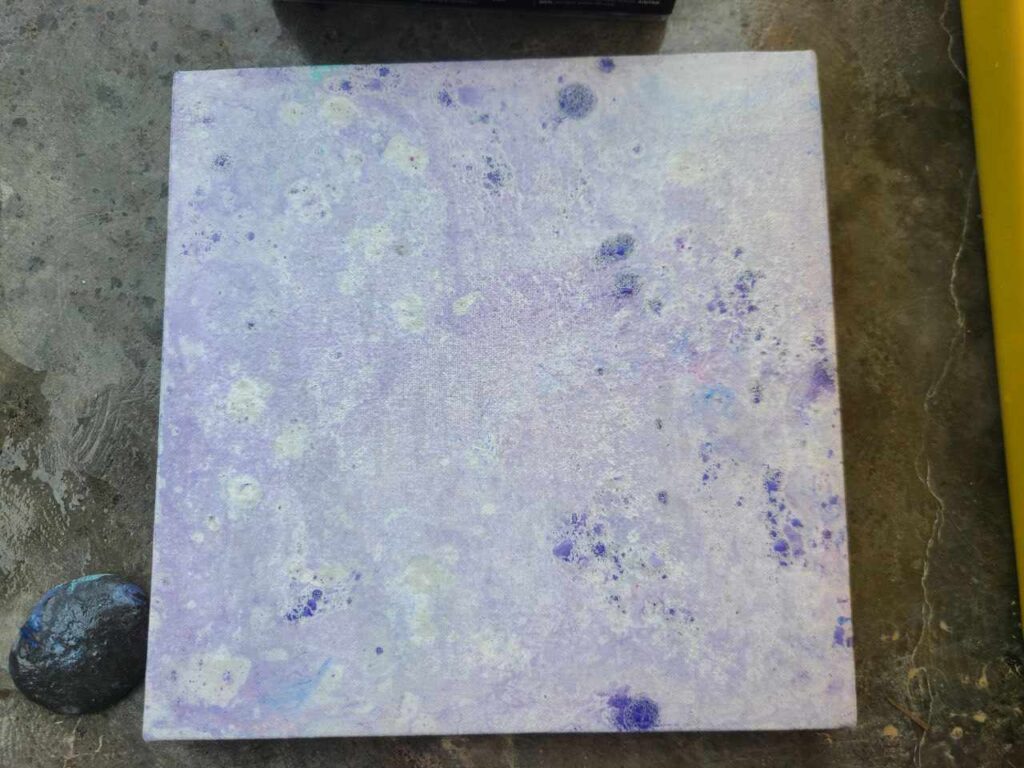
42 – Salt
Sprinkle salt on wet paint and you will see interesting patterns appear on the paint.
The paint must be wet as the water reaction with salt is necessary for the effects.
Better to use cheaper paint for this acrylic painting technique.

43 – Stamps with veggies/ Fruit
Stamping with vegetables is a DIY, craft, painting technique.
Great for fun activities with kids.
You can use apples, potatoes, carrots, something leafy, beets and even citruses for stamps with acrylic paint.

44 – Acrylic paint with inks
Acrylic inks are easy to dilute with water and they also have nice matte finish.
Regular acrylicpaint has semi-gloss finish so combining the two you can play with sheen.
Inks are also cool to make effects with water, drops and splatters.

45 – Acrylic paint with oil pastels
For acrylic painters, oil pastels are very useful small friends.
You can use them to create mixed media paintings, create lines over acrylic paint and play with different textures.
While acrylic is plastic and semi-gloss, oil pastels are velvety, smooth and buttery.

46 – Acrylic paint with gel pens
Gel pens add sharp visible and clear lines to acrylic painting.
You can make an outline with gel pens, then only use watered down acrylic.
Regular acrylic from the tube will be too opaque and cover the gel pen lines.
Or paint an area with acrylic first and then add lines and shapes with gel pens.
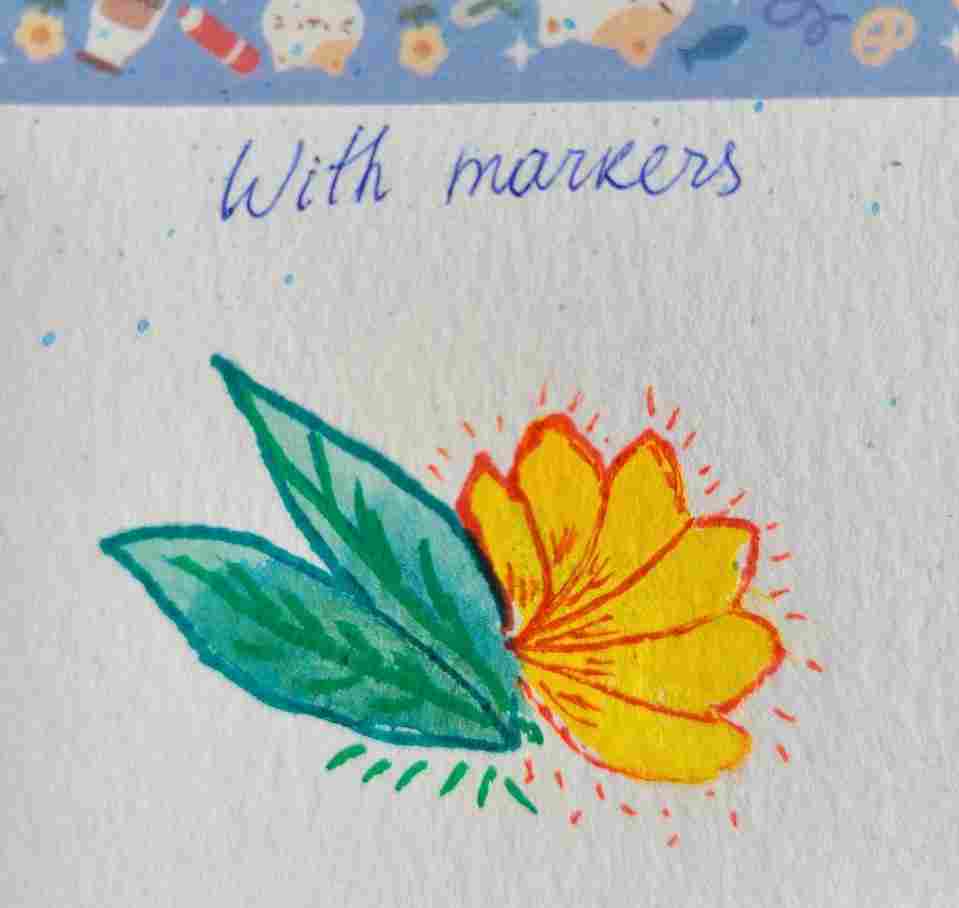
47 – Acrylic paint with markers
Markers can help you draw shapes over acrylic paint once it’s dry.
Posca, Sharpie , Artistro and Artiqo markers are some brands I tested with acrylic paints and they work.
The beauty of this technique is its simplicity – you don’t have to master acrylic paint perfectly to paint something.
You can always add details with a paint pen.

48 – Abstract acrylic painting
Abstract painting is the technique where you can have the most freedom.
It is my style and I see abstract art as a type of meditation, I follow the paint without trying to copy anything specific.

49 – One stroke
One stroke with acrylic paint is when you load your wet brush with a few colors and then trying to finish an element with one stroke.
If not the whole element, try to make one layer with one stroke.
One stroke painting technique is widely used for painting flowers.

50 – Double loaded brush
Tocreate colorful brush strokes you can load on your brush 2 and more colors.
Here I loaded 2 colors, but you can easily pick 3.
And you can also use this technique with a long palette knife instead of a brush.

51 – Psychedelic Acrylic Painting
Psychedelic are all bright, highly contrasting, maybe even bright neon colors.
It is easy to make psychedelic acrylic painting with pouring techniques, but you can also draw lines, shapes, forms and colors them.

52 – Visible brush strokes
Usually we are trying to avoid brush strokes at any cost.
Yet, visible brush strokes is a very expressive acrylic painting technique and it work perfectly with heavy body (thick) acrylics.
Use a flat brush and apply thick layers of paint in one movement, trying to keep them at the same length.
Directions are also important with visible brush strokes – can be circular, a-la Van Gogh, can be flat horizontal/vertical or diagonal for dynamic.
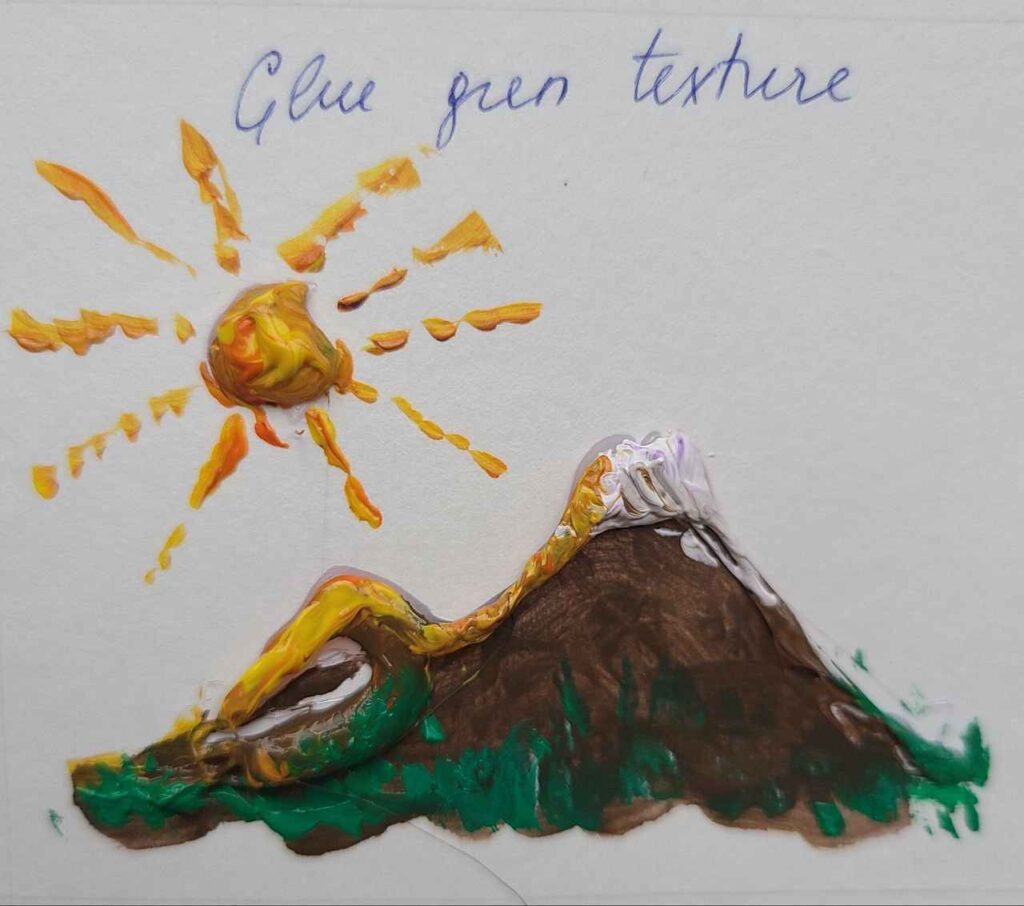
53 – Adding texture with a glue gun
With a glue gun we can not only glue things.
We can use it as a texture tool for making 3D outlines, for ex., for flower petals, butterflies, dragonflies, reptile skins, etc.

54 – Textured Acrylic Painting With Modeling Paste
Modelling paste is one of the easiest way to add lots of texture and volume to acrylic paint.
The idea is to mix it with paint for thick application. You will need a palette knife.
For some beginners pastes are expensive, you can use plaster or joint compound to make a DIY texture paste.
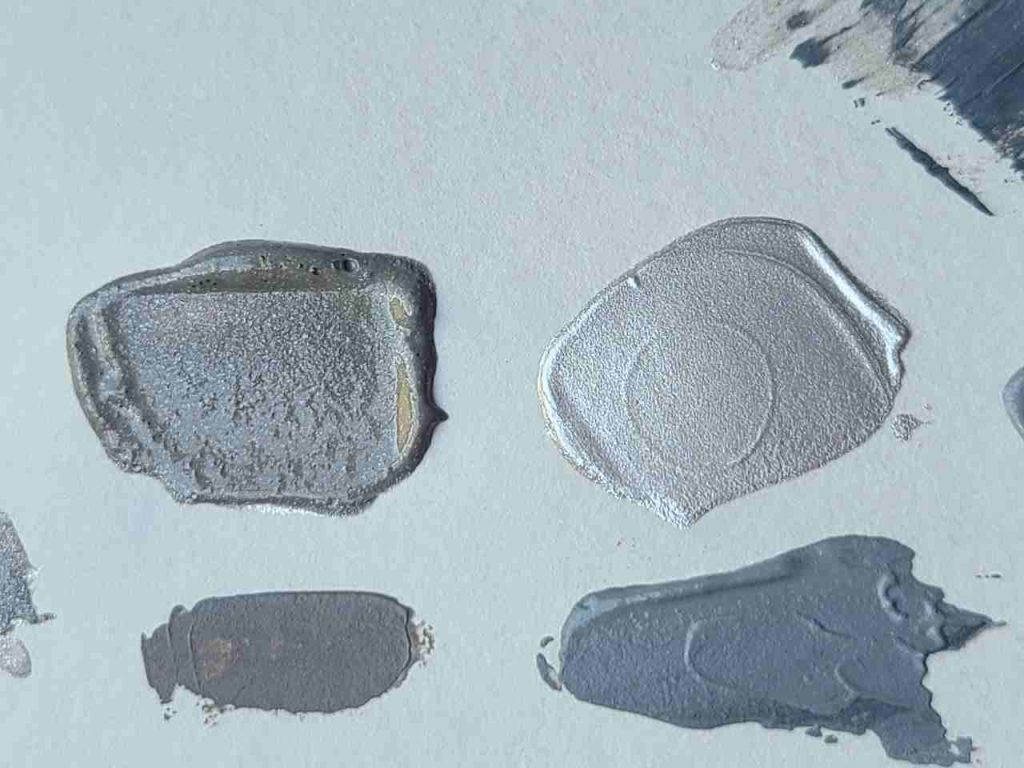
55 – Iridescent Colors
Even if you have regular acrylic paint, you can easily make it shimmer with:
- metallic mica powders
- iridescent medium ( Liquitex )
It adds stunning effects and the colors will play under sunlight.

56 – Airbrushing
Airbrushing is an advanced painting technique.
Not only you need to know how to use the machine, you need to buy an airbrush and a compressor.
Yet, it is one of the best techniques to paint miniatures, models and to spray halos.

57 – Gel Printing With Acrylic Paint
Gel printing is a fun technique you can use with inks and acrylic paints.
As any form of printing we are basically transferring an image or patterns onto paper.
You need a gel printing plate and a roller to make some prints.
Youcan always add prints to your painting as an element of mixed media.
View this post on Instagram A post shared by 🍄tee hee🍄 (@everybody_wants_somebody)
58 – Carving
Paint carving not wood carving! Yes, you hear me right.
There are 2 approaches:
- layer a lot (very much a lot) coats of paint and let them dry in between and afterwards.
- apply multiple layers of a DIY mix of gesso, baking soda and Mod Podge (or Elmer’s glue), let it dry, sand, carve it and paint it 🙂
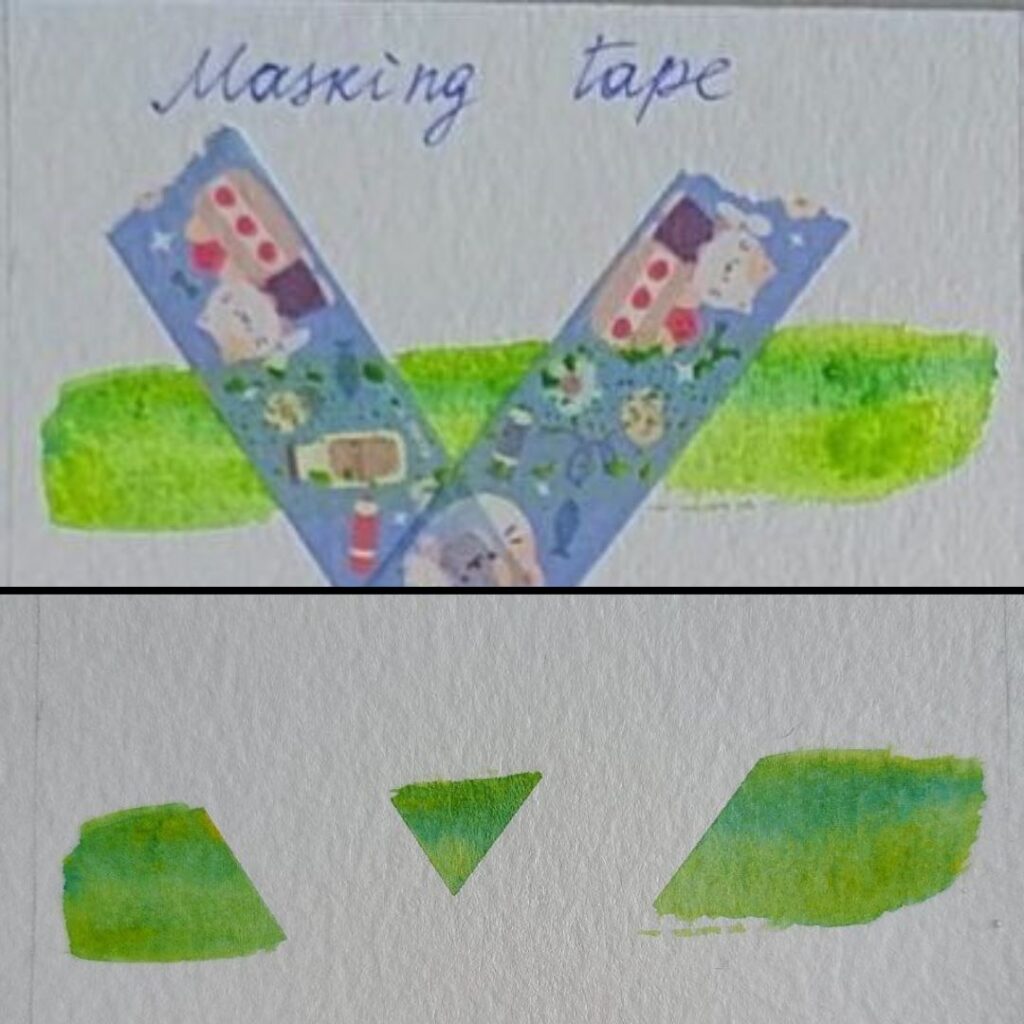
59 – Masking tape
Masking tape techniques is best to create geometrical paintings, for ex., a diamond.
Tape the areas you don’t want to be painted, paint over, let dry and remove the tape.
All the edges will be clean and hard.

60 – Contrasting colors
The best use for contrasting colors is to choose a contrasting color for the background.
It is easy to do with a color wheel: pick the colors opposite from each other.

61 – Gradient Relief
The idea behind this technique is to create a loose gradient by partly blending the paint.
At the same time, we leave the texture (brushstrokes or sponge texture) without smoothing it out.
The dome made with rough sponge.

62 – Paint Trees With Fan Brush
Fan brush doesn’t really make it to my basic setup, but I happen to have 2 different sizes.
They are famous for how easy you can make a loose tree.
63 – Highlighting
Using a dry brush loaded with some white or black(or any other color) you can add light highlights.
Very useful for clouds, mountains, flowers that are not painted in details.

64 – Mixing Colors
Mixing colors is not only a must-have technique but it is also a skill every Pro painter has.
We use this technique in every painting, as we need to mix our own colors, shades and tones.
Try first to make a mixing chart for your palette.

65 – Mixing Colors With Epoxy
This pretty ocean art is made with epoxy and acrylic paint.
The key is to properly mix all colors with epoxy in separate cups and to act quickly.
Acrylic and epoxy resin mix very well and the finish will be glossy, smooth and resin enhances the colors.

66 – Gestural Brushstrokes
Gesturalism or gestural brush strokes is mostly used with oil paint, but can be done with acrylic.
Most often seen in portraits.
Simply means that you can see the strokes and “feel” the gesture behind it.
Technical side of it is that using brushes with long handles allows us more gesture.

67 – Using catalyst contour tools
Catalyst contour tools are super fun to use to add texture and effects to thick applied paint or paste.
They have so many! But you can always use a regular hair comb as an alternative.
Make waves, lines, sharp edges, zigzags!
View this post on Instagram A post shared by Brellian – Artist (@brellian_official)
68 – White Misty Fog Acrylic Technique
Do you want to create a foggy morning in a forest kinda landscape?
Sarah (Brellian) came up with an amazing and easy techniques for doing so.
She uses a misting bottle filled with watered down white paint and mist with it every layer of forest she paints. She teaches it as well.
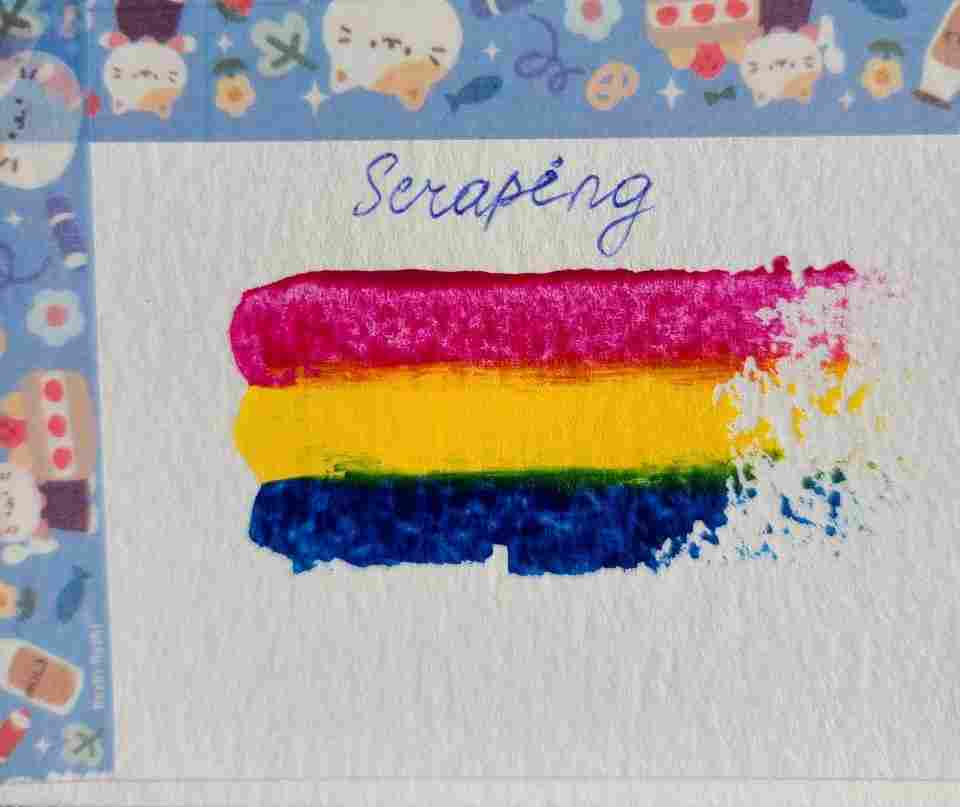
69 – Scraping Paint
Place a few dollops of paint in line.
Take a flat, smooth something that you can scrape with. You can also buy one for under $10.
With light pressure and firm hand drag the tool.
You will get beautiful coverage, some mixing colors in between and a smooth finish.
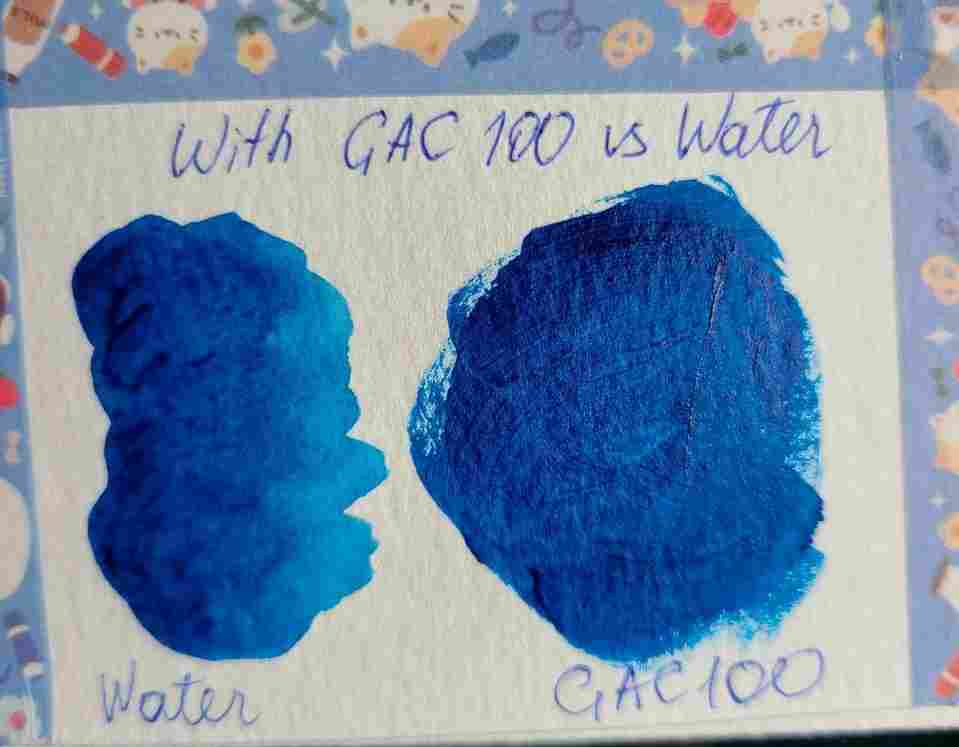
70 – Using GAC 100 Instead Of Water
This technique is also something professional acrylic artist do.
Water thins the paint and improves the flow, but also makes paint more transparent.
And we don’t always need it.
GAC 100 will not only keep the color intensity and opacity, but will also slower drying process without breaking paint and binder bond like water.

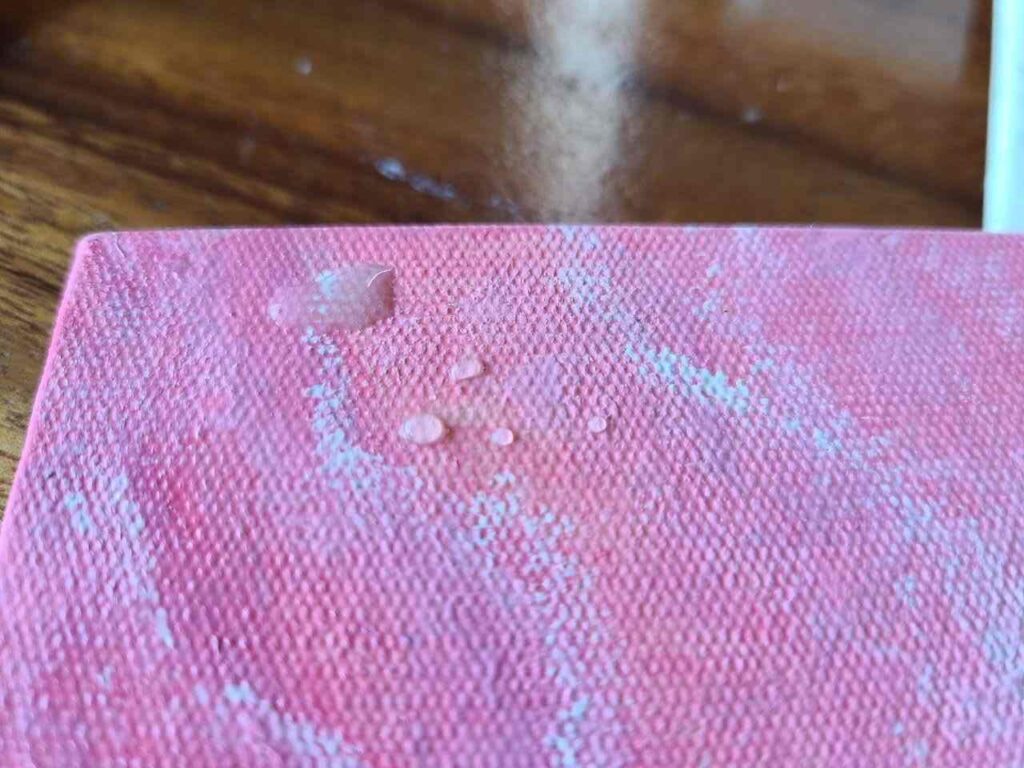
71 – Acrylic paint with Baking Soda
Mixing baking soda with acrylic paint is a craft painting technique.
Yet it add fine texture to the paint.
Apply wet paint and sprinkle or spread some baking soda on top.
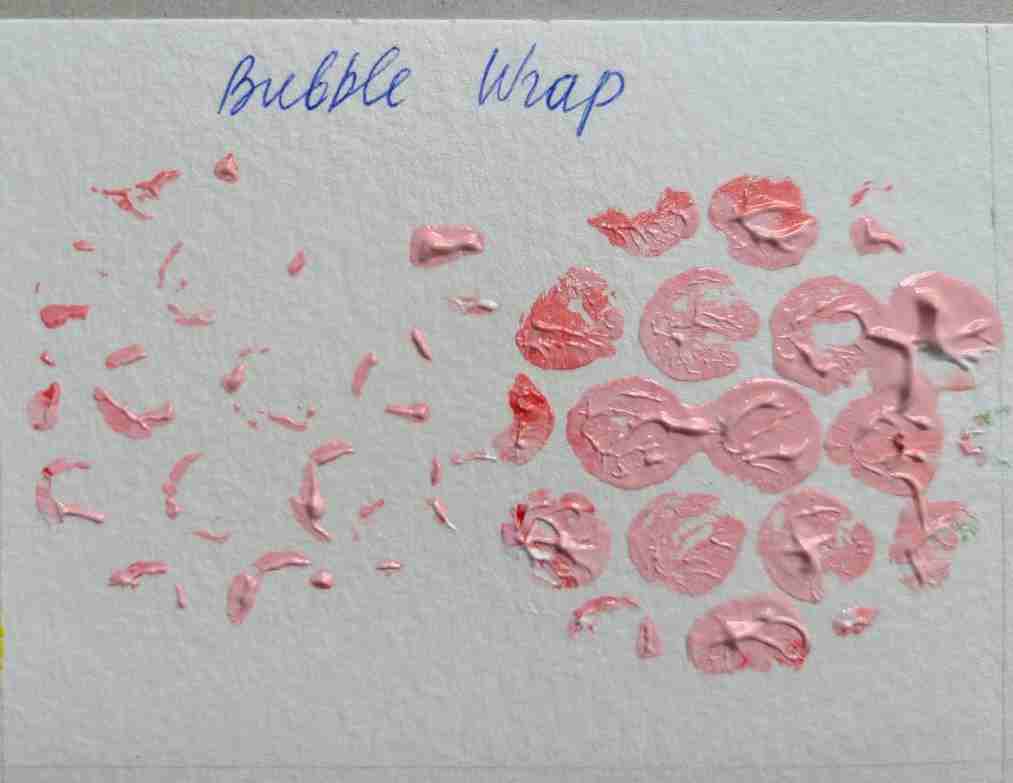
72 – Texture with bubble wrap
Texture and flowers are easy to make for crafts with regular bubble wrap.
Mix some paint on the palette, dip the bubble wrap.
You can stamp it lightly if you are adding some highlights, or press hard to stamp.
You can see my stamp is round, you can paint over bubble wrap any shape you want and make stamps.
Fun for crafting with kids.

73 – Painting transparent bubbles
An easy acrylic painting technique to make transparent bubbles is to use something of round shape.
Mix some wet colors on the palette. Add water so the colors are transparent.
Wet the cup, dip in the colors and then stamp it on paper.
Take a wet round brush and go along the circle so some colors flow inside the circle.
Need inspiration? Check some of my painting ideas collection:
- 55+ Easy Winter Canvas Painting Ideas For Beginners
- 60 Cool and Easy Black and White Painting Ideas
- 55+ Easy & Cute Spring Painting Ideas on Canvas for Beginners
- 29 Gouache Painting Ideas & 16 Famous Gouache Paintings You Will Love
To Recap: All acrylic painting techniques
- dry brushing
- watercolor imitation or washing
- wet-on-wet blending
- painting with a palette knife
- expressive brushstrokes
- underpainting
- paint in blocks
- partially mixed colors
- family of colors
- flat color technique
- painting with fingers
- acrylic pouring
- hydro dipping
- Toothbrush splatters
- Sponge blending
- Rough sponge
- Q tips
- Gradient relief
- Water drops
- Acrylic with Pastel
- Acrylic With Markers
- Acrylic with Gel pens
- With coffee
- Double load brush
- Highlighting
- Color mixing
- Stamping (veggies)
- Dripping Isopropyl Alcohol
- Contrasting colors
- Psychedelic Painting
- Masking tape
- Glue gun texture
- Visible strokes
- Modelling paste
- Mixing on canvas
- Gestural brushstrokes
- Paint Carving
- White mist fog
- Gel printing
- Iridescent effect
- Bubble Wrap
- Painting Transparent Objects
- Acrylic With Baking Soda
- Catalyst contour tools
- Scraping paint
Acrylic Painting Techniques FAQ
What is the most common acrylic painting technique.
Using a dry brush or wet brush are the most common acrylic painting techniques. They simply imply they you either don’t use any water or dip your brush in a jar with clean water before you paint. You should also learn to mix colors and blend as it is the most needed skill in acrylic painting!
At the same time, one of the most beautiful and now popular acrylic painting techniques is for sure acrylic pouring when we thin paint with Floetrol or other pouring mediums and literally pour it on the canvas to make a brilliant abstract painting.
Do you wet the brush before using acrylic paint?
You can use a completely dry brush or wet your brushes before using acrylic paint. Thinned paint will flow better and create thinner layers that will dry faster than thick layers of paint. You can fill a jar with water or use a stay-wet palette to keep your paint wet. If you don’t wet acrylics they are fast-drying by nature and will dry to touch in 5-20 minutes!
What order do you paint acrylic?
It is recommended for beginners to paint acrylic from dark to light and from the background moving forward, adding details and highlights last. If you are painting a landscape I also suggest doing an approximate sketch before painting the canvas.
No matter what acrylic painting technique you’re choosing, make sure you have the right supplies and properly prepare your canvas .
Most acrylic techniques are easy to learn for beginners and can help you create diverse paintings and explore art and acrylic possibilities better. My particular love lies with impasto and palette knives.

Masha Eretnova , born in 1991, is a Buenos Aires-based certified teacher, artist, and member of the Professional Artist Association with 20+ years of personal painting journey.
She started painting and drawing very early and is now an international abstract artist and educator passionate about acrylic painting, gouache, and crafts.
Her works are part of international exhibitions and contests, including ArtlyMix (Brazil), Al-Tiba 9 (Spain), Exhibizone (Canada), Italy, and many more.
Besides her artistic pursuits, Masha holds a post-grad diploma in Teaching Film Photography and 2 music school diplomas: piano and opera singing.
More about Masha’s art journey and work .
Last update on 2024-06-01 / Affiliate links / Images from Amazon Product Advertising API
- Current Events
25 Easy Acrylic Painting Tips for Beginners
Acrylic paints dry quickly and work well on a wide range of surfaces. Unlike oils, they're water-soluble but become water-resistant once dry. This unique property makes them ideal for beginners eager to experiment without the lengthy drying times associated with oil paints.
Here, we've curated 25 essential tips to help you start acrylic painting with confidence and creativity.
1. Start with the Right Supplies
Excellence as an artist requires a commitment to quality. Remember that your art is more than just a creative work—it’s a legacy. Quality artwork is archival, meeting the high standards of durability expected by museums and serious collectors.
Avoid using student-grade paint, crappy brushes, warped or thin canvases, or non-archival materials. Cheap, poor-quality supplies diminish the potential of your painting. You get what you pay for, so if you want to be a professional artist and produce quality artwork, invest in quality supplies. Your choice of materials speaks volumes about your respect for art, so use the best materials you can.
2. Experiment with Surfaces
Canvases or canvas boards are standard surfaces, but acrylics can also adhere well to wood, paper, and even glass. Experimenting with different surfaces can lead to interesting and unique outcomes.
Prepare your chosen surface to enhance your painting outcome. Priming surfaces like wood with gesso or modeling paste can provide a smoother painting experience, ensuring your acrylics glide effortlessly and adhere better. Also, priming the surface prevents the canvas from being “thirsty”, so you won’t need as much paint to cover the canvas.
3. Master Color Theory
Familiarize yourself with basic color theory and master the art of mixing your own colors. A great way to start is by choosing to use three to five colors, and creating shades with complementary colors and varying thicknesses of paint. Use black or white—never both—to alter the color value. This mastery over color mixing gives you complete control over your palette and empowers you to bring your vision to life.
4. Use a Limited Palette
Working with a limited palette encourages you to delve deeper into color mixing and harmony, fostering a cohesive and balanced composition. This constraint can liberate your creativity, pushing you to explore innovative solutions within your chosen hues.
Embracing a limited palette can lead to a more focused and harmonious artwork, teaching you the value of simplicity and the impact of well-chosen colors.

5. Take Care of Your Brushes
Acrylics dry quickly, which can damage brushes if not cleaned promptly. Develop a habit of rinsing your brushes thoroughly in water during painting sessions and washing them with gentle soap and water afterward.
Properly dried and stored brushes retain their shape and extend their lifespan. Store them with bristles facing up to prevent misshaping, ensuring they’re ready for your next creative project.
6. Work in Layers
Acrylics cater to diverse techniques, from thin glazes to thick impasto. Start with a light sketch and thin washes to lay down your composition and gradually build up to thicker layers for texture, depth, and detail.
Experiment with glazing for depth or dry brushing to add texture. Try mediums like gels or pastes to add interesting textures and effects to your work.
7. Keep the Paint Moist
The rapid drying time of acrylics is advantageous for quick work and layering but can be challenging in dry climates. To extend the working time of your acrylics, use a slow-drying medium or keep a spray bottle handy to lightly mist your palette and canvas, keeping the paint moist.
8. Clean Your Palette
A cluttered palette can lead to muddy colors. Regularly clean your palette during a painting session to keep colors fresh and vibrant.
A wet palette can also keep your acrylics moist for longer, reducing waste and making color mixing easier.
Consider using a glass or disposable palette for easier cleanup and to keep your workspace tidy and organized.
9. Sketch First
Begin your painting with a light pencil or chalk sketch on the canvas to help plan your composition and guide your initial layers of paint.
Don't worry about precision or painting over your sketch. Your sketch is there to map out the shape and form of your composition. Embrace this step as a blueprint, not a constraint, allowing flexibility and creativity as your painting evolves.
10. Embrace the Learning Curve
Every painting is a learning experience, and every mistake is a learning opportunity. If something doesn't turn out as expected, don’t worry—you can always paint over it with acrylics.
Acrylics are forgiving, allowing you to paint over and correct mistakes easily, so don't be afraid to experiment and take risks.

11. Experiment and Explore Techniques
There are numerous painting techniques specific to acrylics that you can explore to enhance your artistic vocabulary, such as:
- Washing : Applying a thin, watered-down layer of paint for a translucent effect.
- Glazing : Applying a transparent layer of paint over a dry layer to adjust the color or tone.
- Dry brushing : Using a dry brush with a small amount of paint creates a strong, textured effect.
- Palette knife painting : Applying paint with a palette knife for bold textures and strokes.
Don't limit yourself to traditional painting techniques. Add materials like sand or rice to your paint for texture, or use unconventional tools like credit cards or combs to create unique effects. Play with palette knives, sponges, or even your fingers to apply paint. These tools can offer unique textures and effects, broadening your creative expression.
12. Understand Mediums
Acrylic mediums can drastically alter the behavior of your paint—its texture, finish, and drying time. Gloss medium increases shine and transparency, while matte medium reduces gloss for a flat finish. Modeling paste adds body to the paint for impasto techniques, and retarders slow the drying time, making blending easier.
13. Practice Consistently
Improvement comes with consistent practice. Set aside regular time for painting—even if it's just a few minutes a day—to help you become more comfortable with the medium and develop your own style over time. Remember: Becoming a professional artist requires a strong work ethic and prolific production. Professionals paint 40 hours each week.
14. Learn from Others
Study the work of artists you admire to gain inspiration and insight into different styles and techniques. Online tutorials , art books , and classes are also great resources for learning new approaches to acrylic painting.
Check out this quick tutorial from professional artist Elli Milan on how to make an underpainting with acrylics.
15. Paint from Life
Practice painting from real-life subjects to enhance your observational skills and understanding of light, form, and color. Still-life setups, landscapes, and portraits can offer valuable learning experiences.
Consider painting outdoors (plein air) to capture the nuances of natural light and scenery. This practice can invigorate your work with spontaneity and vibrancy, reflecting the dynamic beauty of the natural world.
16. Record Your Process
Create a video recording or time-lapse of your painting process. As you watch your recording, evaluate your demeanor and temperament as an artist. Do you still lack confidence in planting your brushstrokes and leaving them? Do you “blendy-blendy-smoothy-smooth” everything you do? Recording your process enables you to see the evolution of your painting and assess areas for improvement.
17. Set Achievable Goals
Set small, achievable goals for your painting practice . Whether mastering a new technique or completing a series of paintings, goals can provide direction, motivation, and a sense of accomplishment.
For example, a few SMART goals for artists beginning to paint with acrylics might include:
- Purchase quality brushes and a glass palette by the end of the week.
- Complete a painting that uses glazing and dry brushing by the end of the month.
- In the next 90 days, complete 10 acrylic paintings in various sizes.
Take time to celebrate your achievements, no matter how small. Acknowledging your successes reinforces your confidence and dedication to your art.
18. Join Art Communities
Engaging with other artists can provide support, feedback, and camaraderie. Whether online or in person, art communities—like Milan Art’s online social community —can be invaluable resources for connection, learning, and exposure.
19. Protect Your Art
Once your painting is complete, protect it with a suitable varnish to shield it from dust, UV damage, and fading. This final step will ensure your artwork remains vibrant and intact for years to come.
Select a varnish that complements your artistic finish. Typically, artists prefer glossy rather than matte. For acrylic paintings, you can use an acrylic gloss varnish. (Always use a professional-grade varnish instead of one from Home Depot or the local hardware store.) This final touch not only protects your painting but can also enhance its visual appeal.

20. Balance Critique with Confidence
Be open to feedback on your work, but also trust your artistic instincts. Constructive criticism can be helpful, but staying true to your vision and style is also essential. This balance between openness to growth and self-assurance is critical to your artistic evolution.
21. Study the Masters
Analyzing the works of accomplished acrylic artists can provide knowledge and inspiration. Study their techniques, color choices, and compositional strategies to glean insights that can inform your own practice.
22. Stay Organized
A well-organized workspace can streamline your painting process, making your creative sessions more productive and enjoyable. Invest time organizing your materials and tools, creating an environment that nurtures your creativity.
Your workspace should be a sanctuary for creativity. Tailor it to meet your preferences and needs, ensuring it inspires and supports your artistic endeavors.
23. Free Yourself From Clutter
Clutter blocks creativity—not just physical clutter but also mental clutter, relationship clutter, or time clutter. Examples of clutter include:
- disorganized belongs or piles of laundry
- negative mindsets or fear and self-doubt
- staying connected with people who hold us back or dishonor us
- spending too much time on unhealthy, unhelpful, or unproductive activities like social media gossip, excessive TV-watching, or obligations and activities we don’t want to do
Figure out what clutter is in your life. What is the energy that’s holding you back creatively? Once you’ve identified your clutter, free yourself from it.
24. Start with the Basics
Building a solid foundation in basic shapes, forms, and brushstrokes can empower you to tackle more complex subjects confidently. Dedicate time to mastering these fundamentals, as they are the building blocks of all great artworks.
Focus on understanding the core principles of acrylic painting, such as color theory, composition, and light. Experiment with acrylic paints and the various ways you can lay down acrylic paint. Learn how acrylics behave on your canvas. This foundational knowledge will serve you well as you expand your artistic repertoire.
25. Stay Inspired
Inspiration is the fuel for creativity. Cultivate a practice of seeking inspiration in everyday life, from the natural world to other art forms. Remain open to new experiences and ideas, as they can spark your next artistic breakthrough.
Adopt practices that keep your creativity flowing, such as keeping a sketchbook for spontaneous ideas or engaging in creative exercises. Inspiration will find you working, so an inspired artist is prolific, constantly generating ideas for new and exciting paintings and consistently producing new artwork.
Master the Art of Acrylic Painting
Acrylic painting offers endless possibilities for beginners, blending ease of use with the potential for stunning, diverse outcomes. Following these 25 tips, you'll navigate the initial challenges of acrylic painting like a pro and lay a solid foundation for your art practice.
Learn the essentials of acrylic painting from professional artist Elli Milan. In this online course, Elli shares the three-step acrylic painting process she has used to create and sell her artwork since 1996. Her techniques will empower you to paint lifelike imagery regardless of your subject matter. Enroll now !

Milan Art Institute
Subscribe to our blog, browse posts.

- February 2021
- January 2021
- December 2020
- November 2020
- October 2020
- September 2020
- August 2020
- January 2020
- December 2019
- November 2019
- October 2019
- September 2019
Browse by topics
- art inspiration (45)
- become a professional artist (38)
- art techniques (35)
- art tips (23)
- art tutorial (22)
- art history (17)
- art skills (17)
- hero artists (17)
- painting (14)
- art masters (13)
- art supplies (13)
- drawing (12)
- acrylic painting (9)
- sketching (9)
- art education (8)
- oil painting (8)
- sell your art (8)
- art marketing (7)
- art and travel (6)
- art fun (6)
- artist mindset (6)
- fine art (6)
- travel sketching (6)
- art business (5)
- art studio (5)
- artist brand (5)
- artist voice (5)
- holidays (5)
- professional habits (5)
- traveling (5)
- oil paint (4)
- professional artist habits (4)
- art career (3)
- art resources (3)
- doodling (3)
- professional artists (3)
- urban sketching (3)
- art school (2)
- art therapy (2)
- artist block (2)
- branding (2)
- cleaning (2)
- creative block (2)
- decorative market (2)
- surrealism (2)
- art entertainment (1)
- art galleries (1)
- art influencers (1)
- art markets (1)
- art photography (1)
- art portfolio (1)
- collecting art (1)
- coloring (1)
- composition (1)
- decorative art (1)
- eco friendly (1)
- environment (1)
- impressionism (1)
- mixed media (1)
- narrative art (1)
- plein air (1)
- portraits (1)
- price your art (1)
- right brain (1)
- success stories (1)
- symbolism (1)
- time management (1)
Related Posts

How to clean your brushes for oil painting
Let’s face it, oil painting is messy! Oil paint gets everywhere and is extremely difficult to remove. Your paint will...

How to Get Motivation as an Artist
Creating art is one of the most fulfilling things you can do. But it isn’t always easy. Let’s face it, we all go...

5 Tips for Holding a Virtual Paint Party This Holiday Season
Photo caption: Virtual paint parties allow you to connect with friends and your creative spirit in the virtual...
10 Abstract Painting Techniques for Beginners
Abstract painting, with its vibrant interplay of shapes, forms, lines, and colors, offers a powerful medium for...

10 Tips on How to Sell Your Art Locally
Photo by Ilse Orsel on Unsplash

33 Valentine’s Day Quotes for Painting & Drawing Inspiration
Photo caption: Milan Art Institute co-owner Dimitra Milan suggests using poetry and quotes as inspiration for your...
How to Varnish Your Oil & Acrylic Painting
Why should you varnish your oil and acrylic paintings? The three main reasons you should varnish your artwork is to...

Right Brain Exercises
The right hemisphere of your brain is like an underdeveloped muscle. You need to develop this side of your brain...

4 Tips for Painting Like an Impressionist
Photo caption: Vincent Van Gogh has been associated with Impressionism and has inspired many an artist to paint with...
5 Facts Artists Should Know About Symbolism of Color
As an artist, you have the ability to evoke different feelings and emotions in the viewer of your artwork just by...
Post a comment
Get latest articles directly in your inbox, stay up to date., stay up to date.
27 Easy Acrylic Painting Ideas for Beginners: Tips, Techniques, and Best Practices
1. basic materials for acrylic painting, choosing the right paint brands, selecting brushes for acrylic painting, canvas or paper: which is best, 2. acrylic painting techniques for beginners, wet-on-wet technique, dry brush technique, glazing: building layers, palette knife technique, 3. color mixing basics, understanding the color wheel, creating shades and tints, harmonious color combinations, 4. easy acrylic painting ideas for beginners, abstract art, 5. troubleshooting common acrylic painting issues, preventing paint from drying too fast, achieving smooth color blending, creating texture with acrylics, 6. finding inspiration for your acrylic paintings, nature as a muse, art history and famous artists, personal experiences and emotions, 7. building connections in the art community, local art classes and workshops, online art forums, social media for artists.
Embarking on a new creative journey with acrylic paints is an exciting adventure. With the right tools and techniques, you'll be able to create beautiful, easy acrylic painting ideas. In this guide, we'll cover everything you need to know about the basic materials, techniques, and best practices for beginners. Let's dive in!
Before you can start experimenting with easy acrylic painting ideas, you'll need to gather a few essential materials. Here's a quick overview of the basics you'll need to get started:
When it comes to acrylic paints, you'll find a wide range of brands and quality levels. To get the best results, consider the following:
- Student-grade paints: These are more affordable and perfect for beginners, but may have lower pigmentation and consistency.
- Artist-grade paints: These offer higher pigmentation and better consistency, but can be more expensive. You might want to upgrade to these once you're more comfortable with the medium.
- Popular brands: Some well-known and reputable paint brands include Liquitex, Golden, and Winsor & Newton.
Having the right brushes can make a big difference in your acrylic painting experience. Here are a few tips to help you choose:
- Brush types: Synthetic brushes like nylon or taklon are great for acrylics, as they're more durable and easier to clean than natural hair brushes.
- Brush sizes: A variety of brush sizes will allow you to create different effects and details in your paintings. Start with a few basic sizes, such as small round brushes for details and larger flat brushes for broad strokes.
Deciding whether to paint on canvas or paper depends on your personal preference and budget. Here are some pros and cons of each:
- Canvas: Canvases offer a sturdy, textured surface that's ideal for acrylic painting. Pre-stretched and primed canvases are readily available, making them a convenient option.
- Paper: Acrylic paper is a more affordable option, but it may not be as durable as canvas. Make sure to choose heavy-weight paper that's designed specifically for acrylics to avoid buckling or warping.
Now that you've gathered your basic materials, you're ready to explore easy acrylic painting ideas and techniques!
As a beginner exploring easy acrylic painting ideas, it's important to familiarize yourself with various techniques that can enhance your artwork. Here are four essential techniques to help you get started:
The wet-on-wet technique involves applying wet paint onto an already wet surface. This method allows the colors to blend smoothly, creating soft transitions and interesting effects. To try this technique:
- Apply a base layer of paint to your canvas.
- While the base layer is still wet, add another color on top and gently mix the colors together with your brush.
- Experiment with different color combinations and brushstrokes to see what effects you can create.
Using a dry brush technique can add texture and dimension to your acrylic paintings. To achieve this effect:
- Remove most of the paint from your brush by wiping it on a paper towel or scraping it against the edge of your palette.
- Lightly drag the brush across the surface of your canvas, allowing the paint to catch on the raised texture of the canvas.
- Experiment with different brush sizes and angles to create a variety of textures and effects.
Glazing involves building up thin layers of transparent paint, allowing each layer to dry before applying the next one. This technique can create depth and luminosity in your acrylic paintings. To try glazing:
- Mix a small amount of paint with a glazing medium (or water) to create a transparent layer.
- Apply the thinned paint to your canvas using smooth, even strokes.
- Allow the layer to dry completely before adding another layer on top.
- Continue building up layers until you achieve the desired effect.
Using a palette knife can add an interesting, painterly quality to your acrylic paintings. Palette knives can create bold strokes, thick textures, and unique effects. To use a palette knife:
- Load the edge of the palette knife with paint by dipping it into your paint or scraping it across your palette.
- Apply the paint to your canvas using various angles and pressures to create different textures and effects.
- Experiment with different palette knife shapes and sizes to achieve a variety of results.
By mastering these basic techniques, you'll be well on your way to creating stunning and easy acrylic painting ideas!
Understanding color mixing is a crucial skill for anyone exploring easy acrylic painting ideas. By learning the basics of color theory, you can create a wide range of hues and shades to elevate your artwork. Let's dive into the world of color mixing:
The color wheel is a visual representation of the relationships between primary, secondary, and tertiary colors. It's an essential tool for understanding how colors relate to one another and how they can be mixed to create new hues. Here are the basics:
- Primary colors : red, blue, and yellow. These colors cannot be created by mixing other colors together.
- Secondary colors : green, orange, and purple. These are created by mixing equal parts of two primary colors.
- Tertiary colors : These are created by mixing equal parts of a primary color and a secondary color, resulting in colors such as yellow-orange, blue-green, and red-purple.
By understanding the color wheel, you can create countless color combinations for your acrylic paintings.
Shades and tints are variations of a color, created by adding black or white to the base hue. To create shades and tints:
- Shades : Mix a small amount of black paint with your chosen color to create a darker version of the hue.
- Tints : Mix a small amount of white paint with your chosen color to create a lighter version of the hue.
Experiment with different amounts of black and white paint to create a wide range of shades and tints for your easy acrylic painting ideas.
Creating harmonious color combinations can make your acrylic paintings more visually appealing. Here are some popular color schemes to consider:
- Complementary colors : Colors that are opposite each other on the color wheel, such as blue and orange or red and green. These combinations create contrast and can make your paintings more vibrant.
- Analogous colors : Colors that are next to each other on the color wheel, such as red, orange, and yellow or blue, green, and purple. These combinations create a sense of harmony and unity in your artwork.
- Triadic colors : Three colors that are evenly spaced around the color wheel, such as red, yellow, and blue or orange, green, and purple. Triadic color schemes can create a balanced and dynamic appearance in your paintings.
By experimenting with these color schemes and mixing techniques, you'll be well-equipped to create beautiful and easy acrylic painting ideas that showcase your unique style.
Now that you're familiar with the basics of materials, techniques, and color mixing, it's time to explore some easy acrylic painting ideas. Here are four popular categories to get you started on your artistic journey:
Landscapes are a classic subject for beginners, as they allow you to experiment with colors, textures, and perspective. Here are a few easy landscape painting ideas:
- Seascapes: Capture the serene beauty of a beach or the crashing waves of the ocean.
- Mountains: Practice your shading and highlighting techniques by painting majestic mountain ranges.
- Sunsets or sunrises: Use vibrant colors and blending to create breathtaking skies.
- Forests and trees: Paint lush foliage and experiment with different brush strokes to create texture.
Remember, you don't need to create a perfect representation of the landscape—focus on capturing the essence and atmosphere of the scene.
Abstract art is an excellent choice for beginners, as it allows you to experiment with colors, shapes, and textures without the pressure of creating a realistic image. Some easy abstract painting ideas include:
- Color blocking: Create bold, geometric shapes using contrasting or harmonious colors.
- Texture and patterns: Use various brush strokes, palette knife techniques, or even household items (like sponges or toothbrushes) to create unique textures and patterns.
- Emotion-based paintings: Choose colors and shapes that represent your emotions or feelings, and let the paint flow freely onto the canvas.
Abstract art encourages you to let go of traditional rules and embrace your creativity—there's no right or wrong way to paint an abstract piece.
Still life paintings allow you to practice your observational skills and explore color, light, and shadow. Some easy still life painting ideas include:
- Fruit or vegetables: Arrange a simple composition and focus on capturing the colors and shapes.
- Flowers: Paint a vase of flowers, experimenting with color and texture to create depth and dimension.
- Everyday objects: Choose items from around your home and arrange them into a visually interesting composition.
Remember to pay attention to the light source and how it affects the colors and shadows in your still life painting.
While portraits can be challenging for beginners, they offer a great opportunity to practice your observation and color mixing skills. Here are a few easy portrait painting ideas:
- Self-portrait: Use a mirror to observe and paint your own face, focusing on shapes, colors, and shadows.
- Family or friends: Ask a loved one to pose for you, or work from a photograph.
- Stylized portraits: Instead of aiming for a realistic representation, experiment with bold colors, simplified shapes, or abstract elements.
Start with basic shapes and build up layers of color, shading, and detail as you gain confidence in your portrait painting skills.
By exploring these easy acrylic painting ideas and categories, you'll gain valuable experience and develop your unique artistic style.
As you begin your acrylic painting journey, you may encounter some common challenges. Don't worry—every artist faces these issues at some point. We've got you covered with tips and solutions to help you overcome these obstacles and continue creating beautiful artwork.
One of the main challenges with acrylic paints is their fast-drying nature. While this can be a benefit, it can also be frustrating when you're trying to blend colors or work on a specific area. Here are a few tips to prevent your acrylic paints from drying too quickly:
- Use a spray bottle to mist your palette and canvas with water, keeping the paint moist.
- Try using a stay-wet palette, which consists of a sponge and a special paper that keeps your paint fresh for longer periods.
- Consider adding a retarder medium to your paints, which slows down the drying process and gives you more time to work.
Experiment with these techniques and find the one that works best for your painting style and preferences.
Blending colors smoothly with acrylic paints can be tricky due to their fast-drying nature. However, with some practice and the right techniques, you can achieve beautiful, seamless blending. Here are a few tips:
- Work quickly, and keep your paint wet by using a spray bottle or a damp brush.
- Use a clean, dry brush to gently blend the edges of the colors together, creating a gradient effect.
- Try the wet-on-wet technique: Apply a thin layer of paint to your canvas and then add another color on top while the first layer is still wet. This helps the colors mix and blend more easily.
Remember, practice makes perfect—keep experimenting with blending techniques to find the one that works best for you.
Acrylic paints are versatile and can be used to create a variety of textures in your artwork. Here are some ways to add texture to your acrylic paintings:
- Use thick paint or build up layers to create impasto effects, giving your painting dimension and depth.
- Experiment with different brush strokes, such as dabbing, stippling, or scumbling, to create unique textures.
- Try using a palette knife to apply paint, creating bold, gestural strokes and interesting textures.
- Consider adding texture mediums, such as modeling paste or sand, to your paint for even more texture possibilities.
Don't be afraid to get creative and explore different ways of adding texture to your acrylic paintings—it's all part of the fun and learning process!
By troubleshooting these common acrylic painting issues, you'll gain confidence in your skills and continue to grow as an artist.
Sometimes, the hardest part of creating art is finding inspiration. But don't worry—inspiration can come from many places. In this section, we'll explore some sources of inspiration for your easy acrylic painting ideas.
Nature is a fantastic source of inspiration for artists. The beauty of landscapes, seascapes, and wildlife can offer endless ideas for your acrylic paintings. Here are some ways to use nature as your muse:
- Take a walk in a park, forest, or by the beach, and observe the colors, shapes, and patterns around you.
- Take photographs of interesting natural scenes, and use them as references for your artwork.
- Get inspired by the changing seasons, weather, and time of day—each offers unique lighting and colors to explore in your paintings.
Allow nature to spark your creativity and provide you with countless easy acrylic painting ideas.
Art history is full of incredible artists, styles, and movements that can inspire your own artwork. Studying famous artists and their techniques can help you develop your skills and find your unique painting style. Here are some ways to use art history as inspiration:
- Visit museums or galleries to see famous paintings in person, and observe the techniques and colors used by the artists.
- Research different art movements, such as impressionism, cubism, or abstract expressionism, and experiment with their styles in your own work.
- Study the work of famous artists, like Vincent van Gogh, Frida Kahlo, or Jackson Pollock, and try to incorporate elements of their styles into your paintings.
By learning from the masters, you can discover new and exciting easy acrylic painting ideas for your own work.
Your own life experiences and emotions can serve as powerful inspiration for your artwork. Tapping into your feelings and memories can make your paintings more personal and expressive. Here are some ways to use your personal experiences as inspiration:
- Think about memorable moments or places from your past, and try to capture their essence in your artwork.
- Reflect on your emotions and feelings, and use colors, shapes, and textures to express them in your paintings.
- Find inspiration in your dreams, and use their surreal imagery to create unique and imaginative paintings.
By using your personal experiences and emotions as inspiration, you'll create meaningful and expressive artwork that connects with others.
Remember, inspiration can come from many sources. Keep an open mind, and you'll never run out of easy acrylic painting ideas to explore.
As you develop your acrylic painting skills and explore new ideas, connecting with other artists and art enthusiasts can be incredibly valuable. Building connections in the art community can provide support, inspiration, and opportunities for growth. Let's look at some ways to connect with others who share your passion for acrylic painting.
Enrolling in local art classes or workshops can be an excellent way to meet fellow artists, learn new techniques, and receive feedback on your work. Here's how to find classes near you:
- Check your local community centers, colleges, or art schools for classes and workshops on acrylic painting.
- Look for art supply stores that offer classes or workshops, as they often cater to beginners and intermediate artists.
- Join local art clubs or organizations, which often host classes, workshops, or group painting sessions.
By attending local classes and workshops, you can build your skills, make new friends, and find even more easy acrylic painting ideas through shared experiences.
Online art forums can be a great way to connect with other artists from around the world. These forums provide a platform for sharing your work, asking questions, and discussing techniques and ideas. Here are some tips for finding and participating in online art forums:
- Search for acrylic painting-specific forums, or join general art forums that have sections dedicated to painting.
- Introduce yourself and share your work, while also providing constructive feedback and encouragement to others.
- Participate in forum discussions and challenges, as they can inspire new easy acrylic painting ideas and help you grow as an artist.
By engaging with others in online art forums, you'll gain access to a wealth of knowledge, inspiration, and support from fellow artists.
Creating and maintaining a social media presence can help you share your artwork, connect with other artists, and gain exposure. Here are some platforms and strategies for using social media as an artist:
- Post your artwork on platforms like Instagram, Facebook, or Pinterest, using relevant hashtags to increase visibility and find like-minded artists.
- Follow other artists, art pages, and galleries, and engage with their content by liking, commenting, and sharing.
- Join art-related groups on Facebook or other platforms, where you can share your work, ask questions, and participate in discussions.
Using social media effectively can help you build connections in the art community, access a wealth of easy acrylic painting ideas, and increase your exposure as an artist.
Remember, connecting with others in the art community can provide you with valuable resources, support, and inspiration. So don't hesitate to reach out and start building your network of fellow artists and art enthusiasts.
If you're looking to elevate your acrylic painting abilities, don't miss the workshop ' Improve Your Acrylic Painting Skills ' by Rachel Christopoulos. This workshop offers valuable techniques and expert advice to help you unlock your full potential as an acrylic artist.

Live classes every day
Learn from industry-leading creators
Get useful feedback from experts and peers
Best deal of the year
* billed annually after the trial ends.
*Billed monthly after the trial ends.
Artjournalist
12 Fun & Easy Ideas for Acrylic Painting Techniques
This post may contain affiliate links, which means we may earn a commission if you make a purchase. As an Amazon Associate we earn … Read more
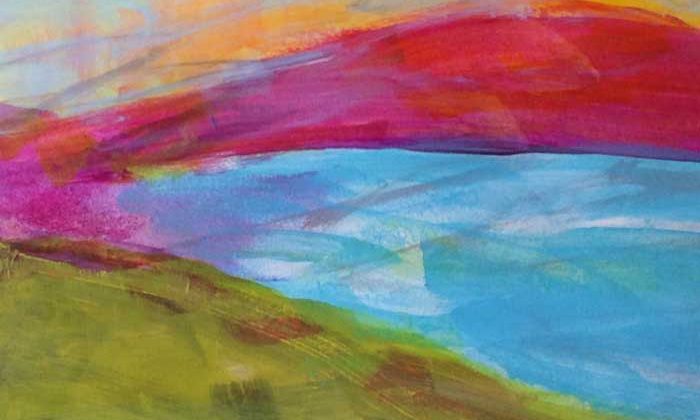
It’s no secret I love working with acrylic paint in my artwork, so today I thought I would share some fun ideas for acrylic painting techniques you can use to create interesting backgrounds in your journal pages and and artwork.
There are so many different acrylic paint techniques which offer so many possibilities for creative expression! You are sure to find some ideas and inspiration here for different things you can experiment with in your creative art journals.

Why acrylic paint? Acrylic paint is easy to find, easy to work with, and easy to clean up – so, yes, allow yourself to let go and have fun making a mess – that’s the best part!
Need a Primer on Working With Acrylic Paint?
If you are new to world of acrylic paint, you might want to also check out these articles on our site, as they have some good info on what to expect when you work with acrylic paint in your projects!
- 12 Acrylic Painting Tips for Working With Acrylic Paint in Your Art Journal
- Types of Acrylic Paint Brushes and How They Are Used
Whether you are working in an art journal or painting on canvas, there are so many different things you can create with acrylic paint. These resources will get you started in no time.
Here are 12 Fun & Easy Acrylic Paint Ideas & Techniques to Inspire Your Creativity!
These acrylic painting ideas are fun, easy, and will definitely help inspire your creativity! Grab your journal, a blank sheet of paper, or a canvas board and have some fun!
#1: Scraped Backgrounds Acrylic Paint Technique
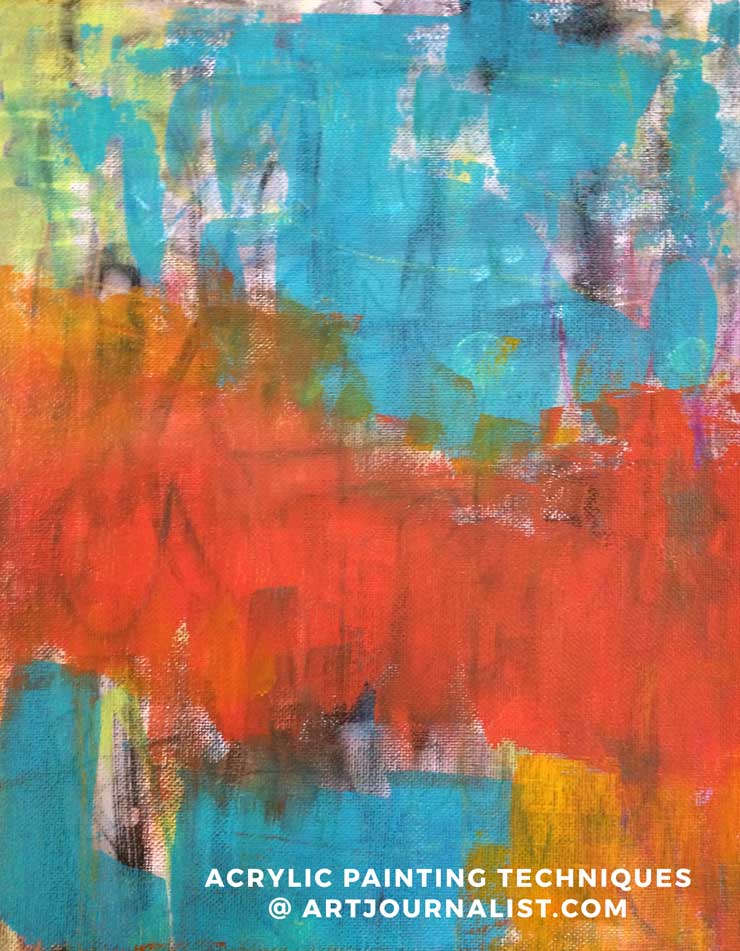
Scraped backgrounds are super easy to do with acrylic paint, and can be a lot of fun. You can quickly create multiple background pages if you are creating a journal using this technique.
Here’s an example of this technique used on canvas to give you some ideas for painting with this acrylic painting method.
All you need is a large flat object – I usually use old expired gift cards and credit cards and “fake credit cards” that you might get in the junk mail pile from different places.
Then, I simply add a few dabs of paint and spread it around with the credit card. Easy peasy and it can really add a nice layer to use as a background. You can also use this technique to create nice straight blocks in your pages.
There’s no limit for what direction you scrape – up and down, side to side – let your creativity flow! You can also use many different colors for different blending effects.
And, this is not just an acrylic painting technique to use for art journals – It also works great for covering large areas of canvas easily!
In the example above, I simply used an old gift card to spread the large sections of orange, blue, and yellow on a canvas over some scribbles made with Neocolor II crayons .
It’s a super fun way to build up lots of layers in your artwork both in your art journals and on canvas!
#2: Underpainting Technique With Acrylic Paint
Underpainting is a technique where you paint the first layer in one color and then after it dries go over it with another color. When the first layer of paint dries, it won’t blend with the new layer of paint, but it will instead slightly show through to the second layer.

For this technique, it’s helpful to use soft bodied paints such as Golden Fluid Acrylics or Liquitex Soft Body Acrylics . Of course, you can also always mix any regular heavy bodies paint with acrylic fluid matte medium to make your paints a bit more translucent as well!
You can do this technique in many different ways and for a lot of different types of projects!
You can definitely see a difference between the shade of the red on top of the purple and the red on top of white paint to the right!
You can also do this to build up a LOT of layers, especially when painting images of scenes and objects. Starting with one color, allow it to dry and keep building on and adding new layers of different colors on top. The first layers will show through at varying areas to create a multi-layered effect.
In the image above, you can see how many different layers of paint show through to create many different shades and colors!
#3: Water Drops Acrylic Paint Idea

Acrylic paint dries pretty fast – which means you can have a lot of fun experimenting with water to create water splatters which cause the paint to lift off from the paper or canvas surface.
This technique is somewhat messy, but super simple! All you will need to do is brush on a few strokes of paint – and then using your brush or fingers, splatter on a bit of water on top of the paint.
Let the water droplets sit for about 3-5 minutes, and then use a dry paper towel to carefully dab the places where the water was splattered.
When you lift up the paper towel, you’ll notice the water causes the paint to also lift off and this creates a neat effect of where the water used to be!
So many possibilities with different ways you can use this one! Use it as a background or for when you start adding layers.
#4: Acrylic Painting With Stencils

Stencils can also be a lot of fun when working with acrylic paint! You can use stencils to create a number of different patterns and textures in your mixed media art.
I find that using foam brushes help the most with getting the best coverage over stencils, but you can experiment with a number of different brushes and techniques.
#5: Mark Making With Acrylic Paint

Another technique that can be fun is to use different types of items to make marks in your painting. You can use these items as a different style of brush stroke, or you can use them as stamps.
There are a TON of things you can use for stamping into your paint. Many of them you already likely have around the house, such as lids, hardware, forks, etc.
This is especially fun when combined with a gelli plate for making art prints .
#6: Adding Texture Acrylic Painting Technique

One of the things that is fun about using acrylic paint is it really works well with creating mixed media art! There are a lot of ways you can add texture into your art with acrylic paint!
In this picture below, I repurposed a piece of netting from a bag of oranges we had to add some interesting texture to the page.
You can attach different things to add texture to your work and paint it right into your picture! This is a great way to repurpose different things from around the house.
You can use tape, pieces of paper, string, ribbons, and more – all of these things can be painted over with acrylic paints! You can use glue or matte medium to help keep items attached and then paint over them – this really adds a lot of texture to your work.
#7: Acrylic Splatters & Sprays

It can be fun to splatter and spray acrylic paint for different effects. In the past, I’ve experimented with making my own DIY acrylic spray paints, by watering down the acrylic paint and putting it in a spray bottle.
It can be messy, but it is fun! The important thing is to make sure the paint is watered down enough that it won’t clog up the spray bottle nozzle.
Alternatively, you can mix water into paint to dilute it and then splatter the brush to get a similar effect.
#8: Dripping Paint Technique

This idea is simple to do – all you need is to use your favorite color of paint, mix with a bit of water, and apply it to the page. Next, just tilt the paper so the paint starts to run. If the paint is not running easily when you tilt the paper, you can add more water.
In this picture above, I used this technique over some handwriting with ink. The watered down paint dripped and also created some neat smearing effects with the layer of ink below it!
#9: Paint Smudging

Another acrylic painting technique idea is to use baby wipes or paper towels to smudge the paint after it is applied.
The main thing is to take some care in picking colors which will blend well. You can see here that some of the colors don’t always play nice together and can give it a muddy effect.
Play around with different materials – baby wipes which are wetter will give you a much different effect than the texture created by dry paper towels. You can also try patting it or smearing it for different effects as well.
#10: Paint With Silhouettes & Masks

A silhouette is an outline of shape of a person or object that is contrasted with the background. You can use many different shapes cut-out from paper or a picture and paint over it.
For example, this silhouette of a person started out as a picture of a person I cut out from a magazine. I traced around the photo and painted it a contrasting color from the background.
You can also use cut-outs of different shapes as a layer mask. Basically you would put down a cut-out shape of any object over your first layer of paint and then add a second layer of paint all around it. When you lift the mask, the layer below will appear to be a different style than everything around it.
You can try this with all sorts of shapes – squares, circles, animal silhouettes and more!
#11: Add Some Sparkle!

Did you know they make several acrylic based glitter paints? Oh yes, they do! You can find acrylic glitter paint at most craft stores. I used Folk Art Extreme Glitter Paint in the example shown below. It comes in many colors, or you can always use it on top of another color!
My only complaint is that photos simply don’t do it justice! {Or maybe I just need better lighting – this picture was taken at night, so not the best of light conditions!}
#12: Alcohol Marbling Acrylic Paint Technique

This is a messy but fun marbling effect you can do when you mix water, rubbing alcohol, and acrylic paint together.
To get this effect, I first pour on two contrasting colors of acrylic paint next to each other on a piece of paper. Then I add a lot of water, without mixing the paints, and then I add rubbing alcohol.
Using the tip of the paint brush, I then swirl it around to create different marbled patterns.
This technique for acrylic paint takes some experimentation – but that’s part of the fun, right?
Which of these Acrylic Painting Technique Ideas Have You Tried?
Have you tried any of these acrylic painting techniques before? Do you have any acrylic painting ideas we should experiment with? Share your thoughts and experiences in the comments below!
Sharing is caring!
Join our facebook group!
Share what you’re creating and working on, ask questions + connect with over 4000 creative artjournalists for inspiration + ideas!
We use cookies to enhance our website for you. Proceed if you agree to this policy or learn more about it.
- Essay Database >
- Essays Examples >
- Essay Topics
Essays on Acrylic Paint
3 samples on this topic
Our essay writing service presents to you an open-access selection of free Acrylic Paint essay samples. We'd like to emphasize that the showcased papers were crafted by skilled writers with relevant academic backgrounds and cover most various Acrylic Paint essay topics. Remarkably, any Acrylic Paint paper you'd find here could serve as a great source of inspiration, actionable insights, and content structuring practices.
It might so happen that you're too pressed for time and cannot allow yourself to spend another minute browsing Acrylic Paint essays and other samples. In such a case, our website can offer a time-saving and very practical alternative solution: an entirely unique Acrylic Paint essay example crafted specifically for you according to the provided instructions. Get in touch today to learn more about effective assistance opportunities provided by our buy an essay service in Acrylic Paint writing!
Example Of A Detailed Sketch Of The Object Essay
Free course work about glencoe introducing art.
Chapter 1 Lesson 1 Checking Your Understanding page 5
73 Easy Acrylic Painting Ideas for Beginners
- Fantastic canvas painting tutorials for beginners
Acrylic paint is perfect for beginners because it’s easy to apply, you can layer colors, and correct or cover mistakes. It is affordable and comes in a wide variety of colors that stay vibrant even after drying.
In this blog post, I collected many beautiful, easy canvas paintings for beginners in video format or step-by-step tutorials. Painting has therapeutic effects, it’s a great way to relax and unwind after a hard and busy day.
The great thing, you don’t need to be a professional artist, grab a blank canvas, some acrylic paint, and a brush or palette knife and start painting!
Abstract acrylic paintings
Easy geometric canvas art, landscape painting ideas for beginners, seasonal canvas paintings, animal canvas painting ideas, easy canvas art with quotes, plants and flower acrylic paintings, other fun acrylic painting tutorials, acrylic pouring tutorials, final thoughts about the easy acrylic painting ideas.
DISCLOSURE: THIS POST MAY CONTAIN AFFILIATE LINKS, MEANING I GET A COMMISSION IF YOU DECIDE TO MAKE A PURCHASE THROUGH MY LINKS, AT NO COST TO YOU. PLEASE READ MY DISCLOSURE FOR MORE INFO.
If you are a beginner, I suggest you try abstract paintings first. They are the easiest to do, they are a lot of fun, and you can experiment with the brush and other tools.
Most abstract paintings use bold colors. They also work with neutrals. but they look the best with high contrast, bold accents, or a metallic touch. If unsure about the colors, use online color-picking software or hop into Colorpalettes and choose an image you like.
This type of art suits all skill levels, however, learning different techniques can take your art to the next level.
1. DIY layered abstract wall art
I love this canvas painting by Sarah Hearts . The palette is gorgeous, and you can create this fantastic art in a couple of hours max with a large flat brush.

2. Easy large abstract art
This beautiful large canvas painting by A Beautiful Mess is the perfect example of using bold colors that turns a simple piece into something fantastic.

3. Two-minute canvas art
Watch this tutorial by Love Create Celebrate if you want a fast and easy canvas painting. This artwork looks fantastic! The best part, anyone can do it, the materials you need are minimal, and you can finish it in a couple of minutes. Grab a black canvas and white paint and start painting!

4. Beautiful abstract acrylic painting tutorial
I love how she uses different blending techniques and tools to achieve fun textures, lines, and shapes. It’s a fun project where you can experiment and create unique paintings.
5. DIY abstract artwork with a palette knife and gold foil
Gold foil is a fantastic craft material that you can use in many projects. It is also perfect when creating art. This tutorial by Cuckoo 4 Design will show you how to incorporate it into an abstract painting.

6. Scrape painting art
This fantastic tutorial by Moms and Crafters will show you how to create art with a scraper. I love the texture and overall look, and it also made me realize that a nice frame changes the whole look of your artwork. So, you might want to consider framing your canvas paintings.

7. DIY large abstract wall art
These canvas paintings by Dans Le Lakehouse are playful and fun. It’s the perfect example of layering and ‘fixing’ acrylic paintings. She redid her artwork until she was satisfied. I love the bright colors, these easy paintings would light up any room.

8. Easy abstract acrylic painting with blending technique
You can learn easy blending techniques from this video. It’s perfect for improving your painting skills as a beginner.
9. Beautiful abstract canvas painting
This tutorial by Love Create Celebrate will show you how to create a wonderful abstract painting with neutral colors and lots of vertical brush strokes.

10. DIY brushstroke art
If you’re looking for a modern wall art idea, check out this tutorial by Cuckoo 4 Design . Pick a color palette that fits your style and add metallic paint for a sophisticated look. Simple and gorgeous, I love it!

11. Easy DIY wall art by Birds Party
This tutorial by Birds Party shows you how layering acrylic paint and short brush strokes, vertically and horizontally, can create fantastic statement art for your living or dining room. Don’t forget, the key is the paint, the beautiful bright colors!

12. Abstract painting with modeling paste
Mixing acrylic paint with other materials or applying it with unusual tools results in fantastic artwork. She uses modeling paste, a rug, and oil paints (it’s suitable for acrylics too) to achieve this fantastic artwork in this video tutorial.
13. Fun acrylic painting
Learn lots of fun ways to add patterns to your paintings from this tutorial by At Charlotte’s House. I encourage you to experiment with other tools and household items around your home, for example, metal scrubs, q-tips, chains, felt or foam sheet scraps, pom poms, fruits, vegetables, cutlery, etc.

14. Simple upcycled canvas painting
This artwork by Savvy Apron shows you how to revamp an old painting to suit your home. Large canvases are not cheap by any means, so going to a thrift store and searching for treasures. It will cost you only a few bucks.

Geometric paintings are sort of abstract paintings too. You can create them by two simple methods, drawing the sections with a pencil and ruler, or the faster method, by applying painter’s tape or washi tape for thinner lines.
They are easy and fun to make, whether you use one or multiple colors, only a few sections, or layering shapes.
The only thing that can ruin it is when the color bleeds under the tape. Even though you can cover them, it is best to avoid them. Try not to drag the paint toward the tape, it will get under it more easily. You may also try only to dab it, as you would do when using a stencil.
15. DIY geometric painting
This tutorial by A Beautiful Mess perfectly exemplifies simple and modern geometric art with fantastic colors. It’s an easy painting idea that you can knock off in half an hour.

16. Layered geometric painting tutorial
This triangle artwork is stunning. Even though acrylic is a fast-drying paint, ensure that the first layers are 100% dry before applying the tape. Wet acrylic paint comes off easily, leaving ugly marks.
17. Simple geometric canvas painting
Using a pencil and a ruler to create geometric art is more time-consuming. However, it’s best for certain types of art. For example, this painting by Young House Love would need a ton of tape for all those lines, so picking the ‘old-school’ method was clever.

18. Easy geometric abstract painting
You can create fantastic dimensional artwork with the right lines and color shades. This video tutorial is a perfect example, it looks almost like an origami canvas art.
19. Geometric DIY art with tape
Tape is also suitable for creating fun patterns, for example, herringbone or the example below. Sum of Their Stories tutorial shows a clever way to use tape above an upcycled canvas. but the herringbone design looks fantastic too.

20. Cool geometric painting tutorial
I love this tutorial! It looks like a stained glass window, I will try this cool painting idea soon.
21. Pinwheel painting
This fun pinwheel painting by Elise Blaha looks so simple. I would pick a more harmonious color palette. Metallic paint would be a great addition.

22. Modern geometric painting with acrylic paint
This abstract geometric art is perfect for guys or people who love modern and stylish designs. The perfect painting for an office.
23. Simple geometric art
As you can see, you can create simple and complex acrylic paintings using masking tape. Christine’s Crafts tutorial shows how fantastic this type of art looks using a single color.

24. DIY geometric painting
In this tutorial by Dans Le Lakehouse , you can learn how to create a fun geometric design using a pencil and a ruler. You can also draw a silhouette, divide it into geometric sections, mostly triangles, and fill it in with vibrant colors. This geometric deer wall art is the perfect example.

Landscape painting is very soothing, especially if you do it in the open air. They are a bit more complicated than abstract paintings. However, you can find many step-by-step painting tutorials on Youtube that will teach you how to do them.
In this section, I tried to collect a few super simple painting ideas that you can try out.
Youtube channels I recommend for landscape painting: Easypeasy Art and AhmadArt .
25. Easy DIY beach painting
If you’re looking for an easy beach painting, this tutorial by Artsy Chicks Rule is for you. She created a fun and simple textured acrylic painting that perfectly fits a coastal living room.

26. Palm tree and beach painting
If you liked the previous idea, you should try this beach scene painting.
27. Acrylic mountain painting
I love this mountain painting by Feeling Nifty . If you like her style, check out her blog, she has other fantastic painting tutorials.

28. Northern lights canvas painting
I never thought that painting the northern lights was so easy.
29. DIY birch tree wall art
This birch tree painting by Persia Lou is easy and makes the perfect gift for your boyfriend, girlfriend, or as an anniversary gift.

30. Forest canvas painting tutorial
Fall is my favorite season. I love how he builds up this forest layer by layer on a black background that accentuates the yellow paint. It’s so soothing to watch!
31. DIY watermelon art
Are you looking for easy and fun summer decor? Make this watermelon canvas art by Spot of Tea Designs.

32. DIY holiday canvas chalk art
I love this DIY canvas wall art by The Merrythought . The best part is that with this easy idea, you can create customizable art suitable for all seasons.

33. Step-by-step snowman painting tutorial
This snowman painting is so lovely, and you can easily recreate it. I love how the lights are done with colored circles.
34. DIY Christmas wall painting by Making Manzanita
Stencils are your new best friend! If you’re not a skillful painter, this tutorial by Making Manzanita is for you! Stencils are a wonderful tool that can significantly ease your work and reduce the creation time.

37. Spooky tree canvas painting by Crafts by Amanda
This simple spooky tree painting by Crafts by Amanda is perfect for Halloween!

36. Jack-o lantern canvas painting tutorial
Paint your own Jack-o lanterns with this easy step-by-step tutorial.
37. Stenciled Christmas canvas art
This tutorial by Albion Gould is a perfect example of how to mix and match different stencils to achieve a fun holiday design.

38. Pumpkin canvas painting for beginners
Paint lovely pumpkins for Thanksgiving with this simple acrylic painting tutorial by Felling Nifty.

39. American flag painting for 4th of July by Step by Step Painting
Make this cool American flag painting for the 4th of July by following this awesome tutorial by Step-by-step Painting.

Painting animals is not as challenging as might first think. Here are a couple of easy painting ideas to get you started.
40. DIY giant pet canvas art
Paint your pet with this tutorial by Pillar Box Blue . She uses a photo filtering app, but you can also try a paint by number online tool, for example, PBNify . This project is a perfect gift for a pet lover!

41. Cool octopus painting
This octopus painting is fantastic! I need to try the glue gun method she uses in the video. It’s perfect to create textured art.
42. Butterfly acrylic painting
Paint beautiful butterflies with my semi-stenciled method. If you like it, check out my easy butterfly painting tutorial.

43. Easy colorful bird tutorial
This Youtube video will show you how to paint simple abstract birds.
44. LLama painting tutorial by Step by Step Painting
This llama painting by Step-by-step Painting is lovely. She also has a cute sloth, monkey, koala, giraffe, horse, eagle, cow, fox, zebra, panda, rooster, and pig other fun animal painting tutorials.

45. Abstract cat painting tutorial
This abstract cat art is a fun silhouette painting that you can apply to other shapes and projects.
You create custom quote art in three different ways:
- hand-lettering that you apply above the painted background,
- sticky, precut letters you paint over it, it’s reverse stenciling,
- quote stencils (for example, this plastic motivational quote stencil set ).
46. Thriftstore painting upcycle
This quote canvas art by Julie Measures looks fantastic! It’s a great idea to upcycle an old or thrifted canvas.

47. Brush-lettered canvas painting
This fantastic tutorial is for you if you’re into large quote wall art or brush lettering. It’s a chic, minimalist large wall decor that fits any home decor style.
48. Funny bathroom sign
I love funny signs, and this canvas art by Drugstore Divas is the perfect bathroom decor.

49. Easy rustic canvas painting idea
You can create this rustic canvas art by Sustain my Craft Habit in half an hour. If you don’t want to buy a basketweave stencil, you can recreate this effect with a DIY sponge stamp.

50. Tumblr-inspired quote canvas painting
I love the bright ombre background of this painting. If you have neat handwriting, you can draw the design freehand or use a stencil or transfer paper.
51. Reverse stencil art
This lovely sign by B4 and Afters is made with the reverse stencil technique. If you have a Cricut Machine, you can create your own stencils or use precut letters or quotes.

52. Quote painting tutorial on canvas
This stunning quote wall art is perfect for kids’ rooms. I love how she has done the lettering.
53. Pretty painted wall art
I love this sign by A Side of Sweet ! It’s so simple to make, and the vibrant colors would brighten any room. The only thing I would change is adding more or darker paint around the letters, making the text more legible.

Flower paintings are super popular too. You can paint realistic or abstract plants too.
I’ve found this awesome Youtube channel, Designer Gemma77 . The creator experiments with fun tools to paint simple, beautiful flowers and other fun paintings.
54. Palette knife modern flower canvas painting
These abstract flowers are my favorite and the ones I want to try. I need to buy some modeling paste and palette knives.
55. DIY floral canvas art by Persia Lou
I love this bouquet painting by Persia Lou . She created a modern and colorful artwork that you can follow step-by-step.

56. Lavender field painting tutorial
Acrylic paint is perfect to be applied with a palette knife. You smooth and blend all the different colors and create a nice texture simultaneously.
57. Embroidered plant painting
If you want to spice up your artwork, check out this tutorial by Pillar Box Blue . The embroidered outline and small tassel make this plant painting stand out.

58. Succulent painting tutorial
This lovely succulent painting is the perfect example of building up an acrylic painting layer by layer.
59. Wildflower meadow acrylic painting
If you like modern flowers, try out my wildflower meadow canvas painting . It’s easy and fun to make.
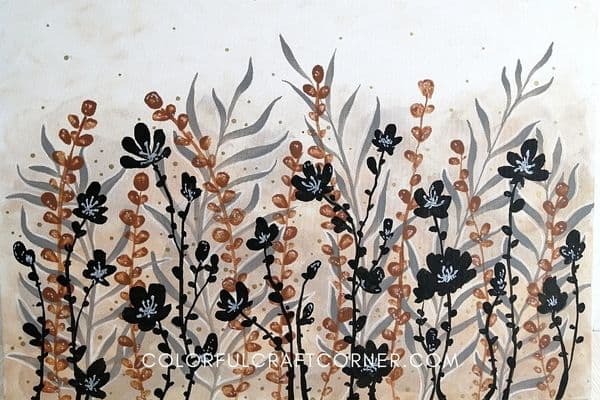
60. Balloon flower painting technique
This floral painting is a must-try! A fun experiment that you can do with kids too.
I wasn’t sure how to categorize these acrylic painting ideas, so I just dumped them here. All of them look fantastic!
61. Heart canvas acrylics painting by The Creativity Exchange
If you want an easy heart painting, check out this tutorial by The Creativity Exchange . The post has several color variations to help you pick your color palette.

62. DIY hamsa palm mandala wall art
Do you need a fast boho wall decor? Try this hamsa palm painting by Made in a Day . I love the black and white design, I will try it with my homemade mandala stencil .
TIP: You can also use spray paint for even faster results

63. Torn paper mountain painting tutorial
Torn a piece of paper, grab a sponge and some acrylic paint, and create this gorgeous abstract mountain view.
64. Polka dot canvas art
I love this polka dot canvas art by Burlap and Blue . You can randomly place the colored dots or hide signs, symbols, or images within the design (like a mosaic).

65. Clouds canvas art
Learn how to paint clouds with this tutorial by Feeling Nifty . She uses q-tips, but small pom poms or round sponge brushes are also perfect for creating bigger fluffy clouds.

66. Girl double exposure acrylic painting
This is another acrylic painting that caught my attention. I want to make my own double-exposure painting but couldn’t decide on the silhouette.
67. Galaxy acrylic painting
Galaxy paintings are perfect for beginners. They look awesome, and you can simply make them using a sponge and dabbing on colors. Here is my galaxy painting tutorial .

68. Step-by-step rainbow sky acrylic painting
This soft rainbow sky acrylic painting is perfect for a teen’s room.
69. Budget-friendly acrylic pouring tutorial
This video tutorial only uses water, no pouring medium or other additives. I have to try it. Note: I’ve seen other artists saying that with this technique, you may have a dull or cracked piece. We’ll see!
Check out this channel for more acrylic pouring techniques
70. Poured paint art
If you are looking for an acrylic pouring artwork, check out this step-by-step tutorial by Moms and Crafters .

71. Beach acrylic pour painting tutorial
This acrylic pour beach painting is stunning! You can learn a lot from her about how she controls and adjust the paint to achieve the waves.
72. Acrylic pour butterfly painting
I could put this painting in the animal art section, but I already had butterfly art, so I thought I would show you a fun acrylic pour technique that’s not abstract art. check out the tutorial by Birdz of a Feather .

73. Coral reef acrylic pour tutorial
If you are looking for beautiful abstract acrylic pour art, try this coral reef art. The perfect accent piece for a coastal room.
You don’t need to buy expensive artwork from professional artists, you can create your own art and decorate your blank walls for a couple of dollars.
As you can see, there are tons of simple techniques, methods, and fun tools that you can try as a beginner to create fantastic art. It doesn’t have to be complicated. Stenciling is a great way to create art if you don’t feel confident painting with a brush.
Most of these simple ideas are ready in a couple of hours. I encourage you to learn from others, try new tools you can find around your home, and most importantly, HAVE FUN!
I hope you liked these fun painting ideas. Which one was your favorite? Leave a comment!

- Entertainment
- Environment
- Information Science and Technology
- Social Issues
Home Essay Samples
Essay Samples on Art
While it may seem easy to compose essays about art, it’s not really so because you have to offer background information in your introduction part and explain why some exhibition or a school of thought is important. This should go to your first paragraph because your purpose is to inspire your readers and provide enough background information. When you already have a prompt that must be followed, determine what kind of essay must be written. It can be a descriptive essay, which is great for a description of the works of art or photography. Some other cases may require working with an explanatory tone where you have to explain why an artist has chosen certain palettes or what has been an inspiration. See various free art essay examples below for inspiration. It also helps to learn how to structure your writing and implement quotes or footnotes that are used to highlight the images. Remember to focus on the ways how to cite images and multimedia elements, depending on the chosen style. Your writing should address every image that you have by checking twice with the grading rubric to ensure that you use the sources that may have already been specified.
What Does Creativity Mean to You
Creativity, an intricate tapestry of imagination and innovation, holds a unique significance for each individual. It is a concept that transcends the boundaries of convention, sparking curiosity and igniting the flames of inspiration. In this essay, we embark on a journey to unearth the meaning...
Censorship of Art and Artists: The Complex Discourse
The intersection of creativity and expression often finds itself entangled in a contentious debate: the censorship of art and artists. This complex issue has sparked discussions across societies and cultures, raising questions about freedom of speech, cultural preservation, and the power dynamics between creators and...
Why I Want to Study Architecture: the Power of Design
The world around us is a tapestry of structures, spaces, and designs that shape our lives and experiences. From towering skyscrapers to quaint houses, every architectural marvel carries a story and a vision. The allure of architecture, with its blend of artistic expression, technical precision,...
- Architecture
The Impact of Technology on Art: A Modern Renaissance
Introduction The influence of technology on art is an evolving narrative that reflects the symbiotic relationship between human creativity and innovative tools. From the early use of simple tools to create cave paintings to the digital art technologies of today, the integration of technology in...
- Art History
- Impact of Technology
- Renaissance
Exploring Feminist Literary Criticism: Unveiling Mona Lisa Smile
Introduction Self-assessment and criticism help us improve our skills and the ways in which we communicate our ideas and perspectives with others. In this feminist literary criticism essay, I will be critiquing and analysis of the movie Mona Lisa Smile. Firstly, I will explain why...
- Literary Criticism
Stressed out with your paper?
Consider using writing assistance:
- 100% unique papers
- 3 hrs deadline option
Frida Kahlo: Exploring Her Biography Through the Film 'Frida'
In the 2002 film “Frida” directed by Julie Taymor, illustrates the life of Frida Kahlo based on the book Frida: A Biography of Frida Kahlo by Hayden Herrera. Who is Frida Kahlo? Her biography in this essay is explored with the help of the film...
- Film Analysis
- Frida Kahlo
Debate Surrounding Graphic Novel and Relation to Literature
Introduction In the past years, the noise about graphic novels has been constantly increasing. A graphic novel is basically a novel in comic-strip format, a book made up of comics’ content. However, they are not the same as comics. Unlike comic books, graphic novels are...
- Graphic Novel
- Visual Arts
Depicting Trauma: Symbolism in Graphic Novels
Introduction I must confess that I never read a graphic novel prior to this course. I think I’ve developed and expressed my opinion of graphic novels frequently over the course of the semester, and I think I would be remiss if I did not close...
Understanding Graphic Novels: Context and Analysis for Reading
Introduction Graphic novels are stories illustrated in comic form but have the length of a novel. “The term graphic novel was invented in 1970 however, the time of its origin is not concluded yet” (“Levitz”). Graphic novels have been debated for decades since some readers...
Jhene Aiko: Exploring the Artistry and Emotions in her Music
The artist I have chosen to write about is Jhene Aiko who is categorized in the R&B and Hip-Hop genre. Jhene Aiko is a popular singer who writes her music under the influence of cannibis, under the influence of therapeutic instruments and while having a...
- Famous Person
- Music Industry
The Joy of Painting: Exploring the Life and Legacy of Bob Ross
Who is Bob Ross, or rather, who was he? During the 80s and 90s, he was an artist who specialized in painting, hosting an instructional painting show on PBS called The Joy of Painting. Though Bob Ross has long since passed on, one will find...
The Uniqueness of Australian Artwork: Exploring Artists' Perceptions
Australian artists provide a unique way of displaying the Australian landscape. John Olsen is one of these artists, who uses symbolism to create a sense of movement. This is conveyed through his spontaneous linear line work as seen in Onkaparinga Hill, blue wren and fox...
Artistic World of Peter Doig: an Insight Into His Life and Work
Peter Doig is a contemporary Scottish artist I found that peaked my interest from his art work to his personal life. I’d like to start off by giving a brief background of the artist seeing that a lot of his work is landscapes from where...
- Contemporary Art
Being an Artist: My Passion, Place of Freedom and Courage
I remember constantly wondering if there was a way that I could make my life meaningful or if it even had meaning. I was just a thirteen year old starting to figure out her own self. My life revolved around wanting to please the people...
- About Myself
Sculpture From Dura Europas: the Head of a Bearded God
One of the artworks in the Yale art gallery is the Head of a Bearded God. This sculpture of bearded man that looks old and wise. This piece has curly hair, bushy eyebrows, and very wide/big eyes. The piece is is classified as a sculpture,...
Kashimiri Papier Mache Art: a Unique Dying Art Form
Kashmir has been wrought in conflict and upheaval for decades now, but its wonderful valleys give us a unique gift of native craftsmanship – Papier Mache art. Kashmir’s rich cultural past is often overlooked due to its troublesome political past. Its handicrafts and shawls (from...
The Art of the Meddah: Exploring Turkish Forms of Storytelling
Culture is the conglomeration of the beliefs and art forms of societiesm across places, along a long-time frame. And quite evidently, the Republic of Turkey has an extremely long history and a resultantly rich diversity in its culture. Throughout its history, the Turkish land was...
The Way Technologies Transform Already Existing Art Forms
Compelling games are not the consequences of accidents, any more than are riveting novels, movies, or music. Creators for all these medias draw on well-established set of strategies and techniques to create a particular emotional experience. Musicians, for example, may create tension through reiteration and...
How Shemistry Influenced the History and Presentation of Art
Chemistry is everywhere in our life. Of course, chemistry is also closely related to art. There are many forms of art, such as oil painting, gouache, watercolor and so on. These painting forms are inseparable from products such as pigments and watercolors, which are based...
Critical Understanding of the Sculptural Art of Alexander Calder
Calder was an American sculptor from Pennsylvania. His father, Alexander Stirling Calder was a sculptor and his mother a painter. Him and his family were constantly on the move around the country throughout Calder’s childhood due to his dads work. And through this Calder was...
Discussion on the Relationship Between Intelligence and Creativity
The relationship between intelligence and creativity has been subjected to research for many years. Unfortunately, there is yet no consensus on how these constructs are related. The connection between intelligence and creativity is that they are functions of the brain that handle data to determine...
- Intelligence
Do Schools Kill Creativity: the Issues of Music Education
In the TEDx video entitled, 'Do schools kill creativity?' Sir Ken Robinson discusses what he believes to be the main problem with our education system, providing a series of funny anecdotes and facts appropriate for his argument. After watching this video about 'Do schools kill...
Creative and Critical Thinking: Combining the Achievements of Thought
Creative, one word that can be interpreted in many ways whether in thoughts which is include ways of thinking and actions and also in verbal form. Critical, on the other side refers to the ability to analyse information objectively and make a reasoned judgment. It...
- Critical Thinking
Culture, Art and Creativity: the Way They Are Related
Art is a reflection of your thinking, your ideas, and your surroundings, the artist adopts his or her surroundings and then by using their imagination, outside thinking and their perspective they present a new face of it in front of the world. Art and creativity...
- Cultural Anthropology
Accessing the World of Theatre: Musicals and Music Theatre
Goodwin (2019) states music theatre is a type of stage performance using music from various forms such as ballets, operas, cabarets, and contemporary music. Musical theatre uses different techniques (e.g. music, dance, songs, acting as well as spoken dialogue) to tell a story to the...
Drawing for Architecture: A Key to Understanding Complex Designs
Architecture the word from Latin is called “architectura” originally from the Greek “arkhitekton”. Architectural drawing has never been taken for granted. All things we design and sketch are from our thinking to our hands. Therefore, drawings are the main development to architectural projects. When designing,...
Architecture: Bridging Vision into Reality
Architecture can be defined in various ways, but if I were to define it, I would simply use these following words, ‘Architecture is an abstract language that bridges a vision into reality.’ I think everyone would agree that architecture is best paired with great effort...
- Interior Design
The Development of Nationalism & Regionalism in Australian Architecture
Introduction From the 1880s, “nationalism” and “regionalism” had been started to be two of the keywords on the Australian development of architecture. These two words point toward the nation’s sake of rejecting foreign architectural approaches and seeking of the local architectural characteristics in Australia. During...
- Modern Architecture
Architecture: A Means to Improve People's Quality of Life
Introduction “Architecture is about finding imaginative, creative solutions to improving people’s quality of life.” - Alejandro Aravena Architecture was born approach back in the prehistoric age, once the first man determined to come back up with shelters made up of twigs and bones. architecture isn't...
- Quality of Life
Architecture and its Role in Nation Building: A Critical Review
Brief introduction on architecture and how its spaces are perceived The universal definition of architecture as a synthesis of ‘art’ and ‘science’ is inadequate in the present democratic, globalized, and information world of the 21st century. Many modern good-looking buildings with sound structures have been...
Romanticism Paintings Analysis: The Raft of Medusa and Liberty Leading the People
I will be focusing on romanticism that is based on emotions and sublimity. I will be displaying the features of romantic art by analysing two paintings from the 19th century. These are The Raft of Medusa by Theodore Gericault (1819; Louvre Museum, Paris), oil on...
- Romanticism
The Ideas Behind The Persistence of Memory and Pillars of Society
George Grosz, Pillars of Society (1926) George Grosz was born in Berlin on July 26, 1893, he studied at Dresden Art Academy and began his career as a cartoonist. He later joined a Dada movement in 1917. And he was a famous figure in Neue...
- Salvador Dali
The Persistence of Memory, Starry Night and Analysis of Other Paintings
Dreams are something that everyone is or was able to have at one point in their life. Dreams are defined as, 'a series of thoughts, images, and sensations occurring in a person's mind during sleep.' Many artists create their artworks from their dreams or other...
- Vincent Van Gogh
The System Of Education: If I Could Change The World
If I could change the world, I would completely change the system of education. It hasn't changed for hundreds of years, and the current system was designed in the Industrial Age. This means, that children in school have to obey every order and do only...
- Importance of Education
Expressive Art: Is Graffiti Art Or Vandalism
Throughout time graffiti has received both overwhelming support and intense backlash. Some view it as a form of expressive art while others consider it a complete destruction of property. However, despite the amount of differentiation, charisma and personality graffiti can bring into cities, it is...
Why Is Art Important For Human
Art is not a necessary part of survival. So why does it matter? Oftentimes art is overlooked and viewed as an unimportant skill or ability to have. However, art has many qualities that one can benefit from. It is a stress reliever that allows people...
The Doll`s House" By H. Ibsen: Nora Helmer Character Analysis
Nora Helmer is a good wife and mother. She does all she can for her family, especially her husband. Considering all the things she does, and the lengths she went to to make sure her husband could regain his health, it was not enough in...
- A Doll's House
Why Is Graffiti Are Not Vandalism
Why is graffiti art not vandalism? According to the Mural Arts Philadelphia website, the village’s first legitimate effort to eradicate graffiti started with the form of the Anti-Graffiti Network in the 1980s. Some people assay that its vandalism, and some assay that its artifice. Park...
My Take On Comedy: From Tartuffe To Sylvia And Cards Against Humanity
Defining comedy is extremely difficult. When something happens that makes you laugh, whether that is in a play or in real life, it’s difficult to pin down why you laughed, to begin with. I find myself defining comedy as a series of events that went...
Attitudes Towards Consumerism in Contemporary Art
In this essay I will be using information gathered from my own personal research, studio research and relevant topics discussed throughout the lectures. Whilst also, considering social, economic, and cultural factors. I will be discussing and analyzing attitudes towards consumerism in Contemporary Art. Built from...
- Consumerism
One of the Most Common Forms of Theatre
Throughout this essay the focus of various practitioners will be explored thoroughly from the paths of life they took and how they became so successful, to the impact that their work had on other practitioners and in general the industry itself. The industry of theatre...
The Practice of Art Forgery and Monet's Aesthetic Flaws
A forgery is a work that is not genuine to its proclaimed origins, however, is presented as a genuine article, and is so acting with the intention to deceive. The practice of art forgery is as well established and mature as the practice of creating...
- Claude Monet
Visual Verbal Essay on Wilfred Owen and Franz Marc
This essay explores two artists, Franz Marc, Brett Whitely and two of their artworks depicting animal scenes. Franz Marc’s ‘Tiger’, ‘Blue Horse 1’ and Brett Whitley’s Giraffe and Hyena. These four artworks will be compared and contrasted using the structural and the subjective frame. In...
- Wilfred Owen
The Role of Creative Industries in the United Kingdom
In this essay I will go over and talk about the creative industries and the role they play in the United Kingdom, I will look at the history and the development of the Creative Industries and their sectors. I will then look at the wider...
- Great Britain
African Art: West African Sculpting
West African sculpting greatly influenced us today because lots o people still do it like when Pablo Picasso recreated the style of west African art he created it like they would some real some supernatural and exaggerated on some body parts after Pablo Picasso shared...
- African Art
Caravaggio's Sacrifice of Isaac by Abraham Due to Divine Intervention
First of all, there are several juxtapositions present throughout the painting. For example, there is a dichotomous relationship between the cold sensuality in the foreground and the pastoral beauty in the background. Secondly, Caravaggio manages to convey the sensational struggle present between the unconditional loyalty...
Greetings From the 1970s Contemporary Photography
The term contemporary refers to things happening in the same period of or in the style of the present or recent times so when referring to contemporary photography that is only basic modern 21st-century pictures or videos.. Over the past years, something called 'the medium'...
- Photography
Claude Monet and Modern Art Today
“Claude Monet” was a famous French painter who used to catch his everyday life's best minutes on canvas. “Claude Monet” was born on 14 November 1840 and His father was a businessman and his mother was a singer. He is one of the most praised...
The World’s Wife Borrowed From Other Texts
It is often that literature, whether being a poem or a book, often provides a voice for those who lack one. The work by Carol Ann Duffy is an accumulation of poems titled 'The World's Wife', first published in 1999 and the present works through...
- Drama (Play Genre)
Typography: From Billboards to Street Signs
Typography is everywhere we look, in the books we read on the websites we visit even in everyday life, from billboards to street signs, product packaging and even on your mobile phone. It is the art and technique of designing and arranging type. Today the...
- Advertising
Rebellious Aspect to Monet’s Personality
Claude Monet is an artist who continues to be adored and held in high esteem even to this day. There may be many who perhaps are not familiar with the name, yet still at least recognise one piece of his work. His paintings are a...
Edgar Degas and His Way of Critics
Mary Cassatt was born in 1844. She was born in what is now known as Pittsburgh, Pennsylvania and died on June 14, 1926 at her French home right outside of Paris. Mary was raised in Philadelphia where she spent her childhood with a social privilege...
- Edgar Degas
- Impressionism
The Principles of Art: Movement, Unity, Harmony, Variety
If you were to ask someone “what is art essay”, the majority of people in the world would think of art and immediately their mind would shoot to a painting. The truth is, art is so much more than just a painting. There are thousands...
- Art Movement
Fairy Tale Black Swan Is a Story of a Ballerina
“Black Swan” is not the fairy tale of “swan lake” but a story of a ballerina, Nina. The story begins with the change of the company, the old lead dancer Beth is about to leave. The stage needs a new lead dancer who can act...
The Book Caesar's Commentarii de Bello Calico
One may call war a side effect of human civilization. Nevertheless, it is in a war that people show their best virtues: courage, loyalty, strength, perseverance, and honesty. Nothing is surprising in the fact that texts on this subject have existed since the writing appeared....
Comparing Two Great Pieces by Pablo Picasso and by Francisco Goya
Today I will be comparing and contrasting two great pieces called “GUERNICA” by Pablo Picasso and “THE THIRD OF MAY” by Francisco Goya.The “GUERNICA” by Pablo Picasso was hard to understand at first but the longer you look at it you understand it is a...
- Pablo Picasso
Black Swan is About Destructive Nature of Ballet
Nina Portman is a ballerina in a New York City ballet company whose life, like all those in her profession, is completely consumed with dance. She lives with her obsessive former ballerina mother Erica who exerts a suffocating control over her life. When artistic director...
The Development of Islamic Art
Islamic art is created not only for the Muslim faith, but it consists of artworks such as textiles, architecture, paintings and drawings that were produced in the regions that were once ruled by Muslim empires. Artists from various disciplines take part in collaborative projects and...
- History of Islam
- Islamic Art
Role of Cultural and Religious Pluralism
Cultural pluralism is a term used when smaller groups within a larger society maintain their own unique cultural identities. Migration is a key process that makes significant contribution to the growth of urbanism. Often immigrants belonging to particular region, language, religion ,tribe etc tend to...
- Art and Religion
- Religious Pluralism
John Berger: Understanding His Artwork
John Berger is a remarkable man who enlighten us with his knowledge using one of his brilliant essays “Ways of Seeing.” Berger has concurred the ability to fully understand any artwork and to recognize what is visible before him. He clarifies that there is a...
- John Berger
America’s Contemporary Multimedia Artist Jeff Koons
Jeff Koons is one of America’s most popular contemporary multimedia artists, who believes that art can change lives, give vastness and expand your parameters. Koons was born in York, Pennsylvania in 1955. He studied at the Maryland Institute College of Art in Baltimore and the...
- American Culture
The Sistine Chapel Ceiling by Michelangelo
The Sistine Chapel Ceiling (Italian: Volta Della Cappella Sistina), painted by Michelangelo somewhere in the range of 1508 and 1512, is a foundation work of High Renaissance craftsmanship. The Creation of Adam' is one of the nine ceiling boards in the Sistine Chapel portraying scenes...
- Michelangelo
History of Medieval And Byzantine Art Movements
A painting wealthy in color typical for St.George on a rearing white horse, shown against a rocky landscape, slaying the winged monster as it appears before him. An angel crowns St.George with a martyr’s crown, symbolizing the triumph of good over evil. The tower on...
- Byzantine Empire
The Power Of Photography: Capturing Emotions With Camera
Photographs help people preserve memories with its technology, but what is actually happening is much more interesting when thought about in more depth. A moment in time is captured forever, so long as the photograph is kept in good shape. It is the closest people...
Jackson Pollock as an Influential America Artist
The painter Jackson Pollock was an influential America painter and a key person to the abstract expressionist movement. He was born in Cody , Wyoming in 1912 and he was the youngest of 5 brothers. He grew up in Arizona and Chico, California he moved...
- Jackson Pollock
The Girl Who Loved Caravaggio by Belle Ami
The Girl Who Loved Caravaggio by Belle Ami is a romantic suspense thriller and the second book in the Out of Time series. High on the success of finding a centuries-old Leonardo da Vinci painting, Angela Renatus, and her fiance Alex Caine are on a...
The Portrayal of the Culture of Death and Afterlife in Art
Throughout history, different cultures dealt with the concept of death and afterlife according to their beliefs, and developed different perspectives about what happens after the body dies. These ideas were often reflected in their art, literature, and their lifestyle as well. Most cultures produce art...
Art Nouveau and Modernist Movements in Art
Art Nouveau is originated in England. William Morris collaborated with other artists so Art Nouveau was created. It has a wide range of different decorative arts, like architectural, painting, graphic art, and jewelry. It was most popular during the 1890s. Its popularity came to a...
- Art Nouveau
- William Morris
The Famous Michelangelo Merisi Da Caravaggio
The famous Michelangelo Merisi da Caravaggio produced original paintings, criticizing those who imitated other artists creative styles. He even accused the great Giovanni Baglione and Guido Reni for imitating his uniquely developed techniques. Caravaggio was the building block for modern art and followed by many....
Art of Theatre and French Figure Joan of Arc
Bernard Shaw (1856-1950) is an irish playwright, critic, and political activist. His influence on Western theatre started from the 1880s till after his death. He won the Nobel Prize in literature in 1925 becoming the leading dramatist of his generation. Shaw's first play to bring...
- Joan of Arc
The Beauty and Skill of Ansel Adams’ Photography
Ansel Adams was born in San Francisco, California on February 20, 1902. As a child, Adams had many freedoms and lots of energy. He was an unattractive child, with big dark circles under his eyes, a crooked nose, and large ears. He was often teased...
- Ansel Adams
Holi Festival and Vibrant Celebration of Colors
Holi is a very vibrant celebration of colors. We have to wait for a whole year. So we can enjoy the festival of color. Although, Holi is fun and joyous. It's also immensely damaging to your skin. The colors are not extracted from flowers but...
- Holi Festival
The Struggle of the Graphic Designers and Social Media
Graphic designers relied heavily on word-of-mouth for their works to become popular and to be seen by the public, it was close to impossible to grow an organic dedicated fanbase to follow your work, nowadays with the rise of the internet and social media, you...
- Graphic Design
Some Interesting Facts About Salvador Dali
Salvador Dali was one of the most, if not the most celebrated artist of the 20th century. His art is iconic, his personality, eccentric, his fashion sense, interesting, his style, unique, his showmanship, unforgettable. All these combined to make him an interesting human and a...
Salvador Dali's Biography: Main Topics
Salvador Dali was born on May 11, 1904 in Figueres, Catalonia, Spain. His father was an atheist lawyer who was very strict in Dali’s upbringing. Dali’s mother, on the other hand, was loving and encouraged him to be artistic. He has an older brother named...
Caravaggio’s Artwork Judith Beheading Holofernes
For this essay, you needed to decide on a painting, Sculpture and other selected types of art work by which ever artist that created them before the 1900’s.Select a topic out of the selection given to do research about the topic and art work to...
William Morris: Arts and Crafts Movement
William Morris was a famous artists who mainly focused on his wallpaper and fabric designs. While he was mainly known for his art, even today, he had many other notable careers and accomplishments, One of them being that he founded the Arts and crafts movement....
Breaking The Parametr In Red Wheelbarrow: Analysis
The most conspicuous element of modernist poetry is the invention and experimentation of new forms of representation. It featured movements such as imagism and symbolism and moved consciously away from naturalism and realism. Ezra Pound was one of the first to delve into this new...
The Importance Of Paying Attention To Detail In Architecture
The architectural detailing process of a project is a long process that includes a lot of steps and patterns to consider. The designing issue is not consecutive for making a theoretical plan for the entire structure, the detailing, and construction of a building. It is...
Depiction Of Revolution In Les Miserables And Musical Theatre
This essay will deliberate the framework of genre, and investigate Musical Theatre, a genre within performing arts. What is Genre? Genre has been around for centuries, it commenced with the Greek philosophers Aristotle and Plato, they created a classification system that would separate literature into...
- Les Miserables
The Concepts Of Love And Hate With Loyalty In "Romeo And Juliet"
Loyalty is a virtue that most people strive for as seen in the play, The Tragedy of Romeo and Juliet by William Shakespeare, which is about two feuding families, the Montagues and the Capulets. Romeo, a Montague and Juliet, a Capulet fall in love. Throughout...
- Romeo and Juliet
- William Shakespeare
Romeo And Juliet: The Decision Between Choice And Fate
“God gave us free will, and we may choose to exercise it in ways that end up hurting other people”-Francis Collins. Romeo and Juliet is a tragic play written by Shakespeare, that follows the lives of two star-crossed lovers. The setting of Romeo and Juliet...
Societal Views On Graffiti: Street Art Or Vandalism
When you think of graffiti what’s the first thing that comes to mind? Vandalism or street art? Most would say vandalism, but what makes the distinction between the two? The intention of the piece. There’s a difference between defiling the back of a building and...
Portrayal Of Love And Hate In Shakespeare's Romeo And Juliet
Shakespeare’s exploration of themes through tragic conventions make the play, Romeo and Juliet, of enduring relevance to modern audiences. Shakespeare’s Romeo and Juliet (1595) captures audiences through the thrill of lovers from feuding families racing together to their tragic demises. This play explores themes understood...
Graffiti And Street Art As An Act Of Vandalism
It is difficult to apply a single definition to what is considered Art. Whether it can or should be defined has been constantly debated. “The definition of art is controversial in contemporary philosophy. Whether art can be defined has also been a matter of controversy....
Passionate Pursuit: Being Passionate About Art
Different pieces of artwork inspire people all around the world. Artists use a wide variety of techniques to make their work unique. While creating new pieces of art, it is common to look at other artists' work for inspiration. While evaluating their artwork you can...
Andy Warhol's Album Artwork: Don't Judge A Book By Its Cover
As the saying goes, don't judge a book by its cover, or in this case an album, but sometimes it cannot be helped. Custom packaging is an extremely important with any kind of product but despite this album cover art has not always been used...
- Andy Warhol
The Role Of Other Characters In Death Of Romeo And Juliet
Romeo and Juliet is such a tragic love story. It is sad that their lives ended, but that doesn’t mean their love for eachother did; their love may still live on with them in the after life. There are many characters who had a role...
The Presentation Of Love In Romeo And Juliet
Romeo and Juliet is a play written by Shakespeare in the 1500’s. It tells us the tragedy of two young lovers named Romeo and Juliet who fall in love at first sight but can never be together due to their two families conflict which ends...
The Importance Of Different Types Of Love In Romeo And Juliet
Romeo and Juliet is a play written by William Shakespeare during the 16th century that mainly follows the themes of love and tragedy. The intense passion the two lovers from both households have for one another causes the deaths of their friends, family and themselves....
The Use Of Hyperbole And Symbolism In "The Doll's House"
A Doll's House delves into the lives of a young couple living in Victorian era Norway. The play follows Nora through her journey, from her previously unexamined life of domestic, wifely comfort, to questioning the very foundation of everything she used to believe in. Having...
Realism In A Doll's House Play
Realism as a literary movement emerged in the late nineteenth century and extended to the twentieth century, the most important factors that led to the emergence of the period of realism is the horrors that happened to people after the World War, which made the...
20th Century Art: Representational Abstract Art
One of the most influential and significant periods in the history of the arts is the 20th century. It was a period that consisted of many rapid and radical artistic changes that gave birth to endless ideas, possibilities, experiences, and visions. Not only were ideas,...
- Abstract Art
The Opposite Concepts Of Realism Versus Idealism
Introduction When comparing realism and idealism, the concepts must be understood historically, theoretically and practically. In this essay, a number of steps will be taken to present a thorough overview of the two schools of thought. Firstly, the epistemological and metaphysical questions of philosophy will...
The Abstract Art And Pop Art Artists And Movements
Pop art emerged in the mid 1950s in Britain, then later in the 1950s in the United States of America. Pop art still influences designers and artists to this day, was against abstract expressionists, pop artists saw abstract artists as intense. The art was a...
Romanticism & Realism: Changing Landscapes
In my essay I will be looking at the contrast between romanticism and photo-realism, how light controls the image and how photographers are able to control how the picture will look like, by the time of day, the angle and being able to change the...
- Romantic Era
The Abstract Art And Expressionism In World War 2
In World War 2, many countries were destroyed by Hitler and his army. There were allies which were the U.S., Britain, France, USSR, Australia, Belgium, Brazil, Canada, China, Denmark, Greece, Netherlands, New Zealand, Norway, Poland, South Africa, and Yugoslavia and the axis powers, which were...
Coriolanus: Plutarch's And William Shakespeare's Versions
Two of the greatest contributors to the “Struggle of the Orders” between Plebeians and Patricians were the Patricians’ fears of Plebeian power overshadowing their influence on Roman politics, as well as the issues of grain pricing and distribution. Plutarch’s “Coriolanus” within his Parallel Lives work...
The Definition Of Fate And Free Will In Macbeth
Throughout time, it has been believed that fate has the power to forge one’s destiny. On the other hand though, I believe these choices can defy fate and that fate only manipulates one's mind into choosing their own path. In the play Macbeth, Shakespeare messes...
Reality Of Romanticism And Realism Under The Umbrella Of Gothic Genre
Two of the most common genres of writing that is found in literature belongs to either the Romanticism movement or the Realist/Naturalism movement. While these two movements might seem like they are related to each other, they are very opposite from one another in the...
Best topics on Art
1. What Does Creativity Mean to You
2. Censorship of Art and Artists: The Complex Discourse
3. Why I Want to Study Architecture: the Power of Design
4. The Impact of Technology on Art: A Modern Renaissance
5. Exploring Feminist Literary Criticism: Unveiling Mona Lisa Smile
6. Frida Kahlo: Exploring Her Biography Through the Film ‘Frida’
7. Debate Surrounding Graphic Novel and Relation to Literature
8. Depicting Trauma: Symbolism in Graphic Novels
9. Understanding Graphic Novels: Context and Analysis for Reading
10. Jhene Aiko: Exploring the Artistry and Emotions in her Music
11. The Joy of Painting: Exploring the Life and Legacy of Bob Ross
12. The Uniqueness of Australian Artwork: Exploring Artists’ Perceptions
13. Artistic World of Peter Doig: an Insight Into His Life and Work
14. Being an Artist: My Passion, Place of Freedom and Courage
15. Sculpture From Dura Europas: the Head of a Bearded God
- Jean-Michel Basquiat
Need writing help?
You can always rely on us no matter what type of paper you need
*No hidden charges
100% Unique Essays
Absolutely Confidential
Money Back Guarantee
By clicking “Send Essay”, you agree to our Terms of service and Privacy statement. We will occasionally send you account related emails
You can also get a UNIQUE essay on this or any other topic
Thank you! We’ll contact you as soon as possible.
The 5 Best Acrylic Paints for Artists in 2024
Winsor & newton.

Acrylic paint hs been around for less than 100 years, however it has taken the hearts, brushes and canvases of many artists since its appearance, this versatile medium has been known for its bright colors, quick drying times, and simple application, which have made it an essential component of contemporary art today.
In this article, we go into the acrylic paint world, learning more about acrylic paint, its types and characteristics and what you should consider before buying your first painting set. We’ll also be looking into the best offers on the market, so whether you are a beginner in the world of art or you want to take your art toolkit to the next level, we’ve got it all covered with top brands and sets to take your art to the next level.
What is Acrylic Paint Made Of?
Acrylic paint is made of pigment that is made of pigments that are suspended in an acrylic polymer emulsion (acrylic, silicones and water) that is water soluble but becomes water resistant once it dries.
While acrylic paint is quite new in the art world compared to other mediums, it is also quite popular due to the immense applications and uses it has, both artistic and industrial.

Types of Acrylic Paint
There are different types of acrylic paints, we can categorize them by their consistency, viscosity, texture, effects, etc. The ones you’ll come across more frequently are:
Heavy Body Acrylics: These are very thick and have a heavy consistency, similar to oil paints, which makes them perfect for texture-heavy techniques like impasto and palette knife painting.
Fluid Acrylics: These are much more fluid that your usual acrylics, perfect for pouring and more spontaneous techniques.
Acrylic Mediums: While these are not paints per-se, acrylic mediums will be very useful to add effects to your art, turning a glossy painting into mate, or adding a layer of gloss to your painting, helping your acrylics stay fresh for longer or adding cracking effects.
Special Effect Acrylics: Acrylic paints that glow in the dark, have glitter on them or any other special texture fall in this category, perfect for special projects, crafts and adding special touches to your work.
Acrylic Ink: This type of acrylic is much more fluid, almost watery which gives it the name, perfect for creating watercolor-like effects, to be used with air brushes and for glazing without a glazing medium.
How to Choose the Best Acrylic Paints
Grade and pigmentation.
When looking for any art medium, we will always find student and professional grade supplies, and while this means a difference in price, this also represents a significant difference in quality, performance and durability of the medium we’re purchasing. If your budget allows it you should always go for professional grade supplies, however professional grade paint tends to be much more expensive upfront than student grade paint.
Student grade paint might be more affordable, but it’s less pigmented, applies unevenly, mixes weirdly in some cases and doesn’t last as long as professional grade paint. The pigment load is lesser and not pure, which means the colors end up looking washed off, muddy and dirty if mixed wrongly. Professional paint on the other side produces vibrant colors when mixed together, is very pigment so a title bit goes a long way and lasts much longer.
Viscosity and Texture

Acrylic paint comes in different consistencies for a reason, you can’t really thicken acrylic paint without affecting its behavior, and if you want to thin it to use it for pouring you can use water but acrylic paint should be only mixed up with a maximum of 50%, going beyond that will dilute the binder in the paint too much and using an acrylic medium might be too expensive which is why selecting the right viscosity and texture beforehand is very important. Think about what kind of art or what kind of project you want to make and buy your paint accordingly, remember to look for “high viscosity” “heavy body” “pouring” “ fluid” and similar words which should be clearly stated in the product information.
Lightfastness

Lightfastness refers to the ability of paint to resist fading when exposed to light, and while acrylic paint tends to have very high lightfastness due to the acrylic polymer, the quality of the pigment and the amount of other additives and fillers also affect the lightfastness oad permanence of the paint. Always look for paint with high lightfastness ratings, and if possible, make sure the brand or manufacturer provides proper testing beforehand.
The price of acrylic paint can vary a lot, from the very cheap dollar-store craft paints to professional heavy body paints prices can go from $2 to $20 per tube, if you’re just starting, don’t go for the cheapest option, try to go for a high quality student-grade paint that fits your budget and if possible, an starter set of professional paint to learn color mixing and color theory. If you already have experience, then going for a professional acrylic paint brand is a no-brainer, try to go for the one that fits your budget the best or invest in tubes one at the time.
Best Acrylic Paint Sets in 2024
- Best Acrylic Paint Overall — Winsor & Newton Professional
- Best Professional Acrylic Paint — Golden Artist Colors
- Best Acrylic Paint for Students — Liquitex Basics Acrylic Paint
- Best Budget Acrylic Paint — Blick Studio Acrylic Paint
- Best Acrylic Paint for Beginners — Arteza Acrylic Paint
#1. Best Acrylic Paint Overall — Winsor & Newton

Selection Criteria
- Our Score – 9/10
- Our Score – 8/10
About Winsor & Newton Professional Acrylic Paint
Winsor & Newton has been producing paint for the longest time, and its acrylic paint is one of the favorites among artists who demand the best from their materials.
The paint feels smooth and creamy, making it easy to spread on your canvas or paper. Even though acrylic paint usually dries quickly, this paint gives you a bit more time to work with it, blending colors just the way you want.
Winsor & Newton Professional Acrylic Paints are formulated using a unique binder that ensures colors remain bright and permanent once dried, additionally, their range includes a wide spectrum of colors, each carefully selected and formulated to provide artists with the broadest possible palette without sacrificing purity and brightness.
The brand’s rigorous testing ensures that each tube of paint meets high standards of color consistency, permanence, and performance, plus they go amazingly well with all the mediums from the brand.
- High pigment strength
- Excellent durability
- Wide color range
- Can dry quickly
2. Best Professional Acrylic Paint — Golden Artist Colors

About Golden Acrylic Paint
Golden Acrylic Paints are a superb option for artists who prefer quality products and paints they can rely on, the main characteristic of Golden is the wide color range and high pigmentation of their paints. They also offer different textures to choose from, do you like your brush strokes to stand out or to work with textures? Then you’ll like their Heavy Body paints, or do you prefer something smooth and thin for fine detailing like their High Flow paints? Either way, Golden definitely has you covered. This flexibility gives the artists the opportunity to experiment and find what really adapts to their style.
Golden stands for the lifelong performance of its paints as well, they use pigments that don’t fade, ensuring that your artwork remains as bright and vivid as on the day you painted it and they even label their paints with how well they stand up to light, so you know your art will last for years to come.
- Exceptionally smooth
- Highly pigmented
- Great lightfastness
- Thicker consistency
3. Best Acrylic Paint for Students — Liquitex Basics

About Liquitex Acrylic Paint
Liquitex Basics Acrylic Paint offers a fantastic balance between quality and value, especially for those starting their learning journey who need a reliable paint to practice and use a lot. These paints are known for their consistency and ease of use, allowing for smooth application and blending, the colors are vibrant and although not as intense as professional-grade paints they’re very pigmented and accurate making it easier for beginners to experiment without the fear of overspending on expensive professional paint.
They can be used straight from the tube for thick applications or thinned down with water for more fluid washes and glazes, plus, they’re made to be lightfast, meaning your artwork will retain its color over time without fading.
- Good for beginners
- Versatile uses
- Less pigmented
- Variable consistency
4. Best Budget Acrylic Paint — Blick Studio

About Blick Studio
Blick Studio Acrylic Paints are known for delivering professional quality at an incredibly affordable price, making them a popular choice among artists working on a budget. These paints have excellent blending capabilities and a buttery texture that is similar to what more expensive brands offer. They also have a wide color range that is accurate and pure and keeps their brilliance and sharpness when mixed together.
While these paints may not have the same load of pigments as some professional paints , they maintain a good balance between quality and affordability which is crucial for those with a limited budget.
- Cost-effective
- Good pigment quality
- Inconsistent thickness
- May fade over time
5. Best Acrylic Paint for Beginners — Arteza Acrylic Paint

About Arteza Acrylic Paint
Arteza Acrylic Paints are especially great for beginners because they combine quality, variety, and affordability all in one. These paints stand out with their easy-to-blend consistency and a broad selection of colors in a nice, easy to store box, making it simple for new artists to experiment and learn without feeling overwhelmed. The quality is comparable to more expensive brands, offering beginners a great painting experience. Despite their affordability, Arteza Acrylic Paints don’t compromise on quality, they offer good coverage and a satin finish that adds a professional touch to finished pieces. Additionally, the paints have been designed with longevity in mind; they are ACMI-certified non-toxic and possess excellent lightfastness, meaning artwork will preserve its color over time without fading.
- Vibrant colors
- Shorter lifespan
- Less coverage
Acrylic Paint FAQ
What makes acrylic paint different from oil or watercolor paints.
Acrylic paint dries quickly, offers vibrant colors, and is water-soluble but becomes water-resistant when dry. Unlike oil paints, it doesn’t need a solvent for cleanup or thinning, and unlike watercolors, it’s more opaque and can be used on a variety of surfaces.
Can acrylic paints be used by beginners?
Absolutely! Acrylic paints are perfect for beginners due to their versatility, ease of mixing and cleaning, and the fact that they dry quickly, allowing for rapid progression in painting projects.
Do I need any special brushes for acrylic painting?
While no special brushes are required, synthetic brushes or those specifically designed for acrylic painting are recommended. They tend to hold up better to the quick-drying nature of acrylics and maintain their shape.
How can I make my acrylic paintings last longer?
To ensure longevity, use a primer (like gesso) before painting, apply a varnish over the finished piece to protect it from dust and UV rays, and store or display the painting in a place away from direct sunlight and extreme temperatures.
Is it possible to mix acrylic paint with other mediums?
Yes, mixing acrylic paints with mediums can alter their texture, transparency, and drying time. There are mediums for thinning, thickening, adding gloss, and even extending the drying time of acrylic paints.
Can acrylic paint be used on any surface?
Acrylics are incredibly adaptable and can be used on a wide range of surfaces, including canvas, wood, paper, fabric, and ceramics. However, some surfaces might require preparation with a primer to ensure the best results.
What should I do if my acrylic paint dries on the brush or palette?
If paint dries on your brushes, soak them in warm water and use a brush cleaner to remove the paint. For palettes, soaking in warm water or using a palette scraper can help remove dried paint. To prevent drying, use a wet palette or keep your paints and brushes moist while working.
Are acrylic paints safe to use?
Acrylic paints are generally safe as they are water-based and non-toxic. However, it’s important to work in a well-ventilated area and avoid ingesting paint or getting it in your eyes. Always check the labels for any specific safety information.
Related Posts

The 5 Best Pastel Pencils for Artists in 2024

The 6 Best Printers for Heat Transfer in 2024

The 6 Best Art Projectors in 2024

The 5 Best Travel Watercolor Sets in 2024

The 5 Best Watercolor Papers in 2024

The 6 Best Printers for Crafters in 2024

The 6 Best Watercolor Paints in 2024

The 6 Best Sublimation Printers for T-Shirts in 2024
The 5 Key Differences between Acrylics vs Oil paints
- By Will Kemp
- acrylic painting
- 469 Comments

A Beginners Guide
What is the difference between oils vs acrylic paints.
Do you want to learn to paint but don’t know where to start?
Get excited about all the paintings you are going to create but don’t know which types of paints to begin with?
To understand the pros and cons of oils vs acrylics you need to ask yourself a few simple questions to decide which medium is best for you…
1. Do you work quickly or slowly?
Acrylic Pros: You can paint on anything. This is one of the key things that make acrylics a great medium to start with when beginning to learn to paint. To be able to set up quickly, start painting on anything is brilliant. Paper, card, canvas board, whatever you have to hand.
Acrylic Cons: They dry quickly, I mean really quickly. You want to do some painting, so you book in a little me time. You’ve got a canvas ready, you’ve prepared your ground and now you’re ready to paint. All is quiet and at peace with the world. You carefully squeeze out your paintings, being careful not to use too much, and then what happens?
The phone rings.
Wrong number.
In this short amount of time, the first blob of paint you’d squeezed out will now be dry, solid, unable to shift. So you scrape it off, squeeze out some more, ready to go and…
A knock at the door.
You put down your brushes, come back 10 minutes later and everything has dried! Not quite the tranquil painting experience you had imagined.
The solution?
- Squeeze out more paint
- Add a retarder to keep the acrylics wet for longer (no more than 15% or the paint goes funny)
- Use a stay wet palette to keep the paints moist. See my video on How to set up a stay wet palette.
Oil Pros: Longer working time. Because oil paints stay wet for a lot longer than acrylics, it gives you the flexibility to start a painting and then come back to it the next day and continue straight where you left off. The paint on the palette will still be wet and pliable; the colours on your canvas can still be blended together.
Oil Cons: Preparation is key Due to the oil in oil paints (usually linseed oil) its best to on work on a prepared canvas or board. If you are going to prepare the surface of the canvas yourself the preparation time is longer. You could, of course, buy a pre-primed canvas and get going straight away. (see: preparing a surface for painting)
2. Do you like subtle blends or hard lines?
Acrylic Pros: A Crisp edge The crisp edges that can be achieved with acrylics can be hugely beneficial if you paint with a more graphic composition. You can mask out areas, work over them quickly, and easily cover a hard shape with thicker paint. You can mix clean, bright colours very easily.

Michael Craig Martin
Acrylics Cons: Achieving a smooth blend Blending with acrylics can be frustrating due to the speed of the drying time. Especially if you are working on a large-scale it can be practically impossible to work the canvas as a whole to bring it all to the same finish together.
This is for a size of say 6ft x 4ft. If you are working smaller than this you can create some lovely blends.
You can achieve smooth blends with acrylics you have to work quickly. You can add a medium to the paint to help keep the working time open for longer. Either use soft gel gloss, retarder (slows down drying time) or my preferred choice, glazing liquid gloss.
Pro tip: I use the glazing liquid gloss even if I don’t need a gloss finish. This is because the matting agent used in the matt glazing liquid is white when wet, it dries pretty clear but I have found it can sometimes leave the blacks looking milky)
Oil Pros: smooth blending Oil paints are king of the ring when blending colours together. Because of the slow drying nature of oil paints they can be fantastic for creating subtle blends.
Working wet-into-wet is the sure-fire way to get a smooth transition in your painting. This is especially true for portrait painting when the subtle shading of the face can need constant revisiting and tweaking. You can also add slower drying oils to your paints to create surfaces that can stay wet for weeks.
Oil Cons: Trying to create a crisp edge without it affecting the underlying colours with oils means you have to wait until the next day, or touch dry otherwise your brushstroke will pull and mix with the paint underneath it. It is very easy to mix ‘muddy colours’ when starting with oils due to everything staying wet and the colours mixing together on the canvas.
Solution: Experience teaches you to work cleanly .
3. Colour shift
Acrylic Pros: They are lightfast With projected laboratory tests acrylics won’t fade in time, the colours will look the same now as they will in 200 years. The binder in oil paint – oil, goes yellow over time, this causes the subtle glow on old master paintings with acrylics they are colourfast, the binder – acrylic polymer doesn’t yellow over time.
Pro tip: The most likely cause of fading is using pigments that are not lightfast, this is true of oils and acrylics.
Acrylic Cons: They change colour when they dry. The binder used in acrylics is usually white but dries clear (the recent binder in Winsor & Newton Artists’ Acrylics is clear, but I feel still has a slight colour shift) This means it seems lighter on the canvas when you first put in on and then dries darker as the white binder turns clear.
This becomes really clear when painting portraits. You think you’ve cracked the precise colour, turn around and the colour has changed. With practice, you can learn to judge to shift but it can be disconcerting when you’re first beginning.
If you add more acrylic polymers to the paint, in the form of mediums (quick-dry mediums, flow release medium) the colour shift will be even greater.
If you use student quality paints that have extra fillers added, which are often white, the colour shift will be more pronounced.
Oil Pros: No immediate colour shift . Initially, oils stay the same colour when painted on a canvas. However, once the colour dries it can appear to change if the oil from the paint ‘sinks in’ to the canvas.
This can lead to some areas being glossy (still have the oil in) and others staying matt (oil has soaked into the underlayer) to produce a deader colour. To overcome this, you have to “oil out’ the area of the painting you are working on. A paint surface can appear dull and is usually caused by too little oil in the paint film due to the absorption into the ground layer (or overuse of thinners such as turpentine)
Pro tip: In classical painting, you build an oil painting up in layers and one of these layers is called the ‘ dead colouring layer ‘ It is painted using oil paint thinned with turpentine on an absorbent gesso ground, this soaks up the oil, speeds the drying time and gives a local colour to the painting.

Leonardo Da Vinci, Adoration of the Magi, detail.
See the painting in close up: Adoration of the Magi, Leonardo Da Vinci
Oil Cons: Yellowing Oil paints will have a slight yellow tinge to them due to the colour of the oil (think of olive oil) As oil dries over time through the process of oxidation additional yellowing takes place. This varies in degree depending on the binder used in the paint.
“Yellowing must therefore be considered as an unavoidable characteristic of drying oils and this must be kept in mind by users.” Professors Mallegol , University Blaise Pascal in France.
4. Do you like working with thick paint or thin layers?
Acrylic Pros: Acrylics are flexible. If you like the idea of using a palette knife and creating thick, impasto paintings, acrylics could be the choice for you. You can paint thickly, build it up and the paint will dry. If you try to achieve the same with oils the outer surface will dry to the touch but the inner paint will still be wet.
You can also work very thinly with transparent glazes or very thickly with a mountain of paint but the actual surface quality of the acrylic remains flexible, this means your painting won’t crack over time. Thin coats of acrylic paint can be used to give a watercolour look to a picture.
Pro tip: Acrylics can crack but usually only in extremely cold temperatures.
Oil Pros: Long drying times If you have plenty of time set aside for your painting, oils can be fantastic. You can work with thick paint, wait a couple of days for that paint to dry then add thin glazes to create luminosity in your work.
Oil Cons: To work with thick paint you need to take into account the drying time of oils. Each particular pigment needs a different amount of oil mixed with it resulting in different drying time, e.g: Earth colours such as Burnt Umber is a rapid dryer whereas Ivory black takes much longer to dry.
The solution: Add a siccative to the paint. A siccative is a medium that helps to speed up the drying process in oil paints. Traditionally this was a cobalt drier, more recently, Liquin by Winsor & Newton is a synthetic medium that can accelerate the drying time of the oil paint by about 50% .
Pro tip: Its best always to work in a well-ventilated area when using liquin (Wikipedia link) as some people can have sensitivities to the Petroleum Distillates used in the product. Liquin Original Safety Sheet
5. Do you work in a small space?
Acrylic Pros: Acrylics can be a great alternative to oils if you’re working in a confined space. You just need access to water and they have a very low odour in comparison to traditional oil painting thinners. Pro tip: Have ventilation is still advised as some acrylics brands contain trace elements of ammonia, (see Princeton University health & safety ) this varies from brand to brand.
Oil Cons: The smell of turpentine If you start painting with oils in a confined space the fumes from the thinners can overwhelm you, turpentine and white spirit can be really strong. White spirit can also be an irritant to the skin and turpentine rags can spontaneously combust! I work with odourless mineral spirits or ‘ Zest It ‘ (a thinner made from citrus ) that have a very little odour compared to turpentine.
There are many new solvent-free gels now coming to market, such as Gamblin’s Solvent-free Gel . These offer a way of diluting the oil paint without using traditional solvents. You can also clean your brushes with walnut oil (Murphy’s soap in the US gets good reviews).
Pro tip: The odourless mineral spirit does not cut through the oil as well as pure artist turpentine and if you are using Dammar varnish in your mixes can cause problems.
Okay, there’s a lot to take in but once you get to grips with which paint is best for your style, oils vs acrylics, so you can just get on and create masterpieces.
What is your preferred medium, oil or acrylics? Let me know in the comments below.
You might also like: 1. Watermixable oil vs traditional oil paint for solvent-free oil painting 2. Painting peonies with acrylics & water-mixable oils 3. The 8 key differences between artist quality & student grade paint
Join the Art School Newsletter (it's Free)
Sign up now to get the latest posts, news about products & art inspiration, straight to your inbox.
- First name *
- I respect your privacy and take protecting it very seriously - privacy policy
You Might Also Like

How to Paint Over an Acrylic Painting

How to Paint a Copper Pot in Acrylics

Getting Started: Throw Away Your Small Brushes
This post has 469 comments.

Hello Will I am a long time amateur photographer who is a brand new painter. I stumbled onto your website via a photography website and I love it. I plan to make a complete survey of it over the next several days. Many, many thanks for your efforts. Charles Taylor

Hi Charles, glad you’re finding the articles of interest. I’m just about to start a free step-by-step series on how to start an acrylic landscape painting , it will be videos and step-by-step instructions which as a brand new painter should help you get started. The first post should go on this afternoon, Thanks, Will

Hi Will, I really needed to know what to use when you switch between oil colours? Like in watercolour we use water, what are we supposed to use in oil paints?
In oil paints you use a thinner, like turpentine or Odourless mineral spirits. Will

Hey Will, I too am an amateur photog who found your site via the DPS blog. I’ve been wanting to try my hand at painting for some time now but had no idea where to start. I found this article interesting and educational. I found your comment to Charles serendipitous because what I most want to try my hand at is a landscape painting using acrylics. I’m excited to see how you will go about it! Thanks for your articles!
Hey Jasia, That just sound like perfect timing! I think you will really enjoy it. If you have any other questions where to start just let me know, Will

Thanks for this article. I started painting about a year ago and I was considering switching to oils. I’ve decided to stick with my medium ….I’m all about acrylics!
Hi Nicole, Glad you enjoyed the article, they are a great medium to use and so versatile. Will

Thanks for the article, I just recently started painting with oils and now I’m spoiled. I feel crippled when trying to paint with acrylic in the same manner. I guess I just need to accepts my style of painting will differ based on the medium. Is it common that artist will try oils and prefer it to acrylic? just wondering … B
Hi Balbinot, It really all is a matter of personal taste. Some of my students who have been struggling with blending acrylics on portraits have moved onto oils and now wonder how they managed without them! Others find the slower drying times of oils doesn’t suit the thick, painterly style of painting they do. I work between the two mediums depending on the subject. What subjects are you painting in the oils? Will

Hi Will it only took me 3 years to notice your reply and question… so my apologies. I paint mostly abstract work, I’m experiencing with new techniques at the moment but still in oils.. Was wondering if you could tell me if the style of painting of Mallory page could be achieved in oil.. I know she uses acrylics… Your thoughts???? Looking forward to hearing back from you .. Thx :)
Hi Balbinot, yes, you could easily create the style of Mallory Page paintings with oils, using pure turpentine with the oils will get that lovely drippy effect. Cheers, Will

I am just about to start painting again as a hobby. I started charcoal painting back in high school but now I’ve decided to try painting with acrylics after reading this article of yours. Though I have an idea on how to mix colours, I have no idea on how to use paints. It is really a big help for us beginners.
Thanks, Dominic
Hi Dominic, Acrylics can be great to start with to learn about colour mixing and handling paint, a lot of the techniques I teach are also designed to be easily transferable to Oil paint as well. Let me know how you get on with your paintings, Will

Hello Will,
I am trying to decide between SLOW-DRYING ACRYLICS (open acrylics) and WATER-SOLUBLE OILS. I have used both regular acrylics and regular oils but I have problems with both – I don’t like the smells in the oils and I have problems blending faces with the acrylics. I have researched a bit and can’t decide which is better. I am hoping for the best of both worlds in one paint. :)
Have you used either of these products?
Yes I have used both, I think if you have worked with oils before you will get on well with the water soluble oils. I’ve found the open acrylics can be okay, but lack the opacity of standard artist quality acrylics, and the working time isn’t as long as oils. If you are working with portraits oils would definitely be the way to go to get the nice smooth transition of colours.
Hope this helps,

Hi Will, I am just beginning ( at 70) to learn to paint with acrylics. Your insights and videos are very helpful. I am practicing to blend with acrylics. I use heavy body (Golden, Liquitex) paints, My questions: 1. What medium do I use to change the heavy body to medium consistency ? 2. What medium do I use while blending. I have watched your related videos, you mention both Soft Gel Gloss and Glazing Medium Gloss in the above context, could you please clarify, Thanks
Thanks for your comment, to change the heavy body to medium consistency I mostly use just water, it’s often a fine line between being too thin and not thin enough. If you have trouble getting the thinner mixture to flow you can always add a touch of ‘acrylic flow release’ this helps to release the surface tension of the paint ( very handy for staining effects)
For blending I personally usually use the glazing liquid ( gloss)
Hope this helps, Will

You mention above you have used Zest-It as an alternative to OMS and was wondering if there were any disadvantages? Have you successfully used it as a replacement for your mediums? For example in your 4-1 OMS-Linseed mix in your Portrait tutorial could you directly substitute it? And from what I understand it is a stronger solvent so would you reduce the mix?
Also does it have any negative effect on the painting such as discolouration or degradation over time etc?
I’m enjoying your drawing course by the way!
Nice to hear from you, pleased to hear you are enjoying the drawing course. I haven’t personally found any really obvious disadvantages between using zest-it or oms.
The only slight issue with anything citrus based like Zest-it is that it doesn’t evaporate 100% from the paint film, so it is not as pure a solvent as rectified turpentine but the benefits interms of more pleasant working conditions if working in a confined space far out way it.
You could substitute the proportions of the mix for a 4:1, the more important thing really is the amount of oil in the mix as as touch more of the solvent will evaporate reasonably quickly in comparison to a touch more oil.
When working in layers with oil paints all you need to be aware of is that each subsequent layer has to have an increased flexibility in comparison to the layer underneath. And because of this more medium will be added (oil or liquin) in each subsequent layer.
Thanks for your response. Can you clarify what you mean by it not evaporating 100% from the paint film? as in, what does that mean in practical terms?
In practical terms, when I say ‘not evaporating 100% from the paint film’ the residue left is so minimal you wouldn’t see it, and the citrus smell means the solvent takes longer to dry than OMS or turpentine. ‘Zest it’ have released a citrus-free version which will cut through the oil a bit better and dries slightly faster, so this might be a better alternative, although I personally haven’t tried it.
So if there is no visible difference, why do I mention it, I hear you cry! – well classically, purists would only consider using Rectified Artist Turpentine as it cuts through the oil and cuts through varnish (such as Dammar varnish) better than anything, however there are now these alternatives that compromise in strength and clarity of solvent for a odour and headache free environment.
It’s personal preference and the compromise is small.

Hello Will Thanks a ton for this extremely helpful article. I’m a 14 yr schoolgirl about to try my hand at canvas paintings. I find painting silhouettes very interesting and I’ve done a few good pieces too. I would like to try painting a silhouette on canvas and I’ve been searching for the best kind of paint considering my age. I find acrylics tough to work with, especially when it comes to blending so I was just wondering whether oil paints would do.
Thanks a lot Shreya
Hello Shreya,
Thanks for the comment. Great to hear that the article was helpful in your decision to give oils a try! Good luck with your painting, thanks. Will

I was wondering where is the best place to let my oil paintings dry? In the sun? Near a window? Under a fan? Or a combination of all? And what helps oil dry faster cold or hot air?
Hey Nicole,
It’s best to leave the oil paint to dry facing the light rather than a wall as it helps to stop the oil from going too yellow in the future. A damp, cold room will dry slower than a warm room with a constant temperature (cold studio vs warm house!)
Also, the drying times will vary depending on the individual drying times of the specific paint pigments you have used. (some paints contain more oil so dry slower) and if you have mixed a fast drying medium (called a Siccative – like Liquin) in with the paints.
Thanks, Will

This might be a difficult one coz I guess it depends on once preference ,liking, bend etc but still what would be your suggestion to an amateur who is just staring off to explore painting … oil or acrylic ???
Thanks, Indy
Yes it is a difficult question to answer due to all the variations you mentioned, the easiest thing to do is to try both.
Acrylic is probably the quickest and easiest to get started with as you only need water to mix with them and can paint onto any surface, paper, card, canvas etc. Also, as it dries so quickly you can paint over your mistakes very easily so can be great for learning about colour theory and colour mixing.
With oils you have a few more technical considerations to content with, such as different drying times of different paint colours, using solvents, preparing the surface to work on etc.
But for some paintings you just can’t achieve the same results with acrylics.

Hello, new to painting, I started with acrylics and I love them but, I always like to try and dive into new things right away so, this was a good, clean, comparison I needed. Thank you so much.
You’re welcome Emily, pleased it helped. Will

Hi Will, Just started painting in acrylics. So happy I “stumbled” upon you on youtube. I have been navigating around your website & find it very interesting & helpful. I can’t wait to begin!
Oh Hi Angie,
Thanks for the comment. Really pleased you found the website, enjoy having a look around!

I have ventured off the canvas onto a board with my acrylics. Primed and prepped. Sketched out my subject (a Puffin – bird). Stated painting. What the heck the paint is sliding around on the board like a blob of jelly on frozen pond. Plus I can still see the lines thru the paint. Did I sand down the primer until it was to smooth? Not thick enough paint? Should I ditch the board and go back to canvas? Or quite painting completely and become a opera sing?
Any suggestions? Thanks for time. Brad Namasta (cheque is in the mail)
The old slippery surface syndrome!! When working on board it can take a bit of getting used to compared with the ‘grab’ and absorbency of canvas. To increase the grab of the board there are a few options, depending on the archival nature/ cost etc. I’ll try to do a more in-depth article on the differences in the future but a quick overview of what you can do follows:
1. Mix in ‘whiting’ with the gesso, this is essential one part of the gesso, the chalk, and the more chalk you have in the gesso the more absorbancy you will have. So add a touch in with your mix.
2. If you don’t have whiting a guerrilla trick it to add a bit of polyfilla in with the gesso, this will again increase the grab of the paint.
3. Painting on a sanded surface will give you a slippery surface in comparison to painting with slight texture on the board.
4. Apply thicker paint.
Hope this helps Puffin,
Cheers, Will

Keep painting and keep singing. Works for me! :) :)

I’m just a high schooler and don’t have a job yet, and my family doesn’t have much money. Acrylics tend to be a lot cheaper than oils, and their faster drying times appeal to me. Acrylics are a lot easier to wash off, too. Since I’m just a beginner painter I think its best to work with acrylics and move on the oils once I feel more comfortable working traditionally. (I do mostly digital art, where I can layers and layer effects)
Good one Bonny, the techniques I teach stem from classical oil painting, so if and when you decide to move onto oils it will be a breeze!

Thank you for sharing you knowledge with those of us who are just starting out.
Your article helped me decide to stick with Acrylics for now… As much as I love the idea of slower drying times of oils, the thought of two little boys running around turpentine (and wet paintings) hadn’t crossed my mind!
Thanks again.
You’re welcome Cheryl,
So pleased the article helped.

How do I make flesh tones with oil paint?
Hi Kiara, You should have a look at my video on mixing flesh tones with acrylics , Cheers, Will

I’m an oil painter from New Zealand.
Your website and videos are so informative and easy to understand. I especially like how you explain how to pre-mix colours for the landscape painting. I’ve seen other artists who seem to just “wing it” on their palette, but your way seems so much more do-able.
I just have a question about acrylics going darker when they dry: is there any way to mitigate this at all? I’d dearly love to use acrylics, but the colour change very much puts me off!
Cheers, Carol
Pleased to hear the videos have been helpful.
As for the darkening issue, it is hard to avoid.
The winsor & newton artist acrylic only have a very minimal shift due to using a clear acrylic binder, rather than a white binder that most companies use.
Some artist add a touch of zinc white into their mixes but I find this impractical. The best way is to buy a few colours and to give it a go, this way you can judge how much of a shift you can handle.

Thanks for your site. I am a High School Math teacher by trade, but have always loved art and painting. This year when we were in need of a teacher for the painting class I volunteered. I will have about 15 students for 18 weeks in the spring so I am trying to plan my lessons now. We will meet 5 days a week for 50 minutes. Most of the students will be beginners. I was thinking of choosing either Acrylics or Oils, but I am not sure which one to choose. I am doing some practice painting now in each. Do you have any suggestions? I have thought of doing some introductory lessons with Acrylics that the school has on hand and then having students purchase 6 – 8 tubes of oil paint once they have the basics of mixing colors and brush strokes.
Thanks, Maretta
Hi Maretta,
Good to hear from you.
Acrylics are a great place to start as students can easily paint over their mistakes and learn the basic principles of how paintings, brushstrokes etc work.
You could then introduce them to oils if their having trouble with the quick drying time of Acrylics.
Have a look at the free courses The cherry painting gets fantastic results!
Good luck with the class,

Hi Will I’ve never done painting before, but I’m looking forward to a new hobby. Alot of info to take in.
Love your site and info supplied.
Thinking that Acrylics are the way to go. I’m interested in doing Still art with shadows. Any advice would be extremely helpful.
Pleased you’re finding the site helpful, have a look under the free courses tab the top, the cherry still life or jug painting are a great place to start.

Hello Will Very pleased to find your site, lots of useful advice here. I’m just starting out trying to paint using W&N Galeria acrylics. My main frustration with these paints is that if, say, I paint blue over a dried yellow, I get green – is this common to all acrylic paints? Also, I do love to paint thickly and acrylics are great for this, but I also love the dry, chalky look that can be achieved with oils. Is there a way to manipulate acrylics into behaving this way? Or are they just too plastic? Many thanks for your help. Jan
Hi Jan, great to hear you’re enjoying the site.
Blue over the yellow will always produce an optically mixed green, unless you apply thicker paint to completely cover the yellow. Artist quality acrylics will often have more opacity and coverage than the galleria range.
Acrylics usually dry more matte and chalky than oils, as it is the oil in the oil paint that gives the glossy look.
You can alter the finish to your paintings by applying a matte or semi-gloss finish, depending on your preference, once the painting is complete.
Hope this helps, Cheers, Will
Thanks for your swift response, Will. How funny that you say acrylics dry more matte than oils when to my eye it is round the other way. Perhaps it depends on how you apply them and other factors? I will experiment and perhaps upgrade to better quality acrylics to get round the colour mixing problem. Thanks again. J.
You’re welcome Jan.

First off, thank you for all these fantastic articles!!
I would like to ask, though, do you find it necessary to have to add a retarder to acrylics? I’ve finally decided to make the jump from digital art to the canvas, and ordered all the supplies I would need, but completely skipped over purchasing a retarder. Do you have any tips that could substitute in any way for a retarder until the time comes that I can purchase one?
Thanks! -Natasha
Hi Natasha,
Pleased to hear you’re enjoying the articles.
No, you don’t need to use a retarder with your acrylic paints. Personally, I rarely use retarder as I find it can change the consistency of the paint.
The one medium I would invest in next time you’re at the art store is ‘acrylic glazing liquid gloss’ ( I use Golden brand) as it can help greatly when blending paints. But to start with just water will be absolutely fine.

Hello Will, I am a pencil artist for most my life, I have found myself in blocks doing drawings so I have started looking at alternative art forms to keep my creative juices flowing. I have always been interested in painting and I had a favorite TV painter I grew up watching. My interests are more with acrylics, there seem to be more pros for me in this area compared to oils. I am into landscape, cartoon, portrait & fantasy drawing…hopefully I can incorporate my skills into painting as well. Chris
Thanks for dropping by, with your knowledge of drawing you will be able to pick up painting very quickly. The biggest stumbling block will be colour mixing. Just start with a couple of colours and build from there.
This tutorial is a simple starting point,
Looking forward to hearing how you get on.

just discovered your website – wow – thank you so much – probably spend most of day on it –
Hey Loretta, Enjoy looking around! Cheers, Will

Your website is very helpful for beginers. I am new to painting and wanted to start with flower painting on canvas but I am not sure what paints are good to start with as a beginer.And I want my canvas to look like glossy like the original one. Please suggest me with this.
Thanks and Regards, Sudha M
I always favour artist quality paints as they give a really vibrant colour. Have a look at this article about the differences between student and artist quality .
To achieve the glossy look, you just need to apply a gloss varnish to your painting when you’ve finished. It is advisable to add an isolation coat before the vanish, so if in the future you want to remove the varnish layer, you can do so.
Here’s an article on how to do it.

Thank you so much much for the info, really useful!
I have been painting with oils since I was a child and now I’m considering to switch to acrylics due to the smell of turpentine…it gives me such headaches! I am bit confused with the mediums though…which ones should I definitely get? I usually paint landscapes on large canvas in a impressionist style.
Thank you!! :)
Nice to hear from you, with acrylics the 2 mediums I use the most are ‘acrylic glazing liquid gloss’ and ‘soft gel gloss’ ( both from Golden Acrylics) the first is for blending and the second is for applying an isolation coat to the painting prior to varnishing.
Switching to acrylics for large scale landscapes you’ll notice a big difference in drying times, have you considered water soluble oils, or using walnut oil and Odourless mineral spirits as a medium, rather than turpentine?

I just wanted to ask if there is a difference between dry pigments and liquid colors? and which is better?
Yes there is a big difference. Dry pigments are just the raw ingredients for the paint that then needs to be mixed with a binder to create a paint. For oils you would mix the pigment with oil, for acrylics you would mix the dry pigment with an acrylic polymer.
You can mix our own paints, but when you’re first starting painting using tubes that have been pre-mixed for you is far more affordable and easier.

I am a not totally new at painting but I’m not a seasoned painter either. I’m about to start a painting on a canvas 20X36 on white background with black and grey objects. The actual objects I would like to be is a large fallen tree up front and in the middle, way back behind the tree, a small accent of spruce trees, grass blades and a bit of a lake look. What I would like to know is how should I prepare the canvas. Gesso or white paint?
Personally I wouldn’t paint onto the white ground as it makes it a lot harder to judge the tones. If the canvas is already white it will already have a coat of gesso on. If the canvas is raw you will need to apply gesso. These articles might be helpful:
How a coloured ground can drastically improve your painting How to use acrylic gesso
A nice tone would be a light grey mixed from raw umber and white.

I am painting a giant ( 10ft x 12 ft) paper backdrop for a photoshoot. Will the acrylic paint crack and peel when I roll the paper up to transport itto the shoot location? If so, can you recommend a paint that will not crack when being rolled up?
Hi Heather, the acrylic shoule be fine. When it dries it forms a plastic skin so is still flexible, so shouldn’t crack when you roll it.

Hi Will, I’m probably one of the many people who have come to this site saying they are planning to do some painting and just reading the first steps I already feel a little more confident with actually starting now lol. It’s the first time since I left school back in 87 that I’ve even picked up a brush but many years of taking landscape photos in Cornwall and seeing all the fantastic art there have given me an urge again. So I think I’ll choose one of my images and give it a go.
Thanks for stopping by, yes, the first steps of picking up a brush again can be the most scary, but with your compositional skills from your photography, and understanding of light and drama I think you’ll get on really well. This tutorial is a great starter.

Greetings Will,
I am a school teacher just painting to relax. Stumbled across your website and thought WOW what a great artist and teacher! Just wanted to say hello and commend you on the feedback you give everyone who comments on your site…one of the greatest characteristics of a great teacher…honest and fast feedback! I will certainly visit this site often for the painting tutorials. Thank you sir.
David L. Phillips
Thanks for dropping by, and for your kind comments. Looking forward to hearing how you get on with the painting tutorials.

Pleased to meet you, Will,
Found you on Youtube: Acrylics for beginners, from which I found your website.
I have been a professional artist, in the 1980s, but using Pen & Ink. So I can draw! However, that’s an end to it, unless you count coloured inks! Paint to me has been a no go area… too scary.
My granddaughters have kicked me out of retirement and I have been selling my work on-line. In the process I have found myself in close communication with a new bunch of friends from all over the world – they are all painters who have both inspired and are cajoling me to paint. But where to start?
Well you certainly have produced a magical website which has ticked all my boxes: which medium? beginners palette? etc…
So I’m going to work my way through your site in the hope that I do not commit too many crimes against art on the way.
Best wishes John
Pleased to meet you to John!
Great to hear you’re making the jump from pen to paint, you might find this tutorial a good starting point: Simple jug still life .
It only uses two colours (plus white) and is aimed at artists such as yourself who are making the transition from drawing to painting. Hope you enjoy it,
I’m sure I will. Many thanks.

This may be too general a question, but are there certain brand names of acrylic paints and brushes that are of a higher quality than others?
Hi Robert, yes, there is usually a big difference between artist quality and student quality materials. Both in paint quality and brush quality. You might find this article helpful .
Will Thank you for your prompt response. I found the article on artist quality vs. student quality acrylics extremely helpful. I´m anxious to get started. Thanks again. Robert
You’re welcome Robert

Hi will Kemp, Thanks for Wonderful writing about drawing and Painting…
Thanks Sugumaje,
Glad you’re enjoying the site,

This is an excellent resource for artists, particularly those like me who have never painted, so thumbs up to that!
I have a drawing background, and am familiar with the concepts of tone, light-sources, etc, but what would you recommend as the bare minimum of colours to work with as a beginner painter. I may choose oils to work with – I prefer the flexibility of this medium based on reading through your site – if that helps.
Many Thanks
Nice to hear from you.
Have a look at this article on my recommended beginners palette , the colours are available in acrylics and oils,

I have preferred acrylic, but did not know the exact difference between acrylic and oil. You did a fantastic job breaking down the differences. After reading, I believe acrylic is still my choice. Thank you.
Hey Amy, thanks for the comment, pleased you found the comparison helpful in your painting.

Thank you Will.i am thankful to have come across your website, the pro and cons of oil and acrylic in your article have answered my doubts/confusion!next step try it out ! I am self learned painter, who has always pined for guidance…my frustration brings long spells of inactivity. My usual medium is oils with pallete knife, hence my surprise, I thought the acrylics are to be used as thin color washes .thanks.
You’re welcome Daljit, really pleased the article helped you to understand the differences between oil and acrylics.

Great site and and very useful, for which I’m also starting acrylic paints as a new hobby, I just want to make make sure what to have as an beginner acrylic painter as one do get the starter kits, but really want to make sure.
Thank you Regards Jodrien
Hi Jodrien, pleased to hear you’re finding the site a useful starting point for your ventures into acrylics! These two articles might help: How to choose a beginners acrylic palette
Are beginners starter kits an expensive mistake?

Hi Will, Your site is amaaaaazing! I love the extended drying time of oils but hate the smell of turpentine and the hassle of clean up. Any advice on using water soluble oil paints?
Hi Meaghan, Pleased you’re enjoying the site. I don’t currently have any specific tutorials on watersoluble oils but I’ll add it too the list. Generally they dry quicker than standard oils as you don’t have the oil in the mix, but this might be advantageous, depending on the subject you’re painting.
They can be harder to get a nice even consistency with as sometimes dry up too quickly on you and other times go too thin, because you’re diluting them with water the ‘medium’ of water doesn’t ‘hold’ the same way as oils. Traditional oil paints can feel more fluid to work with, but on the bonus side you can paint in a solvent free environment. As with most mediums there are pros & cons depending on your own personal prefrences, but I can feel a ‘paint shootout’ on the way!
Thank you for the reply Will. All the cons you mention are definitely true. I’m so conflicted about continuing to use them. It’s hard to determine if it’s my technique that is lacking or the medium. Perhaps I need to experiment more with both traditional oils and the water soluble ones. I’ll definitely keep referring back to your site either way. Thanks again!!!
You’re welcome Meaghan, it can be hard to tell when you’re first starting if it is the paints or the technique that is holding you back from the style you’re trying to achieve. An investment in a couple of colours from each medium can be very advantageous in your own painting development.
Try painting the same image with the different mediums and just note how the painting flows for you. Every artist paints differently and has different preferences so a bit of self experimentation is the way to go!
Speak soon, Will

Just stumbled across your site and have now been on reading articles for 2 days!! Lol Very informative for a beginner like myself. Thank-you Kimberley from Canada
Cheers Kimberley, really pleased you’re enjoying the website and the tutorials. Thanks again, Will

Hello Will, I am a beginner and a student studying in grade 7 . I love your step – by – step teaching and they have greatly improved my painting skills. Thank you very much! Soon , I will write a review of your site on my website ! please do visit it.
Hi Divyanshu, thanks for dropping by and your kind comments on the eaching style. Really pleased the site has helped you to improve your painting skills and thanks in advance for the site review.

Another key difference that you forgot Will, is the cleaning for me!!
Cleaning brushes/palettes when you paint with acrylic is so much easier, a little water + soap and there you go good as new. Fast, neat. When you paint with oil… it gets complicated for me, if i want to deeply clean brushes + palette + my fingers/nails (yes i have paint on my fingers hihi) i have to use a lot and i mean a LOT of thinner (not very cheap, i choose the odorless eco-friendly stuff….), this awfully dries my hands and takes a lot of my time. It’s messy for me. I even tried painting with gloves… (don’t try it lol) I’m probably doing something wrong and probably need more experience I suppose..
I love the blending that you can achieve with the oils, but the cleaning scares me, that’s why I take too much time starting a painting…. decisions decisions decisions… oil or acrylic? and then i end up doing nothing, just staring at my canvas ^^
Hi Angelina, Good point! It can take a bit longer clean up with oils, have you tried the Masters Brush cleaner ?
I’ve found it can work like a charm, just wipe off any excess oil onto paper towel or a rag. Then mix the brush around the in Masters brush cleaner until you have a lather and then rinse out with water.
Have a look at this video for cleaning an acrylic brush , the same principles apply.
Cheers Will, I will follow your advise and try it. Oh, i will oil paint without second thoughts, sounds fantastic! Thanks for the tips again, Angelina.
Good one Angelina, Will

Acrylics!!! But I would like to try oils and watercolours in the future. Thanks for this wonderful site – very informative!
Cheers Stephanie, pleased you’re enjoying the site.

Hello Will, I am a beginner when it comes to painting as I usually draw rather than paint. But recently I bought Acrylic and Oil paints and a canvas so I could paint one of my drawings and I wasn’t sure which to use as this is my first time using them properly. I’ve used both at school but have decided to go with the Acrylic after reading the differences. I was just wondering if you could give me any beginners tips when painting my first piece onto a canvas. I have absolutely no idea where to start!
Hi Rahima, pleased you’ve found the article helpful, here’s a Guide on the best place to start ,

Hello Will, I really hope you can help me. Painting was a hobby to me, but now I have an opportunity to show my work. I have an oil painting, which is more than 10 years old, it needed some touch up fast and all I had was acrylic paint. So, i used it in random places to touch up. Big mistake. Now I’m afraid it will peal or crack. What can I do? It will be crazy to repaint the whole painting with oil. Impossible. It’s huge with a lot of details. Can i put linseed oil over it or something similar to it, or oil paint medium or something else that is clear? I appreciate any answer or advice you can give me. Thank you very much, Lana
Hi Lana, the most likely thing that might happen is the acrylic will peel off the oil as it doesn’t have as good a tooth to adhere to. If the acrylic isn’t too thick you might just be ok, you’re in good company though as Turner is rumored to have applied watercolour glazes to his oil paintings due to clarity of the glaze!

Thank you, would like to subscribe, not sure how
Hi Julia, to subscribe for updates just enter your first name and email address to the signup box on the right-hand side of the website. (It says get updates) Cheers, Will

I find when I do backgrounds and then try to paint objects on top, in acrylic, the two colors blend. Is there a way to do this where the colors will stay separate and vibrant?
Hi Steve, this shouldn’t happen with acrylics as they dry so quickly, you should be able to paint over the acrylic within a few minutes and you will get a clean colour.
They might be atelier interactive acrylics which can be blended once dried. Check the label of the paints you’re using, as this won’t happen with standard acrylics.

Hi Will. I have been painting with oils since I was 13 (am 33 now). I love oils but I want to paint cartoons for my son on canvas. More like pop up art Should I try acrylic??? I have never used acrylic so am super confused Please advice
Hi Rakh, yes, for painting cartoons for your son acrylics will work really well. You’ll be able to get crisp clean colours very easily. You could also use an ‘ acrylic marker ‘ which are quite new out, but you can then draw with the marker and fill in the rest of the shapes with a brush.
Thank you Will.

so helpful for the beginner painter- thankyou!
You’re welcome Ali, pleased it helped. Will

Thank you soooo much! I’m a beginner artist and i’ve always had the doubt of the differences between this two! I really enjoy your page and love the design!
Also, one question: I like to make paintings that have depth and just feel like dreams…should I use oil? or watercolor? (i suppose I can’t use acrylic). Many people have told me to use watercolor, but I’ve always used oil, and I am kind of afraid of watercolor and how to use it. Should I learn watercolor then? or just stick to oil?
Hi Lily, pleased the article helped, if you’re trying to get a very blended, soft dreamlike effect (like looking through a soft focus lens) oils will be fine to use as you can easily blend and soften the edges.

I hope this isn’t a silly question, but my 8 year old daughter recently found some (very) old paint-by-numbers kits that I had stored in the attic. She was very excited and wanted to paint with them, but when we opened up the little plastic paint pots, the oil paint was dry. My question is, is there any way to bring this type of oil paint back to life once it has dried out? (I realize that this question is probably not exactly up your alley, but I hate to see my little girl so disappointed and if this is the way that she wants to start to learn about painting, I want to encourage her.) Thanks in advance for your help!
Hi Sheri, if the paints have fully dried out you can’t really bring them ‘back to life’ as they won’t have any of the oil left within the paints to be able to flow, It might have to be a trip to the art store!

Hey Will, this is a brilliant read. Very detailed. But im still unable to decide which one to choose. I recently fell in love with a girl, who loves paintings. I want to paint a scenery for her. I am totally new to this. So, what do you propose i do? Would be of great help. Thanks in advance. Jack
Hey Jack, pleased you enjoyed the article, as a total beginner to painting, acrylics are the quickest way so create a painting with the most limited materials.

Hi Will, I’d like to thank you for the effort you have put in to your incredibly informative guide throughout your website. It’s good when one finds a teacher like yourself who assumes students don’t know anything. ( although we do know somethings ) :-). It is so good that you teach with the understanding that students know nothing! It makes for a better and fuller learning experience as it makes you leave nothing out in regards to the information you provide, that is a rare quality that only natural teachers like yourself posses.
I also love the pro tips you include. Keep up the great work and more power to you!
Thanks for your very kind comments, really pleased you’ve been finding the tutorials comprehensive and the pro tips helpful in your paintings.

I have only painted two pictures using acrylic. I do like to blend and kind of do “happy little tree” type paintings. I would like to try oil. Can u give a beginners list of needed items to use oil. Are they much more expensive than acrylic? Thank you..and I love your tutorials
Hi Shawna, oils are slightly more expensive than acrylics but you don’t need much equipment to start, just some linseed oil, odourless mineral spirit, a couple of hog brushes and you’re away!
Pleased you’ve been enjoying the tutorials.

Great article. I’m a pastel painter, but are thinking of doing some oils too. Never done it before. I was just wondering if oils (production and coloring) contain any animal products?
Cheers, Marie-Jeanne (MJ)
Hi Marie-Jeanne,
There are a few materials used in traditional oil painting that are derived from animal products, usually used in the preparation of the canvas, such as ‘Rabbit Skin Glue’ and ‘Gelatin’ which is sometimes used in Gesso. Also some paint colours and oil pastels contain animal fat and bone (such as bone black) and natural hair brushes are from animals, squirrel, mongoose, pig etc

Hi Will , Im a senior High School student soon to graduate. I read your article and i liked it very much .Ive been using acrilyc paint since sixth grade and ive always loved it.Im aiming to become an artist such as yourself ,but ive always been wondering if acrylic and oil can be put together in one art piece. Usually its because there both so different i was curious to know if will it look good using both mediums in one art work?. Ive never used oil But im willing to give it a try.
Thank you, Xylia
Pleased you’ve been enjoying the article, you can work with acrylics and oil, but the acrylic must always be underneath the oil. Also, it’s best to have a thin application of acrylics or it will be harder for the oil paint to adhere to the surface of the acrylics.
Hope this helps.

Hey Will, I just started painting about a month ago and people are now asking to buy my paintings over Facebook. I’m still in high school, and I want to travel after I graduate. This question may depend on many factors, and you may not know much about this, but would it be a good starting point to make my money by selling my paintings out of my van?
You can start selling your paintings anywhere really, it’s very simple to set up a shop on Etsy and then you can direct your friends so they can pay direct through the site.

HI, I have been experimenting with acrylics for a few months and recently tried a new style, and did what i considered my most beautiful painting on canvas. The colours were all swirled together and so incredibly detailed, so i took photos and someone wanted to buy my piece! BUT now that it has dried, all the detail has gone, sort of all merged together, and it looks like a horrid maroon/brown sludge of colours..what happened? I have ordered some gloss varnish to go on top, but i can’t see how this will change the picture to how it was when it was still wet :-( Any advice? What paints retail their detail and colour vibrancy even when dry? Thanks
Hi Dee, the gloss varnish will increase the colour vibrancy to the piece, but won’t alter any of the details.

Hi Will, Thanks for sharing these tips! Have always loved art, drawing, painting, dance, and just now getting to actually work with acrylics. We have some quick paint and sip classes here where the instructor shows how to complete a painting in 3 hours ~ the glass of wine helps for beginners. Now I am seeking more serious instruction and your site and information is wonderful. I will be taking my time and reviewing all of it, starting with acrylics and then developing as I paint. Just want to say how much I appreciate your videos and site! Thank you!
Thanks for dropping by, so pleased you’re finding the site helpful in developing your painting.

I am not sure if i have bought a pre prepared canvas or not for my latest portrait and i have not prepared it- this link has been very useful to me as I am experiencing a lot of the pitfalls of oils and your website has helped me extensively to understand the process clearer so thank you for that. However I am stuck on one area I believe i have what you refer to as ‘dead colouring layer’ in certain areas of my canvas. it is not possible to see face on but from the side and it full light it is evident in places. My portrait is currently 95 % complete and i was wondering if you knew of any technique that i could try at this late stage to rectify this problem? I dont believe that i can varnish until at least six months? Thank you
Sounds like your painting has ‘sunk in’ this is where different amounts of oil have soaked into the support (your canvas) and made the painting look dull and ‘dead’ this is exactly what you want to have if you are building up the painting in layers, if you have finding it hard o judge the colours you can ‘oil out’ the canvas. This helps to revive the colours as they looked before the oil was absorbed.
This is from the Oil painting glossary on the site:
Oiling out – this is where you paint a very thin coat of medium over the painting to bring the colours back to how they looked when you first painted them.
“Depending on the absorbency of your canvas, the oil can soak into the canvas leaving the paint looking dull. This is called ‘sinking- in’. Oiling out can be used to blend wet layers into the layer below but is often best used when you’ve had a bit of practice with oils. It is most notable in dark areas of painting, and oiling out enables you to judge the colours as they were when you first painted them. I don’t usually recommend it for absolute beginners as you can get into a mess quite quickly and it can create issues with fat-over-lean principles. However, for more advanced painters, especially realist painters, it can be an invaluable technique to use.”
Thank you Will thats great advice all is not lost! I will try that -cheers

Oil paints seem to stand the test of time. I wonder what condition the great masters painting would have been after hundreds of years, had they been painted in acrylic?
They would have been extremely similar to the way they are today, acrylics are a very stable medium.

Thank you for so much info. I have wanted to paint for a long time now but have not been able to decide between acrylic or oil. I have never seen them compared & contrasted so well before. Based on reading this I now know that I want to use oil. Thank you so much!!
Good one Diane, pleased it helped you to make an informed decision.

As for people who like a bit of both Oil and Acrylics, I recommend trying out Golden’s series “Open Acrylics”, they have an amazing longer drying time, up to a week they are still workable on the palette, and there is no use of terpentine and it’s more environmental!
Thanks Ingrid,
You might find this article on Golden OPEN acrylics interesting. Cheers, Will

Hi, I’m sort of new to the art world so sorry if this seems stupid. I’ve been using acrylics for a while and they are great but I cant get it to look misty. Should I try oils, or is there some special trick for acrylics, or is it more of skill that I would have to develop on my own?
To get a really smooth Smokey blend, oil paints are easier, you can achieve it with acrylics but as soon as the paint dries it’s then impossible to blend. So oils are very easy to blend with, but this also means they are very easy to get dirty colours, because very colour blends with the next. So if you have a good basic knowledge of colour mixing with acrylics first and then try oils you’ll get on really well.

Hi so I have been using oil paints for a while but I haven’t used anything with it. Just the paint by itself… Is that a bad thing? Also how do you use thinners and whatnot with oil paints? And is there a easier way to get my brushes clean? Thanks Ainslee
Hi Ainslee, You can create an oil painting without any thinners, it will just stop you from varying the thickness of the paint as easily. Thinners will help get your brush clean, then use washing up liquid or brush cleaner. Cheers, Will

I’m not an artist, but I have found that I really enjoy painting. I’ve been starting to work with acrylic paints and have found your words to be very helpful. I think I’ll do as you suggested, and build up and ask for oil paints from my birthday. I look forward to trying them. Thanks again for your words,
Great to hear you’ve been enjoying painting and have been finding the articles helpful. Enjoy experimenting with oil paints.

Thanks for the great information. I mostly work in acrylic but have dabbled in oils for something different. I love the depth of oils, however my recent oil took me over a year to do because I kept losing my inspiration in between drying periods; in contrast, my last acrylic took 7 hours in one day, I loved the sense of achievement plus getting my idea onto the canvas while it was still fresh in my head. Can you recommend any other mediums? Ps i’ve tried water colour, but i hate seeing the grain of the canvas through the paint. Sigh. Oh! I have some gouache – what the heck is it?! Thanks
Hi Krystal,
Pleased you found the article of interest. Here’s an article from the Winsor & Newton website regarding understanding Gouache .
Hope it helps,

I have been into all types of art for years (keep in mind im only 23). Drawing, painting, chalk pastel, and other types of crafts. I can never remember a time I wasn’t into art. In all the years I’ve been painting, I’ve always used acrylics. I’ve considered trying oils, but I’m so used to acrylics now, I’d probably wind up with a big muddy mess. Some of my favorite side tools (i guess you could call it that) is a Floating Medium and sponges of various textures. I love how the floating medium helps me layer my colors without them covering up each other. -Nicky
Good one Nicky,

I’m looking forward to start oil painting, but first I want to try my hand with water colors and acrylics. I don’t know exactly what I should draw. Can you help me?
Hi Isha, just find a subject or tutorial that interests you and start simply.

Will great post! For the last 1+ years I have been painting using oil paints and have been thinking if I should switch to acrylics??? and how to go about it… My paintings are mostly potraits with the lot of shades on the face to show the play of light, it has been easy to handle it with oils, reading through your article I understand it may not be so easy with acrylics, did I get it correct.
Is it a good idea to complete the face or potrait subject with oil and then use acrylic in background to have textured effect? Whats the long term effect on the painting, that will be expected in this case.
Hi Siddhangana,
Yes, that’s right, its harder to achieve smooth blends and subtle shading with acrylics due to the quickness of drying times.
You can paint oils on top of acrylics, but not acrylics on-top of oils.
So you could build up the background with an acrylic gel and have a oil face in the centre. make sure you leave the area of canvas of the face quite thin with acrylics though as you need a thin surface for the oil paint to ‘grab onto’.
Thanks for the quick reply Will. I have also gone through you potrait tutorials in black and white. I think my paintings will improve significantly specially in terms of the layers.
Are there any (free/paid) tutorials, where you have created a potrait in colours, would be very helpful if you share links of already shared ones or post new if they are not there already.
Thanks Siddhangana
Hi Siddhangana, I don’t currently have any colour portrait tutorials on the site but an working on a new colour portrait course for the new year.
Will look forward to it.
Regards Siddhangana

Thank you so much for the clear information. What type of the brush will be best for blending colour in oil and acrylic on a canvas?
Hi Ritu, I like using a filbert brush for blending.
Thanks for the reply

Can we use acrylic paints on cloth? and oil paints on cloth?
Hi Mani, yes they will both work, acrylic will have more flexibility and dry way quicker.

Fab website and great advice and content. Thank you for the obvious amount of effort and care taken in compiling this – you have done a great job. Now found I will be a frequent visitor. Thanks!
Thanks for your kind comments Rebecca, pleased you’re finding the articles helpful,

Thanks for the clear, unbiased information, it was very helpful!
Thanks Zeal, pleased you found it helpful. Cheers, Will

I love the article! But, when I was shopping for acrylics, there were multiple different kinds! What is the difference between satin acrylic and high gloss acrylic? The color I want is in the satin acrylic. I am painting the canvas a solid color with the acrylic then doing a melting crayon project over them. Any sort of advice would be great! Thanks!
Hi Kylie, most acrylics have a satin/matte finish to them, high gloss is usually put on in the varnish stage. If you’re going to be working with another medium ontop I would also go for a standard satin finish acrylic. Cheers, Will

Hi Will, I’ve been painting for years and have always found that oil painting is my choice. I’ve tried acrylics but just can’t live with the blending difficulties and fast dry times. I don’t find the colors to be as vibrant in acrylic as in oils as well. When acrylics first came out I was instantly taken by them. (Yes, I’ve been around a long time). As I started painting in oils way back when, I guess I am spoiled when it comes to that medium. Acrylic seems to be the most popular medium today as instant results are what most beginning artists are all about. I do however, use acrylics for basecoats as well as toning a canvas before painting. Good work on your article, most informative.
Regards Gene Alvin aka “Aelf”
Hi Gene, most artists work between the two depending on the subject/effect they’re after. I often apply a coloured ground with acrylics and then paint oils on-top, or paint the whole scene in acrylics. It’s more about understanding the pros and cons of each medium and then deciding on the best one to achieve your vison in your paintings. Pleased you enjoyed the article.

Hi Will, Thanks a lot for your tutorials, helps a lot! Happy painting! Nadya
You’re welcome Nadya, Cheers, Will

Hi Will, I recently found this website and love it! I am a new painter and am painting something for a school project. I am trying to figure out which paint would be best for my painting. I was wondering if I could get your opinion? So, I am painting a beach sunset with a black orca whale tail rising out of the water. Which paint do you think would be best? Do you have any tips for beginners? Thank you so much for your time if you reply to this!
Hi Hannah, I would go for acrylics as the black oil paint will take a while to dry. Cheers, Will

Hi, thanks for the useful tips on your website; I’m a figurative artist specialising in urban landscapes and wildlife. I started using oils a few years ago, but as an asthma-sufferer had to give them up (despite the acquisition of sansodor). I’ve now resorted to becoming an acrylic painter which means my lungs can now take a breather and I can vary my painting technique; and that’s the other thing with oils, the dreaded ‘fat over lean’ principle can drive you a little mad if you wish to be an experimental painter, whereas acrylics allow you to work with other media, such as watercolours, and materials to make collages and mixed-media painting. However, I have found two disadvantages for me with acrylic paint: firstly, it has been hard to convert my palette of Michael Harding oil paints to an equally pigment-rich and traditional set of tube colours in acrylics, and the other issue I have concerns the paint film when it dries – its as they say a matt ‘skin’ that isn’t as aesthetic as an oil film. I suppose I was wondering which ranges are best for both pigment and film; Atelier Interactive has been recommended to me, but I’ve learnt that there can be problems with ‘open’ acrylic paints.
Pleased you’ve been finding the website helpful, to answer your questions:
It has been hard to convert my palette of Michael Harding oil paints to an equally pigment-rich and traditional set of tube colours in acrylics. Michael Harding does make some lovely paints! it is often the oil in the paint that gives the illusion of a more saturated pigment, not necessarily the pigment load. The New Masters acrylics from Old Holland might be the perfect match for you as they have been designed to dry with a slight satin finish and have some great historical colours.

Im just dabbling at the moment with student paints, i bought both acrylic & water paints, small tubes, the water colour set has a tube of oil, no instructions on how 2 use it? What can i mix with the acrylics? Thanku.
Hi Loann, you can mix acrylics with water or acrylic mediums. Will
Thanku for your reply, so how much water with about 12ml of paint? Thanku.
Hi Loann, if you have a look through one of the free tutorials , that’s the best way to see the different ratios of paint I use.

thanks for the article! I have always used acrylic, and I am just starting to use oil paints. I finished one but I had to use acrylic because I need to put sharp edges to the portrait. I guess mixing isn’t that bad at all :)
Hi Jin, you can paint oils ontop of acrylics, but you can’t paint acrylics ontop of oils. Cheers, Will

Hi I have recently switched from oils to acrylics for health reasons. I find I have quite a few canvases (half finished)… Is there anything I can paint on or prime with in order to use acrylics on top of the oils?
Hi Val, its’ not recommended to paint acrylic on-top of oils as the acrylics won’t adhere to the surface of the oils and they will prevent the oils from curing properly due to stopping the air hitting the surface of the oil paint. Cheers, Will

Hello Will, I am a retiree who started painting a couple of years ago with basic acrylics. I wanted a hobby and now I have one. I wanted to paint, and digitize my work to make Christmas cards, plus grow as an artist. I have so much to learn, and not much time to learn it in. No classes at all except casually with the help of another artists. I just love to get involved in painting but am really liking detail. I accidentally found I like portrait painting..AMAZING how a subtle shade can change a person entirely!
I just found your website and just love your advise! so organized! I am thinking about rethinking …getting back to basics and practicing instead of creating a masterpiece each time which ends up stored in the basement. LOL
I am playing with oils now and OMG what a mess….experimenting is more like it. I am so used to the feel of acrylics that I seem to be really great at making expensive MUD! with oils more easily..
I think I found the best resource for a small (laundry room) studio painter…YOUR WEBSITE! Thanks. I just have to figure out what works for me BEFORE I end up in a nursing home…I’m sure I’ll be signing up for a course or two. Wonderful site…especially for beginners. Easy to understand. THANKS
Nice to hear from you and so pleased you’re finding the tutorials clear and easy to follow, good luck with your portraits and hope you enjoy the courses.

Very glad I stumbled on to your website.. I’ve been trying to learn to paint using acrylics, and I love it! However, I have difficulty blending colors when doing portrait, and the color seem to be a bit darker on the canvas when it dries.. So I am thinking of trying oils…What is the best ground color to go well with skin tone?
Hi Geraline,
Great to hear you’ve been enjoying the tutorials, the background choices vary depending on the mood and feel you’re after. You might find this article on studio wall colours of interest. the same principles apply to backgrounds of skin tones.

My first painting and only acrylic work I’ve ever done must have been years ago,when i was still in highschool, i was the only kid using oil, everyone in my art majors class used acrylic, i dont know i just hated it. Messing around with oil and dry brush was my trademark there! I try to tell others why i liked oil but it always seemed useless so i guess it really is taste, but seriously it wouldn’t hurt some to try and explore some new style and beauty, thats why we’re here for, or i am at least. Btw thanks for the post, really needed some facts and opinion.
Good one Sam, pleased it helped. Will

aaaaaaAAAAaaaa…. now I know why all the old brilliant oil paintings (eg. The raft of medusa, Mona lisa etc.) are having yellowish color. Thank You soooo much for the information. I was starting on my friends portrait. But then I got confused should I use acrylics or oil. Since I already have acrylics I was just starting to paint with acrylics but thanks to u, now i think i’ll have to buy oil colors cuz they have fab features
You’re welcome Michael, pleased to hear you’ve found the article helpful, good luck with your portrait.

Bonjour Will,
this article helped me make a simple decision, which is to postpone using oils. I mainly use watercolors and acrylics (not together, indeed!) and I was thinking about exploring oils but have been resisting the idea for a number of reasons, and you listed most of them above. So I think that I have much to learn in acrylics yet, and I love the medium, so I know what to do now, read many of your articles and take some of your courses! Your style of teaching is fantastic and thorough, I know I will learn plenty! I can’t wait to paint!
Thanks Aude, really hope you enjoy working through the articles.

Hi Will Thanks for the wonderful website. I have been painting with Acrylics for some years now (as a novice – for pure enjoyment thereof) and have found your website very informative. Some of the things I have been doing was pure instinct – now I know why I should have/should not have done certain things.
However, I have a question. I am trying to master a technique to replicate a sandstorm – so that you can still see what is behind the sandstorm (almost a see-through). Any ideas on how to get that technique?
Hi Christina,
Thanks for your kind words, to achieve a see-through sandstorm you would just need to apply a thin glaze of paint over the entire paint surface using a transparent pigment, this will let you still see the image behind the sandstorm but it will be as if trying to look at it through a veil.
Thanks Will. It helps – will try it out and let you know if I have any other questions. Regards

Hi Will, Thanks for this post… very informative. I started painting with oils but switched to acrylics when I became a mom… they’re just more practical when you have kids. I am having trouble blending, though. I recently tried your apple exercise (How to paint light & shade in Acrylics) and I could not achieve the desired result. When trying to blend the halftone and the form shadow, with every brushstroke the paint underneath was “removed” and I could see all through the white canvas! Any ideas of what might be causing that? I was using a relatively soft brush…
Nice to hear from you and pleased you enjoyed the post, it is tricky to get a smooth blend with the acrylics due to the quick drying time, the paint underneath shouldn’t be removed though if it was from the first layer. Did it happen on other parts of the canvas or just on the area you blended?

Thank you for all the information. I have not had the right mixture of equipment, desire, time and energy for 40 years. Just painted last night. I now understand some things I experienced using acrylic paints. I just worked with the quick drying issues I experienced. I see what you mean by choosing to use different paint for different results.
My question is this: I remember when young that I could never mix purple in oil. I assume that it can be done, but what are the names of colors in oils that are true primary colors, or do I just need to buy purple? I want to mix my own colors!
I used to paint oils when young, but felt that I should try acrylics. I am out in the middle of nowhere, and I think I also need to get some good oil paints and all the solvents and brushes needed. I think I can pick through your site to make a list before my next 100 mile trek to a store because it is better to look at the real thing than a website.
Your website makes me feel at home, with tons of people picking up their brushes whether for the first time or like me, after so long that it is like something new. Thank you!
Hi Beryl, nice to hear from you and so pleased you’ve been enjoying the lessons. Yes you can mix purple with oils you just need the right red and blue, you might find these two videos helpful on mixing bright pink and bright purple . I demonstrate with acrylics, but the exact same principles apply with oils.
Hope it helps, Will

Hi Kemp I buy some cheap cotton canvas boards for my acrylic painting. I decided to use small one last weekend, painted the background like normal horizon, sky clouds only one layer of paint, dabbed in clouds then found every time I put any paint on brush { small amount } the paint started crumbling and rubbing off. Its made huge mess of my pastel background, tried over painting and it looks worse, dreadful, upsetting and disappointed. ! I’m wondering if you can tell me if it could have happened from no primer on canvas or old white paint that went little dry as mixer please? I’ve never had this happen before and definitely don’t want my art work to be ruined again. I live in tropical Qld Australia where it gets warm and humid often, paint dries quick !!
Hi Lynda, you mentioned “ Its made huge mess of my pastel background ” was this pastel colour, or actual pastels?

Hi Will, thank you so much for your generous instruction. I am transitioning from oils to acrylics, so I consider myself a beginner in this medium. My biggest struggle is drying time. How do you approach coming back the next day to work on a painting once it’s dried? It feels more like I’m starting over and covering up everything I’ve done, rather than adding to the painting.
Hi Susan, If I’m working on larger scale painting I’ll often build up the painting and transition into new colours on new days. So I might just work on the underpainting day 1 and then the next day I’m fresh in with new colours. You can also use a ‘stay-wet palette’ to keep your colours fresh for a few days so it’s a quicker start back at the Easel.
Yes, thank you. I think a better description of what I’m experiencing is that I’m having trouble mixing new color to match the dry. I’ll definitely look into the stay-wet palette!
You’re welcome Susan, here’s a video on how I set out my stay-wet palette when using a limited palette.

Hi Will… I draw well enough but have no idea how to paint…did fairly well though, following your instructions on that apple painting…really excited at this point and cant wait to get started in earnest…thanks for the encouragement! ps I’ve got the “grab a brew” part down pat!
Good one Jim, really pleased you’ve been seeing some good results with your painting (and your tea consumption!) Cheers, Will

Dear Will, Firstly thank you so much for all your wonderful classes. They have really been a big help.
I am going to make the jump from acrylic to oil and am wondering if you can recommend a limited pallet for classical landscape painting? I am inspired by Constable, Turner and the Hudson Valley School.
Thanks in advance for your time.
You can produce some great landscapes using the same basic palette with a couple of extras for speed.
Cadmium Yellow Light, Permanent alizarin crimson, Burnt umber, Ultramarine Blue and Titanium White. You can add a Burnt or Raw sienna or yellow ochre for more muted greens and a Phthalo Blue Green (can be called winsor blue) if you want more vivid blues.
On the Impressionistic seascape course , the only colours used initially are: Burnt umber, Ultramarine blue and Raw sienna. This will give you a good muted base you can add stronger pigmented colours too.

My god I’ve learned so much. Thank you will.
Good one Daniel. Cheers, Will

hi,thanks for explaining the difference thats what i thought and you explained it wonderfully easily for me to understand ,thanks.
Thanks Karen, pleased you found it helpful. Cheers, Will

Hi Will Incredible resource you’ve set up here! I’m struggling to choose between acrylics and oils for portraiture. I prefer the look of oils as they can appear softer, more true to life and muted. However I’m seduced by acrylics drying times and low odour. Is this possible to achieve a more natural look with acrylics or a faster drying time coupled with reduced odour with oils? Any direction on this would be greatly appreciated!
Hi Donna, pleased you’re enjoying the site, your question is very timely as I’m launching a brand new acrylic colour portrait course tomorrow which addresses these very problems, of achieving natural skin tones with acrylics. Look out for the announcement on the blog as I’ll be running a launch week offer! Cheers, Will

Hey Will, Reading your article was of great help. I will be making a canvas painting for which I will be blending colours. Also, I need the piece to have a smooth, soft look. After reading your article, I think using oils would be good. Your views?
Kudos, Harjas.
Hi Harjas, yes the oils will make it easiest to create a smooth soft look. Cheers, Will

Hi Will, I think acrylics have to be my staple because they are so much easier to use and leaving paintings to dry for a year before varnishing is too much. I have bought a small set of oils though and done a couple of small pictures and found the oil paint to have a lovely quality of its own, kind of rich and beautiful so perhaps I will keep making the odd small canvas painting. Is it ok to use the same brushes for oil and use the same ones for acrylic too or is it best to keep a separate set for each?
Hi Dave, ideally you would have a separate set of brushes for each as the residue of oil/turpentine can change the characteristics of the brush and the handling of the paint, and sometimes you might use a coarser brush to more easily move the oil paint around the canvas. Cheers, Will
Thanks Will, I’ll keep them separate to be on the safe side.

Im really struggling to string together bursts of thick painting with oils because of the drying time, however i am worried that with acrylic, is it still possible to scrape and clean the canvas as you can with oil? When the acrylic has dried (and it is on thick) will the canvas be unusable or is there a way of scraping it down?
(also, any thoughts on how the medium effects the price of painting, does acrylic still have the stigma of an inferior, less valuable medium than oil?)
Thanks in advance
Hi Luke, you won’t be able to scrape and clean the canvas down with acrylics as you can with oils. If working with oils in thick impasto you can use a medium such as Oleopasto medium from Winsor and Newton which is a quick drying impasto gel. Hope this helps,

Wow I recently began painting again after many years. I started with acrylics because that was prevalent at the art store. I painted several times and noticed the color change once dry. I researched oils and decide to try oils. Loved the colors but didn’t anticipate the SLOW drying. That changes everything. I have paint everywhere haha. I’m learning!!
I need some paintings to be ready before Christmas. What about doing the background colors of my oil paintings with acrylic? Unheard of?
Hi Carla, yes that would work, oils on acrylic, just not acrylic on oils. Cheers, Will

Hi Will. I have a question. A little unrelated to your others. LOL My fiancee and I have some amazing paintings done by his mother. She passed 15 months ago. We are trying to decipher which ones are oils and which are acrylic. Also, she is a well known artist in our area having had some of her painting hang in local banks and museums. She was also a well known and loved, long time art teacher here for many, many years. She was definitely an eccentric French artist!! How do we go about marketing her art work for sale? It seems such a shame to have them wasting away in storage. You would be amazed at her talent. I know they are worth something. Where do we go to market them? To find out their worth? I would appreciate any and all advice you are willing to share. I really enjoyed this blog. Thanks so very much for your time. Jamie Romantic
Hi Jamie, the easiest way to determine if they are oils or acrylics is to smell them. The acrylics would be practically odourless. In terms of marketing your fiancee’s mothers paintings, its hard to have a one size fits all approach as there are different approaches for different styles. However, If she was a well known artist in the area that would be the first area to market, as previous buyers would be more likely to expand their existing collections. Cheers, Will

Hi Will, I just started painting with acrylics and found your website while looking for some advice on painting (being a total novice). Thank you so much for all the information you have made available. It’s awesome! One question – can I do a background using thinned acrylics and let it dry overnight and then paint over it when it’s dry with quicker-drying ones? Sorry if this is a stupid question, but I am just learning. Thank you so much. Yayoi
Hi Yayoi, pleased you’ve been finding the site helpful, you’ll be able to paint a thin acrylic and then paint ontop with a few minutes. If you where working in oils you would leave a thin colour overnight to dry and then paint with thicker paint the next day.

Thanks Will, this helped me a lot.
You’re welcome Rachel. Cheers, Will

can you use acrylic instead of oil paint? x
Hi Emma, it depends what you’re trying to achieve?
Well I’m supposed to be using oil paint to experiment with before I get back to school but my teacher has not shown me how to use it and I don’t have any so I was wondering if I could just use acrylic instead? x
Hi Emma, they have similar properties when mixing colours (because you are adding white to the paints unlike watercolours) and you can achieve similar results, the main big difference is the drying times between the two. Cheers, Will

Hi Will! I’m working on a impasto painting for class and we’re required to use oil. I’ve tried impasto but only with acrylic and I was wondering how the end product will turn out? Thick blobs of acrylic dry kinda “rubbery” and they keep shape. Will oils be the same (albeit drying much slower) or will they sink? Thanks!!!
Hi Anisia, on thick passages with straight oil paint it will take a long time for the paint to dry, so I would recommend using a quick drying impasto paste for oil paint, the Liquin Oleopasto from Winsor & Newton is good.

Maybe slightly off-topic, but what do you think of Alkyd paints? When I was doing A-level I got put off oils because they took ages to dry (especially mine because I didn’t realise you were supposed to massage the tubes, so when I squeezed the paint out I got an extra helping of oil!) At that time they had only just came out, and I used them, and quite liked them. Would be good to hear a professional artists opinion about these paints.
Hi Peter, Alkyd paints can be great to use if you want a faster drying time to your oil paints and you can achieve some really nice results with them.

Thank you for all this information, it has open my eyes to a whole world of painting. I’m just getting into painting and found this articular very easy to understand and helpful.
Great to hear it Kevin, pleased you found it helpful. Cheers, Will

Hi Will, I’m really glad that I found your website. Although I’ve been painting a number of years and have almost completely taught myself to paint, I feel that I still have a ways to go before reaching my potential as an artist. In this regard I feel I will be able to use your lessons to make good headway toward my artistic goals. One of my goals is to be able to make a living from painting. Sadly to say this has not been the case. It isn’t that my work is bad. I have been commissioned a few times, 7 to be exact, and made decent money. I also have my work on FinaArtAmerica, been there for the last 5 years, and though my work gets lots of hits (overt 9,000 hits for some pieces) no one buys anything–except for selling 2 or 3 prints of my “mating lions.” So my question is: would you be able to offer suggestions or point me in a direction where selling my art regularly becomes possible? How do I get into a good gallery? Do I need an agent? If you’d like to see my work, please visit http://george-perez.artistwebsites.com
Thank you kindly for any feedback. George
Hi George, hope you’re doing well and really pleased you’ve been finding the articles helpful. Regarding making a living from your paintings, different approaches suit different painters so its hard to give a one size fits all answer, but the best thing I’ve found to start with is to focus on one market, and then build from there. For example, if your lions print sold (or the print that has had the most views) gives you a good indication of a subject matter that is saleable. Then you can start to think around where people who are interested in wildlife would go. It could be a local travel agents that sells safari’s or a forum interested in protection of lions. This will give you a more specific focus to start with and will be easier to gain momentum.

Hi Will, THANK YOU SO VERY MUCH!!!! Giving all the time, effort, and generosity, sharing your amazing talent and gifts, is such a blessing for us all!!! I just found you after giving up the search for an art class in NYC that could teach me just the technique for working with oils. (Futile to say the least.) I have many questions, but my first is; Do you paint with more than one medium? Do you find that oil paintings are taken more seriously insofar as $ value?—–Thank you again for your wonderful support.
Blessings, Joni
Hey Joni, thanks for your kind words, yes, I paint with oils, acrylics and watercolours. In terms of $ amount for oil paintings it really varies on subject matter. If you’re painting more classical moody scenes having the painting in oils can add a ‘heritage’. But more and more high end galleries are as keen on acrylics due to the long archival qualities, but personally I would match the medium to the qualities in painting you’re trying to achieve.

hello will, i am a mechanical engineer but painting is my hobby and do not have any guide for artist like work. but tries to learn things from internet. i am happy to get lot of answers to my questions on this site.i loved your work.and would love to learn a lot from here. till now i am using oil paints for painting.recently i have developed an interest in doing heavy impasto and palette knife painting.i am interested in exploring right technique but struggling for correct materials at affordable cost. i have never used acrylics but i understand that acrylics are better for impasto and palette knife painting. i am confused whether to continue with oil or use acrylics.
Hi Manish, you can create heavy impasto work with both mediums, it’s just that with acrylics the thicker paint will dry much, much quicker. What you can do to your oil paints is add a quick drying medium such as Oleopasto from Windsor & Newton to help speed up the drying time. Cheers, Will
Hello Will, I am trying to choose between buying regular oil paint or the new oil paint that mixes with water. I have used the traditional oils in the past but don’t like their smell.
The problem is I have read of a few problems with the new paint: If thinned too much with water the paint doesn’t want to stick to the surface, The finished product is not as shinny as a regular oil painting, A loaded paintbrush does not go as far as with regular oils, Adding the quick-dry medium greatly reduces the painting’s life, If have added a medium then adding water will make paint sticky.
What is your opinion?
By the way I am amazed at the length of time you have kept up this one post and the speed of your responses. Thank you so much for this service.
Hi Gloria, nice to hear from you, water mixable oils can be a good alternative for working without the smell of turpentine. They do have different working properties than traditional oils but the best way is just to try a couple of tubes and see if you like the feel on the paints. You can still achieve some fantastic results with them you just have to be aware of the differences. Cheers, Will
What makes various brands and colors of oil paint safe or not? Is one kind of paint (oil, acrylic, watercolor) safer than another kind?
A number of years ago I discarded all my oil paint. An aging artist friend of mine had some serious health issues blamed on her years using leaded paints. I bought acrylic paints thinking they were so much healthier. Thinking back I see my assumption was rather naive. All paint needs to be treated with respect. But there you go.
For the last several years I have used, and fought with, acrylics. I know they have their place but not for someone attempting to paint portraits!
I am back to wanting to use oils again but am leery about making that purchase. There are so many brands (how do I choose?) and so many dangerous ingredients (lead, zinc, etc.) that I am stymied. I discarded my oils for safety reasons. I don’t want to consciously buy back similar materials.
So I am hoping if I tell you what I want you can give me some suggestions: I want oils made with safe ingredients, as safe as possible considering they aren’t meant to be food. I want mediums that have low odor. The room I paint in has great ventilation in the summer but not so great the rest of the year. And I want professional, quality products that are known to stand up to the test of time. I’ve read about this paint reacting with that medium and becoming gummy, or this paint mixed with that medium cracking after a few years. Etc. Probably too much research. Maybe there is no right answer. Still. Buying a whole new set of paints and brushes is not cheap and I would like to make the best use of my money as possible.
Can you help me?
Hi Gloria, the toxic levels of oils are usually due to either the pigments used or the mediums used to dilute the paints. You can create non-toxic oil paintings if you keep to a muted earth tone palette and use a non-toxic medium to dilute the oil paints such as walnut oil. You might be interested in Leah Mebane’s range of Natural Earth paints . Cheers, Will
Thank you. I’ve never heard of natural oil paints. I thought that was only a thing from the medieval era. Thank you for your effort to find this information for me. Have you or anyone you know used these type of paints? I wonder if the pigments are like the old masters used and if they will stand the test of time.
Hi Gloria, I’m not sure of the lightfastness of each pigment that is used, but you could contact them direct, you might also be interested in M Graham paints that have been ground in walnut oil . Cheers, Will

Im pretty new to this, actually as new as just having finished skatching my picture. I have got acryllic paints, canvas and brushes as a Christmas gift and I got so excited that I want to paint pretty much, so I’m learning the basics through video demonstrations and comments. I read about acryllic colors not smelling – which is not a case with my paints. They stink pretty much, that much actually I thought at first they must be toxic or something! What are good acryllic paint brands? What could be the reason why my paints are smelling? Maybe they are not the real stuff? If that’s the case, I’m rather buying me the proper acryllic paints to get the full experience! Once acryllic paint has dried on the canvas, can it be diluted with water?
Your site is lovely and explains nice the differences between the acryllic and oil paints. According to described, I could say I’d rather go for acryllics at least at the beginning, to start with.. Later when have gained experience with acryllics I could give a try to oils. Thanks for the tips here.
Hi Vanessa,
Most artist quality paints have very little odour, if any, but with many hobby paints the fillers that have been used to extend the colours of the paints can cause a stronger smell. Standard Acrylics can’t be diluted again with water once they have dried, although specialised acrylics like Atelier Interactive paints can be ‘re-wetted’ I’ve just released an absolute beginners acrylic course you might find of interest, on the course I demonstrate with standard artist acrylics. Cheers, Will

what medium of paint gives us more realistic paintings?i have been using only acrylic paints.they are extremly comfortable but i dont find them looking realistic,especially potraits.could you advice me which paints to use to get realistic paintings on canvas.it would be of great help to me :)
Hi Hana, if you’re after a super photorealist finish it can be achieved with acrylics you might find Jason’s painting of interest to see the level of detail possible.

This is really helpful for anyone–either new or having painted for a long time. I have been at it for a long time and sometimes go in spurts. Just starting wit ha painting knife and love it. I always go back to acrylics. Oils are slow and and also hard to use unless you have a decent size studio. Thanks for all of this.
You’re welcome Carol. Will

Hi Will. I stumbled upon this website today, after a near 6 month hiatus from painting following a less than graceful departure from school halfway through my art degree. One of the reasons for my disillusionment with academia was that I felt I was receiving very little instruction in technique – many of my professors simply turned us loose without providing the framework that would allow us to develop our skills. I just wanted to thank you for providing such a wealth of concise (not to mention free) information.
You’re more than welcome Emily, really hope you find the articles and tutorials helpful in your journey back to the Easel! Cheers, Will

Hi Will, thank you for your article. I used to paint in oils many moons ago, but I have been ill and disabled for 26 years now and I feel ready to dip my toe into the genre again. However, I want to start small and easy with proper oil painting by numbers set. I have Acrylic number sets but, due to my fluctuating illness, I need to be able to leave the painting and come back to it hours or a couple of days later. I found I could do this with oil paints but not acrylic paint. I am looking for an adult proper oil painting by numbers kit that isn’t too big. Something about 12″ x 10″, ot there abouts. I have looked a every website I can find but the smaller the canvas/board, the more juvenile the picture. This is fine for children but not for me. Have you any suggestions please Will? Thank you very much. I live in England but don’t mind buying from overseas to acquire what I want. Thank you so much.
Hi Dot, nice to hear from you, I haven’t personally used a paint-by-numbers so I’m not sure of how the different brands vary, but hobbycraft do a range you might find of interest. Hope this helps,

Thank you, you just inspired me :) I am going to be next Picasso

i want to paint a picture which was originally done by oil colors, so can i use acrylics instead?
Yes, you definitely can, you just might find some of the smooth blending more difficult with acrylics, depending on the subject matter of the painting. Cheers, Will

Hi Will, Absolutely fantastic site. A great inspiration. I am finding my acrylic landscapes too realistic and want to head to a more “painterly” approach. I am a big a admirer of Donald McIntyre’s style. I was thinking that I would need to switch to oils but maybe I can still achieve that approach with acrylic and brush working with thicker layers? Dave
Hi Dave, pleased you’re enjoying the site, yes you could definitely achieve that effect with acrylics similar to Donald’s painting style. Cheers, Will

I have just started my art painting course (for beginners) a few weeks ago and I am loving it. We only used Acrylic paints so far and I am struggling with blending and shading in my paintings trying to make my paintings look more 3D than 2D. So I’m considering switching to oil paints. Do you suggest I switch to oil paints or continue with acrylics and try to improve on my techniques?
Thanking you Taahirah
Hi Taahirah, it often depends on the level of smoothness and blending you’re trying to achieve. Working with acrylics to create a smooth blend is excellent training in developing your brush handling and paint handling techniques. You’ll find if you’ve got to a good stage of blending with acrylics when you then try oils the process will be much much easier. Have a look at this lesson on blending a 3D form with acrylics and see how you get on. Hope this helps,
Cheers, Wil

Great post. I use the “dead colouring layer” technique in all my paintings and turpentine is my friend. I have run into all the issues you mentioned when using oil and a lot of turpentine, but that is how I paint. Any suggestions on how to keep the colors vibrant? I have tried the windsor newton, maybe not applying it right, but no success. In my own experience, Windsor Newton paint has really changed the past year or so, no matter where I buy it from….
Hi Sarah, when diluting the paint with turpentine it will always dull the paint and make them less vibrant, the more turpentine you use the less vibrant and dull the paint will be, making it a ‘dead colour’ It’s usually the gloss of the oil that will make a paint feel richer, and as you add turpentine it becomes more matte and flat. Hope this helps,

I found your tutorial videos very helpful especially the how to paint still life of a single red cherry. I am new at this and enjoy using acrylics very much. I would probably eventually want to use oils in time but for now I truly enjoy working with acrylics as I have a very small place to work from with little ventilation.
Thank you for all your helpful tips and suggestions. I will from now on try to only select better Artist grade acrylics to work from as I do notice the difference visually. They are more expensive but are worth the extra cost.
Diane Kanata, Ontario Canada
Hi Diane, great to hear it, really pleased you found the cherry painting demo helpful. The artist grade titanium white will make the biggest difference in your mixes, hope you enjoy experimenting with them. Cheers, Will

After reading your article here on choosing acrylics or oils, where I have learned and truly GRASPED the information, I like both mediums and feel quite natural at wanting to learn and master techniques for not only oil and acrylics, but for watercolors and pastels. I am soooo excited about discovering the artist within me — and yes, I was scared at first to finally admit that I can draw and paint — and feel truly blessed to find your ABSOLUTELY FANTASTIC website!
Thank you, Will, from the bottom of my heart and the depths of my soul, for so graciously and energetically sharing your knowledge and wisdom of art with me and the world for the incredible and unbelievable price of free! May Father God’s infinite blessings continue to rain down on, and be upon, you ALWAYS!
Grateful and appreciative of you,
Antoinette — Queens, New York
P.S.: Today is the first day of my visiting your site. I had “Googled”: “How to use gesso and why?” and your website was listed, THANK GOD!
Hi Antoinette,
Great to hear from you and thanks for your kind words on the tutorials, so pleased you’re feeling inspired and really hope you enjoy exploring the site. Cheers, Will

I love the feel and color intensity of oils. I have just started, and Lukas 1862 was recommended for me. So far, brilliant, beautiful primary colors, and such ease to spread on a prepped canvas. I have one dry so far, and 3 more in process of drying – no mediums, just the paint. I am in grad school online, so am painting as creative stress relief… I have lots of time to allow for drying and any edits I want on them.
Pleased you’re enjoying working with oils Julie. Cheers, Will

Thank you so much for your advice. I’ve learned so much from you. What is your opinion on water soluble oils? Nancy
Pleased to hear it Nancy, you can get some good results with water soluble oils, but if you use water to thin the paint it will evaporate on your palette just like acrylics and the paint can dry and thicken much quicker than standard oils. Also, just thinned with water the paint can be quite thin and watercolour like depending on the brand you use.
Thank you for your response. What brand of water soluble oils would you recommend?
Hi Nancy, the ‘Holbein’s Duo Aqua’ are a good choice. Cheers, Will

Hi Will, oil had been my choice for painting. I love the blending for landscapes but now practicing with acrylics , frustrating at times with the drying time and the blending. Enjoy your articles and hints. Thank you.
Thanks Dianne, pleased you’re enjoying experimenting between the mediums. Will

Thank you for the article. I worked with oil first time when I was 13 years old. After in my art school I tried watercolors, gouache, acrylics, ink etc, but I never really thought about the difference between oil and acrylics…only now after reading your article I’m conciously realized why I picked this or those for my particular painting. By my experience I would prefer oil when u painting realistic portraits, nature,.. when u need “classic” palette and you are ready to work on it long time. And when I wanted to paint modern/contemporary artwork with bright colors, very fast and expressive I chose acrylics. Sorry for my english. Im from Europe, and english is my secondary language,I hope everybody will understand what I wanted to say :-)
Hi Joanna, nice to hear from you and pleased you found the article of interest, sounds like a good balance between the mediums. Cheers, Will

Hi Will, So happy I found your site. Began painting about 10 yrs old with those good old paint-by-number sets, and I was instantly hooked. Hooked on oils. Didn’t really discover or work with Acrylics until I was at Penn State – mid 1970s – majoring in Chemical Engineering (of all things! I’m also a musician). Became a huge YES fan, and therefore a huge Roger Dean fan, and so of course I experimented a lot with mixing oil and acrylics wet-in-wet; never via air-brush though – all hand brushing.
Sadly, it became career time, and for 30 years my love for painting, and to some extent music, has been on hold. But now I’ve been forcibly retired, and want to get back to both. I prefer Acrylics (or mixed Acrylics/Oils) for more modernistic or abstract works because the colors always seem a little brighter and more vibrant to me than Oils, but I also really love to do old style landscape and still life work with Oils alone. But first, as you suggest, I’m reviewing fundamentals and beginning with Drawing. You know, I’m still consistently surprised by how quickly we can forget things that were once second nature, if we neglect them for some years.
So I’m off and running once again – thanks to you! Maybe I’ll go now and paint some happy little trees…(I always admired much about Bob Ross’s style of Git ‘er Done, as well…never saw anyone generate complete oil landscapes so quickly)
Best Regards, Mark
Hey Mark, great to hear from you and so pleased you’ve feeling inspired with your paintings, good luck with the tutorials. Cheers, Will
P.S. Armed with your sections on paint selection, and your video on brushes, I’m about ready to get started. Less is more. Less is more. Less is more. Om
Ha, ha, yes less is more is an excellent mantra to start with.

I am getting ready to start painting and this article was great. I live in an apartment and will be painting mostly on the covered patio. We have very nice weather here in the bay area of northern calif. Which paint will be better if painting outside? The odor is not an issue, just no room in my small studio apt.
Hi Jeff, if you’re painting outside having a water based or traditional oil paint will give you more working time. When paints are outside the wind and warm climate can dry acrylics much quicker as they dry by evaporation (oils dry by oxidation)

Hi Will, I’m new at painting and find it very enjoying and frustrating at the same time if that makes any sense.LOL!!! I found a love for it when I learned how to Faux paint an interior wall, and decided to try out painting on a canvas. Well, I bought acrylic paints and started to become frustrated on some of them bc of the blending and drying way too fast! Especially when it came to painting a realistic ocean wave that didn’t look realistic at all.LOL!!! I started watching you tube video’s and came across some Bob Ross videos and fell in love with his techniques on how to make water look realistic and noticed he used oil paints. I did some research and fell in love with the idea of oil paints and the slow drying time. I just bought a, “Master’s Touch oil color art set” along with,” Odorless Mineral Spirits (Bc I have an 8 yr. old daughter) and two 16″ x 20″ Dbl. Primed Canvas’s. My question is, Do I still need to use the wet on wet method to achieve the blending technique with oil paints on a pre primed, stretched canvas, or can I just start painting on it, and still get that realistic look in painting landscapes? If I still need to do the wet on wet with my Primed Canvas can I use the Odorless Mineral Spirits I have and some Titanium white oil paint to make it a liquid white? Sorry, that was more than one question…They make it look easy in the you tube video’s, but don’t explain if you buy a primed canvas ,you still need to use the wet on wet with oil paint. Its really frustrating bc I want to paint on these really bad and not mess up bc I don’t have a lot of money to spend. So i’m scared to start without knowing for a fact if I should or shouldn’t use the wet on wet with oil paint. Thank you for taking the time to read this. Sincerely, Robyn.
To answer your question: Do I still need to use the wet on wet method to achieve the blending technique with oil paints
Yes, any paint, watercolour, acrylics or oil will only blend together when wet into wet. The liquid white technique is a method used by Bob Ross for his style of painting that applies a layer of slow drying white to the surface. Adding OMS will thin your white but speed up the drying process so won’t act the same as the branded liquid white that he demonstrates with. Hope this helps,

Hi thank you very much for sharing your knowledge of art, it’s so very kind of you. I have learnt so much from reading just a few articles, that I am going to make a point of reading all I can find on line. My question is can you use a varnish on acrylic paint? I find its dull finish a bit, well dull really. I like the shine you see on the old masters, it makes a dark back ground colour look so much more interesting .
Hi Georgina, pleased you’ve been enjoying the articles, yes you can use a varnish on acrylics, a gloss would be best for adding the shine similar to Old Master paintings. You might find this article of interest . Cheers, Will

I use acrylic paint only and I love it! Acrylic is the best paint I’ve ever used and I really enjoying using it.

Thank you so much for this article. I started painting in oil about 20 years ago mostly because that was the medium my grandfather used. I have lived in a series of small spaces which have prevented me from having a space where I could leave my supplies set up and thus it has been at least 5 years since I have painted with them. I really miss it and was thinking about trying acrylics; however, after reading your article I do not think I would like working with them. It seems that I would run into the same frustrations that encountered when I tried watercolors the lack of time to manipulate the paint on the canvas.
Hi Sarah, you might find water-based oils to be the best choice, you can clean up with water and don’t need to use solvents, the handling properties are slightly different that standard oils but they will give you more working time that acrylics. Hope this helps,

Hi… I am beginner for Spray paintings…, i have some doubts So 1.i would like to know SPRAY PAINT BOTTLE requirements…? 2. can we mix ACRYLIC PAINTS and OIL PAINTS while painting..? 3. which one is better for beginners..? and help me to get through…
Hi Keerthi, you can spray paint with acrylics such as Montana brand, you can paint oils ontop of acrylics but not acrylics ontop of oils. Cheers, Will
I’ve produced some really interesting results from spraying them together, using oils in one airbrush, and acrylics in a second airbrush (with a drying retarder) at the same time. It produces really wild textured marble-like effects. I found it really difficult to get the mixture of paint and media just right, as well as spraying with both hands at the same time, but had lots of fun with it. I understand Roger Dean was a master at mixing “un-mixable” media in this way (ref: Roger Dean: Visions)
Cheers Mark, thanks for sharing your experience when spraying both together. Will

Hello Will, I’ve just finished reading the info about ‘oils v acrylics.’ I’m a bit bewildered by some things because painting is a relatively knew experience for me. I started with watercolors but the quick drying time made me feel pressured. I then switched to acrylics and had a bash with those… I had some success but once again the drying time was yet a factor. In the autumn of last year I had a go with oils and I’ve taken to it like a duck to water. I love painting with oils! However, I’m still confused with how to work… someone said start lean and build up with thicker layers of paint. Another said work fat to lean. Also, I do a grounding before I paint using Yellow Ochre on a double primed pre-stretched canvass. Help me out here Will. Many thanks, Sylvia.
Hi Sylvia, when working with oils if you’re working using a ‘in-direct’ method the classical technique is to work ‘fat over lean’ so the further the painting progresses the thicker the layers and the more oil (fat) is in the paint medium. If you’re painting ‘alla-prima’ you don’t have to worry so much about the differences in the medium.
Will, thank you for taking the time out of your busy schedule to answer my question…. it’s a big help to me and I’ll work ‘fat over lean’ from now on. I think it’s wonderful of you to help so many of us who are trying to learn to paint properly… your desire to help is very apparent. I want to do an impressionistic painting so, I watched your demo using acrylics. I’ll watch it again so that I’ve got it in my head and I intend to do your beginner acrylic course. I don’t want to be restricting myself to one medium. Says I…lol!
You’re a real gem of a guy for helping all of us! Thanks again, Sylvia
You’re welcome Sylvia, hope you enjoyed the demo. Cheers, Will
I did enjoy the demo Will, and big thank you to you!
Your demo was very informative and your explanations were clear, concise and easy to follow… that makes it so much easier for me since I didn’t have a clue how to paint using impressionistic strokes. Tomorrow I’ll watch a second time and a third if necessary. What I found intriguing was the way that you blocked in colors first then, built upon that. I also watched the ‘Cherry’ composition too and learned a lot from that. From now on I intend to ‘block’ in and do it your way. Also, your colour theory lessons have been a god-send.
Will, you’ve no idea how happy I am having you as an online resource and to watch real demos too. I live in a rural location with no neighbours… the nearest art class is 90 minutes away and I can’t get to it in the long winter months with all the snow. I’m a Scot living in Michigan and I’ve never seen so much snow in all my life.
Thank so much again! I’m very appreciative. Sylvia
You’re more than welcome Sylvia, yes blocking in can be so helpful to see the tonal range in your picture and start to build the composition quickly without getting too engrossed in the details.

Thank you for this very clear article. I would like to start painting, and having dabbled very very little with paints, I’m instinctively attracted to acrylics, I think because they appear simpler (no worry about multiple solvents, water will do, dry quick etc.). I also will paint in my living room in London (not big) and I have a small child so toxicity is an issue. But I have a friend who paints, he’s good and uses oils… he’s kind of discouraging me from acrylics, criticizing them for being more amateurish and plasticky. I don’t know.. I feel stupid for even asking this here, but why is it that he says that? Is it a common perception and does it have any foundation at all or with today’s paint quality it is only snobism?
I look forward to seeing more of your website. Thanks a lot for your instruction!
Hi Frank, as with all mediums it depends what you do with them and the style of painting you’re trying to create. Oils can still have an ‘Oil on canvas’ factor in comparison to acrylics but modern acrylics are a much different material than when they were first developed and the quality of the pigments used today are excellent in artist quality acrylics. You can also use water mixable oils which enable you to work without solvents yet have a bit extra working time if you want to experience working with oils.

Hi Will, after reading your ‘oil vs. acrylic’ article, I realize I may do better with oils to begin with. I understand the reasoning behind buying the best paints one can afford and am wondering what brands/colors to begin with in oils? I am a total beginner, only having taken a very enjoyable watercolor class with an excellent teacher 30 years ago. Thank you for your help! Kathy
Hi Kathleen, it depends on the style and colours of paintings you like as to palette choice, any reputable brand of oil paint student grade will be a great start such as Winsor & Newton. This article goes through the basic palette I would use for acrylics and oils. Hope this helps,

Thanks! This is just the information I was looking for. I haven’t painted since high school, but I really want to do a large 24×24 painting of my deceased dog. I have a photo I want to use as my inspiration. Thanks to your information, I am going to use acrylics because they lack a strong odor, and because the majority of my painting will be various shades of white, I do not want yellowing to occur.
I’m ready to go get supplies!
Good one Sarah, good luck with your painting. Cheers, Will

Hi! I have long been experience in pencil/graphite portraits but I have longed to oil/acrylic paint portraits on canvas. I’ve read so many articles about which to use and I’m still so torn. I strictly do portraits (I can do other things but have always had a passion for portraits). It seems that oil would be the best for more realistic paintings which is what I’m shooting for but the drying time scares me. I have a young child, small spaces, and am a beginner. My customer base usually like 8X10-11X14 so pretty small and usually want it withing 1-3 weeks. Any help!? I can’t decide which would be best
Hi May, you could use a water mixable oil which would give you some more working time yet be able to work without solvents, this video shows a nice comparison of the drying time of water mixable oil . Hope this helps,

Recently trying colors (Acrylics) on Metal (Tin), but because of its quick drying nature when I use any retarder, it affects the actual colors, not happy with the output, is there any other thing I should use while painting on Tin ? can i use the paint, used for painting on walls as they are also water based. I have already removed all the rust and used the primer on it, it is a 4ft * 3ft surface. Thankyou
Hi Sanjoy, you could try enamel paint that will give you a slower drying paint that adheres well directly to tin, it can be more expensive though due to the size of the surface you’re working onto as is often used for small-scale model work. Hope this helps,

I wanted to paint abstract art on a Formica sheet. What paint I should use, I want the art to look bright. Acrylic or oil paint?
Your help most appreciated> Thank You! Henry
Hi Henry, I would use Acrylics. Cheers, Will
Dear Kemp, Thank you very much for your mail. I wanted to ask you another question. 1. can ceramic paints be used on Formica sheets? 2. If ceramic paints can be used on Formica sheets ,how do I do it. I would appreciate if you can let me know the above. Thank you! With Best Wishes! Henry
Hi Henry, nice to hear from you, I haven’t personally tried ceramic paints on Formica so wouldn’t want to say for sure, I would try contacting the technical department from the brand of ceramic paints you’re using and they’ll be able to give you specifics on the adhesion qualities of the paint onto Formica. Cheers, Will

I paint with oils and acrilics.I have been painting since I was in high school in 1965.I like painting scenery deer bear and like Covered bridges the best.Growing up in Vermont gaves me a love for covered bridges. I live in North Carolina now.There is a man that wants me to his gallery.I am working on a painting of the village of Pomfret Vt.Also working on a covered bridge The West Arlington Bridge Arlington bridge.I want to try oil egg tempra.
Thanks Bob. Will

My 16 year old daughter is absolutely a fantastic sketcher/draw. She just recently draw my grandsons picture and was astonish how good she is and made me thought that I think she should go in to painting. She has a talent that cant be denied.I started to search of an art school for her to do after school and they have acrylic painting around my area and also stumbled on your website which I think was very helpful for me and her.
Thank you! Arlene
You’re welcome Arlene, hope you can both find the lessons helpful in developing your drawing and painting skills. Cheers, Will
Leave a Reply Cancel reply
This site uses Akismet to reduce spam. Learn how your comment data is processed .
- New? Start Here
- Shop All Courses
- FAQ’s & Contact Will
- Free videos
- 7 Painting Principles
- Student Success Stories
- Art Tuition Bundle Offers
How to Describe a Painting: 10+ Phrases to Talk About Art

Art is eternal. Many paintings created hundreds of years ago still inspire and excite us. But it’s also a great topic for conversation with friends or strangers. So, knowing how to describe a painting in your native language and English is essential. And, of course, we are here to help!
In this article, you will learn the best tips for describing a piece of art and understand the importance of such a process. So whether you need it for school or you are going to visit a museum, keep reading! You will find everything you need below.
How to describe a piece of art: General tips
You probably think describing art is effortless. Just say some adjectives, explain the colors and composition, and you’re done. Well, it might be enough for art classes. Yet, in real life, we want you to be more prepared. Here is one of our favorite examples of describing a painting. In the Theory of Everything movie, Eddie Redmayne, a.k.a. Stephen Hawking, says that Turner’s paintings usually look like they’ve been left out in the rain. It is not the description we used to hear, but it is still valid.
As you can see, you have genuinely enough ways to describe a painting. But since it might be hard to navigate at first, we created a step-by-step guide to help you understand what details need more attention and what to talk about during your next visit to the gallery. So, how to describe paintings properly?
Describe your impressions
When discussing a particular painting at the gallery, express your feelings about it. Do you like it or not? Does the picture make you happy or sad? And why does it give you such a mood – because of the colors, composition, or maybe its background history?
For example, you can say that the picture makes you sentimental because the woman in the foreground reminds you of your granny, whom you haven’t seen for a while. Or, for example, it makes you calm because you enjoy the sea view. You can use many adjectives to describe your feeling regarding any piece of art. Here are some of them:
- Positive emotions: inspired, joyful, satisfied, interested, happy, serene, nostalgic, sentimental, excited, impressed, powerful, fascinated, etc.
- Negative emotions: disappointed, sad, moody, gloomy, unsatisfied, scared, nervous, angry, depressing, disgusted, etc.
Don’t be afraid of telling the truth about your feeling regarding any art. Of course, there is no need to be rude – you don’t have to offend an artist and their work. But you shouldn’t tell untruth as well. If you don’t like something, pay attention to your feelings, and try to explain what exactly makes you feel that way. The excellent hack is to share your first thoughts when you see a particular picture for the first time. And when you are finished with this step, you can proceed to the next one.
Describe the composition
You can now talk more particularly about the chosen work of art after conveying your feeling from the picture. And the best thing to start describing it is to explain the composition. In layperson’s terms, you need to tell what is depicted on the canvas. You can use these common expressions and words to describe art composition:
- in the foreground/background, in the middle, on the right/left side, next to, in front of;
- asymmetrical, symmetrical, centered;
- urban landscape, suburban landscape, rural landscape;
- a historic site, domestic setting, intact nature;
- horizontal, vertical, circular, triangular.
For example, let’s look at the Mona Lisa (we are confident you’ve seen this one before). What can you see in this famous painting? There is a beautiful woman in the foreground . She has long black hair and wears a black dress. In the background is a natural landscape – a river, mountains, and a road.
You can be more general when talking about the painting’s composition. Just describe what you can see in the foreground and background, the main shapes of the picture, what is in the center and what is in the distance, etc. The best advice for this step is to tell everything you see, even the smallest details.
Describe the colors
Colors are integral when you need to describe a painting. Of course, we are not telling you to go to the gallery and stand in front of pieces of art saying they are red or yellow. It would be a little bizarre. You can try some other things instead. Here are some adjectives you can use to explain the color palette of the painting:
- bright, vibrant, vivid;
- hot, cold, warm, cool;
- natural, artificial, earthy, rich, intense;
- deep, flat, weak, pale, muted;
- complementary, quiet, contrasting;
- dark, light, monochromatic.
Take a look at the painting and try to identify your impression of the colors used. Are they good together? Do they fit the overall idea and composition? Can you identify the primary color palette and what it is? Are there any specific colors you can notice? The more details your eye can catch, the better your description will be. Try to feel the atmosphere the artist created using a specific color and explain it.
Describe the scene
When describing a composition, you explain only the things pictured in the painting. But when discussing the scene, you create your own story based on the painting. Of course, it would be harder to describe the landscape scene because you can only guess the place’s location, city, or country here.
But if there are any actions, and you feel a little creative, you can imagine the story behind this picture and add it to your description. Let’s get back to the legendary Mona Lisa. You probably know there are many stories about this masterpiece. So, why don’t we create another one?
Take a look at this painting once again, and try to guess a few things. Who do you think this woman is? Maybe she is the wife of the artist. Perhaps she is his mistress. Or possibly, she is just the famous lady of that time, and it’s a custom painting. Where does she live? We know that Da Vinci was born in Italy but spent his last days in France. Hence, maybe it is one of those countries? The number of options is countless. You can choose any picture and make your own vision of it.
Describe the history
Generally, four previous steps would be enough to describe a painting. But if you have a bit more spare time and want to impress whoever you will discuss the art with, you need to do some research.
Start with the information about the artist. Find out their date and place of birth, the genres they were working with, and some major events in their life. When you know something about the artist, it will be easier for you to keep the conversation going. Moreover, it will significantly simplify the painting-describing process.
After learning some basics about the author, research the information about the painting. Try to learn as much as possible about the events or people pictured on the piece of art. It may be a famous historical event or figure. Maybe, it is the sibling of the artist. The more you find, the better you will understand the painting.
Of course, if you’ve decided to do this research, you should skip step four. It won’t be easy to guess and create your versions when you know exactly what the picture is about. But to mention the painting’s history, you need to be sure that you’ve found only relevant information. So pay attention to the smallest details to avoid misunderstandings and confusion.
Why is it important to learn how to describe a piece of art?
You might think that describing a painting can be useful only at the museum or in your art class. But we can show you that it is not entirely true. This simple process can bring you more benefits than you can imagine. Here are only a few of them:
- Improving your speaking and writing skills. Of course, since we are here to study English, the first benefit is connected to our learning process. When you learn words to describe the painting, you expand your vocabulary, understand how to build sentences, and use them in your speech and writing.
- Learning to understand yourself. Yes, you’ve read it correctly. As we mentioned earlier, one of the best ways to describe art is to start with your feelings. And when you realize what you feel regarding some painting, you will learn how to listen to yourself in other situations.
- Imagination development. You probably remember that in step four of describing a painting, we offered to define a scene using your imagination – guess what is going on, and create your version of events. It will help you develop your fantasy and imagination and become even more creative.
- Increasing knowledge. You already know that to describe a piece of art better, you need to find some information about the artist and the historical background of the painting. It will help you to increase your knowledge of various topics, so you will always be an interesting person to communicate with.
Only these four benefits can show you how much profit you have from learning how to describe art. You can use them to discuss paintings, even in your native language. And if you want to master this topic in English, we know precisely how to help you reach this goal.
Learning the best words to describe a painting with Promova
If you are an avid reader of our blog, you probably know our main motto – studying doesn’t have to be boring. And if you still think that describing art in English is tedious, we are ready to prove you wrong. The Promova English studying platform is the best place to learn all the steps mentioned above, but make it easy and fun. There are a few studying options depending on students’ needs. And we will tell you about each one of them.
Let’s start with those who seek help from professional tutors. If it’s you, we have a perfect solution. Promova offers amazing one-on-one lessons with professional teachers . They will prepare a unique plan according to your experience level, studying goals, and interests. As a result, you will start learning only the information pertinent to you and bypass all the useless details.
You can join our friendly and exciting group classes if you need company. It is an outstanding opportunity for those who want to practice speaking. Depending on your English proficiency, you can join any group of six students and begin having fun right away. You can talk to people worldwide, discuss interesting topics, and strengthen your language skills.
Another great option is suitable for those who don’t want to study general information but want to practice speaking and discuss various topics more. Yes, we are talking about our wonderful speaking club . Here, you can discuss art, books, movies, and other amazing topics with students from various countries. And the best thing is that it is free! Go to the Promova website , choose the subject you want to discuss, and book your place. Just as simple as that!
Finally, we have something great for those who prefer to study independently. The Promova app is perfect if you want to practice English alone, anywhere, and anytime. Install the application on your phone or laptop, and enjoy hundreds of lessons and exercises on grammar, vocabulary, speaking, pronunciation, listening, etc. The application is also free, so you can enjoy it immediately. Don’t hesitate, and check one of those opportunities to find the one that suits you best.
All in all, discussing a particular piece of art might be more tricky than you thought. But with minimal preparation, you can become a personal guide for your friends on your next visit to the gallery. All you need to do is to remember some basic steps for describing a painting.
- Find out more about the art and the artist. Scroll through the Internet and visit famous websites like the National Gallery of Art to find information about the chosen painting. Describe the background history of the author and the painting.
- Describe your own feelings about the piece of art – what emotions does it evoke?
- Discuss the composition of the painting – what you can see in the foreground, in the background, etc.
- The next step is to mention the colors of the painting – what are they?
- Finally, you can tell the story of the scene. If you’ve done the research mentioned in the first step, you can skip it since you’ve already discussed it. But if you don’t know what is going on, just turn on your imagination and try to guess.
These five steps are the general plan for describing a picture in English. You can use them for discussing art in your mother tongue as well. And if you need some practice, please describe your favorite painting in our comments section. We will be happy to learn more about the art you like.
How to describe a painting in English?
To describe a piece of art, find out more about the artist and tell the background history of the painting. Then, discuss the composition, color palette, scene, and your impressions of the art. Finally, use many adjectives to show various details of your chosen masterpiece.
Is it necessary to learn how to describe art?
Although it is not mandatory knowledge, it can benefit your English and general studying. For example, learning to describe a piece of art can help you practice speaking and writing, expand your vocabulary, develop your imagination, and increase your general knowledge.
How to talk about my impressions of a particular painting?
First, you need to determine what emotions the art evokes. Try to understand whether they are positive or negative. Then. when it’s done, try to specify your feelings. Does the artistic composition make you happy or sad, excited or disappointed, satisfied or disgusted? After you know exactly what emotions the painting evokes, try to find and explain the reason for it.
How to describe a scene in the painting?
If you don’t know the historical background of the piece of art, you need to appeal to your imagination. First, try to guess the story of this painting – who is painted here, what is this character doing, if they are rich or servants, where are they going, etc. Then, imagine yourself as the artist – what meaning would you put into the painting if you were its author?
- Share full article
Advertisement
Supported by
I Was a Nude Model for a Half Hour. Revelatory? Actually, Yes.
Two shows — an art fair in Brooklyn and an Yves Klein exhibition uptown — ask if nude art can still inspire or shock. I joined in to find out.

By Rachel Sherman
Before last week, I had never interviewed someone who had seen me naked.
That changed when I went to an art fair in Gowanus, Brooklyn, that invites New Yorkers to “Get Nude, Get Drawn.” In front of seven artists, I laid my bare thighs on the floor and posed for these strangers. The next day I interviewed two of them.
The reverse was also true: Never before had I interviewed someone whom I’d seen (or, in this case, touched) naked. But that same weekend I traced the contours of a stranger’s clavicle in an Upper East Side art gallery and then interviewed her.
At the Other Art Fair Brooklyn , where I posed, and “Yves Klein and the Tangible World” at the Lévy Gorvy Dayan gallery in Manhattan, where a performance artist in a box invited strangers to reach in and touch her bare body, I set out to experience nudity — as muse and spectator — to see if it had shock power left in a jaded art world.
Thirst traps ? Eye roll. Sex paintings ? Yawn. In an era saturated with more-than-suggestive marketing (somehow even lip gloss ads require a glance over the shoulder), salacious video games and hypersexualized TV shows, nudity might lean more toward banal than radical now. Does a naked body still hold any creative voltage?
I got my first jolt at “Get Nude,” now in its 10th edition and its second year at the Other Art Fair. Mike Perry and Josh Cochran , two artists with degrees from the Minneapolis College of Art and ArtCenter College of Design, initiated the project to bring more play into the traditionally serious process of figure drawing. They started in 2011 by recruiting models from Craigslist.
In the first year, “we didn’t have any idea what we’re doing,” Perry said, adding that he and Cochran sought practice hours that could be more loose and experimental with figure studies. “We just wanted an excuse to draw for a weekend.”
In something of a barter, models get 30 minutes and three to five poses; in exchange, they can pick their favorite artworks to take home. The rest are sold to fairgoers for $150 each, with profits shared among the other artists, Perry and Cochran. The artists, who draw furiously for up to eight hours at a time, produce around 1,300 nudes over the weekend.
I unrobed and put on an open-back doctor’s office gown, for dignity’s sake, then strutted into a side room and immediately removed it. Seven artists, Perry and Cochran among them, sat in front of me with mounds of felt, colored and graphite pencils, pastels, gouache, acrylic paint and spiked seltzers (the latter presumably for consuming, not creating).
For my first pose, I sat on the floor and curled up into a ball, knees tucked in, nearly everything “private” kept … private. The timer was set for five minutes. I immediately berated myself: What kind of nude pose was this? I wasn’t nervous but my rattlesnake-coiled limbs were insistent on their union. My cheeks stung hot.
“That’s what we really respond to,” Cochran said. “The awkwardness, the different feelings that people bring into the experiment, the kind of the unpredictability of everything.”
I had worried I wouldn’t know what to do with my hands, but my eyes were the problem: I didn’t know where to fix my gaze.
I reassured myself, these are artists. They are comfortable with bodies. They have drawn truckers, breast cancer survivors, models documenting gender transitions and couples on first dates. On the floor, my eyes soon settled.
The heat prickling my face began to fade. I remembered that the chug of breath I heard was, in fact, my own, and I let my belly sag with ease, like a toddler’s at rest. When the timer went off I felt almost nonchalant. “Oh, my crotch is sticking out? Pass a La Croix,” I thought.
At the gallery Lévy Gorvy Dayan, where the exhibition “Yves Klein and the Tangible World” is on view through May 25, I viewed artworks by the visionary French conceptual artist who deployed nude models. In their naked lady collaborations with Klein, seen in the many artworks on the walls, and in “Anthropometries of the Blue Epoch,” a short archival video on loop, it’s easy to pity the models, coated in ultramarine blue paint dragged across and pressed up against sheets of paper, but their expressions suggest an eagerness. In the film, Klein, ever the showman in a waistcoat and tie, instructs his models’ slithering as a maestro conducts his musicians (there was an actual orchestra present in 1960).
Writing for The New York Times, the critic Deborah Solomon wrote that the performance, seen today, “amounts to an amusing relic of the pre-feminist dark ages.”
But it was the second part of the installation I was most interested in: “Sculpture Tactile,” a white box, four and a half by one and a half feet, with a live model inside, and a single hole through which to reach her .
When I visited, I reached in, past a black curtain, and was struck first by warmth, the stillness of the air suspended like an inhale. I submerged my arm past my elbow until all of a sudden I reached flesh: curves and warm skin. I felt the distinct edge of a forearm giving way to a wrist.
How familiar, how sensual, how normal. After a beat I stopped trying to guess how she was sitting and gave into sensation, feeling this delicate creature I was honored to share a species with.
Klein conceived the idea for “Sculpture Tactile” in 1957. But the gallery’s co-owner, Dominique Lévy, who also curated the installation, said Klein feared the world was not ready for this show. He died of a heart attack at age 34 before he could see his vision realized, and the world was left with only a sketch and a typewritten journal entry about the installation. (A bed of hay fills the box when a model isn’t present, per Klein’s instructions.)
When Lévy Gorvy Dayan refabricated the box as a complete work of art in 2014 , at the Independent Art Fair — the only other time it’s been presented with a performance artist — “You had all these very intellectual conversations about the role of performance,” Lévy said. “Now, the reactions are much more visceral and emotional.”
On my visit, I overheard several participants describe the experience as “unusual,” “invasive” and “too much.”
Had we become more prudish?
Most of the people I observed shuddered upon making contact with the model, instantly retracting their arms. Some shrieked, most winced. To my great surprise, many were too afraid to go in.
But nearly everyone who did exited flushed, a small conspiratorial smile on their faces.
“In the last 10 years we have become … I don’t know that I would say puritanical, but less connected to touch,” Lévy said. “Less in touch with touch — and this is all about the importance of touch and the aliveness of the sublime.”
The model inside was Dominica Greene , 29, a movement-based conceptual artist dedicated to exploring the body. She’s been performing since April, alternating with a male artist.
“It is deeply moving for me every time,” she said. “At least two to three times a performance I am brought to tears.”
In each performance period, four hours, she takes two breaks, and in between spends much of her time reflecting on why we fear what we can’t see.
“I kind of just have to be with the practice,” Greene said.
There have been a couple of instances of aggression, what Greene calls “brash” behavior — one visitor grabbed her face, another squeezed and pulled at her skin — and in those cases she gently readjusted, but she otherwise sticks to the guidelines set by Klein to move as little as possible.
“What an honor it is to be a human in a body,” she said, “And he captured that so well, he worshiped the body.”
“A lot of times when you interact with art at first you may be like, ‘Oh my God,’ that was so weird,’” she added. “But then it will sit with you, and its impact will permeate.”
I’m still weighing the impact.
For my final pose at “Get Nude,” I bent over in a forward fold, away from the artists. (How quickly we adapt!) The view was not my — anyone’s — most flattering angle. But tasteful sketches of nipples felt like cheating. I hung forward and took in my new vista.
“OK, that’s time,” Perry said.
I stood up with a head rush, and we all clapped.
Outside, the art fair staff began to hang some of the works. My image could be purchased for $150. Fully dressed now, I was observing the observers when a young woman approached the wall, gasped, and put her hand over her mouth. She called over her friend and pointed to a drawing of me from behind, the final pose.
“Oh my God,” the friend said, shocked.
An earlier version of this article misspelled the surname of a critic. She is Deborah Solomon, not Soloman.
How we handle corrections
Art and Museums in New York City
A guide to the shows, exhibitions and artists shaping the city’s cultural landscape..
At the Museum of Modern Art, the documentary photographer LaToya Ruby Frazier honors those who turn their energies to a social good .
Jenny Holzer signboards predated by a decade the news “crawl.” At the Guggenheim she is still bending the curve: Just read the art, is the message .
The artist-turned-film director Steve McQueen finds new depths in “Bass,” an immersive environment of light and sound in Dia Beacon keyed to Black history and “where we can go from here.”
A powerful and overdue exhibition at El Museo del Barrio links Amalia Mesa-Bains’s genre-defying installations for the first time.
Looking for more art in the city? Here are the gallery shows not to miss in June .
IMAGES
VIDEO
COMMENTS
6.4 Keep your materials clean throughout the session. 7 Acrylic painting techniques for beginners. 8 Acrylic painting colour mixing tips for beginners. 8.1 Tip 1: Spend time practising colour mixing. 8.2 Tip 2: Don't overuse white or black paint. 8.3 Tip 3: Use colour to create perspective.
Everything you need to know about acrylic painting. Acrylic paint is a versatile medium that allows artists to bring their artistic vision to life. It offers the flexibility to create detailed work, layering, and textured impasto techniques. Not only is acrylic paint less expensive than oil paint, but it also provides great value for your money ...
Using fluid acrylics and thinning them with water or a flow medium will greatly help the process. You can either drip from above or flick your wet brush to get a spray of paint. Be sure to let colors dry between spatters in order to get clean, vivid hues. Next: Learn even more about how to paint with acrylics.
Apply a glaze over the entire painting to create a more unified appearance (almost like adding a filter to your painting). Use a glaze to deepen shadows or increase colour contrasts. This technique is also useful for painting subtle shifts in skin tone. Burnt umber works wonderfully in shadows in portraits.
27 - Toothbrush splatters. Use old toothbrush to create splatters for night sky, galaxy paintings and added effects. You can use dry toothbrush or slightly wet it, but watered down acrylic paint will splatter better. Can splatter directly on paper or over painted (and dried) area.
Exercise #1: Swatch all your acrylic paint colors on a canvas to get a feel for how quickly they dry, their opacity levels, and how they apply to your canvas. Exercise #2: While you do this, feel free to incorporate some of the modifying products Griffin mentioned above to see how it impacts each swatch.
Follow along the process in Cat Coquillette's course. 2. Geometric Galaxy. This galaxy is among the cutest easy acrylic painting ideas for beginners on canvas we've seen. Another Cat Coquillette masterpiece, this simple acrylic painting will help you practice blending and detail work. 3.
Artist Mohini Sinha is inspired by nature, and in this class she guides beginners through the process of creating an acrylic landscape painting step by step that looks realistic. 10. Let's Paint Trees - Acrylic Painting for Beginners. Photo of student work by Mariela López Jiménez for Let's Paint Trees - Acrylic Painting for Beginners.
Acrylic paint is one of the best paints that you can use as a beginner. It's not only incredibly versatile, but it's water-based. This means that you can thin and mix the paint to your hearts content, and it's easy to clean! This make acrylic paint the perfect choice for beginners. Now before you plough ahead and start buying what you ...
Here, we've curated 25 essential tips to help you start acrylic painting with confidence and creativity. 1. Start with the Right Supplies. Excellence as an artist requires a commitment to quality. Remember that your art is more than just a creative work—it's a legacy.
Acrylic is great for building up the thickness of paint, as it dries so quickly. Paint should be built up only approximately ¼-inch at a time to allow the paint layers to dry properly. A thickening agent can be added to the paint so it goes on in a substantial layer easily. This is more commonly known as scraping.
Using acrylics is the easiest way to learn how to paint successfully. My acrylic painting lessons stem from classical oil painting techniques, so they will teach you the foundations of painting in both mediums. Acrylics are very forgiving for beginners to work with. They are water-soluble, fast-drying and water-resistant when dry.
Here are a few easy landscape painting ideas: Seascapes: Capture the serene beauty of a beach or the crashing waves of the ocean. Mountains: Practice your shading and highlighting techniques by painting majestic mountain ranges. Sunsets or sunrises: Use vibrant colors and blending to create breathtaking skies.
This idea is simple to do - all you need is to use your favorite color of paint, mix with a bit of water, and apply it to the page. Next, just tilt the paper so the paint starts to run. If the paint is not running easily when you tilt the paper, you can add more water. In this picture above, I used this technique over some handwriting with ink.
Example Of A Detailed Sketch Of The Object Essay. Andrew Morrison created Chief Seattle City 1 and 2 in 2013. The paintings are made on wood using acrylic paint and aerosol lacquer spray paint. They are on display in Seattle and are often borrowed for educational purposes. Andrew Morrison's work is beneficial for the students to get ...
Learn how to make stunning paintings using Acrylic Paint. Whether this is your first time using acrylics or you'd like to develop your painting skills, this ...
Watch how to create stunning paintings with oil pastels in this compilation of videos by a talented artist. Learn the techniques, tips and tricks to make your own masterpiece. Whether you are a ...
58. Succulent painting tutorial. This lovely succulent painting is the perfect example of building up an acrylic painting layer by layer. 59. Wildflower meadow acrylic painting. If you like modern flowers, try out my wildflower meadow canvas painting. It's easy and fun to make.
Visual Verbal Essay on Wilfred Owen and Franz Marc. This essay explores two artists, Franz Marc, Brett Whitely and two of their artworks depicting animal scenes. Franz Marc's 'Tiger', 'Blue Horse 1' and Brett Whitley's Giraffe and Hyena.
An acrylic paint usually dries quickly and normally takes about one to two hours. On the other hand, curing takes one to three weeks. During the first stage of drying, the solvent evaporates making the paint feel dry to the touch even though it may still not be fully dry. If the application is thick, it can take more than 24 hours to dry.
Best Acrylic Paint Sets in 2024. Best Acrylic Paint Overall — Winsor & Newton Professional. Best Professional Acrylic Paint — Golden Artist Colors. Best Acrylic Paint for Students — Liquitex Basics Acrylic Paint. Best Budget Acrylic Paint — Blick Studio Acrylic Paint. Best Acrylic Paint for Beginners — Arteza Acrylic Paint.
Pro tip: Acrylics can crack but usually only in extremely cold temperatures. Oil Pros: Long drying times. If you have plenty of time set aside for your painting, oils can be fantastic. You can work with thick paint, wait a couple of days for that paint to dry then add thin glazes to create luminosity in your work.
Or, for example, it makes you calm because you enjoy the sea view. You can use many adjectives to describe your feeling regarding any piece of art. Here are some of them: Positive emotions: inspired, joyful, satisfied, interested, happy, serene, nostalgic, sentimental, excited, impressed, powerful, fascinated, etc.
Seven artists, Perry and Cochran among them, sat in front of me with mounds of felt, colored and graphite pencils, pastels, gouache, acrylic paint and spiked seltzers (the latter presumably for ...