Unsupported browser
This site was designed for modern browsers and tested with Internet Explorer version 10 and later.
It may not look or work correctly on your browser.
- Communication

How to Record a PowerPoint Presentation on Zoom (Audio & Video)
In recent years, we’ve seen the rise of virtual meetings. It’s now possible to connect with a global team from anywhere! When you learn how to video record yourself presenting a PowerPoint on Zoom , your content is accessible to all.

Sometimes, not everyone can attend a Zoom meeting in real-time. This is especially true if your team works across the globe. Luckily, there’s an easy solution! Let's learn how to record a PowerPoint presentation in Zoom.
Why You Should Learn To Record PowerPoint Presentations With Audio and Video
Work has changed. More than ever, you need ways to connect for meetings regardless of your team's location. Zoom is one of the most popular tools to do this.
Zoom is video-conferencing software used by millions. It’s popular because it's got a free tier, with options to upgrade to more robust plans. Zoom supports audio and video sharing, allowing you to virtually meet others face-to-face.
You can also share your screen, to show slide decks, text, video, and more. It’s a top option to share PowerPoint presentations with anyone. Learn how to record PowerPoint presentations with audio and video to pair it with Zoom.

With distributed teams, it's not always possible to coordinate a start time that everyone can agree on. Plus, it’s handy to review a meeting later. Perhaps attendees want to listen to what you said again. Luckily, there’s an easy solution! You need to know how to record a PowerPoint presentation in Zoom.
In moments, you've got an MP4 video file ready for sharing. To record PowerPoint with video in Zoom takes only a few quick steps. Let’s dive in.
Build the Perfect PowerPoint for Sharing
Before you learn how to record a PowerPoint presentation with video, you need a slide deck to share. Premium templates are your best option. These offer styling and features that you won’t get with a free option that you might find online.
Envato Elements is a great option for this. At Elements, you’ll find thousands of PPT templates that you can share on Zoom. As a member, you've got unlimited download access. That means that you’re able to download and use as many of those templates as you want.

For this tutorial, I’ll be using the beautiful Virtually PowerPoint template from Envato Elements. It’s a creative modern design with over 50 slides inside.
With your template open, you can start building a slide deck for sharing. As you work, know that PowerPoint slides meant for sharing online should be special. Keep the following design tips in mind to help ensure success:
- Don’t crowd slides. When you’re sharing to record PowerPoint with video, slides will look smaller to your audience.
- Use larger fonts. Fine print is hard to read on a screen, and even more so in a later video playback. Opt for large, readable text styles.
- Illustrate! Photos, charts, and infographics keep things interesting. You need your slide deck to be clear, concise, and engaging.
With these ideas in mind, you’re ready to learn how to record yourself presenting a PowerPoint on Zoom. Learn more about the art of narration in PPT below:
Prepare Your Zoom Meeting
To record PowerPoint presentations with audio and video slides, you need to open Zoom. You can use the Zoom desktop app, which is available for download. Or you can log into your Zoom account inside your favorite web browser.
If you already have a single meeting scheduled, you’ll see a thumbnail for it on the Home tab inside of Zoom. But if you've got many scheduled calls and invites, you’ll want to navigate to the Meetings tab. Here, you’ll find a complete list of Zoom meetings that you’re invited to.

As you can see above, I've got a meeting scheduled for today at 9:30 PM. The invite has been shared with others, and I'll be the host of the meeting. Imagine in this example that we want to share a PowerPoint deck and record it for others.
To make a good first impression with your audience, it’s helpful to prep your slide deck in advance. This helps you be ready to share when the time comes. You won’t have to scramble around for your files in front of viewers. I like to open my PowerPoint, then minimize it, before starting a meeting. This way, it’s ready to roll when it’s time to share.
To begin the meeting, click Start. You’ll see the Join Audio menu appear. This lets you choose the audio source that you want to use to capture your narration. In this case, choose Join with Computer Audio.

Optionally, you’ll have the option to test your speakers and microphone. If you’re working with a new setup, this is a great way to ensure that you’re capturing clear audio.
Now, you’re in your meeting. Watch as other participants appear. You’re ready to get started!
Learn more about PowerPoint Sharing on Zoom below:

Begin Recording
With your meeting underway, your next step is to begin recording it. Optionally, you can start sharing slides before you begin recording. But I prefer to start the recording first. It’s easy to forget to turn on the recording once you've got slides displayed. And there’s nothing worse than reaching the end of a meeting and realizing that you’ve forgotten to record!
To begin a recording of a PowerPoint presentation, move your cursor over the menu bar in Zoom. It’s the series of options and buttons at the bottom of the app’s screen. First, make sure that your microphone isn’t muted. This setting is controlled by the Mute button, found on the left side of the menu bar.

To record your PowerPoint in Zoom, click Record . From this point on, anything you share on-screen or say aloud will be captured in your recording.
This is also true of other attendees. If they speak or ask questions, their voices will be captured in the PPT meeting recording. You also have the option of sharing video from your webcam. This way, viewers can watch you speak as you share your PowerPoint. This can be captured in your recording too.
It's a good idea to mention to attendees if you're recording the meeting. This ensures they're able to consent to the recording. Plus, it lets them know that you'll have a copy available for review later. Do this at the beginning of your meeting so that all are aware of the recording process.
Share Slides on Zoom
With your recording underway, it’s time to share your PowerPoint slide deck in Zoom. Once again, return to the menu bar at the bottom of the screen. This time, you’ll want to choose Share Screen . It’s easy to find, highlighted in green in the center of the menu.
Click on Share Screen, and a settings window opens. On its Basic tab, you’ll see several thumbnail buttons. These control the source that you want to share from. Usually, there will be tabs for every app open on your computer. Plus, there are options for a whiteboard, to connect an iPad, and more.

To see how to video record yourself presenting a PowerPoint on Zoom, click on the Microsoft PowerPoint thumbnail. Then, click Share.
PowerPoint appears on your screen. You can navigate through your slides as usual. You’ll see that a green box has appeared around the border of the PowerPoint window. This signifies that this area of the screen is being actively recorded. Anything outside of the green boundary won't be captured in your recording.
As you can see, it’s easy to learn how to record a PowerPoint presentation in Zoom. It’s a useful way to share and preserve slide presentations for others in the future!
For best results, keep the following tips in mind:
- Narrate clearly and concisely. Remember, you’re being recorded! Speak clearly, at a cadence that’s easy to follow. Talk too fast and your words will be hard to understand.
- Control sources of audio. Try and eliminate background noise from your environment. This keeps extra sounds from appearing in your recording. And be sure to ask other attendees to mute their mics, unless they've got a question.
- Use a clean, readable template. Premium templates like the Virtually PowerPoint deck have neatly-arranged slide layouts. These are easy for your audience to read.
By embracing these ideas, you’re sure to make a winning impression. They help you build useful, enjoyable recordings for meeting participants to watch later.
Save and Share the Finished Recording
When you’re finished presenting, it’s time to end the meeting and ready your recording for sharing. This is easy to do, and only takes a moment.
You’ll first want to stop sharing your PowerPoint slides when you’re finished. To do so, click Stop Sharing . This is highlighted in red on the menu bar. (It’s only visible when you're actively sharing).
Then, end your meeting when you're ready. Click End , then End Meeting for All. Once you end a Zoom meeting, the app saves any recordings that you made during your meeting. For longer meetings, this may take a few moments. You can monitor the progress on the bar shown in the Conversion popup.
When the conversion process is complete, a Finder window opens. Inside it, you’ll see an MP4 video file. This is your converted meeting PowerPoint! You can watch it on your computer or mobile device. And it’s ready for sharing with others.

You’ve learned how to video record yourself presenting a PowerPoint on Zoom. As you can see, it’s amazingly easy to do! It’s the perfect way to ensure that everyone can hear and enjoy what you've got to share. It only takes a few clicks.
The Top Source for Shareable PowerPoint Templates in 2022 (With Unlimited Use)
As we’ve seen, premium templates are the best PowerPoint decks to share on Zoom. With expertly-built layouts and cool designs, they’re sure to help you succeed. The best source for these templates is Envato Elements .
Elements has a powerful offer: unlimited downloads. For a flat monthly rate, you can download and use as many PowerPoint templates as you want.

With a vast library of thousands of custom PPT templates , you’re sure to find one that’s just right for you.
Plus, Elements offers countless other creative assets. Among them, you’ll find custom fonts, stock photos, music, and more. As a PowerPoint presenter, you can make use of all of these. Together, they help you create stunning slide decks ready for sharing.
Explore PowerPoint Templates

Consider the top advantages of Envato Elements:
- Creative flexibility. Each template is fully editable by you. This lets you tailor each slide to your needs.
- Time savings. Instead of building layouts from scratch, you’re simply filling in blanks. This gives you more time to focus on refining your message and preparing to present it.
- Professional designs . Audiences will appreciate the stylish slides in your presentation. You’ll enjoy them as well, finding inspiring layouts in every template.
Envato Elements is the creative offer that you can’t afford to miss. Join today and start exploring the vast library!
Now You Know How to Record PowerPoint Presentations With Audio and Video
You just learned how to record PowerPoint with video. This is a crucial skill for successful online meetings.
Here's a challenge: before you schedule an in-person meeting, convert it to an online meeting instead. Now that you know how to record a PowerPoint presentation with audio and video, you can skip in-person meetings!


How do I record a PowerPoint presentation in Zoom?
The Zoom online meeting platform allows you to record the audio and video of your meetings. Follow these steps to record a PowerPoint presentation in your Zoom account.
1. Before logging into Zoom, open the PowerPoint deck that you wish to use for your presentation.
2. Navigate to the Zoom log in page: https://zoom.us
2. Click on Host and select either video on.

3. Click "Open Zoom Meeting" and wait for Zoom to load and open.
4. Click "Join with Computer Audio."

5. Your video and audio are now activated. Look at the bottom of the screen to see meeting tools. Select "Share Screen."

6. Select your PowerPoint presentation to open into the Zoom meeting.

7. Once you start sharing, the tool bar will move to the top of the page. Click on the ... to see all options. Select Record when you are ready to start recording your meeting. NOTE: Be sure to set your slide deck to present mode for your presentation.

8. When you have completed you presentation, click the ... More to view the entire tools menu and click on Stop Recording.

9. Once the recording has ended, stop the meeting nand a link to the recording will be generated. You will be prompted to either create a new folder or place your recording in an existing folder.

10. Navigate to the folder to access the recording link to your meeting.
- Last Updated May 13, 2022
- Answered By Suzanne Schriefer, Librarian
FAQ Actions
- Share on Facebook
Hello! We're here to help! Please log in to ask your question.
Need an answer now? Search our FAQs !
How can I find my course textbook?
You can expect a prompt response, Monday through Friday, 8:00 AM-4:00 PM Central Time (by the next business day on weekends and holidays).
Questions may be answered by a Librarian, Learning Services Coordinator, Instructor, or Tutor.
- Is the Big Tech Boys Club Failing Women?
- Watch! Wolverine Movies in Order
How to Share a PowerPoint on Zoom
Share your screen, whether or not you're the presenter
:max_bytes(150000):strip_icc():format(webp)/DanSeitz-212239-b7461a6af1964919a88b89c04d193d8c.jpg "record powerpoint presentation in zoom")
- University of Vermont, Emerson College
:max_bytes(150000):strip_icc():format(webp)/headshot-00415ba557444a8a9b6bb139498b97c5.jpg "record powerpoint presentation in zoom")
- The Ultimate Guide to Shopping Online
- The Ultimate Guide to Online Learning at Home
- Two-Factor Authentication
- The Ultimate Guide to Skype
What to Know
- Anybody can share a PowerPoint on a Zoom call but may need permission from the call’s organizer.
- To see notes, you’ll need a second screen to divide the view or have your notes on a separate device.
In this article, we’ll discuss how to share a PowerPoint, or any presentation, on Zoom. You can do this in a few clicks for more straightforward presentations, but for more complex presentations, you may want some more tools.
How Do You Share a PowerPoint in a Zoom Meeting?
For a presentation where you don’t need to see your notes, sharing a PowerPoint is a quick process.
Open your presentation, and close any windows you won't need. This will limit clutter and distractions.
Log into your Zoom call and when you’re ready to present, click Share Screen at the bottom. Choose your presentation from the menu.
When using a single screen, you should always pick the specific program you want to share. Doing this will protect your data and prevent pop-ups and other interruptions.
Go to the Slide Show tab in PowerPoint and click From Beginning . For the smoothest presentation, do this before anyone else joins the call, where possible.
Use the controls in the lower left-hand corner or keyboard controls to move through your presentation as usual.
Be sure to click on the Presentation window if you’re going to use keyboard controls. PowerPoint won’t acknowledge inputs from the keyboard unless you’ve deliberately clicked on the window.
How Do You Share a PowerPoint With Zoom and Still See Notes?
The best way to see your notes is to use a second monitor and PowerPoint’s Presenter View tools. Then your notes and controls are on one screen, visible only to you, and your presentation is on the other.
Open your PowerPoint and go to Presenter View to see your notes . This mode opens two windows: The presentation and the control panel.
Drag the control panel to your primary screen and the presentation window to your second screen. You’ll be able to see and control your presentation while looking directly into your webcam if you’re using it, and you won’t have to hold your neck at an angle to use the controls.
Log into the Zoom call and click Share Screen at the bottom. Choose your presentation window.
If you’ll need to present other documents or materials in addition to your presentation, have them open and minimized on your screen and share your second monitor instead. Then you can quickly bring those materials up without disrupting your flow.
Tips for a Better Zoom Presentation
If you're not the call organizer, contact them and ask what permissions they've set up and whether you'll need permission to share your screen.
For meetings with multiple people sharing the same presentation, book a call a day before and practice "handing off" control of the slides in Zoom. Alternately, the person sharing their screen should prepare to move to the next slide when cued. Everyone should also have an up-to-date copy of the presentation, so it can continue if somebody drops out of the meeting.
Keeping Murphy's Law in mind, having your notes in one or two other places is a good idea. Consider using your phone and a printed copy to ensure that you can rely on one of the two additional sources for your notes if everything goes wrong.
To record yourself giving a PowerPoint presentation on Zoom, launch Zoom and PowerPoint; be sure to close all other applications. Create a new Zoom meeting, select Share Screen , select your PowerPoint presentation, and click Share . Launch your PowerPoint slideshow. In Zoom, choose Record > Record on This Computer . Your computer is now recording.
Join the Zoom meeting from your iPad using Zoom's mobile app for iOS. Open your PowerPoint presentation and tap Share Content from the meeting controls. You can use PowerPoint's annotation and drawing tools to make notations on your slides if you like.
Get the Latest Tech News Delivered Every Day
- Zoom: What It Is, History, and How It Works
- How to Use Dual Displays When Working With Microsoft Office
- How to Make Someone Else a Presenter in a Microsoft Teams Meeting
- How to Create a Loomie 3D Avatar For All Your Zoom Meetings
- How to Fix It When a Zoom Microphone Is Not Working
- 7 Benefits of Video Conferencing
- How to Change the Host on Zoom
- Top 5 Free Web Conferencing Tools
- How to Share a Digital Business Card
- How to Connect Two Home Computers Through a Network
- How to Connect an iPhone to a Projector
- The 10 Best Working From Home Tips in 2024
- Wi-Fi Tutorial: How to Connect to a Wireless Network
- What Is a Digital Business Card?
- Google Meet Screen Sharing Not Working? How to Fix the Problem
- What Is a LAN (Local Area Network)?
Teaching with Technology
Recording a video lecture of yourself with zoom and powerpoint slidedeck.
There are two different ways to record a video lecture of yourself and your PowerPoint slidedeck using Zoom.

Picture-in-picture View instructions

Video overlay View instructions
If you want to record your screen and PowerPoint without your video image (similar to an audio podcast, but with a visual component of your slides), follow these instructions .
Note: Before doing any recording, make sure to prepare your slidedeck to make room for the video image of yourself, so that your video image won't be overlaid on top of any text or images. Sometimes drawing a rectangular box on each slide helps to "save" a space for your video to go.
- Open the Zoom app and your PowerPoint file. Close all other files and applications.
- In Zoom, click “New Meeting” (orange icon); make sure your microphone and camera are on.

- Go to PowerPoint and launch your slideshow.
- At the bottom Zoom toolbar, choose Record, then choose “Record on this Computer” from the menu that pops up. Your lecture is now recording. Note: if you don't see the Record button, you may need to click on the "More" button in the Zoom toolbar, and then choose the "Record on this Computer" option.
- Start your lecture. Advance your slides with the right arrow key; return to a previous slide with the left arrow key.
- When you are finished, click on the "Stop Recording" button in the bottom Zoom toolbar. Note: if you don't see the Stop Recording button, you may need to click on the "More" button in the Zoom toolbar, and choose the "Stop Recording" option there.

- Trim the beginning and ending of your video (if needed) using QuickTime or another video editing tool, then upload your video to Ensemble, Reed’s media server.
Want to do more? Read how to annotate your PowerPoint slides with Zoom .
How to Record a PowerPoint Presentation on Zoom

In this age, virtual presentation is the order of the day, and one of the popular platforms used for it is Zoom. People usually ask how to record a presentation on Zoom, hence, the purpose of this guide. This article will feature a step-by-step process for recording a PowerPoint presentation on Zoom. Read on to find out more.
How to record a PowerPoint presentation on Zoom
How to record a zoom presentation, how to record a zoom presentation on a smartphone, how to record a zoom presentation on a computer.
- How to record a PowerPoint presentation on Zoom with a single monitor set-up
How to record a PowerPoint presentation on Zoom with a dual monitors set-up
- How to video record yourself presenting a PowerPoint
- Tips for recording a presentation in Zoom Keep it concise! Avoid too many details on your slides. Be straightforward in your presentation. Audience engagement is crucial End with a bang!
It would help if you had a good grasp of presenting on Zoom for successful web conferencing. Zoom is a platform for video and audio conferencing. It allows you to share your ideas or discuss them with people virtually. With Zoom, you can present anything to your peers, tutors, investors, or clients anywhere. You can record Zoom presentations on your Android or iOS smartphone and a computer.
Here are the steps on how to record a presentation on Zoom:
You cannot record a Zoom presentation locally on your smartphone, but you can record to the Zoom cloud. As a host or co-host, you can record to the cloud; however, you cannot do so as a participant. Here are the steps to follow:
- Ensure you have the Zoom app. You can download the Zoom app from Google Play Store.
- Open the Zoom app, and start or host a new meeting. You can also be a co-host by receiving permission from the original host.
- Ensure that your recording source is unmuted before you start recording. If you want a video of yourself, use your camera.
- Click “More” tap “Record” and the app will now show “Recording” at the top of your screen. Your video will automatically record to the cloud.
- To stop or pause the recording, click “More” again, then tap the “Pause” button or “Stop” button.
- You can share your screen with others. While recording, you can talk through the slideshow.
- Once you are done with the presentation, click “End Meeting.” Your device will process the recording, and the presentation will appear under “Recordings” on the Zoom web portal.
Your Zoom presentation will automatically record to the cloud on your computer if you are a host or co-host. You can also use your computer to record on Zoom locally. Here are the steps to follow:
- Ensure you have the Zoom app. You can download the app from the Zoom website.
- Then carry out the steps in numbers 2 through to 9 under the steps to follow in recording a Zoom presentation on smartphones.
- For changing local recording settings, go to your profile, click “Settings” then “Recordings”. You can change the settings here, but usually, you don’t have to change anything here.
- After your Zoom session starts, click on “More” and then “Record on this Computer”. This will start recording your Zoom call. You can also use the Alt+R on Windows and Command(⌘)+Shift+R on macOS to local recording.
- You can pause or stop the recording with the pause or stop icons on the page. Alternatively, you can use “Alt+P” to pause and “Alt+R” to stop (Command(⌘)+Shift+P on macOS)
- After the meeting has ended, Zoom will convert the recording so you can access the files.
- After conversion, the recording files folder will open, and you can access it. You can also find these recordings in the Documents > zoom folder.
You can record a PowerPoint presentation on Zoom in two ways:
- A single monitor set-up
- A dual monitors set-up
A single monitor set-up is either with the slides in a window or as full screen. The set-up with the slides in a window is useful when you want to access meeting features while sharing your presentation. In contrast, the full-screen version is simply a full PowerPoint screen sharing.
How to record a PowerPoint presentation with a single monitor set-up
- In Zoom, start or co-host a meeting.
- Click “Share Screen” in the Zoom toolbar.
- Select the window with the PowerPoint presentation and click on Share.
- Switch to PowerPoint and navigate to the Slide Show tab.
- Open the PowerPoint file you want to present for the set-up with windows. Hit the Slide Show tab and select the “Set Up Slide Show” option. Under Show type, select “Browsed by an individual (window)” and then click OK.
- Start the presentation by choosing the “Play from Start” or “Play from Current Slide” options from the slide show tab.
- The PowerPoint will display the slide show in a window. You can now press record in Zoom by pressing the shortcuts mentioned above or the record button.
A dual monitors set-up allows you to use a primary monitor for the slide show and a secondary one for the presenter’s view. The
- Open PowerPoint presentation on a different monitor.
- Go to Zoom and start or co-host a meeting.
- Choose the monitor that the PowerPoint presentation is in as your primary monitor, then click “Share.”
- Switch back to PowerPoint and start presenting.
- The participants will view the primary monitor, while the host will view the secondary one. You can view your slide notes and control your presentation with the secondary monitor as the host. A green border indicates the monitor you are currently sharing.
- If you are not sharing the right monitor, you can click “Swap Displays” to rectify it.
- Or you can click “New Share” on the “Screen Share” tab and choose the PowerPoint screen in a slide show view.
How to video record yourself presenting a PowerPoint using Zoom
You may need a video recording of your presentation, so here is how to video record yourself during your PowerPoint presentation:
- The first step is to make room on your Slide Deck for the video recording of yourself, so it doesn’t overlap with any text or images. Sometimes, drawing a rectangle box on each slide will save space for your recording.
- Open your Zoom app, and click “New Meeting.”
- Ensure your camera and microphone are on to capture your video and audio.
- Hit the share button, go to PowerPoint, select the file you want to present, click the “Share Screen” button on the bottom toolbar, and launch your slideshow.
- Select the record option, then choose “Record on this device” from the menu at the bottom Zoom toolbar. You are now recording yourself presenting your PowerPoint presentation.
- Note: Click on the “More” button in the Zoom toolbar and then choose the “Record on this device” option if you don’t see the record option.
- Start your presentation. Use the right arrow key to advance your slides and return to a previous slide with the left arrow key if using a computer.
- After presenting, click on the “Stop Recording” option in the bottom Zoom toolbar.
- Note: You may need to click on the “More” button in the Zoom toolbar and choose the “Stop Recording” option if you don’t see the Stop recording button.
- Hit the “End Meeting” button on the bottom right of the meeting screen, then click “End Meeting for All.”
- You will see a pop-up box signaling that Zoom is converting your recording.
- Depending on your device’s settings, the recording will be uploaded to your internal or external memory storage, cloud, or hard drive when the conversion is complete.
Tips for recording a presentation in Zoom
Here are five tips for creating an impactful and informative Zoom presentation:
1. Keep it concise!
Your presentation must be structured, organised, and focused on the key points to keep your audience engaged. The vital point is to keep the content brief yet comprehensive. As much as you need to fill in the content details, you should keep your ideas short and straight to the point. This way, you don’t lose your audience, and they would understand the lecture.
2. Avoid too many details on your slides.
Bullet points or list format with few information texts are best when making slides. Your slides must not be bulky and should include the key points so it is easy to navigate when recording your presentation. It is best to avoid reading your slides directly during the recording session to avoid losing your audience’s attention. Give details to the points but not too much, and make them engaging.
3. Be straightforward in your presentation.
It is best to be straightforward during your video session to have your audience’s attention. When a presentation is dragging on, the audience may not grasp the point and lose interest. However, when the essence of the lecture is evident, the audience is eager to follow through until the end. Such a Zoom session is understandable, enjoyable, and beneficial for the audience.
4. Audience engagement is crucial.
The endpoint of a presentation is to sell your ideas to the audience. You must attract the audience’s attention during the Zoom session to achieve it. Having a compelling introduction is one way to get your audience engaged. Adding humour, photos, videos, charts, graphs, gifs, and more to your presentation can make it exciting and captivating for your audience. You can look up compelling intros and ways to make your lecture engaging on the internet.
5. End with a bang!
As much as the introduction is key to a captivating lecture, the ending is vital. The ending part of the presentation is the last impression you want to give your audience about your idea. To make this impression lasting, you need to end your lecture memorably. You can do this with a famous quote, a humorous phrase, or an infographic that encompasses the critical points of your presentation. Ending on an impressive foot is one of the tips for an informative and exciting presentation.
Knowing the proper steps to take when recording a presentation in Zoom makes it a simple task. This article discusses all you need to know regarding this process, including what to do when you want to take a video of yourself presenting. The tips in this content will also aid you in recording an impactful and educative Zoom presentation. Has this article been helpful?
At SlideBazaar, we help you create engaging and memorable presentations. Choose from our collection of professional templates or opt for our custom design services for a personalized touch. Your presentations deserve to be elevated to new heights, and we’re here to help you achieve just that!
BROWSE BY CATEGORY
- PowerPoint Templates
- Keynote Presentations
- Infographic
- Free slides
QUICK LINKS
- Frequently Asked Questions
- Terms & Conditions
- Privacy Policy
- DMCA Policy
EMAIL NEWSLETTER
Get updates of our PowerPoint templates and slide designs before anyone else.
How to Record a Presentation on Zoom | Easy Step-by-Step

Table of contents:
Can you screen-record a presentation on Zoom?
How to easily record a presentation on zoom, how to record a presentation on zoom as a participant, is zoom your best option for recording a presentation, recording presentations with riverside, faqs on how to record a presentation on zoom.
It’s time to start capturing better recordings and transforming your Zoom presentations into fresh content opportunities. There’s so much that you can create.
By learning how to record presentations on Zoom and achieve better audio and video quality, you can take control of your production strategy. You can capture Zoom recordings that allow you to clearly communicate important concepts and ideas with an audience. You can create video materials for use in training, marketing, communication, and more!
Want to record your Zoom presentation but not sure how to start? We’ve put together this helpful step-by-step guide to help you along the way. Here’s everything you need to know about Zoom presentation recording.
You can easily use Zoom’s screen-share feature and recording capabilities to capture a presentation. To record on Zoom, you’ll have to host the presentation meeting, or you’ll need special permissions.
If you’re a participant and don’t have permission, then another option is to use external software. You can use your device’s in-built screen recording tools or another screen recording software platform to record Zoom presentations.
Using a non-native recording tool to capture Zoom content can have some drawbacks. These recordings are likely to achieve a lower overall quality. In your final recording, the sound may be crackly, and video resolution may be low, reducing your content’s professional value.
Recording a presentation on Zoom is easy when you know what you’re doing! In fact, as a presentation host, you can quickly and easily set up recording without ever leaving the Zoom app.
To get started with your Zoom presentation recording, follow these simple steps.
Step 1: Open your Zoom account, and navigate to the ‘ Settings’ menu. Here, select ‘ Recordings’ , and ensure that ‘Local recordings’ are switched on.

Step 2: Next, navigate to your home screen and launch a call by pressing the ‘New Meeting’ button. If prompted, select ‘ join with computer audio’ , or choose another microphone.

Step 3: Before you begin, import and/or open any presentation materials you’ll need, such as slides or images. You can easily share presentation materials by using the ‘Share Screen’ option and selecting the relevant tab where your materials are located.

Step 4: Check that you are unmuted . If you need to record video of yourself, ensure that your webcam is switched on, and select ‘Start Video’ from the bar menu at the bottom of your screen.
Step 5: Ensure that everything you need for your presentation is working correctly before beginning your recording. When you’re ready, select record from the bar at the bottom of your screen.
Choose whether to do a Zoom local recording on your computer, saving your recording to your desktop, or record to the cloud, recording to your Zoom account.
Step 6: Start your presentation, and work through your materials while Zoom records.
When your presentation is complete, press ‘ Stop Recording’ , and then press ‘End’ and ‘ End meeting for all’ to close off the recording.
Step 8: Once your Zoom meeting has ended, locate your recorded files. If you chose to save files locally on your computer, you’ll find them on your desktop or in your device’s documents folder. If you recorded to the cloud, you’ll receive an email when your files are ready.
Step 9: Edit, trim, or refine your recording on your video editor of choice. Then prepare to share it as a training resource, marketing asset, or something else.
Generally, speaking, Zoom’s in-built recording tools allow meeting hosts to capture the call.
If you’d like to record a Zoom presentation as a call participant, you’ll need to obtain permission from the host of the call, or you’ll need to be invited as an alternative host. You’ll then be able to use the app’s standard recording tools.
As a standard Zoom participant, it is unfortunately not possible to record content. In this case, it’s best to ask the call host to record content for you. Another option is to use external recording software.
To record your Zoom presentation using an external screen recorder, follow these steps:
Step 1: Choose your software system.
Step 2: Launch your Zoom meeting, and set up your presentation.
Step 3: Follow your software’s instructions to record your screen.
Step 4: Once your presentation is complete, stop your recording and save your files.
Zoom offers great native recording features that can help you easily capture presentation content. However, that doesn’t mean that Zoom is the best recording tool on the market.
In some instances, Zoom recordings can be prone to low recording quality. This may compromise your professionalism, and make it difficult to see or hear your recordings clearly. This is usually because Zoom relies on internet connection for recording. If you have connection problems your resolution suffers. It’s also worth knowing that Zoom doesn’t offer separate video or screen-share tracks which limits your editing flexibility.
If you want to explore Zoom alternatives, there are plenty of great ones to choose from, with some tools offering a range of extra features and functionalities that will help you produce better presentations than ever before.
We have a full guide on Zoom alternatives . Although, with recording files unaffected by your internet connection, and with high-quality resolution, Riverside is a risk-free bet.
“Riverside is far better than Zoom for recording interviews.” - Seth Godin , author, entrepreneur and marketing leader.
Riverside offers a seamless presentation recording experience. This video recording software is best for high-quality audio and video, captured from any location. It’s got all the remote recording tools you need, and with a built-in editor plus separate tracks of your screen, video and audio, post-production becomes much easier.
Riverside features and functionalities include:
- Studio-quality results, offering up to 4K video resolution and 48kHZ audio quality
- Local video and audio recordings which means everything is captured directly on your device and unaffected by unstable internet connection
- Separate screen, audio, and video tracks for each participant, providing better editing control
- Up to 10 participants in one recording and up to 1,000 audience members
- Cloud storage, including automatic uploading, so that you can save time and keep files secure
- User-friendly interface that anyone can use, regardless of skill level
- Desktop and mobile software versions, helping to record content anytime, anywhere
- Native editing tools for customized logos and backgrounds plus automatic audio fine-tuning
- Text-based video editing so you can create professional content as easily as editing a text transcript
- Magic Clips tool for turning your long-form recordings into multiple short clips at the tap of a button
To start experiencing all these benefits and more, start recording on Riverside!
How to record a video presentation with Riverside
Ready to give Riverside a try for your next recording? Follow these simple steps to get started.
Step 1: Create a Riverside account , and start your journey.
Step 2: Go to your Studios dashboard, and select ‘ + New Studio’ at the top right of your screen. Name your studio, and choose ‘Audio & Video’ as your recording type.
Then you can either choose to adjust settings by selecting ‘Continue set up studio’ or you can select ‘Enter Studio’ to get recording.

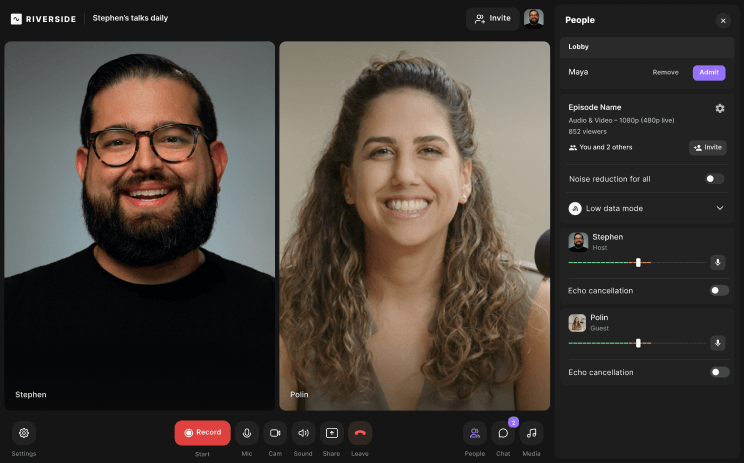
Step 3: On the next screen, check that you are joining as a host, and verify your chosen camera and microphone options on the right side of your screen. Select whether or not you’re using headphones. Then press ‘ Join Studio’ .
.webp "record powerpoint presentation in zoom")
Step 4: If you haven’t already, invite your remote guests.
To do this from the studio, simply select ‘ Copy link ’ or ‘Invite by email’ on the right Invite People tab.
If this doesn’t appear or you’d like to add more guests later on, select ‘ + Invite’ from the right Studio dashboard.

Step 5: Next, you can start preparing your presentation.
At the bottom of your screen, use the menu bar to select ‘Share’ . Then select the open tab or window on your device where your presentation materials are located.

Step 6: Once you’ve set up these details, select ‘Record’ from the bar menu at the bottom of your screen, and start recording your presentation.
Step 7: Throughout your recording, use the ‘Mark Clip’ button to mark sections of your recording that stand out and could be used later to create short-form videos.
Step 8: When your presentation is complete, press ‘Stop’ to end the recording.
Step 9: Once the files have finished uploading, go to the right side of your screen, select ‘View recordings’ .
Step 10: Here, use the ‘ Edit & create clips’ button to access Riverside's in-built editing tools. When you’re ready, choose ‘Export’ to save and download your recorded content.
You can also download your files as separate tracks for your own editing. To do this, don’t select Edit, but select the files you want to download and press ‘ Export’ . You’ll also have the option to download files directly into a Descript or PremierePro timeline-suitable format.
Step 11: Prepare to share your presentation recording as part of your training process, marketing strategy, or something else entirely.
Are you still wondering how to record a presentation with ease? Here are our answers to a few of our most frequently asked questions.
How do I record myself presenting slides?
The good news is that you can easily capture your slides as part of your presentation recording! The simplest way to achieve this is by opening your slides in a separate window or tab on your device. Then you can use Zoom’s screen-share feature to record those slides, selecting the destination tab and sharing your screen for the duration of your call.
Can you record a Zoom session if you are not the host?
Unfortunately, Zoom is not designed to allow call participants to record content. If you’re not the host of your call, you’ll need to request hosting or recording permissions from the person who is. Alternatively, you can ask the call host to record on your behalf or use external screen recording if you have the consent of other participants.
How do you record a presentation with camera?
You can integrate webcam footage as part of your presentation recording simply by using Zoom’s native video capture tools. However, if you are screen-sharing to present with slides, these will dominate the screen, with your video only taking up a small portion of the audience’s view.
An alternative is Riverside, which records content on separate tracks so you can capture video and audio in full, then edit as required.
Are you looking for an easy, intuitive way to record your next presentation? Record with Riverside , and capture all your content in high-quality seamlessly.
Kendall Breitman
leads Riverside's community. She has over ten years of experience in television and video production for places like NBC and Bloomberg News. You’ll find Kendall on our webinar, where she shares her expert insights on content production, branding, and more.
Record in studio quality without the studio. Transcribe, clip, and edit within seconds.

Keep reading
---Riverside.png)
Riverside resources
Recording software.
High-quality recording software for professional audio, video, and screen capture.
Screen Recording Software
Capture screen recordings in full HD with constant frame rate MP4s for easy editing.

Video Recording Software
Capture video and screen-sharing online with up to 4k resolution, and get ISO tracks for all participants.
Start creating with Riverside

Podcast guides
© 2023 RiversideFM, Inc.
Academic Technologies @ W&L
Always on-hand to provide assistance in integrating a wide variety of technologies in the teaching and learning process.
How to Record a Presentation with Multiple Speakers in Zoom
Need to record a group presentation? Here are some tips to create a polished recording!
Working assumption :
- The meeting host should think of themselves as the producer of the recording.
- There is one PowerPoint (.ppt file) that will shared by the meeting host.
Before you begin …
- IMPORTANT! The meeting host and all speakers should update their Zoom client to the latest version .
- Need to borrow a headset or clip-on microphone? Contact the ITS Information Desk at [email protected] , 540.458.4357 (HELP), or stop by Leyburn Library.
- Why? The kind of microphone you use will affect the other participants’ ability to hear you.
- Enable “Cloud Recording”.
- Enable “Record active speaker with shared screen”.
- Enable “Record thumbnails when sharing”.
- Enable “Optimize the recording for 3rd party video editor”.
- Click the Save button.
Five minutes before the meeting begins ….
- Why? Other applications have a way of intruding and asking for attention from your CPU and broadband connection.
- Headset microphones should sit an inch or so away from your face and a few centimeters away from the corner of your lips. Clip-on microphones should sit at the upper side of the chest.
OK, it’s time!
- The host signs into Zoom with their W&L credentials (either at wlu.zoom.us or within the Zoom client) and starts the meeting.
- Do an audio/video check for each speaker, i.e. make sure everyone can start/stop their camera and mute/unmute their microphone.
- All speakers start their cameras.
- Share only the PowerPoint application, not the entire desktop.
- The meeting host spotlights speaker #1 .
- All other speakers should stop their video and mute themselves.
- The meeting host turns on “ Hide non-video participants “.
- The meeting host starts a cloud recording .
- When the speaker #1 is finished, the speaker #2 should start video and unmute audio. Then speaker #1 stops video and mutes audio while the meeting host spotlights speaker #2.
- Repeat for all speakers.
- Stop the cloud recording when finished!
Don’t panic if there’s a goof or mistake! After the recording has processed so you can download it , the mp4 file can be edited in Camtasia (Windows or Mac) or QuickTime (Mac). Contact the ITS Information Desk you need access to either of those applications!
- Startup Stories
- Learn from founders
- Startup Reviews
- Editor’s Corner
- Startup News
How to Video Record Yourself Presenting a PowerPoint on Zoom
- October 1, 2022
- 3 minute read
Written by Ravil Muldagaliyev
In recent years, selling over video calls has become increasingly popular amongst high-performing B2B sales reps. By using video conferencing technology like Zoom Meetings, sales reps can connect with B2B buyers anywhere in the world.
However, decision-makers are often bombarded with requests to join a video sales call and have to prioritize their time. As a result, it can be difficult for a sales rep to schedule a live Zoom video call.
Did you know that you can video record yourself presenting a PowerPoint on Zoom and then share screen recording with your product champion or a decision-maker?
In this quick and easy guide, you will learn how to do just that!
Pre-recorded or asynchronous video presentations provide an excellent opportunity to reach decision-makers in a format that is convenient for them. Asynchronous video presentations allow reps to connect with prospects in a way that is non-intrusive and flexible.
How to record PowerPoint presentation with audio and video?
Step 1 – start a new meeting in zoom..
Prepare your PowerPoint presentation that you want to video record and then open Zoom App. To start a new Zoom meeting click “New Meeting”.
If you don’t have Zoom app installed on your computer, you can download the free version of the software on the official Zoom website . It is available for both Mac and Windows.
Step 2 – Test audio inputs and outputs.
Click “Join with Computer Audio”.
You can test your microphone and speakers or headphones here by clicking “Test Speaker and Microphone”.
Step 3 – Adjust video settings.
Click on the arrow next to the “Stop Video” button. In the menu select “Video Settings”. The “Video Settings” menu has a lot of features, however, one of the most useful ones is blurring or replacing your background with an image.
Step 4 – Adjust microphone settings.
Click on the arrow next to the “Mute” button. In the menu select Audio Settings. Here you can adjust audio settings like background noise suppression, input and output levels to ensure your audio recording sounds great.
Step 5 – Share screen with your PowerPoint presentation.
Click on the “Share Screen” button and then select computer screen that has the PowerPoint window that you would like to present.
You can also mask Zoom and other apps by a black box in your screen recording by checking off the “Optimize for video clip” option in the “Share screen” box.
Step 6 – Start recording your PowerPoint presentation on video.
Click on the “More” button and press “Record” in the menu to start recording your PowerPoint presentation on Zoom.
To verify that Zoom is video recording your computer screen and your PowerPoint presentation, look for a glowing video recording circle as shown on the screenshot below.
Go through your PowerPoint slides as if you were on a live Zoom meeting. Zoom will record
Step 7 – Save the video recording of your PowerPoint presentation.
To stop recording and save your video recording simply end meeting.
Once you end the meeting “Converting meeting recording” box will appear.
The video recording of your PowerPoint presentation video recording will be automatically saved on your computer, see screenshot below.
Step 8 – Upload and share your video recording.
Depending on the size of your video files, you may be able to share them via email as an attachment or upload them on YouTube and then share a link with the recipient(s).
How to record PowerPoint presentations faster and easier
If you want to save time and find the easiest way to record a PowerPoint presentation, try DeckLinks – a video presentation maker built for recording and sharing video presentations. This tool is easy to use, has instant access, and doesn’t require any browser extension. All you have to do is upload your existing slideshow and begin recording a video narration slide by slide as you would present naturally to a client. Once you record a video, you can share your presentation with a trackable single link.
In addition, the software has video sharing capabilities, granular analytics and unique features for sales and marketing teams. It’s a great option for recording video sales decks or adding a video narration to proposals or marketing presentations.
You May Also Like
Brand development done right: from idea to identity.
- August 31, 2024
Scaling Smart: Why Fractional Executive Talent is the Future
- August 18, 2024
Stealth Startup Mode Explained: A Path to Competitive Advantage
- August 3, 2024
Leadership vs Coaching: What Drives More Success in Startups?
- July 17, 2024
What it Takes to Be a Successful Serial Entrepreneur in Tech
- July 12, 2024
Community Building: Cultivating Growth for Startups and Nonprofits
- March 26, 2024
Remote User Testing: A Complete Guide For Startups
- March 3, 2024
Leadership Coaching: Everything You Need to Know To Empower Your Team
- February 29, 2024
Input your search keywords and press Enter.
- Slide Library
- Slide Library for PowerPoint
- Downloadable slides and shapes
- Slide Library search
- Search Library via shortcut keys
- Slide Library update alerts
- Rename or delete objects
- Share Slide Library
- Save slides or shapes to Slide Library
- Save presentation to Slide Library
- Manage Templates
- View all templates and set default
- Agenda Wizard
- Create Agenda Slides
- Update Agenda Slides
- Agenda Slide Numbering
- Navigate via Agenda
- Table of Contents
- Import Agenda Items
- Save Agenda Format
- Manage Colors
- Color Palette Toolbar
- Customize Color Toolbar
- Apply fill with outline color
- Recolor Charts
- View RGB color values & names
- Theme Color Tints and Shades
- Share Color Palette with team
- Insert Shapes
- Standard PowerPoint shapes
- Callouts / Speech Bubbles
- Hand Drawn Circles
- Harvey Balls
- Create Mini Slides
- Move to Multiple Slides
- Right Facing Centered Triangle
- Status Indicators
- Arrange and Align Shapes
- Select same color or size
- Select shapes by attribute
- Align shapes
- Align to first selected shape
- Choose Align anchor point
- Align using shortcut keys
- Copy paste position multiple shapes
- Straighten Lines
- Swap positions
- Distribute evenly
- Set Horizontal Gaps
- Set Vertical Gaps
- Squeeze or expand gaps
- Remove gaps
- Group Objects by Row
- Group Objects by Column
- Send to back, bring to front
- Send backward, bring forward
- Flip or rotate
- Group, ungroup and regroup
- Edit Shapes
- Same height, same width
- Copy paste position, size
- Resize shapes
- Slice shapes
- Multiply shapes
- Stretch shapes and fill gaps
- Toggle line weight and style
- Change margins toggle
- Chevrons same angle
- Paragraph Styles
- Save Paragraph Styles
- Apply Paragraph Styles
- Use PowerPoint Indent Increase/ Decrease to apply bullet styles
- Reset Paragraph Styles
- Ticks and Crosses bullets
- Paint Formatting
- Advanced Format Painter
- Position & Size Painter
- Table Format Painter
- Style Painter
- Text Format Painter
- Change Shape Painter
- Chart Format Painter
- Angles & Curves Painter
- Animation Painter
- Cycle Accent Colors
- Format Text
- Fit text to textboxes
- Wrap Text Toggle
- Merge Textboxes
- Split Textboxes
- Increase/ Decrease Font size
- Change Text Case
- Color Bold Text
- Delete Text or Replace
- Insert Superscript text
- Format Tables
- Create table from text boxes
- Convert table to text boxes
- Convert text to table
- Insert columns and rows
- Paste Excel data without source formatting
- Paste Excel data into text box tables
- Export Table or Box Table Data to Excel
- Set cell margins
- Express Table layout
- Table stripes
- Autofit columns
- Evenly space columns
- Align shapes over tables
- Harvey Balls for Tables
- Status Indicators for Tables
- Customizable PowerPoint Shortcut Keys
- Extra PowerPoint shortcuts
- Add PowerPoint shortcuts
- Search shortcut keys
- Reassign PowerPoint shortcuts
- Reset PowerPoint shortcuts
- McKinsey PowerPoint shortcuts
- F4 or Ctrl+Y redo or repeat
- Printable PowerPoint Shortcuts PDF
- How to Print a Custom Shortcuts list
- Search Shortcut Keys
- Searchable PowerPoint Shortcuts list
- Format Toolbar Overview
- Format Toolbar Layout Options
- Lock or Unlock Objects
- Lock objects
- Lock objects to the Slide Master
- Unlock objects
- Proofing Tools
- Fix Lines & Outlines
- Fix Layout, Transitions, Animations
- Fix Punctuation & Language
- Fix Margins, Bullets, Indents
- Check for Confidential items
- Reduce File Size
- Check Slide Master
- Sync Template Settings
- Set Proofing Language
- Change set language for PowerPoint presentations
- Flip PowerPoint Slides
- Flip Slides for Translation
- Slide Numbering
- Manage Slide Numbering
- Slide Numbers with totals
- Add words to Slide Numbers
- Change Starting Slide Number
- Skip Slide Numbers on Hidden Slides
- Slide Navigator
- Footers & Footnotes
- Filename Footer
- Enlarge Footnotes
- Refine Slides
- Add summary slide
- Format slide title
- Display No Fly Zone
- Send slide to appendix
- Camouflage mode
- Format Painter
- Set Grayscale
- Format Images
- Compress file size
- Format Charts
- Charts Toolbar
- Config Options
- Customize Settings
- Dark Mode Display
- Review Slides
- Customizable Status Stamps
- Sticky Notes
- Tag slides with filename and page number
- Share Slides
- Email selected slides in PPT or PDF format
- Print selected slides
- Save selected slides
- Slide Library for Teams
- Team Slide Library
- Create multiple Team Slide Libraries
- Synchronize Team Slide Libraries
- Synchronize Team Slide Library to your company Dropbox/ Box/ OneDrive folder
- Updating your Team Slide Library
- Import entire presentation to the Slide Library
- Share Slide Library with a colleague
- Share Custom Settings
- Share Custom Settings with Team
- Getting Started
- Getting started with PPT Productivity add-in for PowerPoint
- Downloadable PowerPoint Elements for Slide Library
- Tutorial - How to Create Custom Paragraph Styles for PowerPoint
- Can I use PPT Productivity on a Mac?
- PPT Productivity Basic Tools Tutorial
- PPT Productivity Plus Tools Tutorial
- New Features
- August 2023 update: Color Toolbar enhancement, new icons and more
- February 2023 update: New Slide Libraries available to download!
- January 2023 Update: Agenda Wizard, Format Painters + More
- How to copy and paste formatting in PowerPoint
- PowerPoint How To
- What are the most popular PowerPoint shortcuts?
- Where are PPT templates stored? Finding templates in PowerPoint
- Pasting data into a PowerPoint table without source formatting?
- Consulting Toolkit
- How to create effective consulting slides using Minto Principles
- Missing the McKinsey PowerPoint Shortcuts?
- Missing the Accenture QPT for PowerPoint?
- Missing the BCG PowerPoint Tools?
- Missing the Bain Toolbox for PowerPoint?
- How to add Stamps or Stickers to PowerPoint slides?
- Looking for a Consulting PowerPoint Toolbar?
- Top 10 PowerPoint Hacks / Shortcuts used by strategy consultants
- PowerPoint Tips
How to record a PowerPoint presentation with audio for sharing
- October 12, 2023
- Last updated: February 26, 2024
Wondering how to make a video with PowerPoint? If you want to create a video presentation from your PowerPoint slides, you can use PowerPoint's in-built recording feature. The feature allows you to narrate your slides, add annotations, and insert webcam video. You can then export your recording as a video file that you can share with your audience.
This article explains how to record your PowerPoint slideshow and how to share the recorded presentation via Teams or Zoom. We'll also give you some tips on how to avoid common pitfalls and glitches that you might encounter.
Here's our step by step guide to record a PowerPoint slide show:
- Open your PowerPoint presentation and click on the Slide Show tab.

- From the PowerPoint Set Up group, click on Record Slide Show button. You can choose to record from the beginning, or from the current slide.

- A new window will open with your PowerPoint presentation in full screen mode. You will see a Recording toolbar at the top left corner of your PowerPoint screen if you are on a single monitor, or at the top of your main monitor if you are working on dual screens (as pictured in the screenshot below). You can use this toolbar to control your recording in PowerPoint, such as start, pause, stop, rewind, and forward. You can also use the pen, highlighter, and eraser tools to annotate your slides.

- To start recording your PowerPoint presentation, click on the Record button (the red circle). You will see a countdown from 3 to 1 before the recording begins.
- As you record, you can speak into your microphone to narrate your PowerPoint slides. You can also click on the Camera button (the camera icon) to turn on your webcam and insert a video of yourself in the corner of your slide.
- To move to the next or previous slide, you can use the arrow keys on your keyboard or click the Next or Previous buttons on the Recording toolbar.
- When you get to the end of your PowerPoint slideshow, you can export the video immediately by selecting export and following the prompts, or you can end your recording to review, before exporting to video format. To end your recording in PowerPoint, click the Stop button (the square icon) or press Esc on your keyboard.
- You will be taken back to the normal view of your PowerPoint presentation. You will see a speaker icon and a camera icon on each slide that has audio or video recording. You can click on these icons to preview, edit, or delete your PowerPoint recordings.

- To export your PowerPoint recording as a video file, click the File tab and select Export.
- In the Export window, choose Create a Video from the menu on the left.

- In the Create a Video panel, you can adjust the video quality, resolution, and file size. You can also choose whether to use recorded timings and narrations or not.
- Click on Create Video and choose a location and a file name for your video.
- Wait for PowerPoint to create your video. You can see the progress bar at the bottom of your screen.
- Once your PowerPoint video is ready, you can play it with any media player or upload it to any online platform.
Troubleshooting issues that may arise when recording a PowerPoint presentation
If you want to record a PowerPoint presentation with narration, annotations, or video, you may encounter some issues depending on your device, software, and settings. Here are some common problems and how to fix them:
- If your microphone is not working, make sure it is plugged in, turned on, and selected as the default recording device in your system settings (for example sometimes your monitor or webcam can also have a microphone, and the wrong device has been selected). You can test your microphone in PowerPoint by going to Slide Show > Record Slide Show > Settings > Microphone.
- If your video camera is not working, make sure it is plugged in, turned on, and selected as the default camera in your system settings. You can also test your camera in the PowerPoint app by going to Slide Show > Record Slide Show > Settings > Camera.
- If your annotations are not showing up in your PowerPoint recording, make sure you have enabled the pen and laser pointer tools in the PowerPoint app. You can do this by going to Slide Show > Record Slide Show > Settings > Pen and Laser Pointer Tools.
- If your PowerPoint recording is not saving or playing back correctly, make sure you have enough disk space and memory on your device. You can also try saving your PowerPoint presentation as a video file by going to File > Export > Create a Video.
Can I share my recorded PowerPoint presentation via Zoom or Microsoft Teams?
If you have recorded a PowerPoint presentation, you can share it with your audience via Zoom or Microsoft Teams. Here's how to share your recorded PowerPoint presentation in both platforms.
How to share recorded PowerPoint Presentations via Zoom To share your recorded PowerPoint presentation on Zoom, you need to have the Zoom app installed on your computer and the PowerPoint file saved on your device or on OneDrive. Here are the steps to follow:
- Start or join a Zoom meeting and click Share Screen in the meeting controls.
- Select your primary monitor then click Share. If you are not sure which monitor is your primary, select the one that PowerPoint opens in.
- Switch back to PowerPoint and click the Slide Show tab. Begin playing the recorded PowerPoint presentation by selecting the Play from Start or Play from Current Slide options.

- If you have recorded narration or video for your PowerPoint presentation, make sure to check the Play Narrations and Use Timings option in the Set Up group on the Slide Show tab.
- Your participants will see your PowerPoint presentation in slide show view with your narration and video playing along.
- To stop sharing your recorded PowerPoint presentation, click Stop Share on the Zoom toolbar.
How to share recorded PowerPoint Presentations via Microsoft Teams To share your recorded PowerPoint presentation on Teams, you need to have the Microsoft Teams app installed on your computer and the PowerPoint file saved either on OneDrive or your local computer. Here are the steps to follow:
- Start or join a Teams meeting and click Share content in the meeting controls.
- In the share content menu ensure 'include computer sound' is turn on

- Select Browse OneDrive or Browse my computer at the bottom of the 'share content' menu.

- Navigate to the folder where you have saved your PowerPoint presentation file and select it.

- To stop sharing, click Stop presenting on the Teams toolbar.
Troubleshooting issues when sharing recorded PowerPoint presentations via Teams or Zoom
If you want to share a recorded PowerPoint presentation with your audience via Zoom or Teams, you may encounter some issues that can affect the quality or the delivery of your presentation. Here are some common problems and how to solve them:
- If your recorded PowerPoint presentation has audio or video embedded, make sure you check the option to share computer sound when you start sharing your screen. Otherwise, your audience will not hear the sound from your presentation.
- If your recorded PowerPoint presentation has animations or transitions, make sure you play it in slideshow mode and not in editing mode. Otherwise, your audience will see the editing tools and the slides will not advance automatically.
- If your PowerPoint presentation has hyperlinks or action buttons, make sure you click on them during the presentation and not before. Otherwise, your audience will not see the linked content or the action result.
- If your PowerPoint presentation is too large or has high-resolution images or videos, make sure you compress it before sharing it. Otherwise, your presentation may lag or freeze during the presentation due to bandwidth limitations.

See our tools at work
Book a personal demo with our PPT professionals

Start 30 Day Free Trial
Start your 30 day free trial - Microsoft Office for Windows
Download and Install
Existing customers download to install on a new computer
Related productivity tips

How to add animation to PowerPoint objects
PowerPoint has a number of built in functions that can enhance the impact of your slide ...
How do I create a PowerPoint Agenda / Table of Contents?
PPT Productivity add-in for PowerPoint makes creating and updating PowerPoint Agenda and Table of ...

How to protect / lock a PowerPoint presentation?
Unless you protect your PowerPoint document, anyone with access to the .pptx file can open, copy and...

Use zoom for PowerPoint to bring your presentation to life
If you would like to make your presentations more dynamic and exciting, try using zoom for PowerPoint .

To add a zoom, go to Insert > Zoom .
To summarize the entire presentation on one slide, choose Summary Zoom
To show selected slides only, choose Slide Zoom
To show a single section only, choose Section Zoom

When you create a zoom in PowerPoint, you can jump to and from specific slides, sections, and portions of your presentation in an order you decide while you're presenting.
Note: See the Requirements table below regarding which versions of PowerPoint support the features described in this article.
Summary zoom
A summary zoom is like a landing page where you can see the pieces of your presentation all at once. When you're presenting, you can use the zoom to go from one place in your presentation to another in any order you like. You can get creative, skip ahead, or revisit pieces of your slide show without interrupting the flow of your presentation.
Create a summary zoom
Go to Insert > Zoom .

Select Summary Zoom .
The Insert Summary Zoom dialog box opens.
Select slides you want to include in your summary zoom. These become the first slides of your summary zoom sections . To learn more about using sections in PowerPoint, see Organize your PowerPoint slides into sections .

If you already have sections in your presentation, the first slide of each section is preselected by default. If you don't want to include certain sections in your zoom, deselect them. Then, if you want PowerPoint to get rid of any sections you didn't include in your summary zoom, clear the check box next to Keep unused sections in your presentation . Don't worry—the slides in the sections you're discarding will still be part of your presentation.

Once you've selected all the slides you want to use for your summary zoom, select Insert . Your summary zoom is created, and it appears as a new slide just before the first slide you included in your summary zoom.

Add or remove sections from your summary zoom
Once you've created a summary zoom, you might still want to add or remove sections of your presentation. If you've made changes since first making your summary zoom that you want to capture, you don't have to start from scratch—just update your summary zoom.
Select your zoom, and then select the Format tab on the ribbon.

Select Edit Summary , choose the sections you want to have in your summary zoom, and then select Update .
Note: You won't be able to add or remove sections from your presentation in this view, just from your summary zoom.
A slide zoom can help you make your presentation more dynamic, allowing you to navigate freely between slides in any order you choose without interrupting the flow of your presentation. They're a good option for shorter presentations without lots of sections, but you can use slide zooms for lots of different presentation scenarios.
Slide zooms help you drill down into multiple pieces of information while feeling as though you're staying on the same canvas.
Create a slide zoom
Select Slide Zoom .
The Slide Zoom dialog box opens. Select the slides you want to use in your slide zoom.
Once you've selected all the slides you want to use, select Insert .
An item for each slide you selected in step 3 is added to the slide. Select each item in turn and drag to arrange them on the slide.
Tip: If you want to, you can create a slide zoom quickly by simply selecting the slide you want from the thumbnail pane and dragging it onto the slide you'd like to have your slide zoom on. This way, you can create slide zooms and change them quickly, and arrange them however you like simply by clicking and dragging.
Change the preview image of your slide zoom
Your slide zoom by default will be a preview thumbnail image of the slide, but you can choose a new image from your PC or the web to represent the section or slide you'll be going to.

Select Change Image to choose a new picture from the web or your PC to use instead of the thumbnail.

Choose or search the web for the image you want. When you've selected the image you want, select Insert .

You can also choose various looks for your zooms from Zoom Styles —you can change the border, add visual effects, or pick from any of the border and effect combinations in the gallery.

Section zoom
A section zoom is a link to a section already in your presentation. You can use them to go back to sections you want to really emphasize, or to highlight how certain pieces of your presentation connect. To learn more about using sections in PowerPoint, see Organize your PowerPoint slides into sections .
Create a section zoom
Select Section Zoom .
Select the section you want to use as a section zoom.
Select Insert . Your section zoom will be created.
Tip: If you want to, you can create a section zoom quickly by simply selecting the section name you want in the thumbnail pane and dragging it onto the slide you'd like to have a section zoom on.
Change the preview image of your section zoom
Your section zoom by default will be a preview thumbnail image of the slide, but you can choose a new image from your PC or the web to represent the section or slide you'll be going to.
More zoom options
Zoom for PowerPoint truly lights up when you make it your own. Select the Format tab of the ribbon to get to the Zoom Tools , which you can choose to create just the look and feel you're going for when you present.
Choose to return to the home page or continue through your presentation
If you want to return to the zoom slide after viewing sections or slides in your summary, slide, or section zoom, make sure the Return to Zoom check box is selected. If you want to move on to the next slide after viewing part of your zoom, uncheck it.
(If you're working with a summary zoom or a section zoom, you'll return to the zoom slide by default when you're presenting after going to the section. If you're using a slide zoom, you'll move on to the next slide by default after viewing your slide zoom.)
Make the background of your zoom transparent
Another way you can change the look of your zoom is by choosing to adopt the background of the slide where your zoom lives to make the zoom almost indistinguishable from the main canvas while you present. Select Zoom Background to make your summary, section, or slide zooms blend in to their home slide.
In the Zoom Styles group, select Zoom Background . The zoom will adopt the background of the home slide.
Change the transition options of your zoom
By default, your zooms will use the zoom transition when you present, which is what helps make the zooms feel so lively. However, if you don't want to use the zoom transition, or if you want to change the duration of the transition, you can do so.
In the Zoom Options group, make sure the box next to Zoom Transition is checked if you want to use the zoom transition when presenting your zoom.
If you don't want to use the zoom transition when presenting, uncheck the box next to Zoom Transition .
To change the timing of the zoom transition, use the up and down arrows next to the Duration indicator to change how long the zoom transition lasts.
Requirements
See the following table for details on the minimum version numbers required in PowerPoint to create or play zoom links.
| PowerPoint version | What you can do with Zoom |
|---|---|
| or newer PowerPoint 2019 | Create and play zoom |
| or newer | Play zoom |
| PowerPoint 2016 | Play zoom as hyperlinks with no zooming transition. |
| PowerPoint for the web PowerPoint Live in Teams | None None |
| PowerPoint for Android PowerPoint for iOS PowerPoint Mobile for Windows | Play zoom |

Need more help?
Want more options.
Explore subscription benefits, browse training courses, learn how to secure your device, and more.

Microsoft 365 subscription benefits

Microsoft 365 training

Microsoft security

Accessibility center
Communities help you ask and answer questions, give feedback, and hear from experts with rich knowledge.

Ask the Microsoft Community

Microsoft Tech Community

Windows Insiders
Microsoft 365 Insiders
Was this information helpful?
Thank you for your feedback.
Maintenance Notification: On September 17th, 2024, the Zoom Community will be down starting at 10:00pm PDT for up to 1 hour
Empowering you to increase productivity, improve team effectiveness, and enhance skills.
Communication
Productivity, apps & integration, employee engagement, business services, customer care, developer tools.
- Financial Services
- Manufacturing
- Small and Midsize businesses
- IT Professionals
- Customer Experience
- Sales and Revenue
- Marketing and Events
- Meeting SDK
- App Marketplace
- Developer Solutions
- Partner Solutions
- Find a Partner
- Become a Partner
- Partner Portal
- Partner Learning Center
- Resource Library
- Webinars & Events
- Customer Stories
- Zoom Trust Center
- Zoom Community
- Learning Center
- How-to Videos
- Customer Success Hub
- Global services
- Hardware options
- Customer Managed Key
- Customer Support
- Premier Support
- Developer Support
- Premier Developer Support
Download the Zoom app
Keep your Zoom app up to date to access the latest features.
Zoom Virtual Backgrounds
Download hi-res images and animations to elevate your next Zoom meeting.
- Plans & Pricing
- Join by Meeting ID
- Public Event List
- Screen Share Only
- With Video On
- With Video Off
- Phone System
- Mail & Calendar
- Marketplace
- Rooms and Workspaces
- Workspace Reservation
- Contact Center
- Virtual Agent
- Revenue Accelerator
- Events and Webinars
- Work Transformation Summit
- Customer Success Events
- Customer Success Forum
- OnDemand Learning
- Zoom Status
- Submit Feedback
- Community Terms and Guidelines
- Getting Started
- Community Center
- Happy Rewards
- Social Corner
- Community Champion Program
- Billing & Account Management
- Zoom Meetings
I've lost my recording
- Subscribe to RSS Feed
- Mark Topic as New
- Mark Topic as Read
- Float this Topic for Current User
- Printer Friendly Page
- Lost Recording Issue in Zoom Events and Webinars 2024-09-13
- Zoom Recording While Displaying Poll in Zoom Meetings 2024-09-13
- I need both video streams from my recent recording in Zoom Meetings 2024-09-13
- Looking for past meeting that was held and no longer on the Zoom calendar in Zoom Meetings 2024-09-12
- Mark as New
- Report Inappropriate Content
2024-09-13 03:16 PM
- All forum topics
- Previous Topic
How to Record PowerPoint on Google Slides
Have you ever wondered if it’s truly possible to record a PowerPoint presentation seamlessly within Google Slides , without relying on cumbersome third-party tools? In today’s digital landscape, effective communication can make or break your presentation. With the right knowledge, you can easily record PowerPoint presentations to create engaging video content for your audience. This article will explore the requirements for Google Slides recording , provide detailed recording tutorials , and discuss various options to manage your recordings effectively.
Introduction to Recording in Google Slides
The growing demand for effective digital presentations has led to a notable enhancement in the capabilities of Google Slides . This Google Slides introduction emphasizes its innovative recording features , allowing users to effortlessly capture live presentations. Such functionality presents a hassle-free alternative to traditional recording methods that usually require third-party software. Now, presenters can include video from their webcams, adding a personal touch to their presentations.
Recordings save automatically to Google Drive, making it easy to share or access them later. Familiarity with these presentation enhancement tools not only enriches the user experience but also elevates the overall quality of presentations. Understanding the necessary requirements and limitations will further aid in maximizing the potential of the recording capabilities in Google Slides .
Requirements for Recording PowerPoint on Google Slides
To successfully record presentations on Google Slides, several essential requirements must be fulfilled. Understanding these components ensures a smooth recording experience while maximizing Google Slides compatibility .
Supported Browsers
Currently, recordings in Google Slides can only be performed using Google Chrome and Microsoft Edge. While users can access, manage, and share recordings through various browsers, the specific recording functionality is restricted to these supported browsers . Choose one of these options for an optimal recording experience.
Account Limitations
Recording capabilities are subject to specific Google Workspace account types. Generally, features are available for Business Standard or Plus, Enterprise editions, and Education Plus. Users operating under personal accounts may encounter recording restrictions , limiting this functionality.
Storage and Access Considerations
For seamless recording, edit access to the presentation is mandatory. Users should also be aware of the 30-minute recording limits per session and ensure they manage their Google Drive storage effectively. Should Drive storage quota exceedance occur, users will face barriers to generating additional recordings. Proper management of storage is vital to maintain uninterrupted recording capabilities.
Recording a PowerPoint presentation using Google Slides is a straightforward process that allows users to create effective visual content. Following the correct recording instructions ensures a smooth execution of the Google Slides process . Below are the step-by-step instructions to get started with slideshow recording .
Step-by-Step Instructions
- Open your Google Slides presentation in either Chrome or Edge.
- Click the ‘Rec’ button located on the upper right corner and select ‘Record new video’.
- Adjust your video inset settings as needed to prepare your interface. Ensure your camera and microphone are properly set up.
- Click the large red button to start recording. You can pause or re-record as necessary during this step.
- After finishing, click ‘Save to Drive’ to store your recording in your Drive.
Editing Access Requirement
To utilize the recording feature in Google Slides, obtaining edit access to the presentation is essential. This means you must either create the presentation or receive recording permissions from the owner. Lacking the appropriate access will disable the recording functionality, preventing successful slideshow recording .
Recording Options in Google Slides
When utilizing Google Slides for your presentations, several recording options are available to enhance the overall experience. These Google Slides features allow users to select the location and size of inset video frames, which can significantly improve the visual appeal of the slides. By choosing from small, medium, or large video inset sizes, presenters can position their videos in any corner or at the center of the slides, tailoring the layout to fit their content effectively.
In addition to size and placement, Google Slides provides flexibility with video settings . Users can utilize external microphones and cameras, ensuring that the audio and video quality during recordings meets professional standards. Leveraging these recording options not only promotes a clear message but also enhances engagement with the audience, creating a more personalized viewing experience.
Overall, the ability to customize video placement and enhance audio-visual quality in Google Slides empowers users to create impactful presentations. By taking advantage of these features, they can effectively convey their messages and keep the audience captivated throughout the session.
Can I record PowerPoint presentations on Google Slides using any browser?
Currently, you can only record presentations in Google Slides using Google Chrome and Microsoft Edge. Other browsers do not support the recording functionality.
What types of Google Workspace accounts can use the recording feature?
The recording feature is typically available for users on Business Standard, Business Plus, Enterprise editions, and Education Plus accounts. Users with personal accounts may not have access to this feature.
Is there a time limit for recordings in Google Slides?
Yes, recordings in Google Slides are limited to 30 minutes per session. It’s important to manage your sessions accordingly if you have longer presentations.
What should I do if my Google Drive storage quota is exceeded?
If your Drive storage quota is exceeded, you will be unable to create more recordings until you free up space. Regularly check your storage usage to avoid interruptions.
Do I need edit access to the presentation to record it?
Yes, you must have edit access to the presentation, either by creating it yourself or being granted permissions by the presentation owner, in order to use the recording feature.
Can I adjust the video inset settings while recording?
Yes, Google Slides allows you to customize the location and size of the inset video frame during the recording process, enhancing the presentation’s visual appeal.
What equipment is recommended for better recording quality?
To improve audio and video quality, consider using external microphones or cameras for your recordings in Google Slides.
How can I manage and share my recordings after I save them?
After saving your recordings to Google Drive, you can access, manage, and share them just like any other file stored in your Drive. Use the sharing options provided by Google Drive to control access.
- Recent Posts

- How to Change PowerPoint Cover: Quick Tips - September 13, 2024
- How to Create a Book Cover in PowerPoint - September 13, 2024
- How to Customize PowerPoint Ribbon: Simple Guide - September 13, 2024
Similar Posts
How to control powerpoint from android: easy guide.
Master your presentations from anywhere! Learn how to control PowerPoint from android with ease, ensuring a smooth, efficient experience.
How to Save PowerPoint Recording: Step-by-Step
Learn the simple steps to save PowerPoint recording, ensuring your presentations are securely stored and easily accessible for future use.
How to Control PowerPoint from iPhone: A Complete Guide
Learn how to control PowerPoint from iPhone using simple, step-by-step instructions. Enhance your presentations with easy mobility and increased efficiency.
How to Add a Drop Cap in PowerPoint: Expert Guide
Learn how to easily create a drop cap in PowerPoint with our step-by-step guide. Enhance your presentation’s design by adding a professional and creative touch.
How to Use the Eyedropper Tool in PowerPoint: Expert Guide
Learn how to use the Eyedropper tool in PowerPoint to pick and match colors for a consistent and professional presentation design. Step-by-step guide included.
How to Introduce Yourself Effectively in PowerPoint
Master the art of self-presentation with our guide on how to introduce yourself in PowerPoint, ensuring a memorable first impression.
Leave a Reply Cancel reply
Your email address will not be published. Required fields are marked *
Save my name, email, and website in this browser for the next time I comment.
© 2024 pptbliss.com - All Rights Reserved
IMAGES
VIDEO
COMMENTS
To begin a recording of a PowerPoint presentation, move your cursor over the menu bar in Zoom. It's the series of options and buttons at the bottom of the app's screen. First, make sure that your microphone isn't muted. This setting is controlled by the Mute button, found on the left side of the menu bar.
to the top of the screen. Hover over the minimized control bar to reveal the full set of Zoom controls. RECORDING IN ZOOM . 1. To begin recording, click …More in the Zoom control bar at the top of the screen. 2. Click Record to the Cloud in the dropdown menu that appears. (or press Alt+C on Windows or ⌘+Shift+C on Mac)
A Zoom video conferencing tutorial--how to record yourself while giving a presentation using the Zoom video interface. Although Zoom video conferencing is a...
This is a quick guide on how to use the free version of zoom to record a presentation with picture in picture of both your slides and your webcam.
This video covers the video settings as well as process of setting up Zoom to record PowerPoint presentations in Presenter View while leaving slide notes out...
Launch Zoom. Open the Zoom application on your computer and click New Meeting. If prompted, select Join With Computer Audio. Start your Video. Click Start Video to record a video of yourself alongside any content you share. Open presentation materials. Open any files and programs you plan to use in your presentation and close anything you won ...
Follow these steps to record a PowerPoint presentation in your Zoom account. 1. Before logging into Zoom, open the PowerPoint deck that you wish to use for your presentation. 2. Navigate to the Zoom log in page: https://zoom.us. 2. Click on Host and select either video on. 3.
To record yourself giving a PowerPoint presentation on Zoom, launch Zoom and PowerPoint; be sure to close all other applications. Create a new Zoom meeting, select Share Screen, select your PowerPoint presentation, and click Share. Launch your PowerPoint slideshow. In Zoom, choose Record > Record on This Computer.
Go to PowerPoint and launch your slideshow. At the bottom Zoom toolbar, choose Record, then choose "Record on this Computer" from the menu that pops up. Your lecture is now recording. Note: if you don't see the Record button, you may need to click on the "More" button in the Zoom toolbar, and then choose the "Record on this Computer" option.
Open PowerPoint presentation on a different monitor. Go to Zoom and start or co-host a meeting. Click "Share Screen" in the Zoom toolbar. Choose the monitor that the PowerPoint presentation is in as your primary monitor, then click "Share.". Switch back to PowerPoint and start presenting.
You'll know recording has begun because a red light will appear in the upper left corner of your Zoom window with the words "Recording." Click on the pause icon if you want to pause the recording. Click on the start icon when you are ready to resume recording. Click on the stop icon when you're ready to stop the recording. Your local ...
Another option is to use external recording software. To record your Zoom presentation using an external screen recorder, follow these steps: Step 1: Choose your software system. Step 2: Launch your Zoom meeting, and set up your presentation. Step 3: Follow your software's instructions to record your screen.
In this step-by-step tutorial, learn how to best present Microsoft PowerPoint slides in Zoom Video Conferencing.⌚ Timestamps0:00 Introduction1:19 Share entir...
In this article I am using the Zoom app in Windows 10. The six options are: Share your entire screen/desktop. Share the Slide Show window. Share the editing window with a clean look. Run the Slide Show in a window and share that window. Use Presenter View to show the audience your slides while you see Presenter View.
Switch back to Powerpoint and click the Slide Show tab. Begin the presentation by selecting the Play from Start or Play from Current Slide options. PowerPoint will display the slide show in a window. In Zoom, start or join a meeting. Click Share Screen in the meeting controls. Select the PowerPoint window and then click Share.
The meeting host should check their Zoom Recording settings: Enable "Cloud Recording". Enable "Record active speaker with shared screen". Enable "Record thumbnails when sharing". Enable "Optimize the recording for 3rd party video editor". Click the Save button.
Step 1 - Start a New meeting in Zoom. Prepare your PowerPoint presentation that you want to video record and then open Zoom App. To start a new Zoom meeting click "New Meeting". If you don't have Zoom app installed on your computer, you can download the free version of the software on the official Zoom website .
Open your PowerPoint presentation and click on the Slide Show tab. To Record a slideshow in PowerPoint, navigate to the Slideshow tab. From the PowerPoint Set Up group, click on Record Slide Show button. You can choose to record from the beginning, or from the current slide. Record a PowerPoint slideshow to share via Teams or Zoom.
This is a step by step instruction on how to record a PowerPoint Presentation in Zoom and submit it into Blackboard Learn.
If you would like to make your presentations more dynamic and exciting, try using zoom for PowerPoint. To add a zoom, go to Insert > Zoom. To summarize the entire presentation on one slide, choose Summary Zoom. To show selected slides only, choose Slide Zoom. To show a single section only, choose Section Zoom.
Hi. I was in a Zoom meeting this week and was added as a co-host. I recorded my 15-minute presentation and started the conversion process to download to my pc. The conversion was very slow so I stepped away for about 5 minutes. When I came back I saw the generic Zoom screen.
Introduction to Recording in Google Slides. The growing demand for effective digital presentations has led to a notable enhancement in the capabilities of Google Slides.This Google Slides introduction emphasizes its innovative recording features, allowing users to effortlessly capture live presentations.Such functionality presents a hassle-free alternative to traditional recording methods that ...