How to Use Canva to Create and Give Presentations
Canva makes it easy to edit text, make GIFs , and create content for social media like Instagram . But Canva also makes it easy to create presentations and if you are in a hurry and forgot your PC, Canva allows you to give that presentation using your smartphone. Here is how you can create and give presentations using Canva while on the move.
Table of Contents

Create Presentation Using Canva Templates
One of the things that make Canva so much easier to use is templates. They offer free and paid templates for almost all sorts of content that you may think of. We will be using a free template to create a presentation on Canva’s web app.
1. Open Canva in your browser and search for Presentation in the search bar.

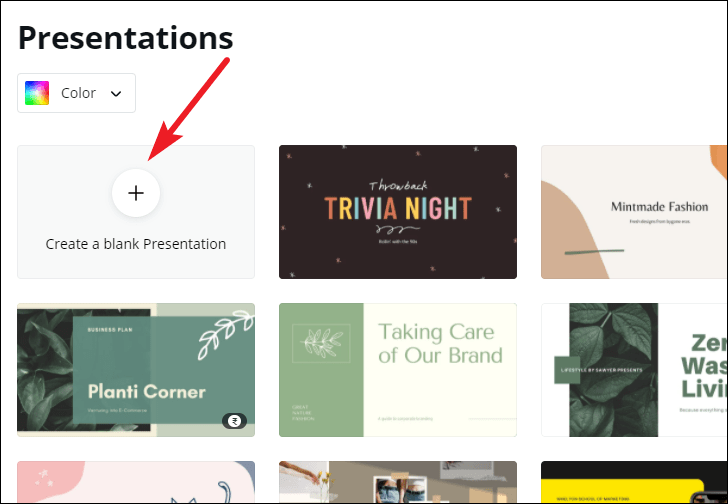
2. You will be taken to the presentation templates page . You can filter by category or just scroll through until you find something that catches your eye or meets the criteria. You can also click on the empty frame with +sign to create a new presentation from scratch but that would be time-consuming.
Note: Templates with a golden crown icon are paid templates.

3. Click on any template and you will see a pop-up menu with more details about the template. Click on Customize this template to begin making your template. Click on the star icon to bookmark it for later perusal.

4. Now, in the left sidebar, you will find all the slides in the presentation. When you select a slide, you will be able to edit it on the right side. Each element can be edited or removed including text, image, and various elements. It is easy to add, edit, and format text .

5. You can choose from a variety of apps from the marketplace to make your work easier including AI apps like Dall-E. Simply click on Apps in the left sidebar and choose the one that you want to use.

6. You can also draw on slides or use stock images from sources like Pixabay and Pexels without having to leave Canva.

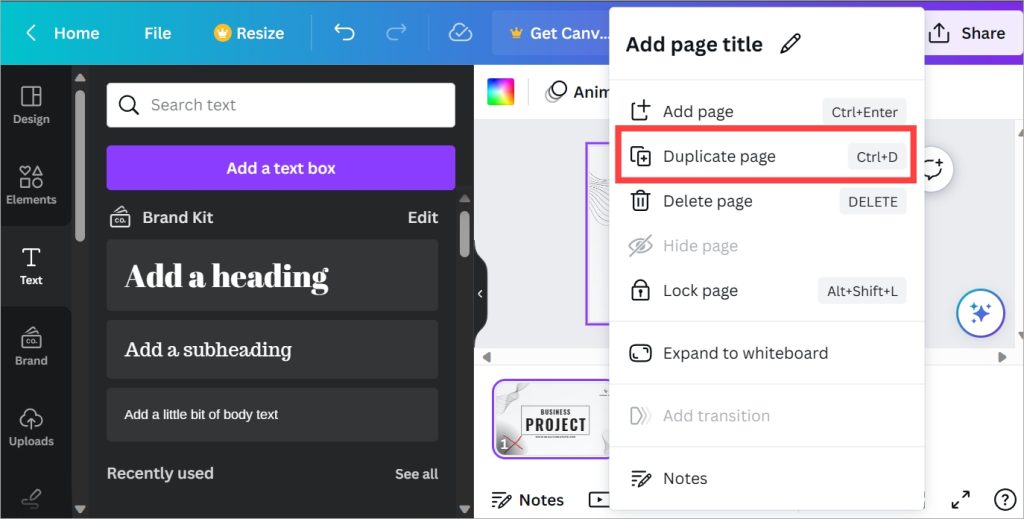
7. To add a slide, click on the plus icon at the bottom. You can also right-click on the existing slide and select Duplicate page to create an identical new slide that will retain the formatting and layout of the first slide. So all you have to do is change the text and some elements.
When you are happy with the presentation, you have a couple of options. Let’s have a look at them in the below sections.
Give a Presentation Using Canva
There are two ways to do it. You can present a presentation made in Canva using both the web app and the Android or iPhone app.
Give Canva Presentation on PC
1. Go to Canva homepage and click on Projects in the left sidebar.

2. Click on the presentation that you want to give to open it.

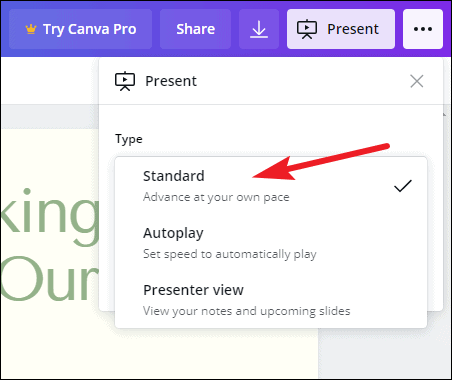
3. Click on the Present button in the upper right corner. You will see three options to present.
- Present full screen – this will begin a full-screen presentation for everyone to see.
- Presenter view – this presents the slides that you have created along with notes that you may have.
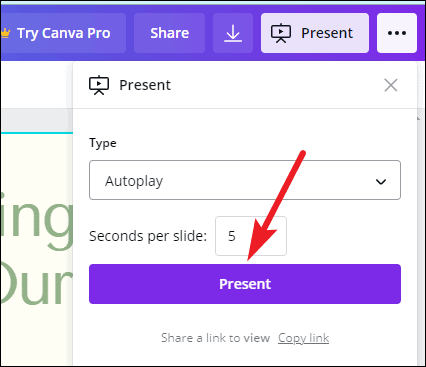
- Autoplay – this will let you set a timer so that once you begin the presentation on Canva, slides will change after the chosen time (in seconds) automatically.

4. Once you selected a form of presentation, click on the Present button to begin.
Have you heard of Adobe Spark? We did an in-depth comparison between Canva and Spark . Find out who won and why.
Give Canva Presentation on Mobile
If you are working remotely or traveling and don’t have your laptop on you, Canva allows you to give presentations directly from mobile.
By Sharing Presentation Link
Open the Canva app and go to the Projects tab. Now open the presentation and then select the Presentation menu (TV icon).
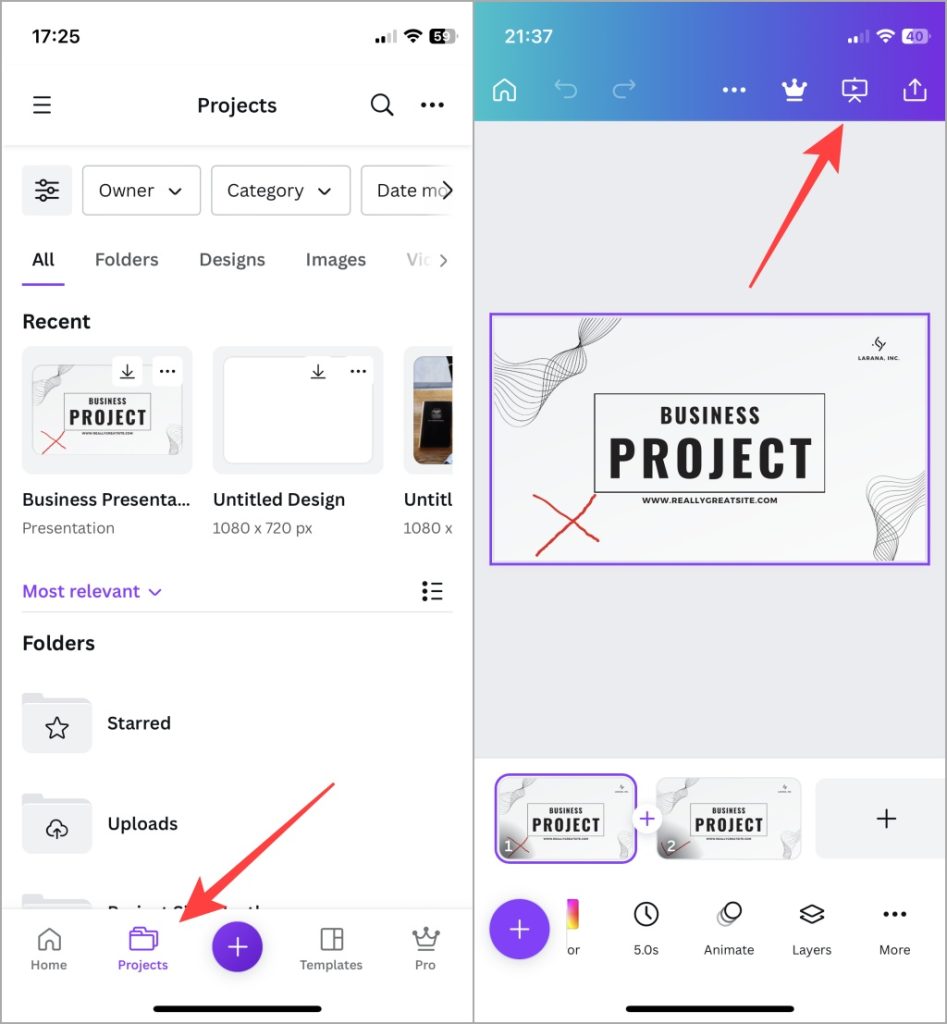
If you are casting your mobile screen on a bigger screen, this will work beautifully.
Using Phone as Remote to Give Presentations
This is one neat trick up Canva’s sleeve. You would have noticed how presenters on stage have a small remote in their hands that they use to change slides. You don’t need anything but your smartphone to give presentations saved on Canva now. And it is quite easy.
1. Open the presentation on your web or mobile Canva app. Here we are using the web app. Click on the Present button to begin the presentation.
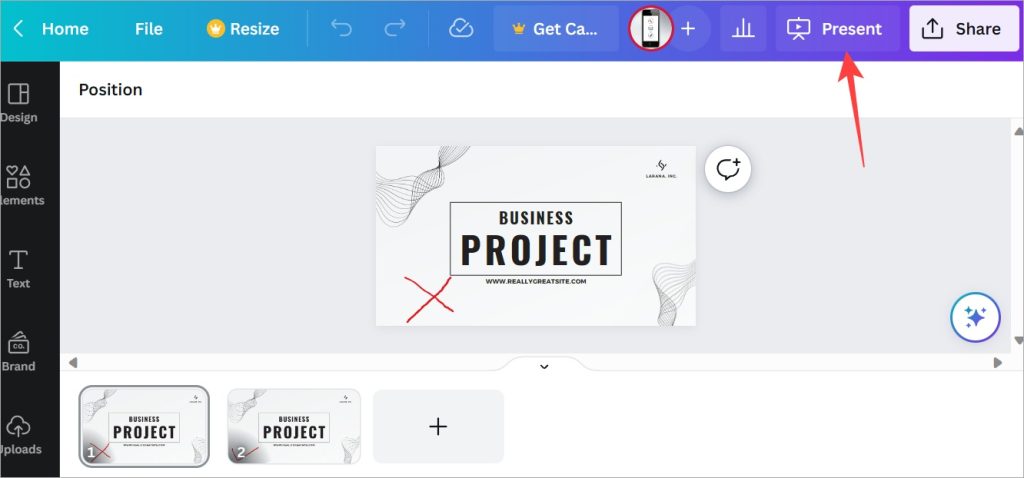
2. Select an option depending on how you want to present. We discussed the three options above. Now click on Present button.

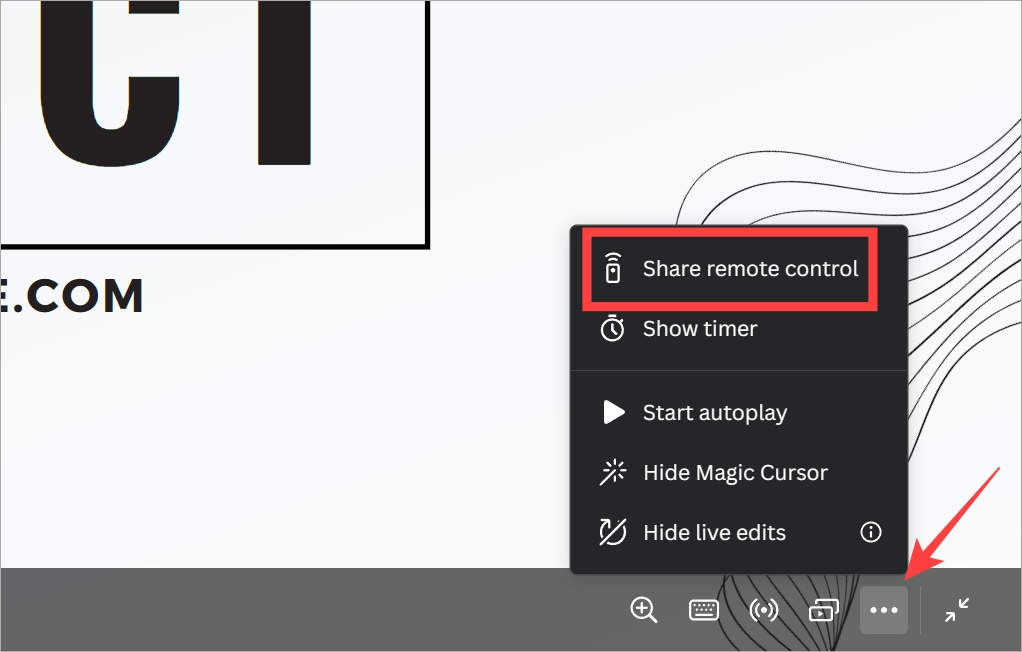
3. Once the presentation begins, click on the meatballs menu (three-dot icons) at the bottom right corner of the screen and select Share remote control option.
4. Either scan the QR code or Copy the link and paste it on your mobile browser. Any browser will do.
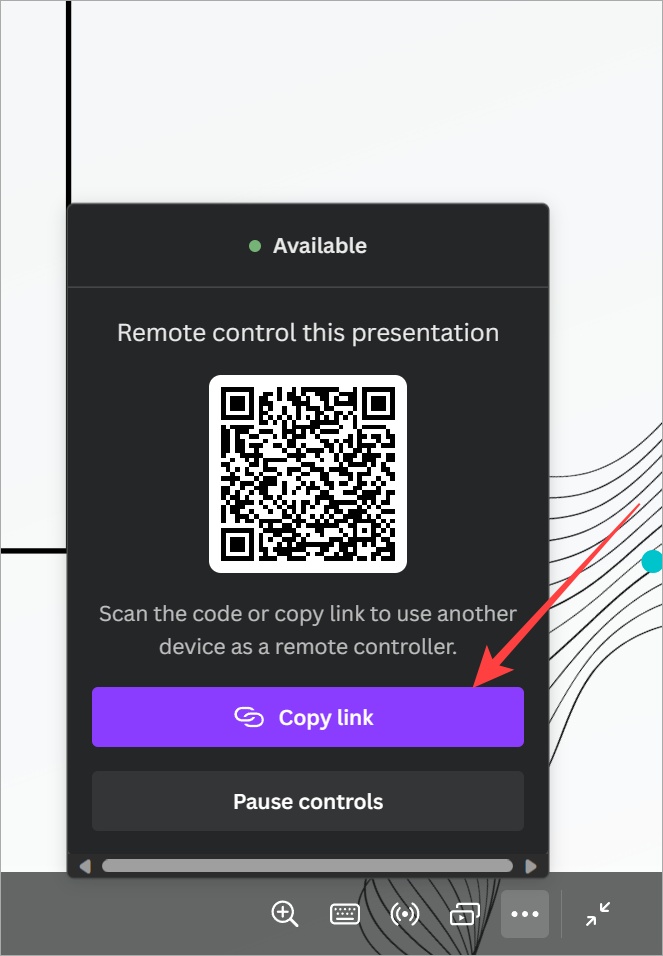
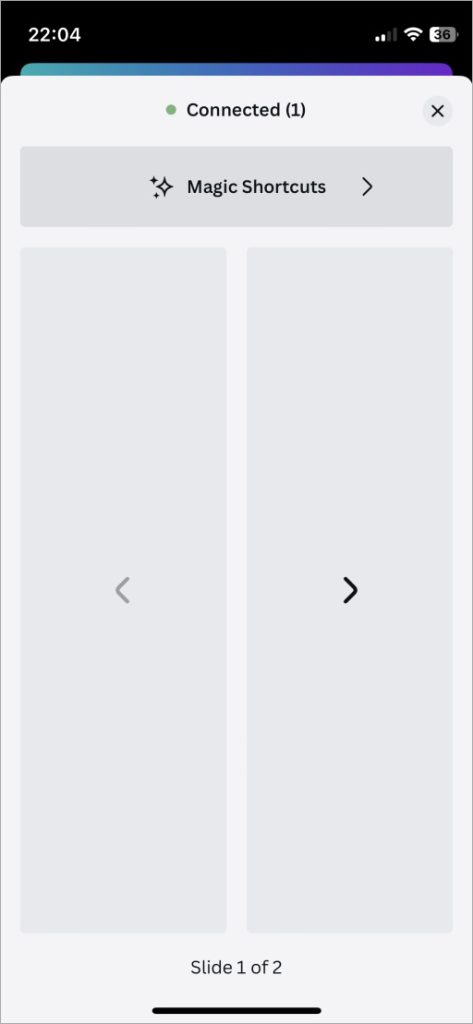
5. You can now control the presentation and slide movements right from your mobile browser. Here is how it looks. Tap on the left or right button to move slides.
Presenting, Canva!
Canva not only makes creating presentations easy thanks to the wide variety or free and paid templates, but it also offers intuitive ways to present your slides. But that’s not all that Canva can do. We use Canva to create featured images, resize images , make background transparent , and so much more.

Gaurav Bidasaria
Gaurav is an editor here at TechWiser but also contributes as a writer. He has more than 10 years of experience as a writer and has written how-to guides, comparisons, listicles, and in-depth explainers on Windows, Android, web, and cloud apps, and the Apple ecosystem. He loves tinkering with new gadgets and learning about new happenings in the tech world. He has previously worked on Guiding Tech, Make Tech Easier, and other prominent tech blogs and has over 1000+ articles that have been read over 50 million times.
You may also like
13 useful samsung notes tips and tricks to..., samsung galaxy phones can’t make or receive calls..., 3 ways to fix usb debugging greyed out..., 7 things iphone copied from android in ios..., you can use an android phone as a..., 2 ways to change app icon size on..., how to change font size only in text..., how to unlock hidden display modes on your..., 6 best good lock modules for your samsung..., boost android’s battery life with these 6 developer....
How to Use Canva Presentations
Make visually appealing presentations that'll stand out among others using Canva.

Canva, a graphic design platform, is gaining a lot of traction as a design tool. Its basic premise – it’s just as easy to use for non-designers. You don’t need to be an expert in graphic designing to use Canva, and that is one of the main reasons behind its popularity.
With design becoming one of the hottest commodities for just about every field, Canva makes it accessible to everyone. Whether you’re an entrepreneur, a marketer, influencer, or a blogger, you can use Canva to make fetching content for social media, posters, graphics, design your own business cards even. If you’ve got even a little eye for design, Canva can help you cut down on the costs of hiring professional designers.
But did you know you can also use it to make just as engaging and stimulating presentations? Whether you want to make presentations for a professional environment or personal use (like a birthday surprise), Canva Presentations have got you covered. Let’s dive right into it!
Getting Started
Canva offers a web app you can immediately start using on your desktop without having to download anything. Unfortunately, the web app is your only option as there is no desktop app. So you need an internet connection to work with Canva as it stores all your work on its servers.
Canva also has a mobile app for iPhone and Android, which you can use on the go. But when getting started, using the web app is the best course of action.
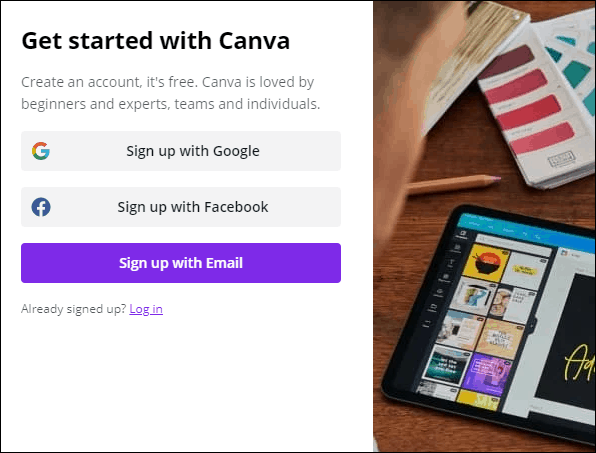
Go to canva.com and create a free account. Click the ‘Sign Up’ button to create a new account.

You can sign up with your Google account, Facebook account, or your email address.
Canva has a freemium structure, so you can use it for free with limited features or get a Pro or Enterprise subscription for complete access. It also offers a 30-day free trial to its Pro features, so you can try it out before deciding whether you want to convert to a paid user.
Now, from the Canva home page, click the ‘Presentations’ button under the Design anything banner. If you can’t find the option, you can also search for ‘Presentation’ from the search bar.

There are plenty of size options to choose from when creating a presentation. Let’s stick with the standard size ‘1920 x 1080 px’ here.

One of the things that makes Canva so easy to use for everyone is the sheer number of templates. The assortment of templates in existence ensures that you’ll find something to match your needs. But if not, you can also start with a blank slate and create your presentation from scratch.
For this guide, we are selecting a template for the presentation. Before selecting a template, you can see what it has to offer by clicking the three-dot menu and selecting ‘Preview this template’.

Click ‘Use this template’ to select the template if you like it or go back and select another.

Editing the Presentation
The template will load into the editing interface. Canva has an eerily easy editing interface. Let’s navigate the interface first. Below the slide is the thumbnail view where you can see all the slides in thumbnails side by side.
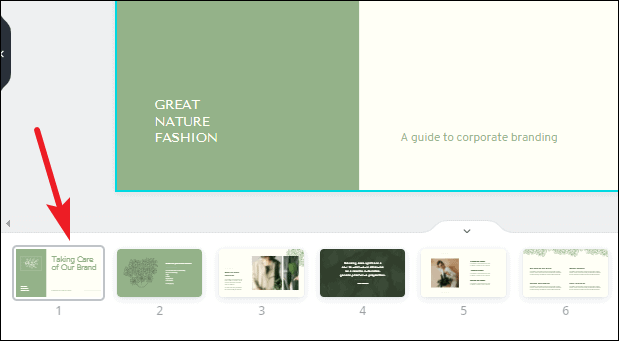
To turn off the thumbnail view, click the on/ off toggle (arrow).

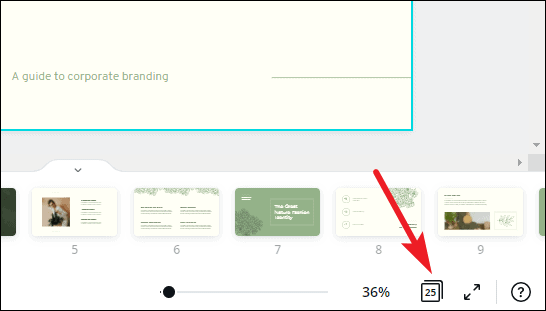
Click the grid view button to switch views.
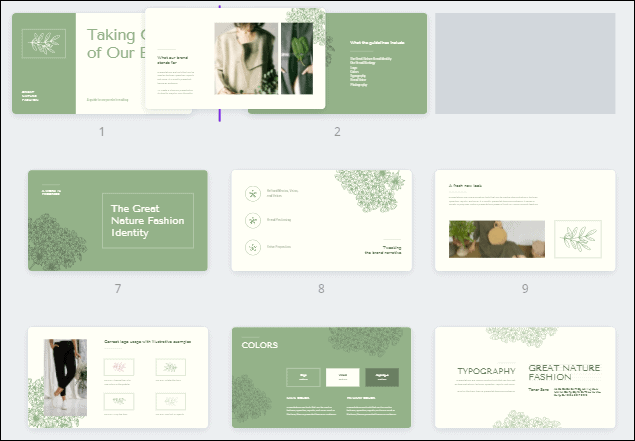
The grid view is helpful when there are a lot of slides in your presentation. Using grid view, you can get an overview of them all. You can also rearrange the slides by dragging and dropping slides into a new position. Click the ‘Grid View’ button again to switch back.
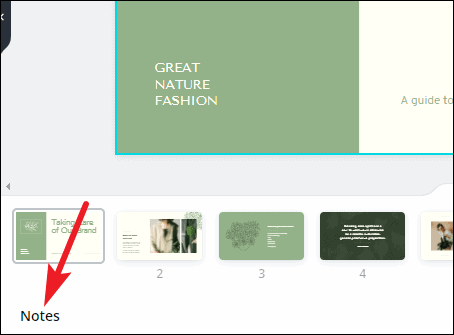
Click the ‘Notes’ option to add notes to the presentation that you can use for reference while presenting.
The name of the presentation can be edited from the top-most toolbar.
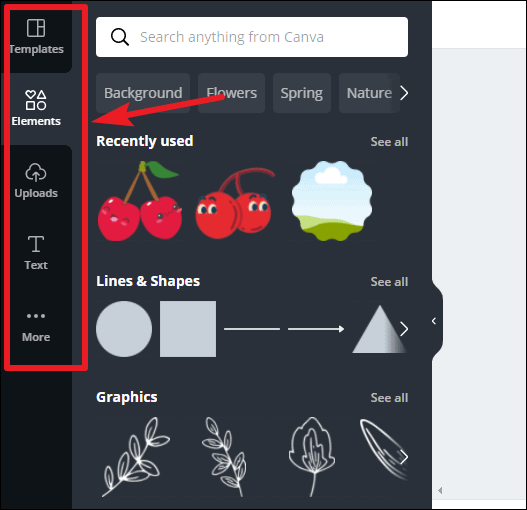
Now, on the left is the toolbar that houses all the tools for editing the design elements in the presentation.
When you’re using a template, almost all of the elements can be selected and edited. You can delete an element, change color, font (for text). To select an element, hover over it. The part of that element will be highlighted in blue. Click it to select it.
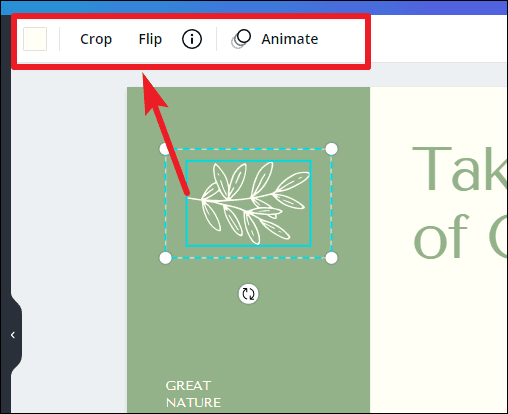
Another toolbar will appear above the slide with editing options specific to the element you have selected. Depending on the element, you can change it’s color, font, font size.
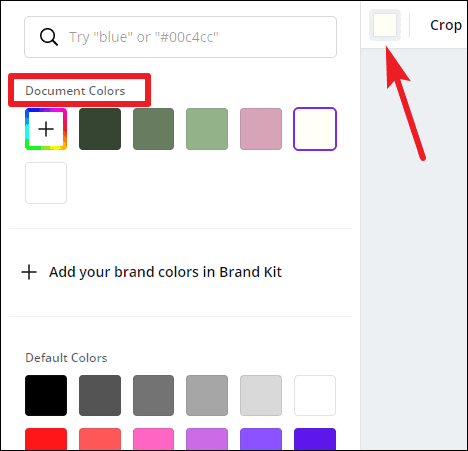
When you click the color option, a palette for document colors will appear above, followed by available default colors. For free users, only limited color options are available. If you have a Brand Kit (available only for Canva Pro users), that palette will also appear here.
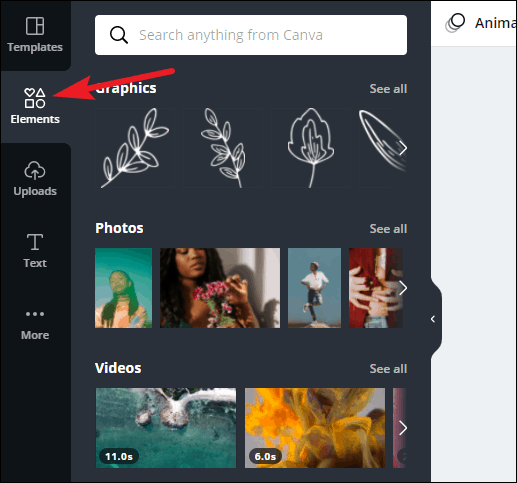
Click on the ‘Elements’ option on the left toolbar to add elements like photos, videos, graphics, audio, charts, etc. to your presentation.
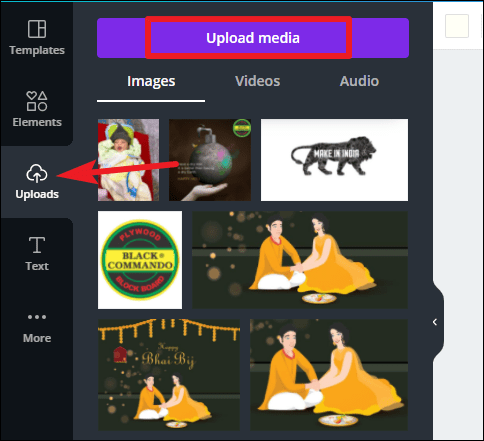
To add photos, videos, or audio from your computer, click the ‘Uploads’ button. Then, click the ‘Upload media’ button to select content. Any media you previously uploaded will also be available here.
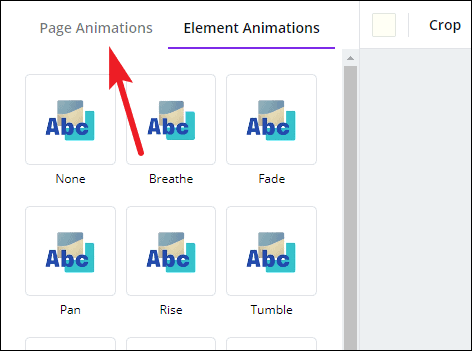
You can also add animations to individual elements or the entire page. Select an element and click the ‘Animate’ button.
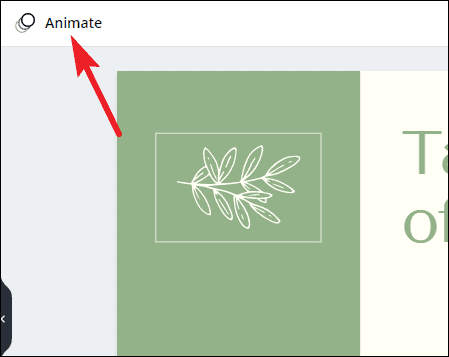
‘Element animations’ will open. To switch to page animations, click the ‘Page Animations’ tab.
Presenting your Presentation
Once your presentation is complete comes the main part – presenting it. Canva offers a lot of options for your finished presentation. You can present it right from Canva or publish or download it for various platforms.
To publish it elsewhere or download it, click the ‘three-dot’ menu on the top-right corner.
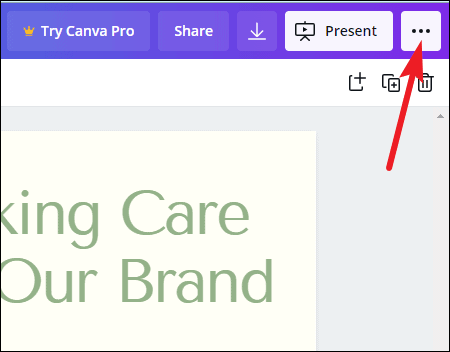
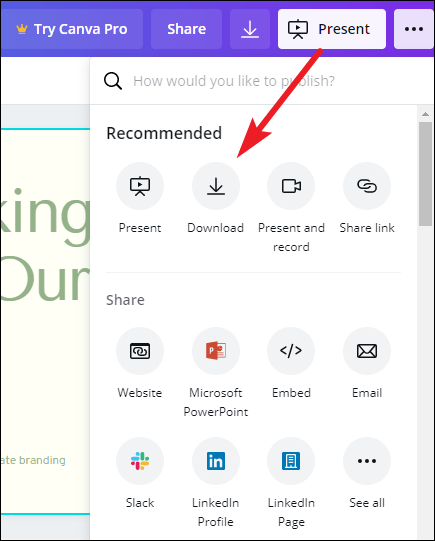
A list of options will appear. You can download it onto your computer, or as a PowerPoint presentation, share a link to the presentation, publish it as a website, embed it on your website, and much more. You can also record it while presenting with a voiceover.
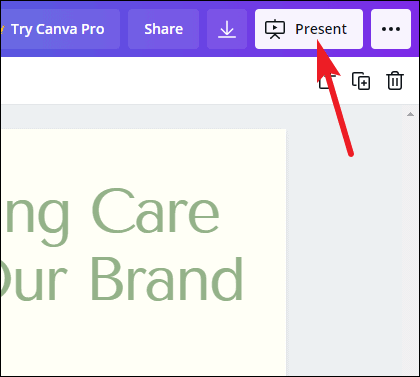
To present straight from Canva, click the ‘Present’ button.
Click the drop-down menu below ‘Type’ and select how you want to present it.

There are three options to choose from: ‘Standard’ – where you present at your own pace, ‘Autoplay’ – where the presentation advances automatically, and ‘Presenter View’ – where you can view your notes and upcoming slides, but the rest of the people cannot. Presenter View is best used when you’re presenting on a projector.
After selecting the type, click the ‘Present’ button.
Bonus Tips for your Presentation
While presenting the presentation on Canva, you can add special effects to enhance the performance with some keyboard shortcuts. All you need to do is press the associated key with each effect to bring it into action. Press the same key to stop it. You can also press multiple keys to add 2 or more special effects. With these effects, your presentation is bound to stand out to your audience and be memorable.
Drumroll : Add a drumroll before a slide by pressing the key ‘D’ before a big reveal.

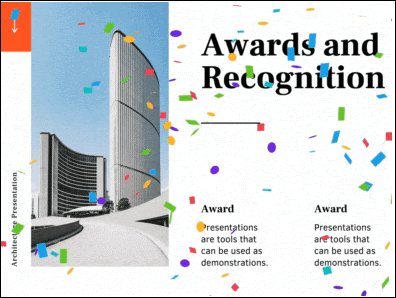
Confetti : Add a shower of confetti to celebrate something with the key ‘C’ .
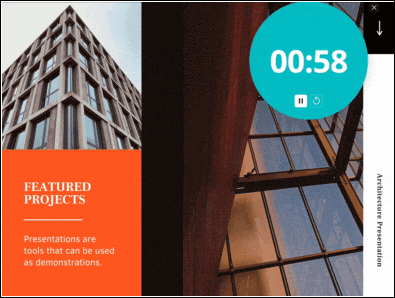
Countdown : Add a countdown from ‘1-9’ by pressing one of the keys.
Quiet : Bring a 🤫 emoji to screen to hush your audience with the ‘Q’ key.
Bubbles : Press down the ‘O’ key to bring bubbles on the screen.

Blur : Build tension and add drama to the atmosphere by blurring the screen with the key ‘B’.

Presentations are a huge part of professional life, whether you’re presenting to your clients, doing a webinar, promoting your brand, to name a few. With Canva, you can make presentations that’ll leave a long-lasting impact but won’t take long to make.
Here's every feature Apple Intelligence will power on Apple devices
Here's everything Siri can do with the AI upgrade in iOS 18

5 best secure web browsers for privacy in 2024
Get all the latest posts delivered straight to your inbox., member discussion.

How to Fix "Premium Images Can't Be Exported On Their Own" Error in Canva

How to Use Magic Switch in Canva to Instantly Convert Your Designs

How to Use Soundraw AI Music Generator in Canva

How to Use Magic Studio in Canva to Transform Your Ideas into Videos

How to Make Artistic QR Code in Canva using Mojo AI
How Do You Present a Canva Presentation?

Creating visually appealing and engaging presentations is crucial in today's digital age. With the rise of remote work and virtual meetings, having a captivating presentation can make all the difference in effectively conveying your message. Canva, a popular online design tool, offers a wide range of features and templates to help you create stunning presentations. In this tutorial, we will explore how you can present a Canva presentation to ensure maximum impact.
Preparing Your Presentation
Before diving into the presentation itself, it's essential to have a clear plan and structure in mind. Here are some steps to help you get started:
- Define your objective: Determine the purpose of your presentation and what you want to achieve.
- Gather your content: Collect all the necessary information, images, and media files that you'll need.
- Create an outline: Organize your content into sections or slides to ensure a logical flow.
Designing Your Canva Presentation
Canva provides an extensive library of pre-designed templates that you can customize based on your preferences. Follow these steps to design your Canva presentation:
- Login to Canva: Visit the Canva website and sign in using your account credentials.
- Select a template: Browse through the available templates or start with a blank canvas if you prefer complete creative control.
- Add slides: Customize the number of slides and their layout according to your outline.
- Edit content: Replace the default text with your own content by simply clicking on it and typing away. Use different font styles and sizes to emphasize key points.
- Upload media: Insert images, videos, or audio files to enhance your presentation. Canva provides a user-friendly interface for uploading and positioning media elements.
- Apply visual effects: Experiment with Canva's various visual effects and filters to make your slides visually appealing. This can include adjusting brightness, contrast, or adding overlays.
Presenting Your Canva Presentation
Once you have designed and finalized your presentation, it's time to present it effectively. Here are some tips:
- Practice makes perfect: Familiarize yourself with the content and rehearse the presentation multiple times to ensure a smooth delivery.
- Set up your environment: Choose an appropriate location with good lighting and minimal distractions. Make sure your device is connected to a stable internet connection if presenting remotely.
- Navigate through slides: Use the arrow keys or navigation buttons in Canva's presentation mode to smoothly transition between slides.
- Add annotations: Canva allows you to draw on slides during the presentation using its built-in annotation tools. Utilize this feature to highlight specific points or illustrate concepts.
In conclusion,
A well-designed Canva presentation combined with effective presenting techniques can greatly enhance your ability to engage an audience and convey information successfully. By following these steps, you'll be well on your way to creating visually stunning presentations that leave a lasting impression.

About the author:

Related posts
How Do You Make a Canva Presentation? Creating visually appealing presentations is essential for grabbing your audience's attention and effectively conveying your message. One popular... October 4, 2023 canva -->
How Do You Put a Video in a Canva Presentation? Are you looking to add a video to your Canva presentation? Adding multimedia elements like videos can greatly enhance your presentations and make... October 2, 2023 canva -->
How Do You Use Canva for a Presentation? Canva is a powerful graphic design tool that can be used for various purposes, including creating stunning presentations. With its user-friendly... October 2, 2023 canva -->
How Do You Make a Canva Video Presentation? Are you looking to create a captivating video presentation? Look no further than Canva! With its user-friendly interface and extensive library of... October 4, 2023 canva -->
How Do You Insert a Table in Canva Presentation? What is a table? Tables are a powerful visual tool used in presentations to display data in an organized and structured manner. They consist of... April 10, 2023 canva -->
How Do You Add Audio to Canva Presentation? Adding audio to your Canva presentation can enhance the overall experience for your audience. Whether you want to include background music,... October 4, 2023 canva -->
How Do I Print a Canva Invitation? Are you looking to print a beautiful invitation created in Canva? Printing your Canva invitation is a breeze with just a few simple steps. In this... October 5, 2023 canva -->
How Do I Put a YouTube Video Into a Canva Presentation? Have you ever wondered how to add a YouTube video to your Canva presentation? Well, you're in luck! In this tutorial, we will guide you through the... October 4, 2023 canva -->
How Do You Add Animations to Canva Presentation? Are you tired of boring and static presentations? Do you want to add a touch of creativity and interactivity to your Canva presentations? Look no... October 2, 2023 canva -->
How Do I Make a Canva Presentation Creative? Canva is a powerful tool for creating stunning presentations that captivate your audience. With its user-friendly interface and wide range of design... October 2, 2023 canva -->
You haven't yet saved any bookmarks. To bookmark a post, just click .
Canva Presentations: How to Create and Share Them
Canva may not be your first thought for creating a presentation. However, this popular web-based design tool offers a robust slideshow feature set. We’ll walk through how to create a Canva presentation, present it to your audience, and share it using a variety of methods.
Create a Canva Presentation
If you’ve never made a presentation with Canva, don’t worry. This online graphic design application goes beyond creating images and crafting infographics. Canva makes it super easy to create and set up a presentation for your audience.
On the Canva home page, select Presentations below the Search bar. Then, choose a slideshow size or Canva presentation template to get started.

Note : If you’re using Canva Docs , you can also convert your document to a presentation by selecting Convert at the top. Follow the prompts, and you’ll see your presentation open in the Canva editor.
Once in the Canva editor, use the menu on the left side to add slide elements. You can select or drag items like shapes, images, or text boxes onto your slides.

You can also edit or remove a slide element by selecting it and using the tools that display near the item or in the top toolbar. For example, you can change the style of text or transparency of an image.

Be sure to check out the full set of Canva presentation tools in the editor. You can add animations, insert slide transitions, use the grid view to rearrange presentation slides, and more.
Set Up the Presentation
After you tap your creativity to make an attractive and informative presentation, you can add notes, clock your speaking time, and adjust the slide durations.
Add Presenter Notes
To add presenter notes to a slide, select Notes in the bottom toolbar. Then, type your note in the panel that displays on the left. You can then move to your other slides and add notes the same way.

When you finish, deselect Notes in the toolbar.
Use the Timer
If you’d like to time your presentation, you can use the built-in countdown Timer feature. Select Timer in the bottom toolbar to display the timer. By default, the timer is set for five minutes, but you can change this using the plus and minus buttons.

Press the Play button to start the countdown, the Pause button to temporarily stop the timer, and the Reset button to restart the timer.

To close the Timer, deselect Timer in the toolbar.
Set the Slide Duration
Maybe you’re using Autoplay (described below) and would like to display particular slides for a longer or shorter time. You can adjust the slide duration for each or all slides in two different ways in Canva.
Use the Duration Slider
Expand the bottom section by selecting the Show Pages arrow. Then, choose Duration on the left to see the default timing for each slide.

Select a slide thumbnail (page) and hover your cursor over the left or right side of it to display the duration slider. Then, drag the slider in or out to shorten or lengthen the duration.

When you finish, deselect Duration in the toolbar and optionally use the Hide Pages arrow to minimize the bottom section.
Use the Timing Feature
Another way to change the duration of a slide is by using the Timing option at the top of the editor. Select a slide to see its duration and choose the current timing to enter a new duration, or use the slider to adjust it.
You can also turn on the toggle to apply the new duration to all pages (slides) in the presentation.

To close the Timing tool, deselect it in the top toolbar.
Show a Canva Presentation
The great thing about creating a presentation in Canva is that you can present from it as well. If you prefer not to download and present using a different application, you have a few options to show your slideshow directly from Canva.
When you’re ready to present or practice your presentation, select Present on the top right. You’ll then see the options below.

Present in Full Screen Mode
Choose the Present full screen option to enter presentation mode. You’ll see your presentation consume your entire screen and have controls at the bottom.

Use the arrows on the left to move through the slides and the controls on the right to zoom, interact, use shortcuts, or exit full-screen mode.
Use Presenter View
To see your notes and controls on one screen with your presentation on another for your audience, choose Presenter view .

Your screen shows the time, a count-up timer, and other controls for a countdown, AutoPlay, and the font size for your notes.
You can drag the other screen wherever needed for your audience to view.

Present and Record
Maybe you want to incorporate your smiling face into your presentation. For this, pick the Present and record option to record yourself live as the presentation plays. You can then share the whole presentation as if you’re in the same room.
Note : This feature is currently only available when using the Google Chrome web browser.
You’ll see your face appear in a circle on the bottom left of the presentation. You can use the Pause and End recording buttons at the top to control the recording as well as see your presenter notes.

When you finish, you’ll see a link that you can copy and have the option to download the recorded presentation immediately.

Use Autoplay
Like Autoplay for a PowerPoint presentation, this is one more way to present a slideshow using Canva. With Autoplay, you can start the presentation and let it play on its own. This is ideal for kiosk presentations or when you are unable to present yourself.

When you choose Autoplay , the presentation begins and moves through each slide using the Durations you set (explained earlier). You can also manually control the presentation if needed using the same tools as the Present Full Screen option.
Share a Canva Presentation
Along with or instead of actually presenting a slideshow with Canva, you can share it in a variety of ways. Whether you want to collaborate with your team, download the file to your device, or pop the presentation up on social media, Canva has you covered.
Select Share in the top right corner and then choose one of the following ways to share.

Collaborate With Others
Maybe you want to work on the final presentation with a team member or coworker. You can grant access to others and provide them with a collaboration link.
Enter the people, groups, teams, or email addresses in the People with access field. Then, open the Collaboration link drop-down menu and pick Anyone with link to provide access.

Download a Presentation
If you’d like to save your presentation to your device or download it as a Microsoft PowerPoint file, this is easy too.
Select Download and use the File type drop-down to pick PDF, PPTX, GIF, PNG, or another format.
You can then choose to flatten the PDF, include notes, or download only certain pages (slides).

Share on Social Media
Want to post your presentation directly to Facebook, Instagram, or another social media network? Select Share on social , choose the location, and follow the subsequent prompts to sign in and set up the social media post.

More Sharing Options
If you don’t see the sharing avenue you want, don’t despair because there are even more. Select More at the bottom of the Share menu.
You’ll then see sections for Share, Social, Save, Messaging, Design, and More Options giving you a ton of sharing methods. As examples, you can obtain a public link, send it to your phone, get an embed code for your blog, upload it to Dropbox or Google Drive, send it to Slack or WhatsApp, and more.

Will You Create a Presentation in Canva?
Now that you know the basics, are you going to use Canva for your next presentation? If so, let us know what you think of the tools and features. For doing even more, check out how to blur a face in a photo using Canva .
Related Posts
- 11 Beautiful Canva Resume Templates for Any Profession
- How to Use Canva Docs to Create Documents Online
- How to Make a Vision Board on Canva
- How to Blur the Face in a Photo Using Canva
- Is Canva Pro Worth the Cost?

Sandy Writtenhouse is a freelance technology writer and former Project, Department, and Program Manager. She turned her education, job experience, and love of technology into a full-time writing career. With all sorts of gadgets in her home and her hands, she seeks to help others make life easier through technology. Read Sandy's Full Bio
Leave a Reply
Your email address will not be published. Required fields are marked *
How to Create the Perfect Professional Presentation in Canva

Your changes have been saved
Email Is sent
Please verify your email address.
You’ve reached your account maximum for followed topics.
Not Every Gadget Needs to Be a Smart Device: Here's Why
6 ai tools to easily get rid of background noise in your audio or video recording, 9 alternative sites better than goodreads for book lovers.
These days there's a lot of options for creating workplace presentations, ranging from old-school classics like Microsoft PowerPoint to relative newcomers like Google Slides. Another platform that you can use to create a presentation is Canva.
As a template design site where you can craft beautiful documents, Canva makes the act of creating presentations as simple as Google Slides---perhaps even simpler. Here's how to design a workplace presentation in Canva.
Step 1: Launch Canva

If you don't have an account with Canva yet, check out our rundown on what the site is and what it's good for . If you already have an account, log in and go to your homepage.
Under Create a design , click Presentation .
You can also look for Presentation in the search bar, under the sign that says Design anything .

After you click on Presentation , you'll be taken to a blank workspace. Like all Canva's workspaces, you'll see a collection of pre-made templates along the left-hand side.
If you want to create a presentation from the ground up, you can. We've already got a great tutorial on how to create a resume from scratch using Canva , and it uses very similar principals.
If you're creating this presentation for work, however---and you're short on time---then it's probably best to go with a template.
Canva divides these templates based upon their stated purpose, ranging from creative applications to pitch decks. For this tutorial, let's go to the Professional Presentation section, as it has templates that are well suited for our purpose. Pick one that you like.

Once you click on a design, you'll see a bunch of different pages displayed along your sidebar. Each of these pages has a slightly different layout, but they all use similar elements and color schemes.
Step 2: Pick a Page Design, Change Your Text

The great thing about Canva is that there's no order in which these individual pages have to be arranged. You can use one or several designs multiple times, back-to-back, or never use them at all.
To apply a design to your first page, simply click on your blank workspace so the page is active. Then click on one of the premade designs sitting to the left. Canva will automatically load it into the page and you can begin modifying.
For this tutorial, I've decided to pick a design that would work well as a title page. By clicking on the individual text boxes within this page, I can erase the placeholder text and put down my own.
If you want to further adjust the size, color, weight, and spacing, you can do so in the Text editing box, seen here highlighted in red.
Step 3: Adjust Your Visual Elements

Having the right text---but not too much text---is one of the most important things you can consider when you're putting together your presentation. Making sure the visual elements match up is really important too.
In Canva, you can keep or delete however many graphic elements you want. You can also move them around.
To Delete an element, click on it so its bounding box shows up. Press Delete .
To Move an element, click and drag it around the page.
If you want to change the color of an element, go to the color swatch icon at the top of the screen. You can pick a color swatch from the premade palette, or you can choose a custom color with the color picker by clicking on the + .
Step 4: Add Page Notes

One of the last things that you'll want to add to your page is your presentation notes. Notes are not required, of course, but they can help you remember what you're going to say, especially if you're presenting in front of a group.
To add notes in Canva, go to the top right-hand corner of your page and click on the Add notes icon, seen here in red. When you do, another pop-up box will emerge.
Start typing your notes into the box. There's a word limit, of course, but we doubt you'll run over it. When you're done, click Save .
Step 5: Add a New Page

The whole point of slideshows is that you're showing off a series of pages. If you just had one page, for example, it would technically be a poster, so chances are high you'll want to add more.
After you finish your first page, go to the bottom of your workspace and click on +Add a new page . Canva will add another page to your presentation.

If you want to switch this page to a different style, go to the page designs on the left-hand side of your screen. Click on the one that you want.

Once you create more than one page, you might want to label them to keep your workspace organized.
To label your pages, go to the top left-hand corner of your active page where you see the dotted line. Click on it and start typing. From there you'll be able to enter a new title.

If you're not happy with this new page at all, you can delete the whole thing. At the top right-hand corner of the page, you'll see a trash can icon. Click on it.
Did you hit delete by accident, or have you changed your mind? No worries: just use the Undo button in the top left-hand corner of your workspace.
Step 6: Add a Graph

One of the best features about Canva is its ability to easily insert graphs into your presentation. It then allows you to customize those graphs to your needs.
To add a graph, find a page design that has a graph in it. Once that page is applied to your presentation, double-click on the graph inside that page so its bounding box lights up.
In the left-hand toolbar, you'll see your graph controls emerge. At the top of those controls is a dropdown menu showing you what type of graph you're using. Beneath that is a list of items, along with their values.
To change the name of these items, click on each individual box and start typing. To change the values, click on the box and insert the appropriate number.
Every time you change these values, Canva will automatically update your graph in real time, so you can see how it looks.

If you want to change the style of the graph you're using, click on the dropdown menu and choose another. Canva will automatically change the appearance of your graph while keeping your values intact.

Finally, you can also adjust the color of your graph.
Make sure your graph's bounding box is active, then go to your Edit controls in the top left-hand corner of your screen, seen here in red. Start experimenting with them to get the right effect.
Step 7: Check Your Presentation and Add Transitions

As you wrap things up, you'll want to check your presentation for errors. You might also want to add transitions between your pages.
To add transitions, go to the Present button at the top right-hand corner of your screen. Click on the icon.

When you click on that icon, Canva will open up a dropdown menu where you can pick the Transition style that you want.
After you choose your Transition style , you can also choose your Type . Type allows you to control the speed at which your presentation plays.
When you have all these things squared away, click on the blue Present button to watch your slideshow play out. It will take you to a full-screen version of it, where you can scan for errors.
When you're done checking your presentation for errors, press the Escape key to exit out of the window. Make any changes that you need to---if applicable---then finalize the design.
Step 8: Download Your Presentation for Work

Once your presentation is finished, you're ready to download. To download your presentation---or use it in another format---click on the dropdown menu beside the Present button.
Most of these options are free-to-use with a basic account, but for those that aren't, you'll see a gold "crown" symbol beside it. There's also a ton of options, ranging from downloading the file, emailing it to your coworkers, or embedding the file on another platform.
And that's it. You're done.
Ace That Slideshow Presentation
Now that you've seen how to put together a workplace presentation in Canva, you can start exploring. There's a lot of customization options, so it's best if you fiddle with those settings yourself.
Looking for other things you can design? Here's how to create a cover letter with Canva .
- Productivity
- Presentations
Small Business Trends
How to create a canva presentation.

This article will show you how to create a presentation in this powerful creative tool which is free for all registered.
Can Canva be Used for Presentations?
Why you should be making presentations on canva.
Canva isn’t only to create and download designs like a logo or icons. Canva also has presentation tools to add visual interest to your slideshow designs.
How to Create Presentations on Canva: A Step By Step Guide
Step 1: access canva through your computer, step 2: select a template to customize, step 3: customize your presentation slides.
Remove images from your Canva design presentation as needed by clicking on the image and hitting the backspace or delete button on your keyboard.
Step 4: Add or Remove Text and Modify Fonts
Step 5: add more slides, step 6: download your presentation.
To download your presentation, click on the “Share” button at the top right of your screen. Then click the “Download” link, then the “Download” button.
Canva Presentation Templates
Blue modern corporate presentation, beige brown abstract organic class syllabus blank presentation, tri-colored borders real estate listing presentation, blue and yellow simple human illustrative investing finance tips, blue white professional modern healthcare service proposal, how do you present a canva presentation, how to add video footage to a canva presentation, canva presentations vs. powerpoint presentations, tips on creating canva presentations, can you convert a canva presentation to powerpoint.
You need to have JavaScript enabled in order to access this site.
- Sign in with Apple
- Login with Facebook
- Login with GitHub
- Login with Google
- Login with LinkedIn
- Login with Microsoft
- Login with X.com
Forgot Password?
Enter your Email and we'll send you a link to change your password.
How to use Canva: A simple guide to the graphic design platform

Have you heard of Canva? It's a graphic design platform lets you create everything from Instagram posts to business logos, for absolutely no cost. Using it is simple and painless thanks to all the preloaded templates, images, fonts, and graphics, and it offers a very well-designed, intuitive, user interface. All you need to use it is to sign up with Google, Facebook, or an email address.
We're taking an overview-style look at All Of The Things you can do for free on the Canva website.
A brief history of Canva

Canva was founded in Sydney, Australia, in July 2012 by tech entrepreneurs Melanie Perkins, Cliff Obrecht, and Cameron Adams.
The Canva concept came from Perkins, who realized there was a gap in the market for an easy-to-use graphic design platform . As a commerce and communications student at the University of Western Australia, Perkins was frustrated by how complicated and hard to learn mainstream design software was. Canva's aim? To enable the whole world to design.
Within a year of its launch, Canva had racked up three-quarters of a million users. As of 2020, Canva had more than 30 million monthly active users.
Canva is also available as iOS and Android apps, but for the purpose of this feature we're looking at the full-fat website version.
What does Canva offer for free?

The answer is quite a lot. The "free forever" features include more than 250,000 templates, over 100 design types (social media posts, presentations, letters, and more), and hundreds of thousands of photos, font styles, and graphics.
All users with free accounts can also enjoy 5GB of cloud storage and the ability to invite friends to your Canva "team" to collaborate and comment on designs in real-time. Each free team can have up to 3,000 members, and you can create up to 20 free teams.
Once you've made a Canva creation, the platform makes it very simple to download it to your computer, share it with others, and, in some cases, post it directly to other websites.
What are the paid-for Canva options?

Obviously, paying to use Canva Pro will get you even more functionality. All the design content on the platform will be unlocked for you to use as often as you like, which means you'll have unlimited access to over 420,000 templates with new designs added daily. You can also enjoy working with more than 75 million premium stock photos, videos, audio, and graphics.
In addition, your cloud storage allowance will get upgraded to 100GB; you can save designs as templates for anyone in your Canva team to use; and you can schedule social media content to publish at certain times and dates.
Going "Pro" allows you to create a "Brand Kit" to upload your own fonts, brand color palette, and logos to use across the entire Canva platform. You’ll also get access to Canva's impressive "Magic Resize" tool, which, with a couple of clicks, allows you to change a post you've created for Twitter, for example, to a perfectly sized Facebook post.
Canva is currently running a limited-time offer offering a 5-for-1 deal on Canva Pro. If you purchase one seat, they'll include an additional four free seats. This offer ends on Feb. 12. After that, the pricing is as follows:
Australia Monthly: $17.99 + $9.99 for each additional seat Annually: $164.99 + $6.99/mo billed annually for each additional seat
United States Monthly: $12.99 + $6.99/mo for each additional seat Annually: $119.99/year + $4.99/mo billed annually for each additional seat
United Kingdom Monthly: $10.99/mo + $5.99 for each additional seat Annually: $99.99/year + $4.99/mo billed annually for each additional seat
Europe Monthly: $11.99/mo + $6.99/ for each additional seat Annually: $109.99/year + $4.99/mo billed annually for each additional seat
How to use Canva for social media posts

With the free version of Canva, you can create a plethora of posts for many social media platforms, meaning you can make professional-looking content even if what you're selling is just your personal brand.
That includes Instagram posts, stories, and story highlight covers, Facebook posts and covers, YouTube channel art, intros, and thumbnails, LinkedIn banners and posts, Twitter posts, TikTok backgrounds, Pinterest pins, and more.
Canva's design process is the same across the type of content you create, so if you can make a basic social media post, you'll be able to go on to create more advanced designs, such as presentations, brochures, or business cards.
Canva's interface treats each part of your creation as a separate element: The image is one element, colors are other elements, text is another element, and graphics are another. This means creating with Canva is broken down into easy chunks you can tackle one at a time.
We're going to take you through how to create a basic social media post using a simple Canva template so you can see all these elements edited and changed from the template to the finished product.
Once you've signed up for a Canva account, you're ready to start designing. From the home page, hover over the "Templates" menu and a window will pop up with popular options.

We're creating a standard Instagram post, so that's what we click on to see the templates available to us. Along the top of the screen, you will see trending search terms, in this instance coronavirus, food, sale, birthday, and summer. There is also a color menu you can click on to narrow down the search results to search your preferred palette.
In addition, there is the choice to create your own Instagram post from scratch using a blank template, but we're going to use one of the pre-made templates. To open a template for editing, simply click on it and then click "Use this template."

This opens the template in a new editing window, which has your design on the right of the screen, your editing options in a bar on the left of your screen, and your download and share options to the top right.

As we've already explained, Canva's design process breaks things down into elements. To change the image element, you can click on the template's image and hit the delete key. Now, if you click on the Photos menu on the left, you can see the photography available to you within Canva.

You can do a keyword search to find a suitable image, select from your "Recently used" photos, or scroll through the trending images for inspiration. If you want to use any images you see, simply click on them. There are a generous amount of free options, as well as others only available to Canva Pro users. (You can select Pro photos to use in your design, but they will have a Canva watermark on them.) Alternatively, you can upload your own images from your computer. To do this, click on the Uploads menu on the left.

This will show you any images you have already uploaded, and give you a big blue "Upload media" button that lets you upload new images from the device you're using, as well as from Facebook, Google Drive, Instagram, and Dropbox. Once uploaded, select the image you want to use from your Uploads area.
Now we want to change the templated text. To change the text element, simply click on it to highlight it.

Then you can overtype the pre-loaded text with your own choice of wording. Once you've clicked the text element, you'll also see all your text editing options appear along the top of your screen.

These are extensive. They allow you to change the font type, size, and how the text is aligned, and add effects such as drop shadows and glows. If you click the three-dot "More" menu at the top right of your screen, you'll see even more advanced options to change the transparency of the text and where it is positioned on the design.
One option that's worth looking at in more detail is the ability to change the color of the text. If you click the underlined capital A menu option to the top middle of your screen, your text color options appear on the left.

From here you can search for a color by keyword, or by RGB HEX color code in the search box at the top. Next down is a color picker button; if you click it, it will allow you to choose any hue from the pop-up color chooser window.
Below the "New color" picker tool, Canva gives you exact matches of colors that are in your design. This includes a selection of colors that already appear in your document, and even more cleverly, colors picked out from any image you're using, even if it's one you've uploaded yourself.
The next thing we're going to change are the colors on the page, as this works in a similar way. Click on your screen when there is a design element, such as a shape or patch of color, to highlight this element. You will see a blue box appear around the selected element and a small corresponding square of color at the top of your screen.

If you click on the small square, you'll see the same color menu appear as for the text color options, allowing you to choose from existing colors in your design, or add in fresh new ones. You can click to change each element separately, including the background color, this way.
Next, should this suit your design, you can add in some free icons and shapes. Start this process by clicking on the "Elements" menu option to the left of your screen.

From here you can keyword search for what you're looking for and select the free versions available. Alternatively, you can scroll down through the elements menu to see what's available. This includes shapes, arrows, lines, frames, stickers, and a whole, huge selection of themed graphics. Once you click on what you'd like to add, these will appear on your design. You can position them where you want them, resize them by grabbing a corner and making them larger or smaller, or in some cases look for that small color square at the top of the screen to change their color.
When you've finalized your design, look to the top left of your screen for your sharing and downloading options. Hitting share lets you share the image with your Canva team members, to an email address, or you can generate a link to your creation.

As you download, you do have further settings to consider. For free Canva users, this is whether you want to download your creation as a PNG, JPG, PDF, or GIF file. Use the drop-down menu to change from the default PNG option.

And that's it! Creating with Canva is a very simple, step-by-step process. With this free tool available to everyone, there is no excuse for sub-standard social media posts ever again.
How to use Canva for special occasions

Canva goes further than just Facebook posts, though. You can create design content for the special occasions and memorable moments in your life using the free platform too.

Canva offers free templates, many of which are genuinely lovely, for all kinds of greeting cards, postcards, save-the-date notices, invitations, announcements, to create fun "tickets" for events, and to make photo books to remember an event or occasion.
How to use Canva for personal graphic design

There are plenty of personal graphic design options on the Canva platform, as well. In some cases, you can save money by making your own personalized versions of products you'd normally have to buy.

These include labels, such as address, kitchen, and gift labels, creating your own calendars, making weekly schedule planners, designing travel and food diaries, making chore and meal charts, and so much more.
How to use Canva for professional graphic design

On a basic level, you can use Canva's pre-made templates to make a business card, to create your resume, and to write professional-looking letters.

Other templates that professionals from all kinds of industries might find useful are presentations, invoices, business letterheads, logos, proposals, flyers, brochures, newsletters, and flyers, among many, many others.
Taking Canva creations to the next level

Posters, Zoom virtual backgrounds, menus, CD covers, infographics, basic website design, Twitch banners, Instagram sale post templates, certificates, T-shirt designs, mug designs, A4 documents, animated social media content, jigsaws, and gift certificates are some further examples of the kind of easy, templated graphic design Canva offers.

You can even pay to have some of these professionally printed via the Canva Print service. If you haven't already, sign up to this fantastic free service and enjoy getting creative with a bit of DIY design. It's highly recommended.

Amy-Mae is a freelance writer covering tech at Mashable.


Canva: Design, Art & AI Editor

About this app
Data safety.

Ratings and reviews

- Flag inappropriate
- Show review history

App support
Similar apps.

Canvas Login
You are here: american university university library canvas discovery.
Back to top
HELP FOR STUDENTS | HELP FOR FACULTY | CANVAS TRAINING
AU Students, Faculty, and Staff:
For use by AU students, faculty, and staff with an @american.edu account
Log In To Canvas
Professional & Lifelong Learners:
For use by alumni and learners without an @american.edu account
- Grades 6-12
- School Leaders
At ISTE? Join us at booth 1359!
51 Powerful Ways To Use Canva for Education (Plus Free Templates)
Start working smarter, not harder!

Canva for Education is a game-changer, from nailing whole-group lessons to wowing students with new collaborative group activities, all in just a few clicks. And the cherry on top? Sending Canva projects straight to Google Classroom ! Plus, Canva isn’t just for creating lessons and activities for kiddos—it’s a lifesaver for quickly and easily designing just about any type of classroom materials. Meet the Teacher posters? Check. Classroom schedule cards? You bet. And my all-time fave: those weekly parent letters that make me look like I’ve got everything under control (Shh, our secret!).
Ready to get started with Canva for Education? Below you’ll find simple step-by-step instructions to set up your free account and tips and tricks for how to make the most of it. Plus, there are 50 awesome ideas for using Canva with links to Canva templates for everything from student activities to classroom decor and more!
How To Use Canva for Education: Get Your Free Account

Once you get the hang of Canva for Education , you’ll be shouting from the rooftops (or maybe just the teachers lounge) about how much you love it. Trust me, it’s like having a magic wand for your overflowing teacher plate.
Get started with Canva for Education by following these steps:
- Click on the “Get Verified” button designated for teachers.
- Register using your school email address via Google, Microsoft, Clever, or email sign-in options.
- Verify your email address with Canva by checking your inbox for a “confirm your email” message. Don’t forget to look in junk, spam, or other folders if you can’t find it.
- When prompted, choose “Teacher” as your primary use for Canva and indicate your teaching level (higher education, primary/secondary [K-12], or other).
- Select “Claim Canva for Education” and confirm your active educator status by providing your name, school name, address, and website.
- Share the subjects and grades you teach so Canva can tailor templates and content to your needs.
- Submit your information, and you’ll become a verified Canva for Education user either immediately or within a few days!
Be sure to review Canva’s eligibility criteria to confirm that you qualify for a free Canva for Education account.
How To Use Canva for Education if You’re Already a Canva User
You can easily upgrade to a Canva for Education account without losing any of your previous designs. Simply follow this link and the steps above.
Canva for Education Tips and Tricks
- Free Canva for the Classroom Online Course: Level up your skills and boost your confidence.
- Canva Lesson Plan: See a sample lesson plan designed for secondary students to introduce Canva for Education in your classroom.
- LMS Integration: Find out how to seamlessly integrate Canva with Learning Management Systems, such as Canvas, Schoology, Google Classroom, D2L, Blackboard, Moodle, Microsoft Teams, and more.
- Canva Video Resources for Teaching: Learn how to simplify your teaching experience with Canva.
- Creating and Managing Folders: Organize your Canva items efficiently using folders, just like you would on other digital platforms.
- Education Templates: Canva offers numerous templates, but this resource focuses specifically on education-related ones.
- Beginners Guide Tips and Tricks: This blog covers everything from starting with Canva to navigating the interface, uploading images, and discovering the best Canva hacks.
- Bulk Create: Save time creating personalized student items with Canva’s Bulk Create feature, an incredibly useful yet lesser-known tool.
Canva Templates To Kick Off the School Year
1. all about me.
Yves Hart , a K-5 district instructional coach from Maplewood, New Jersey, recommends using her All About Me Canva template at the beginning or end of the year to encourage students to celebrate their individuality while sharing about themselves.
Use Yves Hart’s template: All About Me Shoe Design Worksheet
Alternate template: All About Me Hat Logo Design Worksheet
2. Class Syllabus

Amy Elliott, an eighth grade teacher from California, Missouri, shares, “My district requires every class to have a syllabus, but I’ve yet to meet a middle schooler who reads them until I started using this design. It’s more eye-catching than its bare-bones cousin and the template encourages concision.”
Use Amy Elliott’s template: Course Syllabus
3. Meet the Teacher

Elliott also recommends using a “meet the teacher” Canva template. She shares it at open house night to introduce herself to students and their families. “It’s quick to prepare and helps break the ice as well as starts rapport building by being the first to put myself out there.”
Use Dani Quintana’s template: Meet the Teacher Template – Beige
Alternate templates: Meet the Teacher Templates
4. Would You Rather

Rozanne Rosenberg, curriculum developer, editor, and resource creator on Instagram and TpT from New Jersey, shares, “I love this Would You Rather activity to kick off the school year. Rather than asking students to choose between two random things, this activity centers around learning styles and preferences with questions like ‘Would you rather spend an hour reading or spend an hour solving a math problem?’ I would print each set of questions and mount them around the room, then have students walk around silently and place a dot sticker in the column with their preference. We’d come back together and discuss the data as a class and notice any patterns. You could also turn it into a graphing lesson! Most years, I would repeat the activity with families on Back to School Night. Then I would show my students how their grown-ups’ results were similar to or different from theirs!”
Use Rozanne Rosenberg’s template: Would You Rather
5. Exploring Identity

Rosenberg also uses Canva to design quick and easy worksheets. She says, “These worksheets are part of a unit that I designed centered around exploring identity. It’s great to kick off the year or to do it in April as part of your Poetry Month activities . Students are encouraged to explore the origins of their names by interviewing loved ones and then planning out some adjectives to use in creating an acrostic poem of their name.”
Use Rosanne Rosenberg’s template: What’s in a Name?
Alternate template: Acrostic Name Poem
6. Personalized Punch Cards

Are you ready to add some excitement to your classroom with personalized reward punch cards? Whether it’s for encouraging positive student behaviors, celebrating completed homework, or simply ensuring devices are charged for class, these customizable punch cards are the perfect solution for end-of-the-year shenanigans! Get ready to see motivation and enthusiasm skyrocket as students eagerly work toward their goals.
Use this template: Positive Behavior Punch Cards
Canva Templates To Celebrate the End of the School Year
7. celebrate your students.

In Canva, when you navigate to “All Templates” and then “Certificates,” you’ll find plenty of options to help you celebrate student achievements. Steffy McCourt, an English teacher from Plymouth, Michigan, shares, “These templates are a fun place to let your imagination run wild. You could create a certificate for the best question of the week or the most voracious reader of the month. Does the kid who made a joke that had everyone on the floor laughing deserve a certificate? Absolutely!”
Use Steffy McCourt’s template: Reader of the Month
Alternate template: Mathematics Certificate
8. End-of-Year Reflection

Get your students excited about reflecting on their year or a class you’ve taught with this vibrant and captivating template. This end-of-the-year reflection activity takes the hassle out of creating a reflection activity for your students, making it an enjoyable and engaging experience for everyone involved.
Use this template: End of Year Reflection
9. Memory Book

Introducing the ultimate memory book, packed with everything your students would love to include in their end-of-year journal. This amazing keepsake captures cherished moments with friends, favorite events, beloved teachers, fondest memories, and so much more.
Use this template: Colorful End of Year Journal
10. End-of-Year Bingo

Get ready for an exhilarating class activity—introducing the end-of-year Class Bingo! With your students having spent the year getting to know each other, they’ll be thrilled to fill their bingo cards with ease. This awesome game is guaranteed to bring loads of excitement and energy to the last few days of school, as students celebrate their friendships and shared experiences.
Use this template: Friendship Class Bingo
Canva Templates for Your Daily Routines
11. morning meeting slides.

“This is a template I designed for Morning Meeting,” shares Rozanne Rosenberg. “You can use it directly in Canva and present from there, or export it and put it into Google Slides and then insert text boxes with your message, morning work, and joke of the day, or other categories that work for your class.”
Use Rozanne Rosenberg’s template: Morning Meeting Slides
Alternate template: Colorful Muted Morning Meeting Presentation Slides
12. Soft Start Anchor Chart

Yves Hart uses Canva to remind her students of their soft start choices daily. “Teachers start the day in a way that allows students voice and choice. This soft start menu gives students a visual of what choices are available to them. The best part of Canva is that the graphics are included.”
Use Yves Hart’s template: Soft Start Anchor Chart
13. Student Greetings

Here’s another simple and easy way to greet students daily from Yves Hart. She shares, “Part of student engagement is how students start the day. This poster can be displayed at the door to show various ways to greet the teacher or each other. Students can pick an option upon arrival. This is a great way to build a community in a quick, non-verbal way.”
Use Yves Hart’s template: Classroom Greetings
Alternate template: Good Morning Classroom Greetings Poster
14. SEL Morning Check-In

Discover the world of SEL check-ins for students of all ages with versatile Canva templates. Whether you choose to kick off the day with a whole-class check-in on your smartboard or send out a thoughtful weekly check-in as the week wraps up, these engaging templates are perfect for any situation. Don’t miss the chance to connect with your students on a deeper level, fostering emotional well-being and creating a supportive learning environment.
Use these templates: Primary Age Check-In and Secondary Age Check-In
15. Question of the Day (Attendance Question)

Looking for a fresh and exciting way to take daily attendance in your classroom? Try putting up a thought-provoking question of the day on the board as students arrive, and have them respond either digitally or with a sticky note! This innovative approach not only tracks who’s present for class but also sparks curiosity and engagement from the very start of the day.
Use this template: Question of the Day
Canva Templates for Classroom Games
16. this or that.

Rozanne Rosenberg shares, “Canva is a great tool to put together engaging slides for students quickly. This or That? is a fun game that engages students in the physical or virtual classroom. Project each slide and then have students make a choice and discuss it with a partner.”
Use Rozanne Rosenberg’s template: This or That? Getting to Know You
Alternate template: This or That Energizer Game
17. Guess the Word

In search of an engaging game in a snap? Try the “Guess the Word” game, complete with easy-to-follow instructions for students and an alternating play between Team A and B.
Use this template: Guess the Word
18. Memory Game

Whether you’re a kindergarten educator guiding your students through a number-based memory game, or a high school geography instructor assessing your pupils’ understanding of South American countries, there’s an abundance of pre-made and adjustable memory game templates available for you to print, cut, and utilize with your students.
Use these templates: Colorful Numbers Memory Game and Halloween Memory Game

Regardless of whether you’re searching for an entertaining trivia game for your upcoming staff gathering, a method to revise material for a specific topic, or simply an enjoyable activity for a Friday, don’t miss out on the fantastic trivia games and templates available.
Use this template: Trivia Game
20. Four Corners

In search of a speedy icebreaker that avoids putting anyone on the spot and gets everyone moving and mingling instead? Give this four corners game a go! It’s perfect for getting everyone chatting with loads of different people. It even includes the directions!
Use this template: Four Corners Ice Breaker Game
Canva Templates for Classroom Setup and Decor
21. google classroom banner.

Amy Elliott shares, “I like personalizing my space, be it my classroom or its digital equivalent. This banner can be further customized to reflect class sections, etc. They’re also quick to make if you feel like updating them throughout the school year.”
Use Amy Elliott’s template: English Class Classroom Banner
Alternate template: Google Classroom Banners
22. Beautiful LMS Buttons

Want to personalize your LMS? Check out these awesome buttons that Steffy McCourt created for Canvas. She recommends searching “Canvas Banner” and “Canvas Buttons” for more Canvas design inspo than you even knew existed.
Use this template: Green Playful Boho Canvas Button
23. Classroom Labels, Tags, and Posters
Rozanne Rosenberg shares, “Classroom decor is super easy with Canva! You can use the icons and images available in the system as I did here for library book bin labels (left) and schedule tags (right), or you can import other clipart that you purchase. These were made as a table, with background color overlaid using a white box, the text, and the icon image.” You can also find and customize templates like posters for voice level, motivational posters, class rules, name tags, and more.
Use Rozanne Rosenberg’s templates: Schedule Tags and Book Bin Labels
Alternate template: Back to School Classroom Decor – Modern Boho
24. Schedule Cards

“A staple in classrooms, giving students the visual cues for the flow of the day,” says Yves Hart. “Teachers can create their own using Canva templates. An awesome money saver and a way to ensure that whatever theme is chosen can truly be represented in every corner of the classroom.”
Similar template: Schedule Card Labels
25. Letters and Numbers

No matter what classroom theme (like cactus classroom ) or color scheme (such as soothing blues) you’ve got going on in your classroom, Canva’s got a super-cute template that’ll perfectly match your classroom vibe.
Use these templates: Letter Pennants , Alphabet With Words , and Ten-Frame Numbers
Canva Templates for ELA
26. wonder map.

“I got this exercise from David Lee Finkle, and it’s one of the first exercises I do with my students each year,” says Steffy McCourt. “The goal is to have them list 3-5 (or many more) questions/topics they wonder about. Then, as we start writing throughout the year, they can pick topics off their wonder map to explore in more detail.”
Use Steffy McCourt’s template: Mind Map Brainstorm
27. The Storyboard

Every year Amy Elliott’s eighth graders participate in National Novel Writing Month’s Young Writers’ Program. “They set writing goals (usually between 2,000 and 10,000 words) and write original short stories over the course of a month. This exercise helps them get the foundation of their story lined out in a visual and engaging way,” shares Amy.
Use Amy Elliott’s template: Plot Comic Storyboard
Alternate template: Blank Simple 6 Panel Storyboard
28. Engaging Read-Aloud Slides

Yves Hart uses Canva templates for picture books in the image for prompting and student engagement. Yves recommends that you “Use graphics, pictures, or clipart already available on the site or download your own.”
Use Yves Hart’s template: Zelda and the Runaways
Alternate template: Read-Aloud for Young Children Infographic
29. Informational Slides

In search of ELA informational slides for your upcoming whole- or small-group session? Explore the pre-designed informational slides available on Canva. While these slides can save you significant time and effort, always remember to verify the accuracy of the information before using them in your lessons.
Use these templates: Figurative Language Lesson Slides and Small-Group Practice
Canva Templates for Math
30. foundational skills practice.

Whether you aim to help your students improve their counting, addition, subtraction, or shape-identification skills, Canva offers a wealth of mathematical resources to support learners in grasping the fundamental concepts of math.
Use this template: Subtraction Math Foundational Worksheet
31. 3D Shapes

Experience the excitement of hands-on activities with 3D shape nets and versatile templates for a fun learning experience. Enhance graphing and data analysis lessons with unique cubes designed for data collection, bringing increased engagement to your classroom.
Use these templates: Cube , Triangular Pyramid , or Data Dice
32. Math Maze

Searching for a captivating review activity to energize your math class? Dive into this customizable maze, which centers around decimals but can be tailored to suit any math unit. Watch as your students immerse themselves in a thrilling and interactive learning experience!
Use this template: Decimals Math Maze
33. Informational Slides

Discover Canva’s extensive range of math lesson slides, designed for educators teaching kindergarten through high school. For high school teachers delving into probability and statistics, explore these comprehensive probability slides that cover crucial aspects of the subject, ensuring a solid foundation for your student’s learning experience.
Use this template: Math Probability Presentation
Canva Templates for Science
34. periodic table of elements.

Seeking a charming periodic table of elements poster that reflects your unique style? Customize fonts, colors, and more to create the perfect match for your vibe. Once you’ve tailored it to your liking, print it out and enhance your classroom with a touch of personality!
Use this template: Periodic Table of Elements Poster
35. Science Notebooks

Whether you’re utilizing digital notebooks, assigning individual pages for each investigation, or opting for hard-copy notebooks, these versatile note templates serve as an excellent starting point for a wide range of science topics. Enhance your students’ learning experience by exploring these adaptable resources tailored for diverse educational needs.
Use this template: Earth’s Layers Science Notebook Sheet or Science Notebook Setup
36. Doodle Notes

Unleash creativity in science class with this simple doodle note sheet for any unit. Spark curiosity and enhance learning through engaging visuals.
Use this template: Vocab Doodle Notes
37. Informational Slides

Discover Sylph Creatives’ incredible science presentations on Canva. Explore heat energy, the ear’s anatomy, and the solar system with these captivating visuals.
Use this template: Ruby From Sylph Creatives
Canva Templates for Social Studies
38. current events.

Capture the week’s top events with this versatile worksheet. Kids of all ages can jot down key news or social media highlights to discuss in social studies class.
Use this template: Current Events Bell Ringer or Homework Worksheet
39. World Traveler’s Passport

Learning about countries around the world? Use this fun passport template as a way for student to take notes or share their knowledge.
Use this template: World Traveler Passport
Alternate template: Around the World Notes
40. Capitals, States, and Countries

Master geography with these engaging worksheets. Practice U.S. states and capitals, and identify flags from around the world. They even have flash cards for you to print and cut for students to use when studying.
Use these templates: United States Capitals Geography and Countries Flags Worksheet
41. Informational Slides

Test your knowledge of various government types with these premade slides. A fun and interactive way for students to learn with activities like completing the word, country government identification, and some multiple choice. These types of slides could be used for whole-group lessons, small-group quiz reviews, or the quiz itself!
Use this template: Types of Government
Canva Templates for General Classroom Activities
42. bingo choice board.

“Want your students to write for an audience? Want to give students a choice in how to ‘publish’ their work? Gamify it by using a Bingo Template,” recommends Steffy McCourt. “You can offer a little prize for students who get a bingo or the prize can be the work itself.”
Use Steffy McCourt’s template: Poetry Bingo
Alternate template: Classroom Content Bingo
43. Student Work Gallery

Use a gallery template for students to show off their work like McCourt, who shares, “Students can check out their classmate’s work as they complete their own slide. Finally, teachers use the gallery next school year to show students examples of what they are going to create!”
Use Steffy McCourt’s template: Student Work: Gallery Template
44. Brainstorming Graphic Organizer

“Create an interactive whiteboard where students can share their ideas, knowledge, and questions simultaneously. They can also interact with each other by adding stickers. Teachers can add a timer so that students can learn to manage their time effectively,” shares Steffy McCourt.
Use Steffy McCourt’s template: Idea Brainstorming Classroom Graphic Organizer
45. Collaborative Assignments

With the ability to assign tasks directly through Canva or effortlessly via their numerous LMS integrations, getting students to collaborate on a shared activity is a piece of cake! Be it an SEL check-in for every day of the week, a brainstorming session, or a group project, Canva makes the whole process smooth and hassle-free for both teachers and students.
Use this template: Colorful Daily SEL Group Work
46. Instructional Coach Menu

Steffy McCourt shares, “There are so many menus in Canva templates. Try converting one into a tantalizing selection of coaching services . Make it extra tempting by delivering it to teachers with homemade cookies.”
Use this template: Instructional Coaching Menu
47. Group Brainstorming Graphic Organizer

Ignite creativity and collaboration in your classroom with this versatile brainstorming activity. Students begin by independently generating ideas, then join forces with their group to combine and refine their thoughts. Finally, they share their collective insights with the entire class. This engaging process can be applied to any content area—from exploring themes in reading to devising solution strategies for math problems.
Use this template: Bubbling With Ideas
48. Video Presentations

Discover the ultimate tool for creating captivating videos: Canva templates! With a plethora of templates to choose from, you’ll find everything you need, whether you’re crafting a video to share in class or seeking an easy-to-use solution for student video assignments.
Similar template: Video Collage
Canva Templates for Communication
49. infographics.

Search for pre-populated designs that match your information needs, or choose from a stunning array of functional templates to easily customize with your own data. Perfect for enhancing classroom procedures or establishing meeting norms with your fellow educators.
Use this template: Cute Infographic
50. Social Media Posts

As technology and social media continue to shape our society, it’s time to level up your communication game with families on all platforms. Why not start by using a captivating template to share details about upcoming parent-teacher meetings? Keep families engaged and informed in style!
Use this template: Parent Meeting Facebook Post
51. Weekly Parent Newsletters

Rest assured, I haven’t forgotten! I can just imagine you all sitting on the edge of your seats, eagerly anticipating the arrival of this spectacular weekly parent newsletter that’s sure to make communicating with families feel like a walk in the park—and perhaps even bring a smile to your fellow teachers’ faces!
Use this template: Weekly Parent Newsletters
What is your favorite way to use Canva for Education? Come and share in our WeAreTeachers HELPLINE group on Facebook.
Plus, try these 33+ of the best teacher productivity tools to help you manage all the things.

Copyright © 2024. All rights reserved. 5335 Gate Parkway, Jacksonville, FL 32256
COMMENTS
Create stunning presentations with Canva's drag-and-drop tools, AI features, and rich content library. Collaborate, record, and share your slides with ease, or log in to access your existing designs.
Canva is a free-to-use online graphic design tool. Use it to create social media posts, presentations, posters, videos, logos and more.
Canva's presentation maker not only looks good, it feels good to use. It's completely online so there's no need to download any bloated software. Best of all, it's completely free. Designing is an absolute breeze thanks to its drag-and-drop features and ready-made professional quality templates. Everything you need to become a visual ...
Unlock your potential to create stunning visuals in this comprehensive guide to Canva Presentations. This tutorial will walk you through all the key features...
Transform your slides into a visual masterpiece with this Canva Presentations tutorial! Learn how to engage your audience with dynamic layouts, data visualiz...
Join Ronny to learn how to create awesome presentations with Canva. We'll explore actionable tips for creating impactful presentations and show you how to ...
Go to Canva homepage and click on Projects in the left sidebar. 2. Click on the presentation that you want to give to open it. 3. Click on the Present button in the upper right corner. You will see three options to present. Present full screen - this will begin a full-screen presentation for everyone to see.
Drumroll : Add a drumroll before a slide by pressing the key 'D' before a big reveal. Confetti : Add a shower of confetti to celebrate something with the key 'C'. Countdown : Add a countdown from '1-9' by pressing one of the keys. Quiet : Bring a 🤫 emoji to screen to hush your audience with the 'Q' key.
Follow these steps to design your Canva presentation: Login to Canva: Visit the Canva website and sign in using your account credentials. Select a template: Browse through the available templates or start with a blank canvas if you prefer complete creative control. Add slides: Customize the number of slides and their layout according to your ...
Select Timer in the bottom toolbar to display the timer. By default, the timer is set for five minutes, but you can change this using the plus and minus buttons. Press the Play button to start the countdown, the Pause button to temporarily stop the timer, and the Reset button to restart the timer.
Step 1: Launch Canva. If you don't have an account with Canva yet, check out our rundown on what the site is and what it's good for. If you already have an account, log in and go to your homepage. Under Create a design, click Presentation .
Finding the "Videos" section. Click on "More" first, then click "Videos.". Add video. When you find the perfect video for your presentation, click on or drag and drop it onto one of your slides. Add text to video slide. To add text to your video slide, click "Text" and click one of the options.
Need a Canvas Account? Click Here, It's Free! Browse courses. Log In. Email. Password. Stay signed in. Forgot Password? Sign in with Apple.
Create tools that people will love, for a platform used by millions. Amplify the power of Canva by developing new tools and integrations. Build apps. Want to work faster with your team? Power up your design toolkit with new AI design tools and simplify your workflow with Canva Apps and Integrations.
Login with your email address, mobile number, Google, Facebook or Apple. ... Visual documents. Visual Suite. Docs. Presentations. Whiteboards. PDF editor. Graphs and charts. Photos and videos. Video editor. YouTube video editor. Photo editor. ... Try our quick intro tutorial and get designing on Canva, like a pro. Join your class with an invite ...
Presentation Tutorial: How To Make a Presentation in Canva (FREE & EASY) // In this video, I'm going to show you a simple presentation tutorial on how use (F...
As we've already explained, Canva's design process breaks things down into elements. To change the image element, you can click on the template's image and hit the delete key. Now, if you click on ...
Canva is a free design tool that lets you create stunning presentations, videos, social media posts and more. Whether you need to design a logo, a flyer, a resume or a website, Canva has thousands of templates and features to help you unleash your creativity. Sign up for free and start designing today.
Welcome to Canva - where magic happens! Get ready to unleash your creativity with our all-in-one digital art studio & AI editor. Enjoy easy-to-use photo & video editor, endless templates for your resume, presentations, Instagram reels, invitation or other creative digital art ideas - right at your fingertips!
Make it simple and hassle-free with a collection of well-designed and easy-to-use presentation templates from Canva. To captivate your target audience, you need the proper presentation template design that suits your subject. After all, a pleasing visual, coupled with helpful and relevant content, can go a long way in creating a solid presentation.
Launched in 2013, Canva is a free online design platform with a mission to empower everyone in the world to design. Featuring a simple drag-and-drop user interface and a vast range of templates ...
Canvas Discovery Login. AU Students, Faculty, and Staff: For use by AU students, faculty, and staff with
Mobile. Go to canva.com and select Sign up . From the signup page, choose to Continue with email or Sign up with work email . Enter the email address you'd like to use in Canva, then select Continue . Enter your preferred account name. Click Create your account. Enter the code that was sent to your email address to finish signing up.
24. Schedule Cards. "A staple in classrooms, giving students the visual cues for the flow of the day," says Yves Hart. "Teachers can create their own using Canva templates. An awesome money saver and a way to ensure that whatever theme is chosen can truly be represented in every corner of the classroom.".
Aplikasi presentasi Canva menyajikan sederet fitur canggih yang mampu menciptakan presentasi yang lebih menonjol bagi guru, atasan, rekan satu tim, dan lain-lain. Ratusan layout contoh presentasi, pustaka foto, elemen desain, video, gif, efek suara, fitur split video, penerjemah dokumen, konverter PPT ke PDF, hingga akses penyimpanan, semua ...